
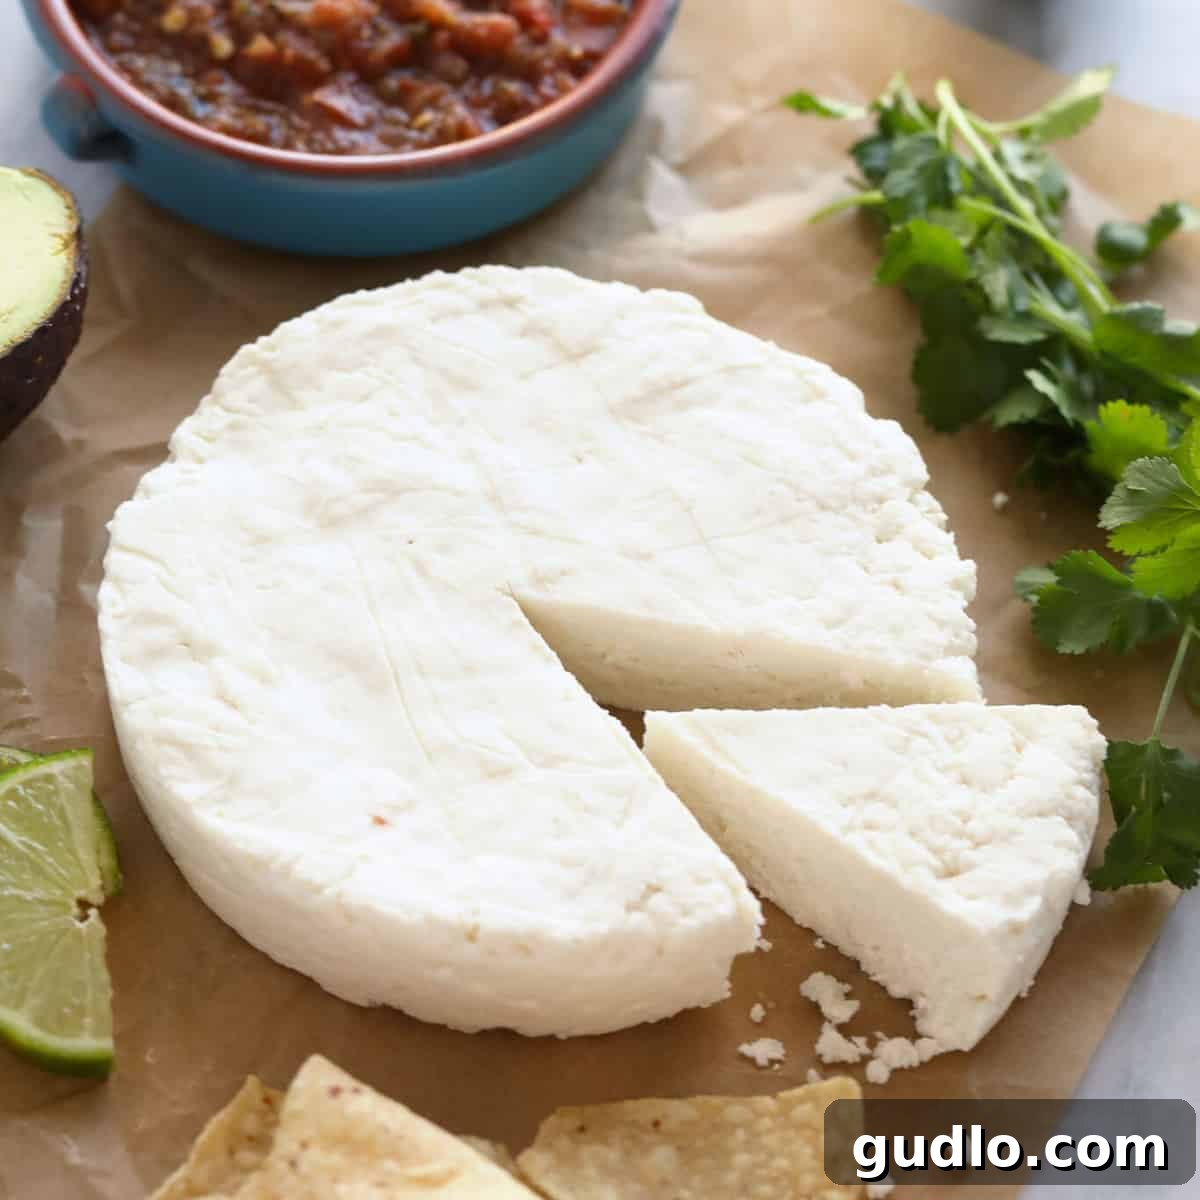
Dreaming of creating your own fresh, authentic queso fresco at home? This comprehensive guide will walk you through everything you need to know to master the art of homemade cheesemaking. Forget store-bought options; with just a few key ingredients – pasteurized whole milk, animal rennet, and salt – you can craft a delicious, versatile fresh cheese that’s ready to enjoy in just a few hours. Get ready to impress your family and friends with the irresistible taste and texture of real homemade queso Fresco!
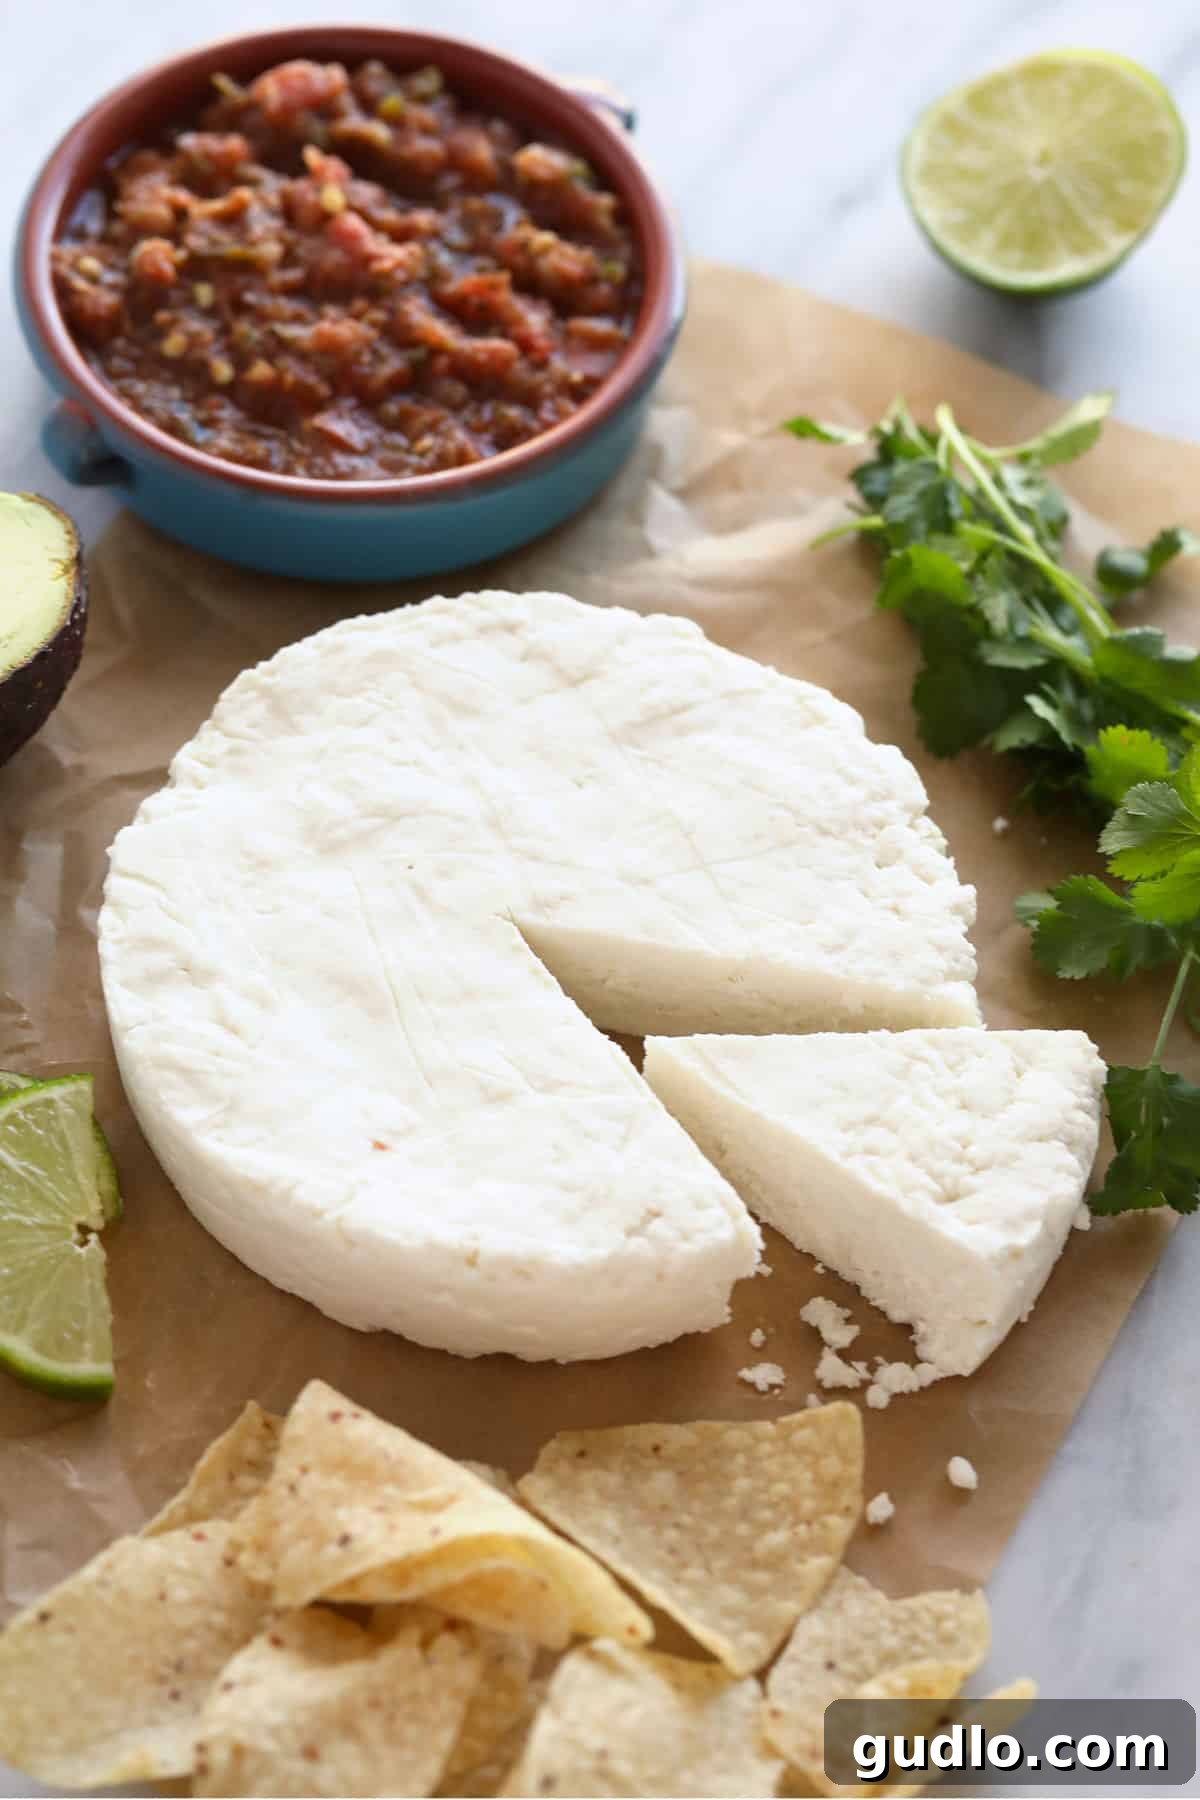
What is Queso Fresco? The Epitome of Fresh Cheese
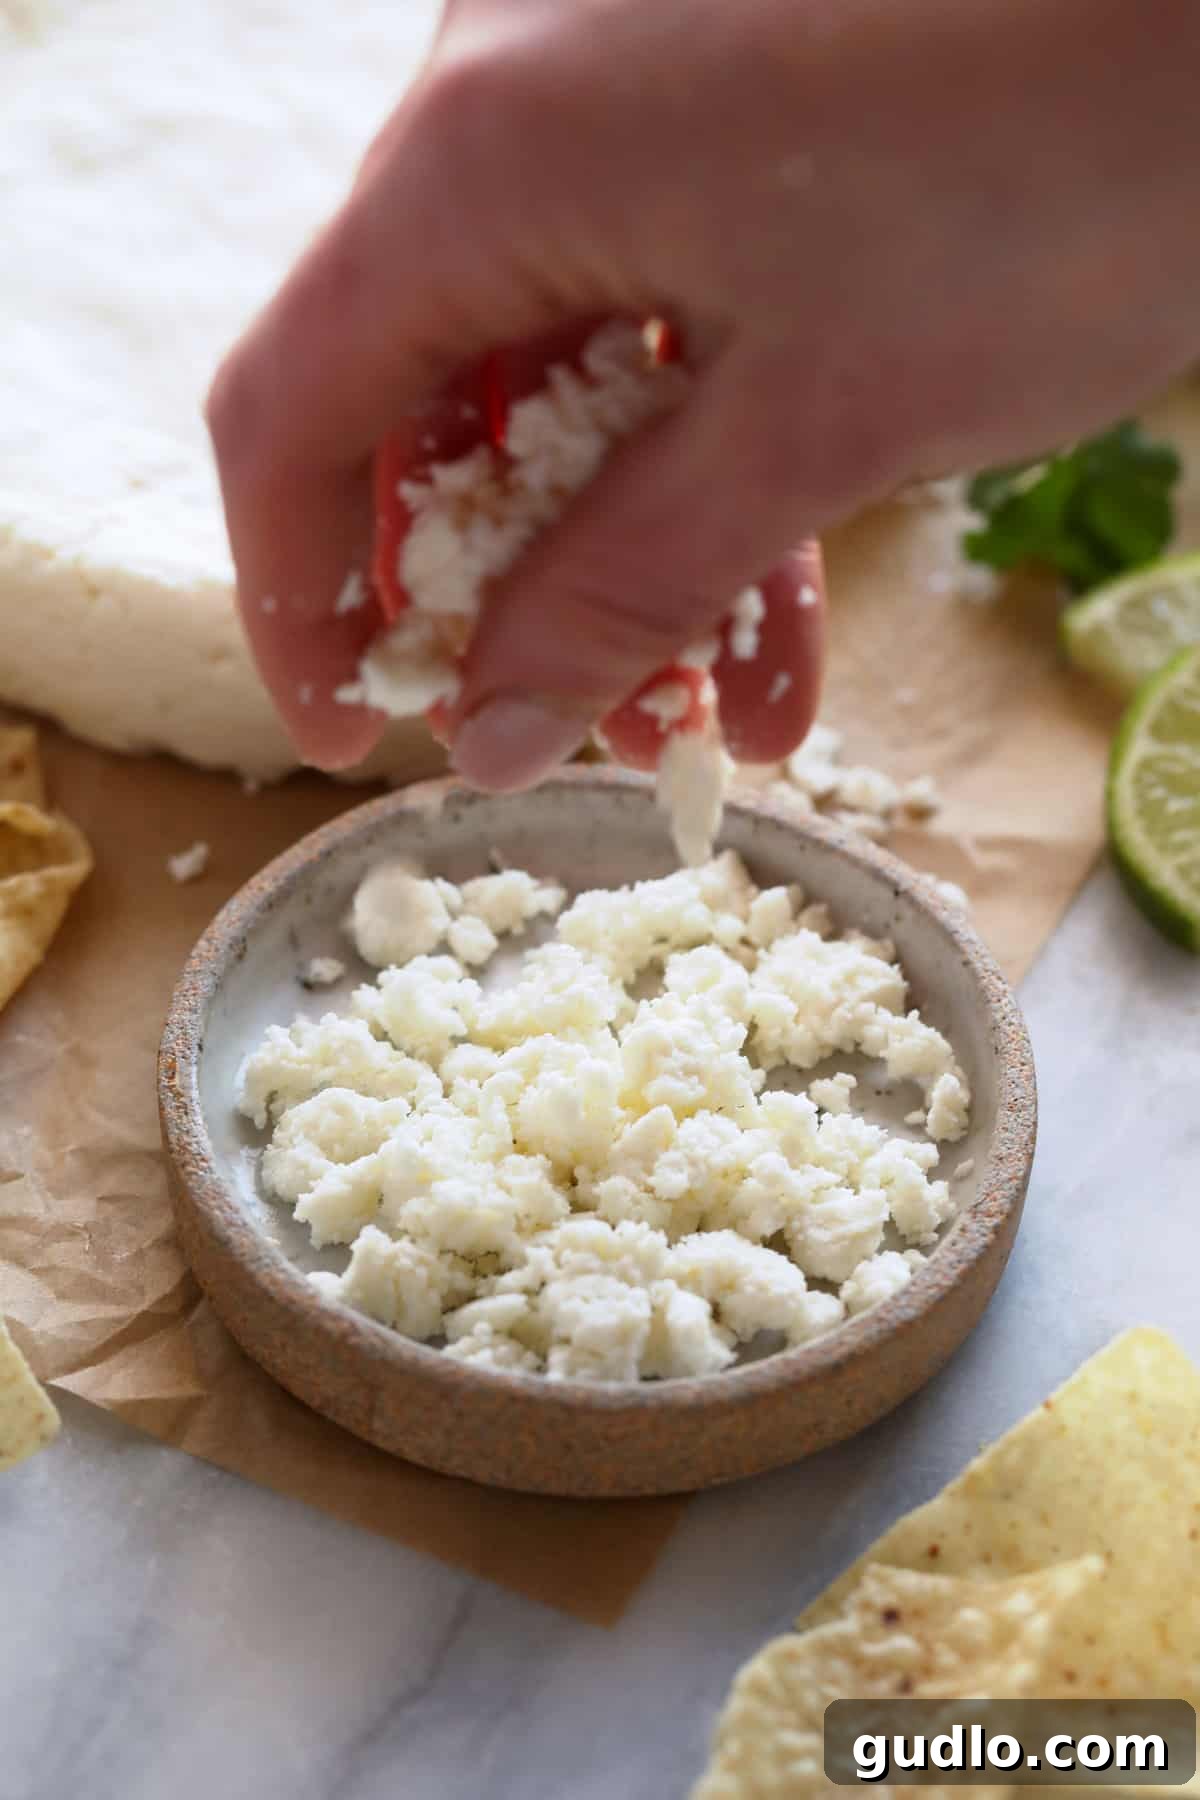
In Spanish, queso fresco literally translates to ‘fresh cheese,’ a name perfectly capturing its essence. This bright, milky, and typically unsalted or lightly salted cheese is a staple in Mexican and Latin American cuisines. Traditionally crafted from cow’s milk or sometimes goat’s milk, queso fresco is celebrated for its mild flavor profile and soft, crumbly texture. Unlike aged cheeses, it’s meant to be consumed fresh, offering a delightful counterpoint to robust and spicy dishes. Its versatility allows it to be crumbled over tacos, salads, enchiladas, or simply enjoyed on its own as a light, refreshing snack. It melts minimally, holding its shape beautifully when heated, making it an ideal topping that adds both flavor and texture without disappearing into your meal.
Why Embark on Your Own Queso Fresco Journey?
When it comes to home cheesemaking, queso fresco is an excellent starting point for beginners, provided you have the right ingredients and a little patience. There are numerous compelling reasons to try this delightful recipe in your own kitchen:
- Unmatched Freshness: Experience the true taste of fresh cheese, made from scratch in your home in less than a day. The flavor and texture of homemade queso fresco are simply superior to anything you’ll find at the grocery store.
- Culinary Versatility: Queso fresco is a culinary chameleon. It’s the perfect topping for vibrant salads, a creamy addition to countless meals like enchiladas and burritos, and even a delicious, mild component on a gourmet charcuterie board. Its ability to absorb flavors makes it a fantastic canvas for your culinary creativity.
- Customization Options: This recipe is a fantastic foundation. Feel free to experiment by adding your favorite herbs, spices, or even chili flakes to infuse unique flavors into your queso fresco, tailoring it precisely to your palate.
- Ingredient Control: When you make cheese at home, you know exactly what goes into it. This allows you to choose high-quality, organic, or locally sourced ingredients, avoiding unwanted additives or preservatives often found in commercial cheeses.
- Rewarding Experience: There’s immense satisfaction in creating something delicious from basic ingredients. Cheesemaking is a rewarding craft that connects you to traditional culinary practices.
The Authentic Approach: Rennet vs. Acid
The world of fresh Latin American cheeses often sees two main categories: queso fresco and queso blanco. Historically, queso fresco is distinguished by its use of rennet, an enzyme that coagulates milk, resulting in a distinct texture and flavor. In contrast, queso blanco is typically made using an acid, such as vinegar or citrus juice, to curdle the milk. While many online recipes might suggest using vinegar or lemon juice for a quick cheese, to truly honor the tradition and achieve the authentic taste and texture of queso fresco, this recipe strictly calls for liquid rennet. Our aim is to guide you in creating a cheese that aligns with centuries of cheesemaking heritage, producing a product that is both authentic and incredibly delicious.
Essential Equipment for Your Cheesemaking Adventure
Cheesemaking is a precise craft, and having the right tools can make all the difference between success and frustration. While it might seem a bit more involved than your average cooking recipe, the equipment required for queso fresco is relatively simple and often multi-purpose. Here’s what you’ll need to gather before you begin:
- Cheesecloth: Essential for draining the curds. Opt for a good quality, unbleached cheesecloth with a fine mesh. You’ll need enough to line your colander and twist into a bag.
- Digital Thermometer: Absolutely crucial for accurate temperature control. Cheesemaking relies on precise temperatures for proper coagulation, so a reliable thermometer is non-negotiable.
- Colander: To hold the cheesecloth and curds during the draining process, allowing the whey to separate.
- Mixing Bowl: A large one to sit your colander in and catch the draining whey. Also useful for mixing salt into the curds.
- Heavy-Bottom Stainless Steel Pot: A large pot (at least 1-gallon capacity for a gallon of milk) is vital for heating the milk evenly without scorching. Stainless steel is preferred for its heat distribution and ease of cleaning.
- Large Whisk: For gently stirring the milk and cutting the curds.
- Slotted Spoon: Perfect for carefully transferring the fragile curds from the pot to the cheesecloth-lined colander.
- Cheese Mold(s): You’ll need either one 2-lb cheese mold or two 1-lb cheese molds to shape your queso fresco. If you don’t have a dedicated cheese mold, a glass container or even a clean plastic container with small holes poked in the bottom (for drainage) can work, as long as it’s lined with cheesecloth. A glass container like this is a good alternative, ensuring it’s properly lined.
The Golden Trio: High-Quality Ingredients
While you only need three core ingredients for this queso fresco recipe, their quality and type are paramount to your success. Precision in selection ensures your cheese sets correctly and develops the desired texture and flavor.
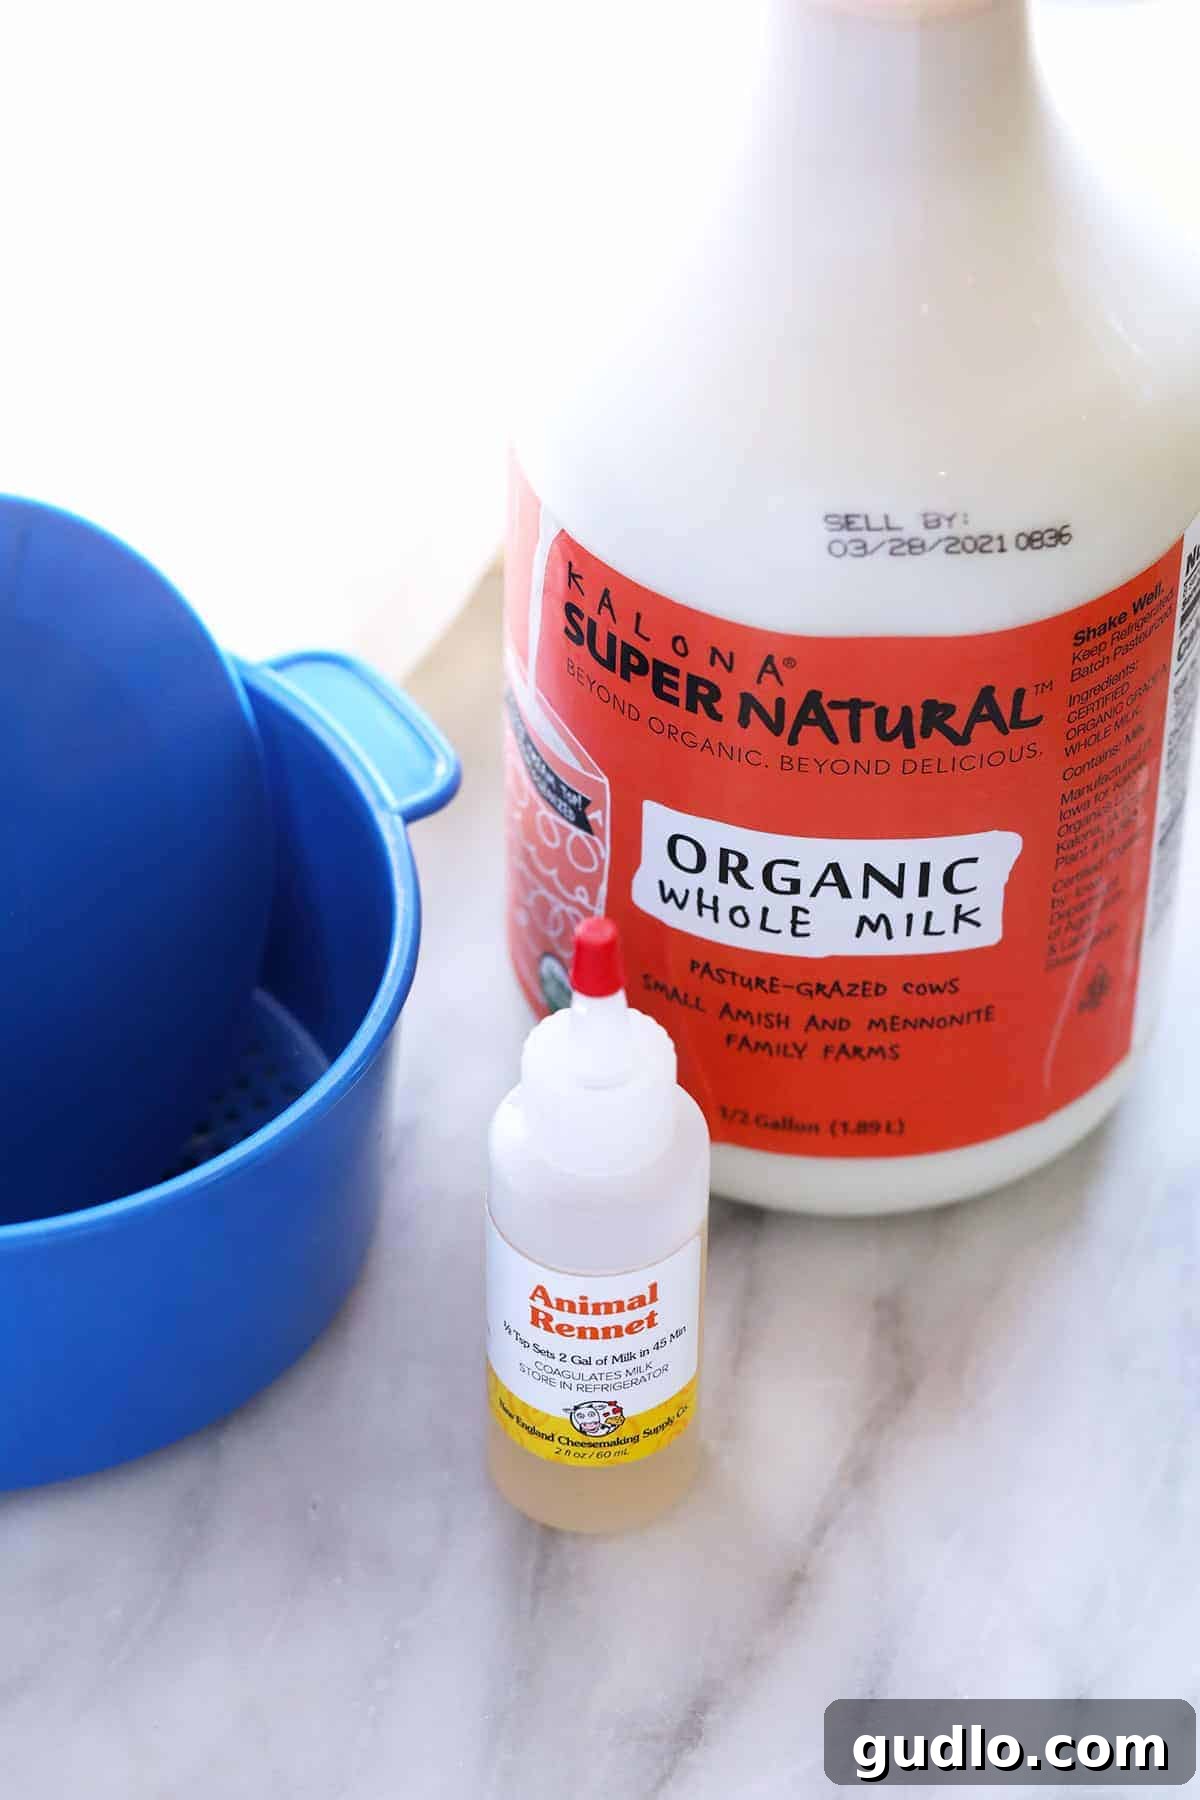
- 1 Gallon Organic Pasteurized Whole Milk, Non-UHT: This is arguably the most critical ingredient. We’ll delve deeper into why “non-UHT” is essential below.
- ½ Teaspoon Single-Strength Liquid Animal or Vegetable Rennet: Rennet is the enzyme that transforms liquid milk into solid curds.
- 1 Teaspoon Kosher Salt: For flavoring and preserving your fresh cheese.
The Heart of the Cheese: Understanding Your Milk
The milk you choose is not just an ingredient; it’s the foundation of your queso fresco. Its quality and how it has been processed will directly impact the success of your cheesemaking. While we’ve had success with various types of rennet, the milk remains the undisputed most important factor.
Through extensive testing, we’ve unequivocally found that you must use non-homogenized and non-UHT milk for this recipe to work correctly.
Decoding UHT Milk: What You Need to Know
UHT stands for Ultra Heat Treated Milk. This processing method involves heating milk to extremely high temperatures (around 280°F or 138°C) for a very short period (2-4 seconds) to extend its shelf life dramatically, often allowing it to be stored unrefrigerated until opened. While convenient, this intense heat significantly alters the protein structure of the milk. For cheesemaking, this is detrimental: UHT milk will never properly coagulate with rennet because the proteins necessary for curd formation have been denatured. Most milk sold in the USA is UHT, so you must carefully check labels for “non-UHT” or “low-temp pasteurized.” Non-UHT milks are generally more common in Canada and specialty dairy sections in the US.
To reiterate: You absolutely need to use non-UHT milk. Using UHT milk will result in a failed batch of cheese, as the fundamental protein structure required for curdling is compromised.
Our Top Milk Recommendation
- Kalona Supernatural Whole Unhomogenized Milk is highly recommended and has consistently yielded excellent results in our tests. Look for brands specifically stating “low-temperature pasteurized” or “cream-top.”
Rennet: The Magic Enzyme Behind Curds
Rennet is an enzyme, traditionally sourced from the stomachs of ruminant animals, that plays a pivotal role in cheesemaking. Its function is to coagulate the milk proteins (casein), causing them to bind together and form solid curds, separating from the liquid whey. Understanding the types of rennet available will help you make an informed choice:
- Liquid Rennet: This is our preferred choice due to its ease of measurement and consistent results. There are two common types:
- Animal Rennet: Derived from calf stomachs, this is the traditional form of rennet.
- Vegetable Rennet: Produced from certain plants or microbial sources, this is a suitable alternative for vegetarians. We have tested both animal and vegetable liquid rennets, and both work wonderfully. We strongly recommend liquid rennet for its accuracy in dosing, which is crucial for successful cheesemaking.
- Rennet Tablets: Rennet tablets are a convenient option, often found at co-ops or online, and boast a longer shelf life than liquid rennet. While we did attempt cheesemaking with tablets in our tests, the results were not successful. We attribute this failure primarily to the milk used, not necessarily the tablets themselves, but we still lean towards liquid rennet for reliability.
- Powdered Rennet: Similar to tablets, powdered rennet is also available online and offers extended shelf stability. We have not personally tested powdered rennet for this recipe, but it is another option if liquid or tablet forms are unavailable.
Step-by-Step Guide to Making Perfect Queso Fresco
Patience is not just a virtue in cheesemaking; it’s a necessity. Rushing any step can compromise the delicate process of curd formation and drainage, leading to a less-than-perfect cheese. Follow these detailed instructions carefully for the best results:
Step 1: Gently Heat the Milk
Pour your gallon of non-UHT whole milk into your heavy-bottom stainless steel pot. Using a large whisk, stir the milk well to ensure any thick cream dissolves evenly throughout. Place the pot over medium-low heat. Slowly warm the milk, stirring occasionally, until it reaches precisely 109ºF (43ºC) on your digital thermometer. This temperature is critical for rennet activation. Be vigilant to avoid overheating; too much heat can denature the milk proteins and prevent curd formation. Once the target temperature is reached, immediately remove the pot from the heat.
Step 2: Introduce the Rennet
With the milk off the heat, add the ½ teaspoon of liquid rennet. Whisk it thoroughly into the milk for about 30 seconds to ensure it is evenly distributed. This is where the magic begins as the rennet starts to work on the milk proteins.
Step 3: Allow the Milk to Set (Coagulation)
Cover the pot with a lid and let the rennet-treated milk sit undisturbed for at least 1 hour at room temperature. During this crucial period, the rennet will work its wonders, transforming the liquid milk into a firm, custard-like curd. Resist the urge to peek or stir; stability is key for proper coagulation.
Step 4: Evaluate and Cut the Custard
After the initial hour, gently check the milk. It should have firmed up into a solid curd, resembling a firm yogurt or soft custard. You can test this by gently inserting a knife into the curd and lifting it slightly; it should break cleanly. If it hasn’t set, allow it to sit for another 15-30 minutes, checking periodically. Once set, use your large whisk to carefully cut the curd into approximate ¼-inch chunks. Move the whisk gently but firmly through the curd in a grid pattern. Be careful not to mash the curds too much. If the curd has hardened too much, it will be difficult to cut, and may result in a tougher cheese.
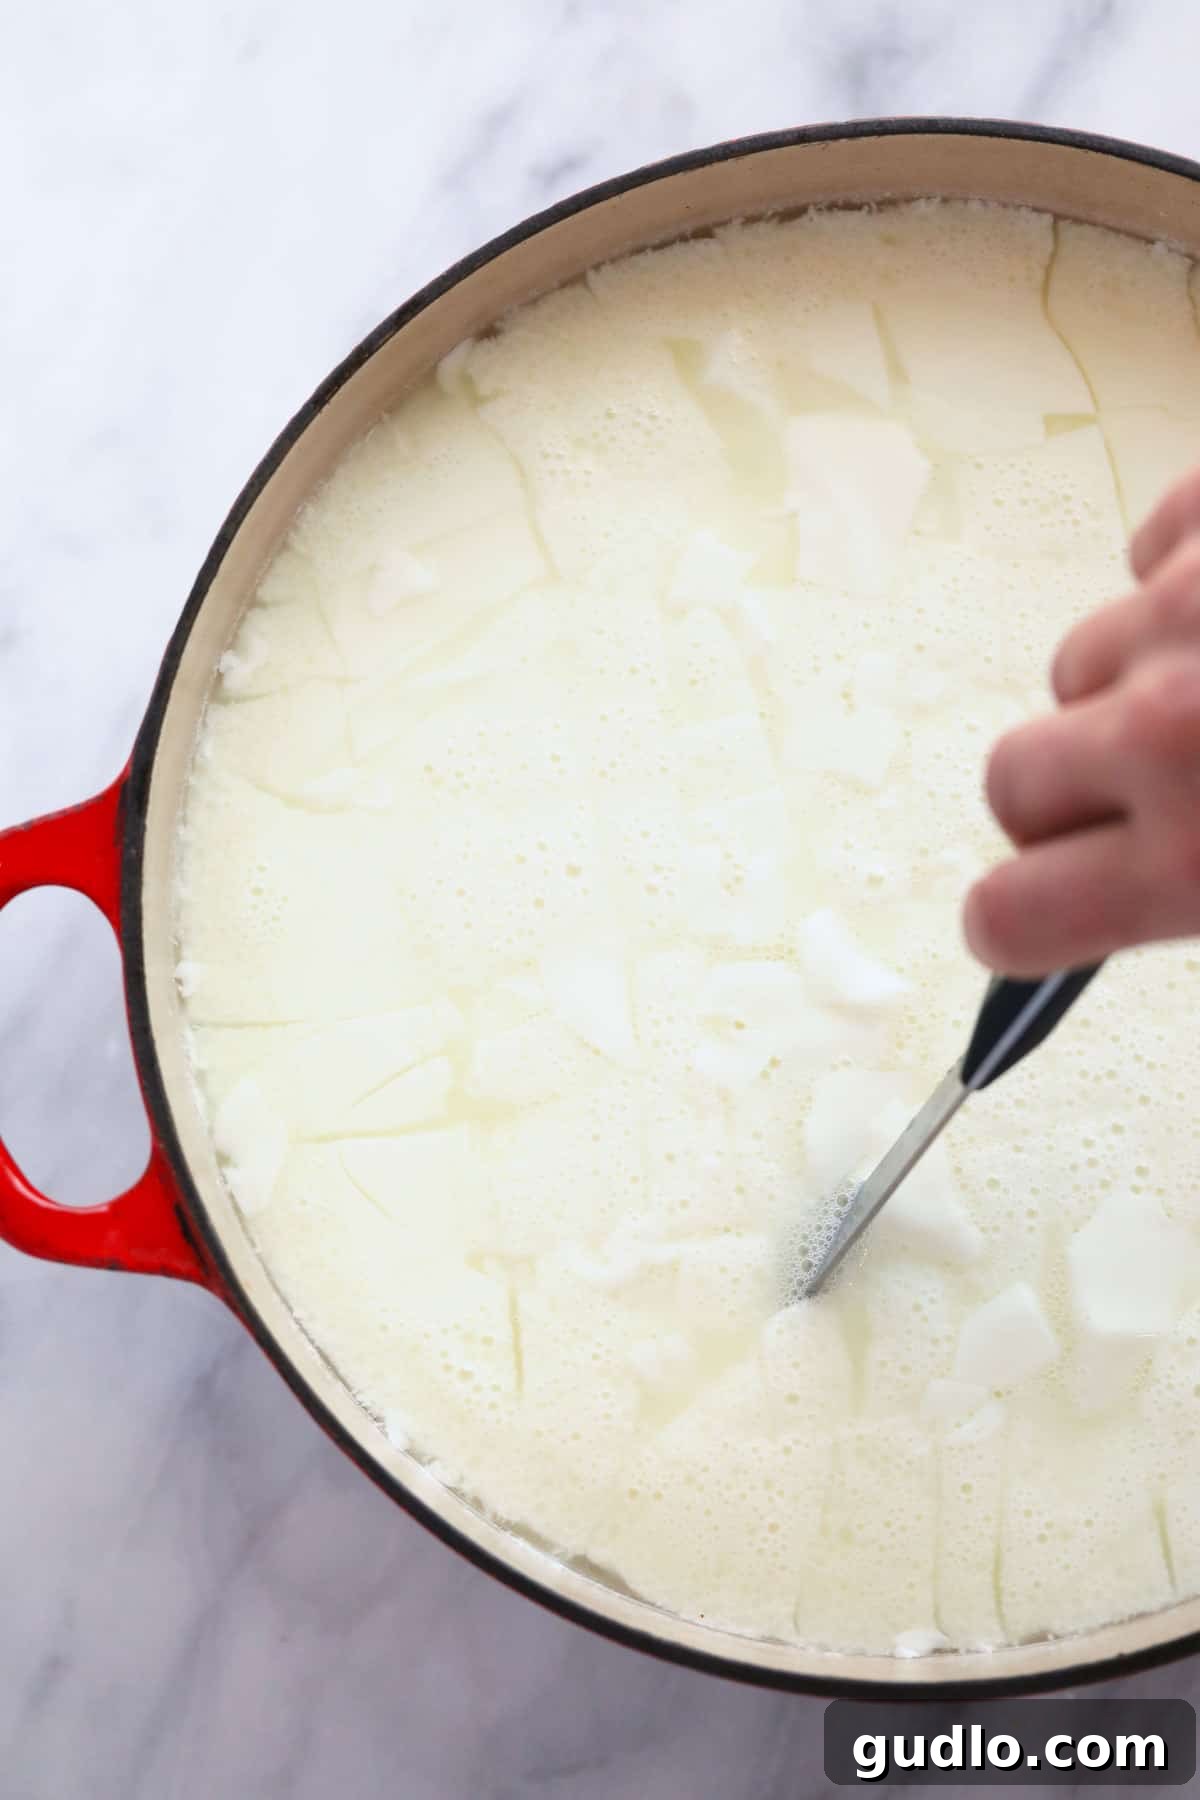
Step 5: Allow Curds to Settle
After cutting, let the curds sit quietly in the pot for another 10 minutes. This resting period allows the curds to shrink slightly, firm up, and sink to the bottom of the pot, clearly separating from the greenish-yellow liquid, which is the whey.
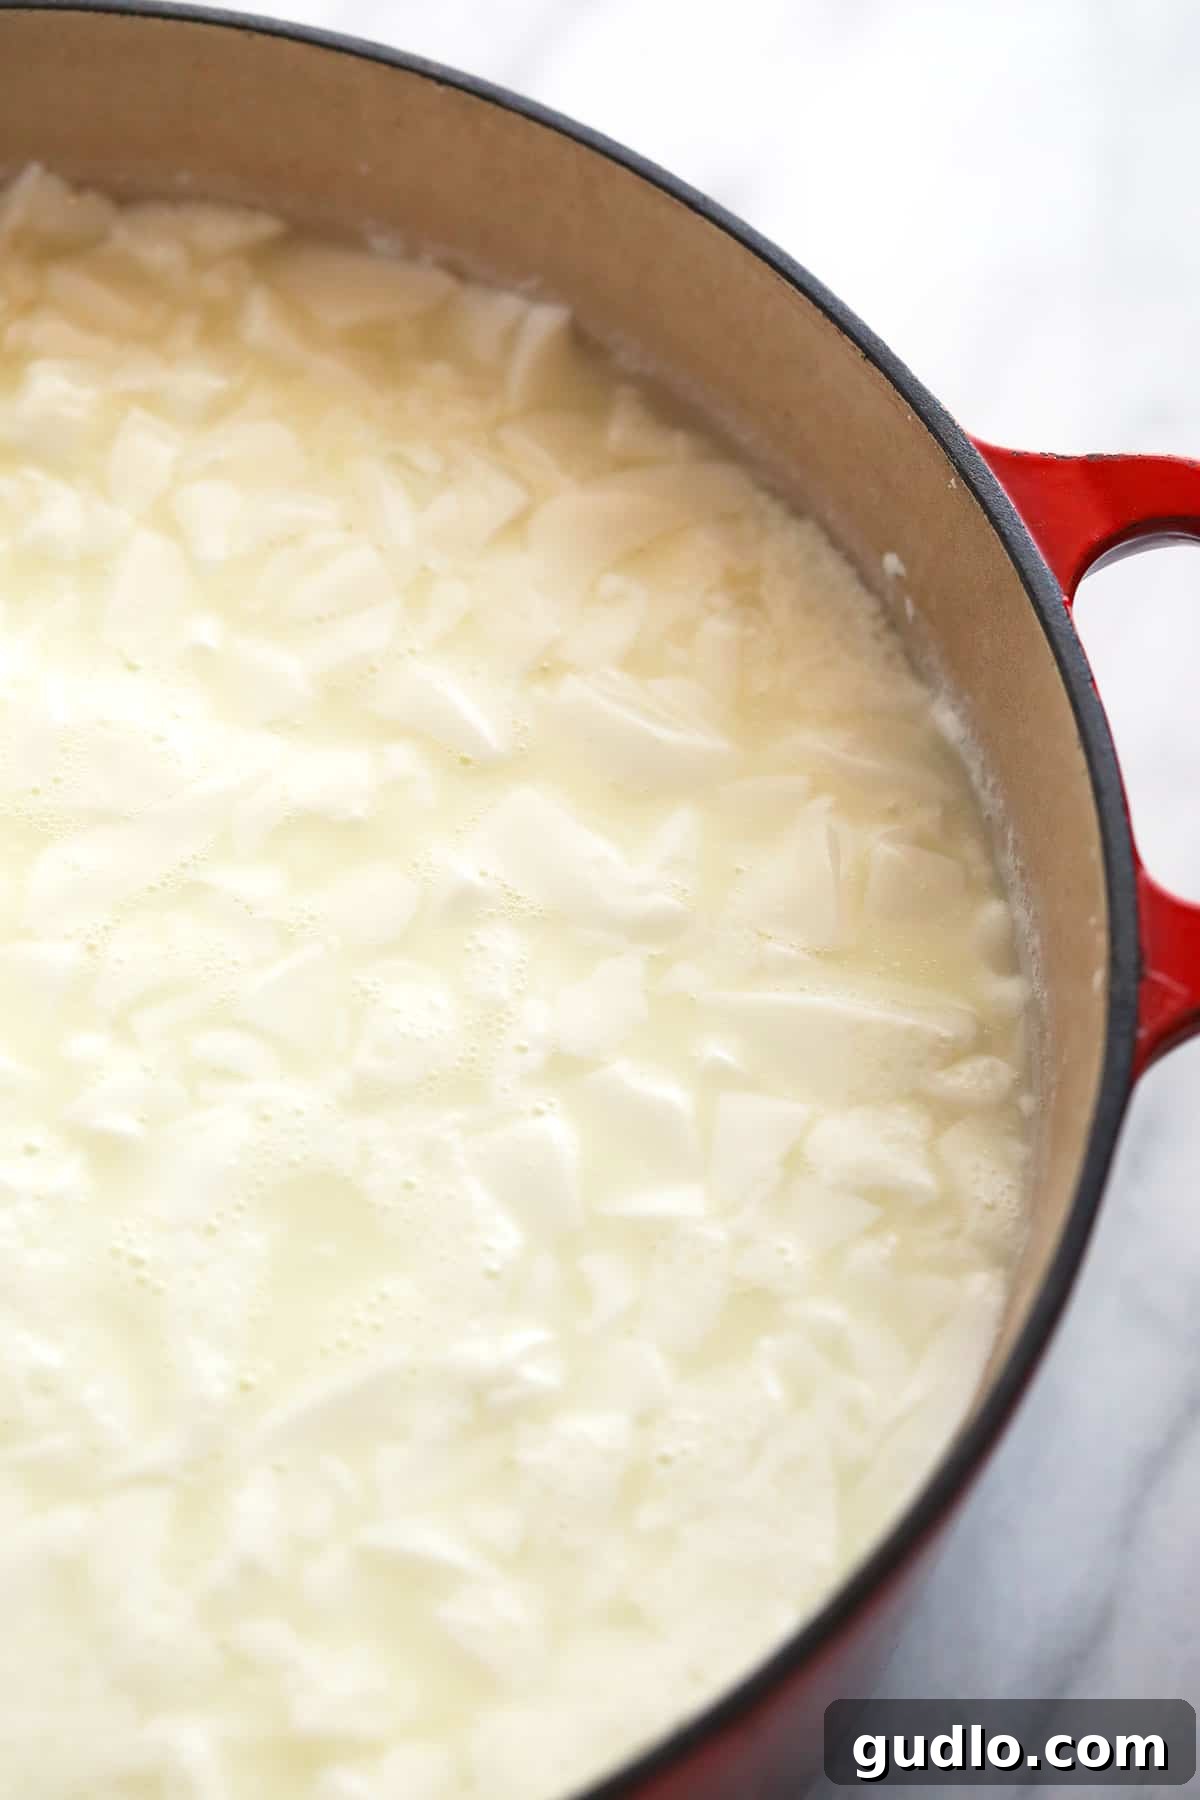
Step 6: Prepare for Drainage and Transfer Curds
While the curds are settling, prepare your draining station. Wet a large piece of cheesecloth (at least twice the size of your colander) and line a colander with it, allowing ample overhang. Place the colander inside a larger mixing bowl to catch the whey. Using your slotted spoon, carefully scoop the curds from the pot and transfer them into the cheesecloth-lined colander. Discard the excess whey caught in the bowl, or save it for other culinary uses.
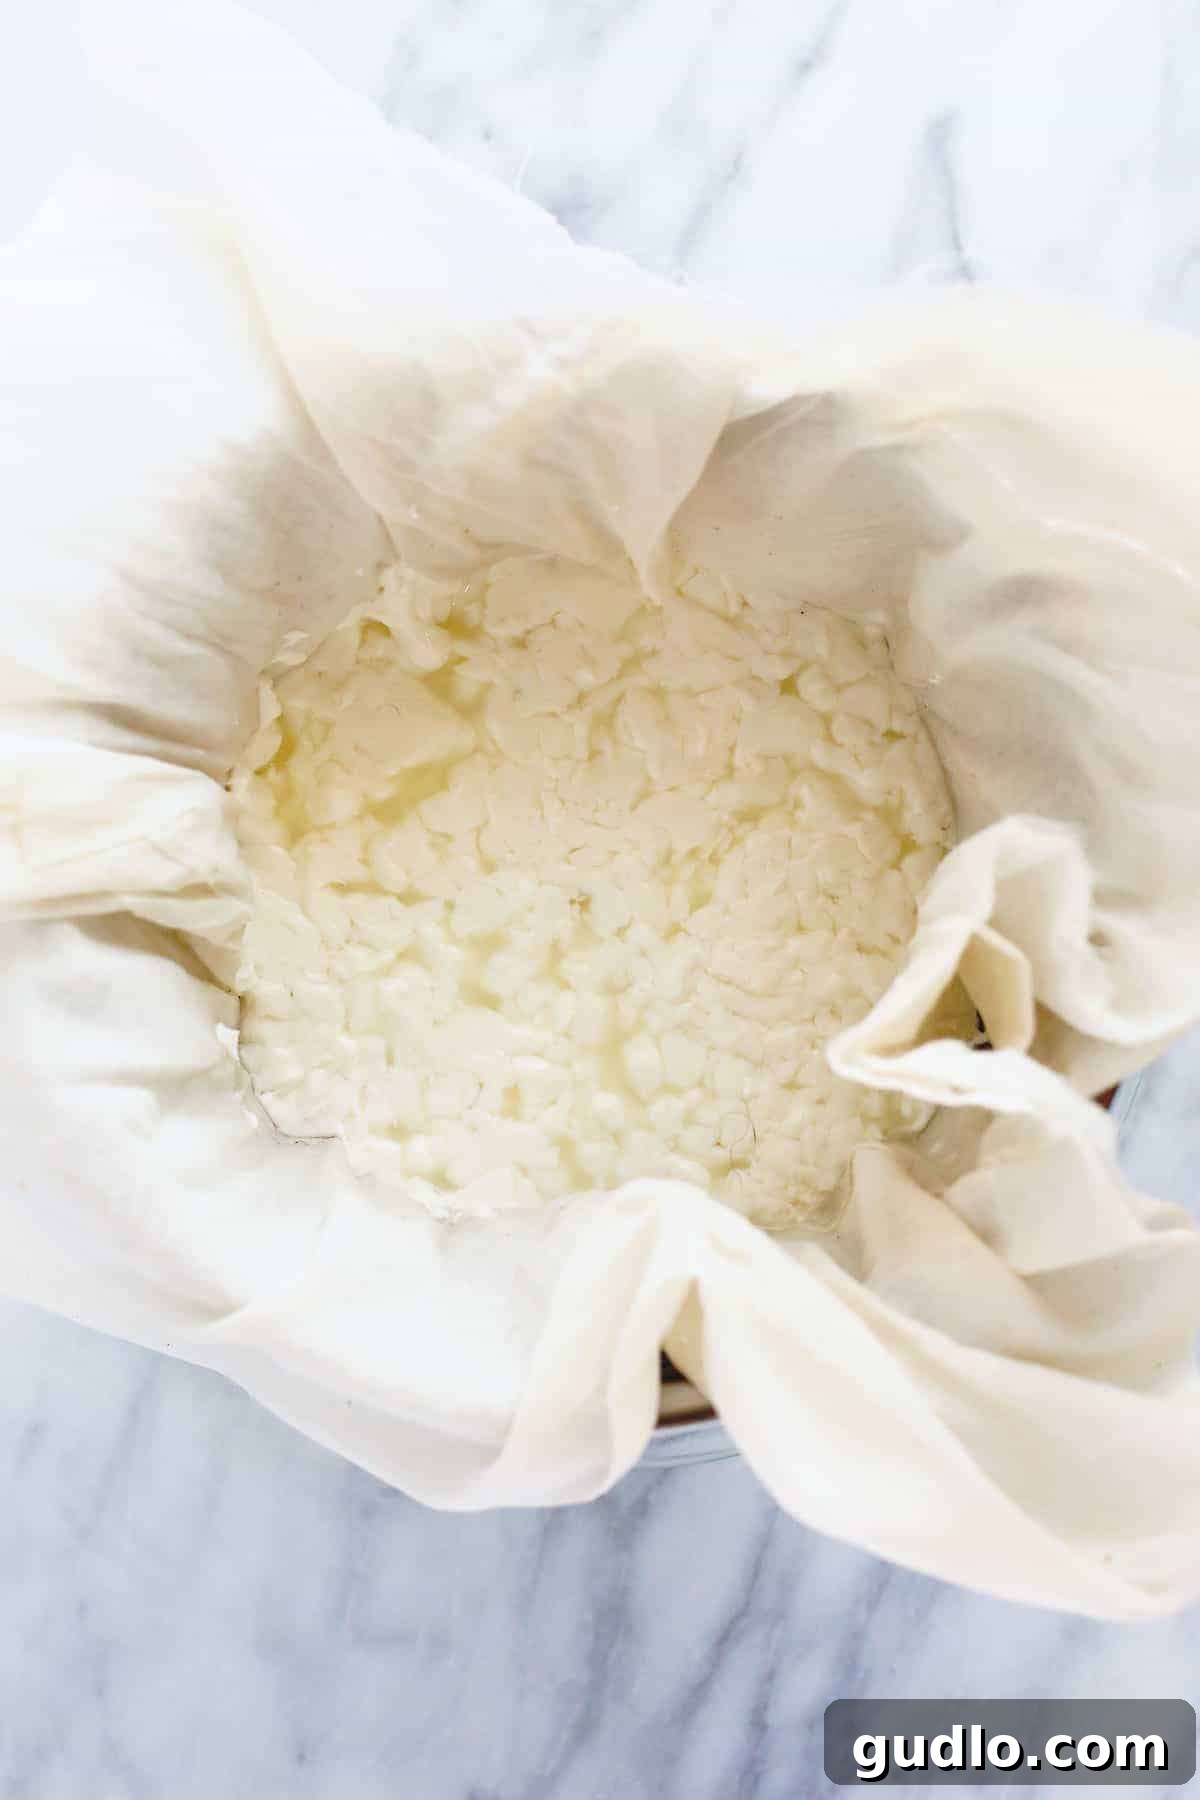
Step 7: Manual Whey Drainage
Gather the four corners of the damp cheesecloth and lift them, forming a bag around the curds. Gently twist the cheesecloth to apply light pressure, encouraging more whey to drain from the curds. Continue to gently squeeze and drain the curds by hand for approximately 8-10 minutes. The goal is to remove as much excess whey as possible without breaking the curds too severely. You’ll notice the curds becoming firmer and drier.
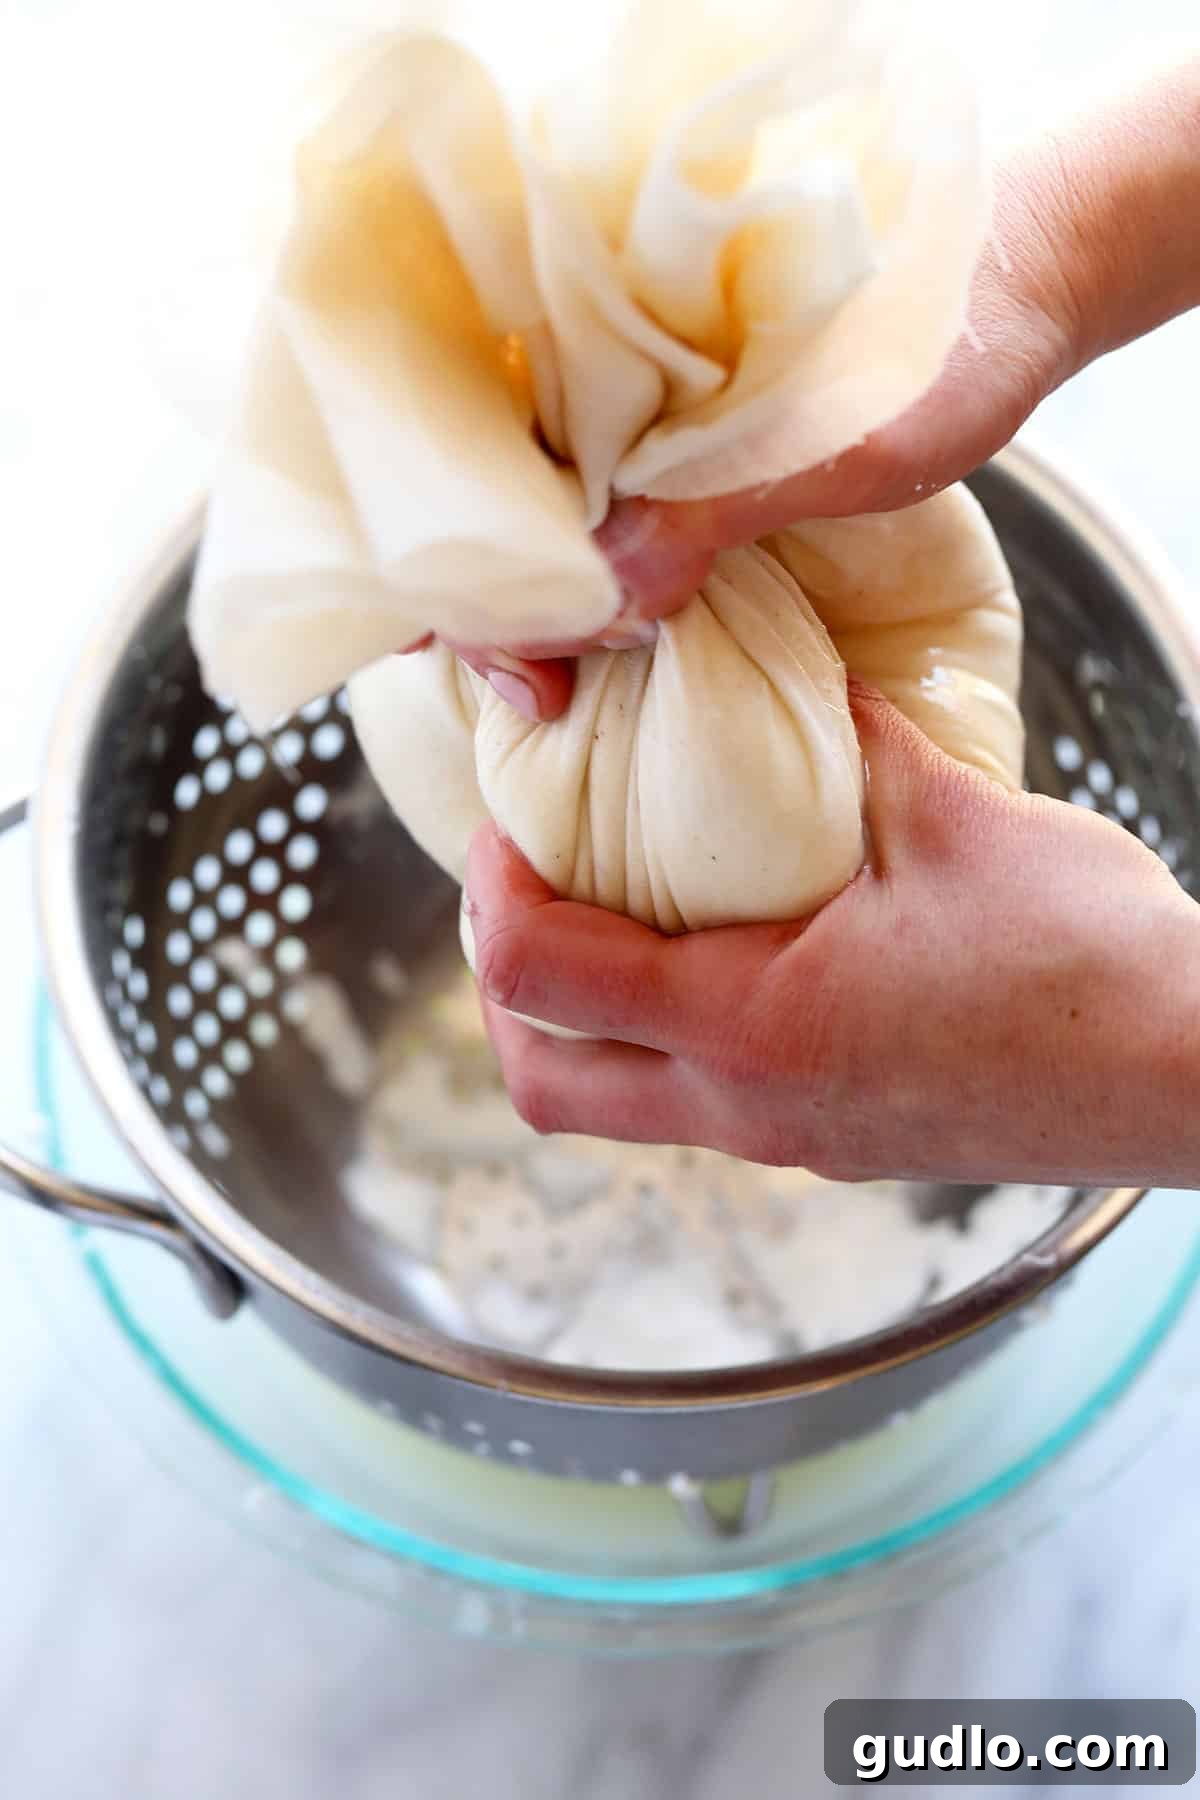
Step 8: Final Resting for Drainage
Return the twisted cheesecloth bag containing the curds to the colander. Let it sit for an additional 10 minutes to allow any remaining whey to drip away. This passive drainage ensures the cheese reaches the right moisture content.
Step 9: Season the Cheese
Carefully unwrap the queso from the cheesecloth and transfer it to a clean mixing bowl. Use your hands to gently break up the cheese curds. Sprinkle the 1 teaspoon of kosher salt evenly over the curds. Gently massage the salt into the cheese, ensuring it’s well incorporated without overworking the curds. This is also the stage where you can add any desired flavorings (see “Fun Flavor Add-ins” below).
Step 10: Mold the Cheese
Line your cheese mold(s) with a fresh piece of damp cheesecloth, allowing the ends to drape over the sides. Transfer the seasoned queso curds into the lined mold, pressing them down gently but firmly to fill the mold evenly and remove any air pockets. Fold the excess cheesecloth ends over the top of the queso. If you have a cheese press, use it to gently apply pressure. Alternatively, you can place a flat plate or lid on top of the folded cheesecloth and place a heavy object (like a canned good) on top for a makeshift press.
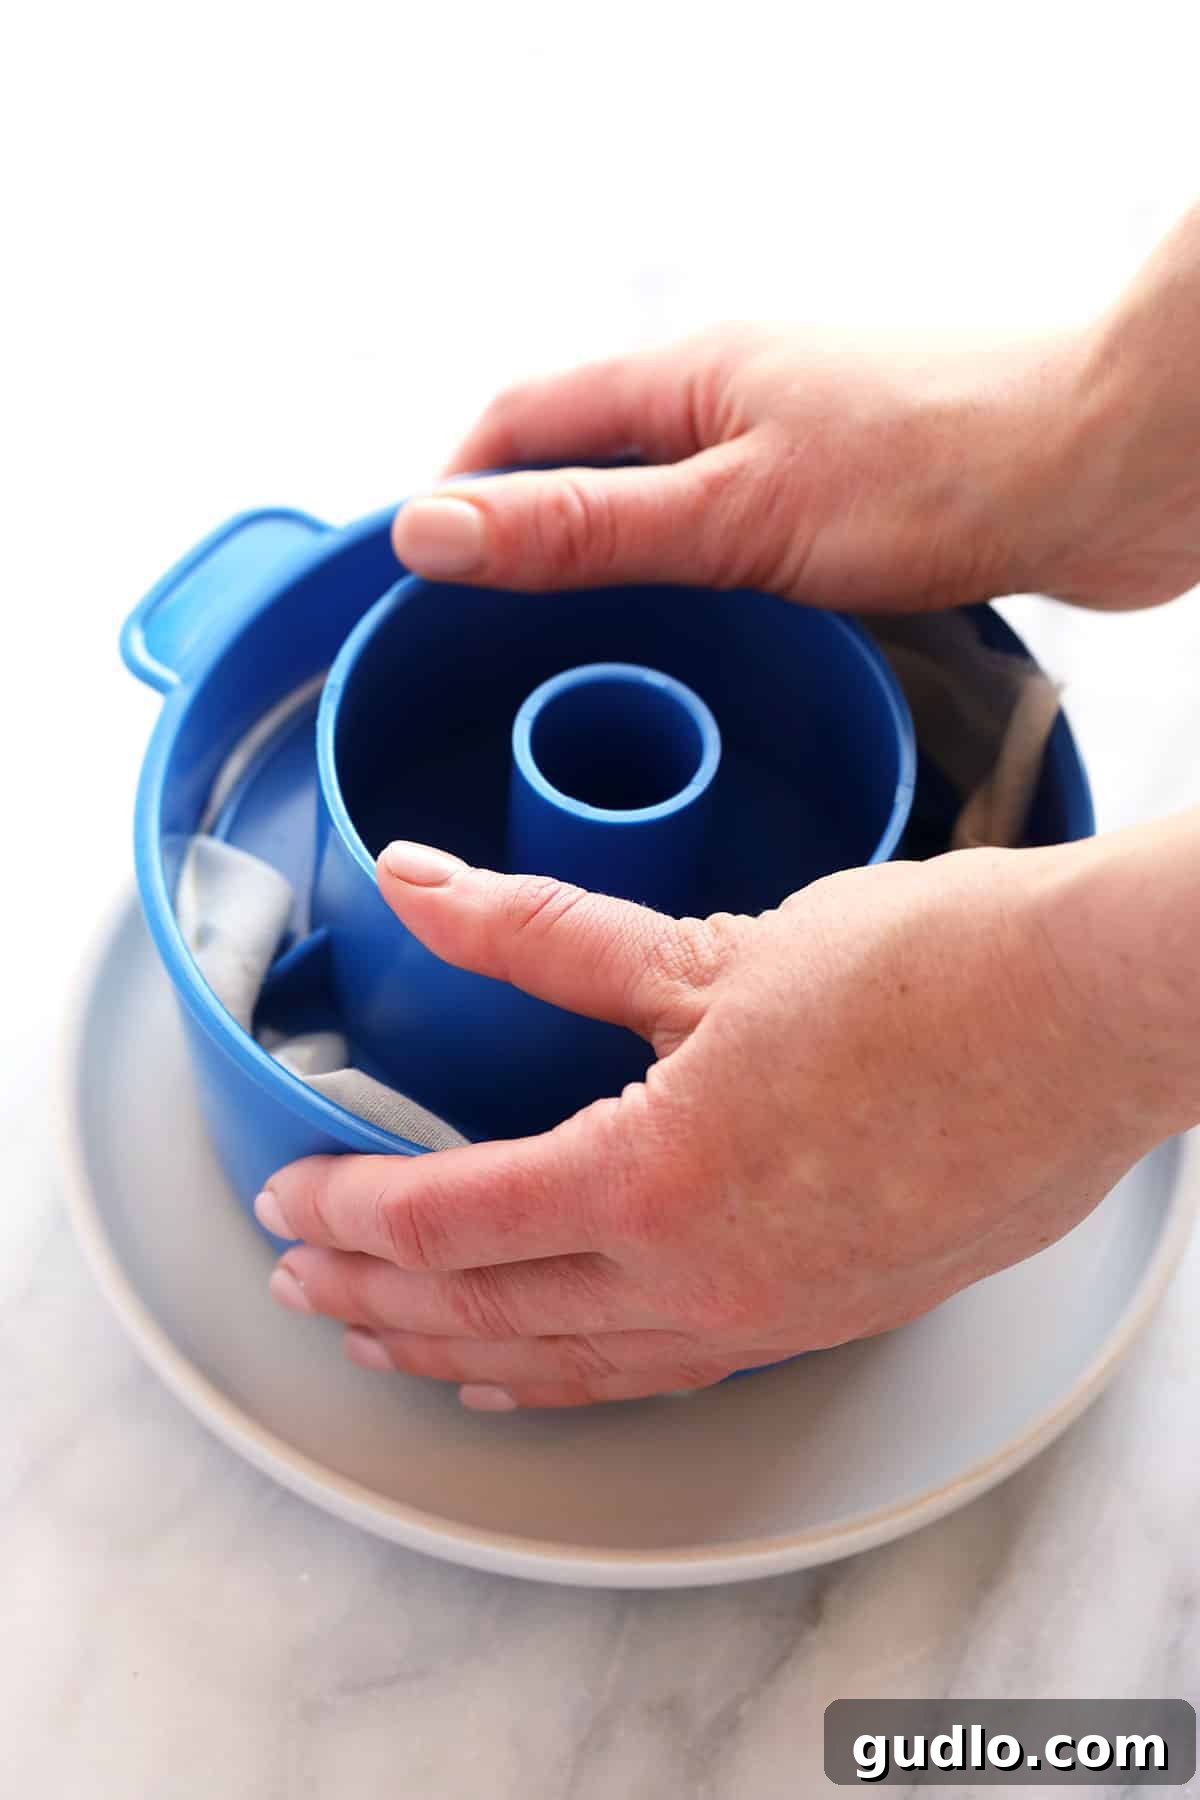
Step 11: Initial Mold Pressing
Let the cheese sit in the mold under light pressure for 10 minutes. This helps the curds bind together and form a cohesive block.
Step 12: Flip and Chill to Set
Carefully unmold the cheese, flip it over, and return it to the cheesecloth-lined mold (so the bottom is now the top). This helps ensure even shaping. Apply gentle pressure again (using your press or makeshift weight). Place the molded cheese (still in its mold, ideally on a rimmed baking sheet to catch any drips) in the refrigerator to chill and set. Allow it to firm up for at least 1 hour, or ideally 4-6 hours, for the best texture. The longer it chills, the firmer and more cohesive your queso fresco will become.
Step 13: Enjoy Your Homemade Masterpiece!
Once chilled, your homemade queso fresco is ready! Unmold it, remove the cheesecloth, and enjoy. You can cut it into wedges, crumble it over your favorite dishes, or slice it for a cheese board. Serve immediately or store as directed below.
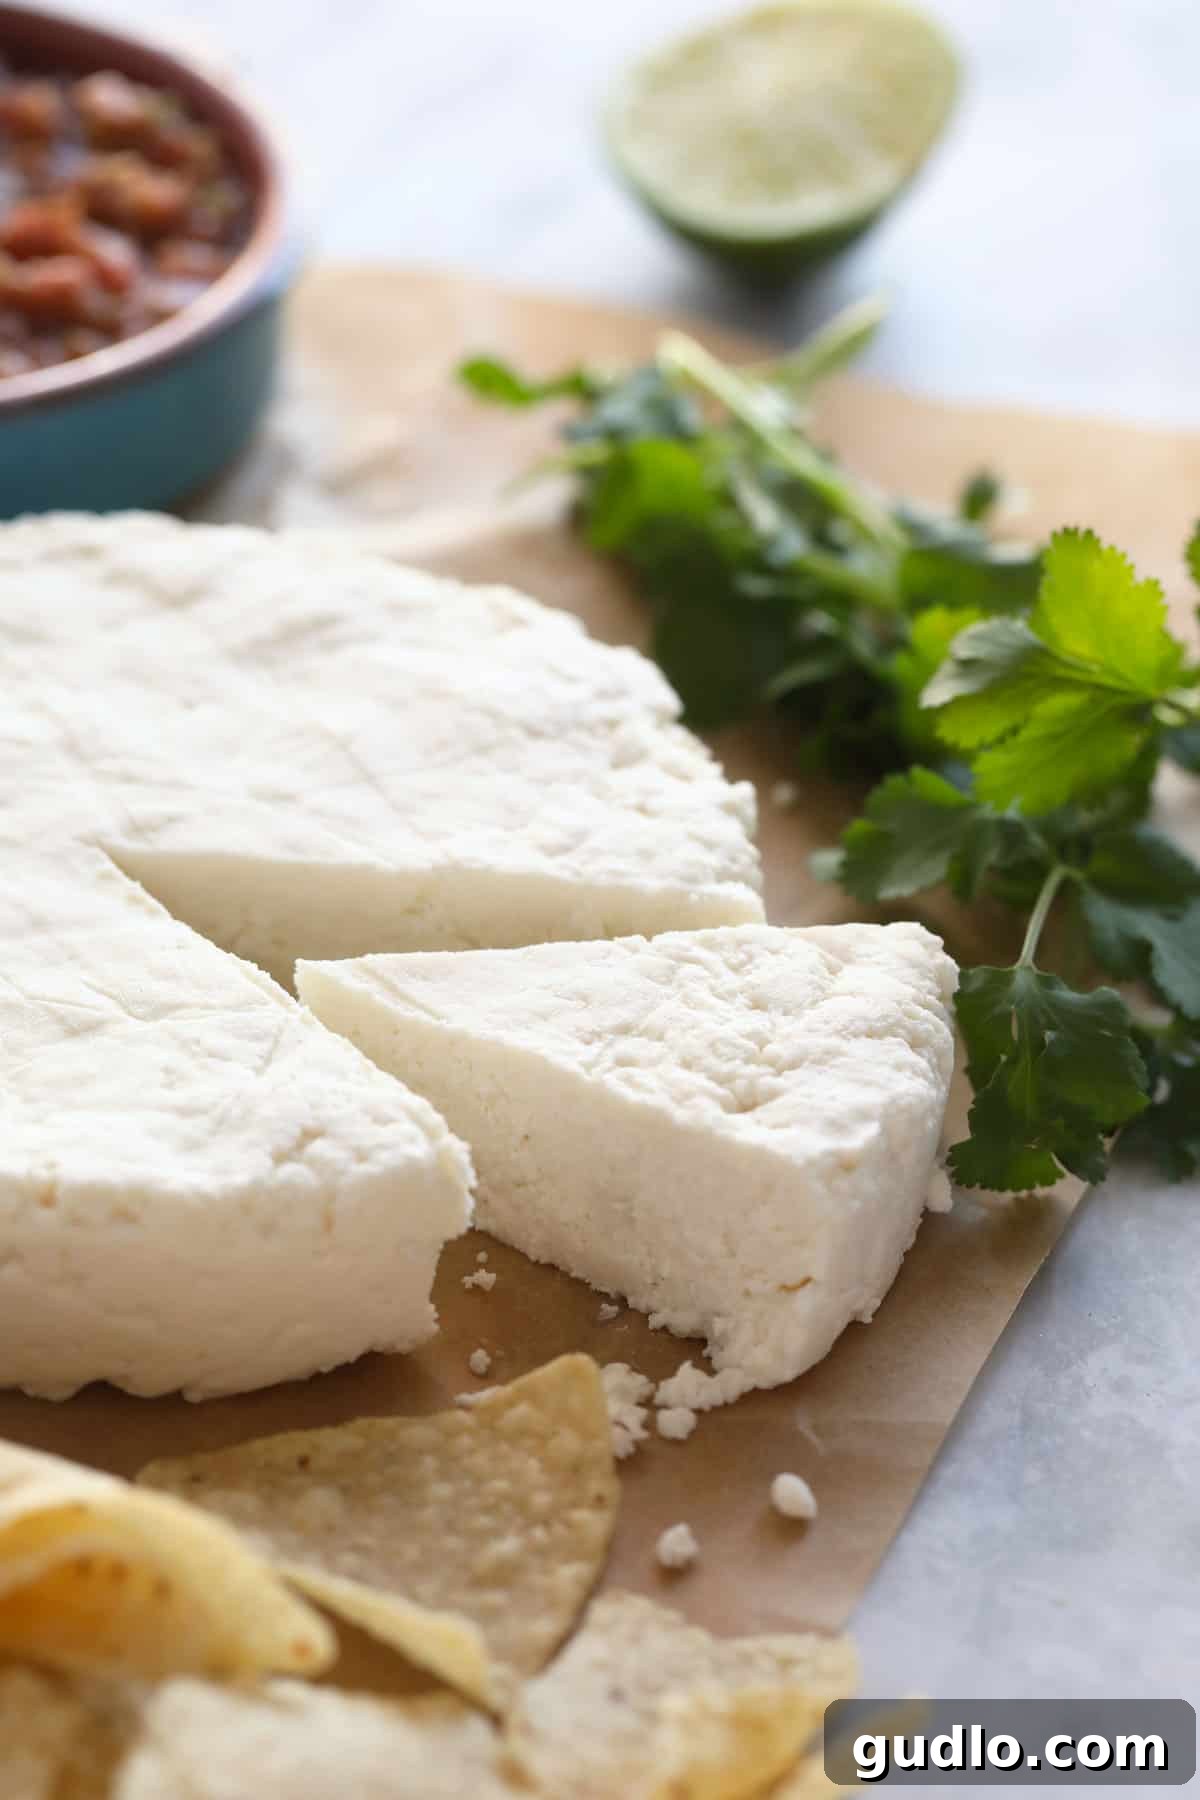
Expert Tips & Troubleshooting for Queso Fresco Success
Ingredients Are King: Don’t Compromise!
We cannot stress this enough: the quality and type of your milk and rennet are critical. Seriously, do not stray from our advice regarding non-UHT milk. Using UHT milk is the most common reason for cheesemaking failure, as its altered protein structure simply won’t form proper curds. Invest in good quality, fresh, non-UHT, and ideally non-homogenized whole milk, and ensure your liquid rennet is fresh and active. This attention to detail will save you frustration and ensure a delicious end product.
Patience, Patience, Patience!
Cheesemaking is a meditative art. It cannot be rushed. Each resting period, heating step, and draining phase serves a specific purpose in developing the curds and shaping your cheese. Trying to speed up the process by increasing heat, reducing resting times, or aggressively pressing can lead to a crumbly, dry, or even unformed cheese. Embrace the journey; the reward of a perfectly crafted homemade cheese is worth every moment of waiting.
Fun Flavor Add-ins: Unleash Your Creativity!
The beauty of homemade queso fresco is the opportunity for customization. When you add the salt to the broken-up curds (Step 9), consider infusing your cheese with additional herbs and spices. This is where you can truly make the recipe your own! Here are some fantastic options to inspire you:
- Cracked Black Pepper: Adds a subtle warmth and aromatic kick.
- Fresh Minced Garlic: For a pungent, savory depth.
- Garlic Powder or Onion Powder: A milder, more consistent flavor than fresh garlic.
- Roughly Chopped Fresh Cilantro: A classic pairing, offering a bright, herbaceous note.
- Red Pepper Flakes: For those who enjoy a little heat and visual appeal.
- Chopped Jalapeños or Serranos: For a more pronounced spicy kick.
- Chives or Scallions: Delicate oniony flavor.
- Smoked Paprika: Adds a smoky, earthy undertone.
Troubleshooting: What If My Curds Don’t Set?
If, after waiting the recommended time, your milk hasn’t set into a firm curd, don’t panic! Here are a few common reasons and solutions:
- UHT Milk: As mentioned, this is the most likely culprit. There’s no fix for UHT milk; you’ll need to start over with non-UHT milk.
- Inactive Rennet: Rennet can lose its potency over time, especially if not stored correctly (usually refrigerated). Test a small amount in warm water to see if it causes milk to coagulate.
- Incorrect Temperature: If the milk was too cold, the rennet might not activate effectively. If it was too hot, the proteins might have been damaged. Re-check your thermometer’s accuracy.
- Insufficient Rennet: Double-check your measurement. If your rennet is less potent, you might need a tiny bit more (but add cautiously).
- Calcium Chloride: Sometimes, milk (especially pasteurized milk) benefits from a small amount of food-grade calcium chloride to help the curds firm up. This isn’t usually necessary for queso fresco but can be a last resort.
Delicious Ways to Enjoy Your Homemade Queso Fresco
Now that you’ve successfully crafted your own batch of queso fresco, it’s time to put it to good use! Its mild, fresh flavor and crumbly texture make it incredibly versatile. Here are some of our favorite serving suggestions:
- Mexican Cuisine Staples: Crumble generously over tacos, burritos, enchiladas, nachos, or quesadillas for an authentic touch. It adds a delightful creaminess and tang that perfectly complements the rich flavors.
- Salad Topper: Sprinkle over any green salad for a boost of protein and fresh flavor. It’s particularly good with corn and black bean salads.
- Charcuterie Boards: A wonderful addition to any cheese board. Its mildness pairs beautifully with spicier jams (like jalapeño jelly), fruits, and crusty bread.
- Soups and Stews: Garnish hearty chili, tortilla soup, or black bean soup with a generous crumble of queso fresco just before serving.
- Eggs: Elevate your breakfast by crumbling it over scrambled eggs, omelets, or our Huevos Rancheros.
- Grilled Vegetables: A fantastic finishing touch for grilled corn-on-the-cob (think elote!), zucchini, or bell peppers.
- Fresh Fruit: Surprisingly delicious with watermelon or other sweet fruits for a sweet-and-savory contrast.
Don’t just take our word for it; try these irresistible recipes from Cheese Knees:
- Crunchwrap Supreme
- Bean and Cheese Burrito
- Steak Quesadilla
- Beef Nachos
- Queso Fresco Dip
- Mexican Corn Salad
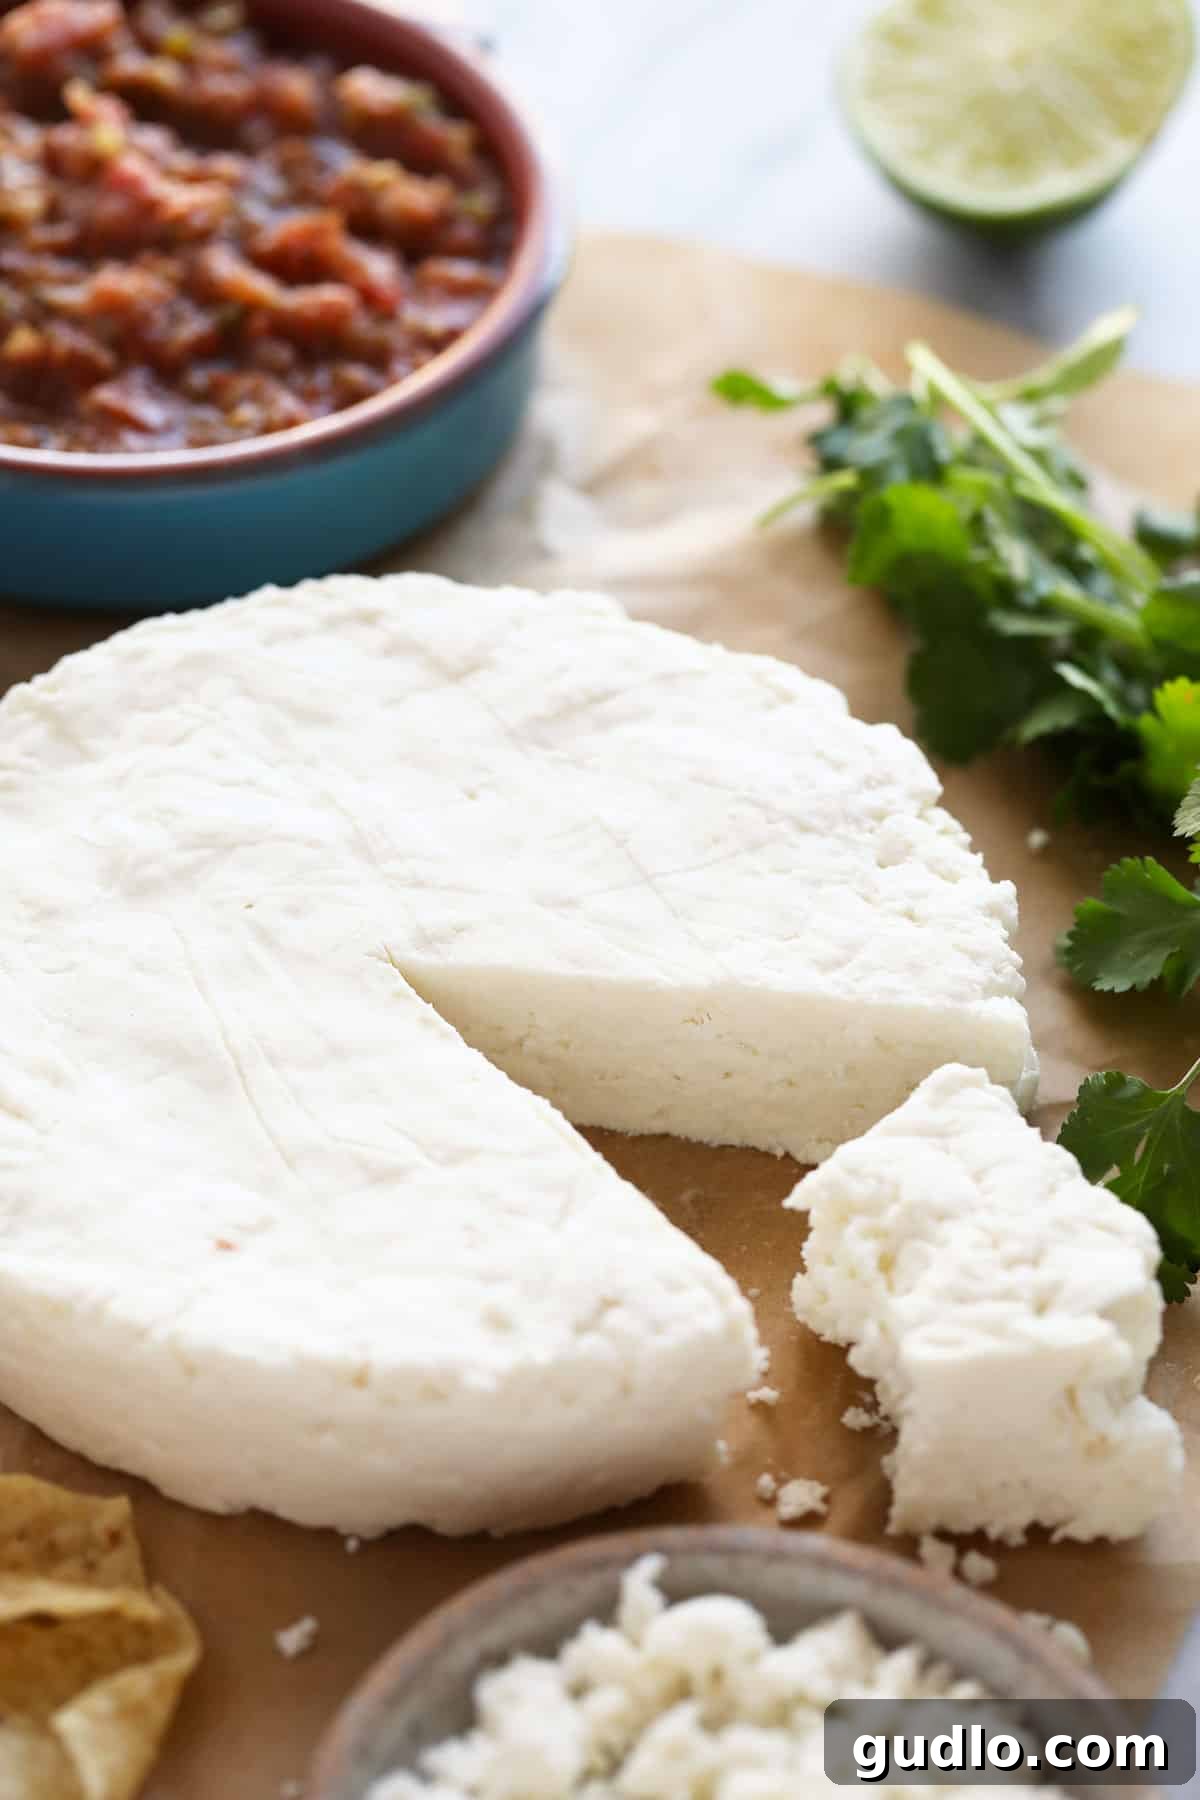
Storing Your Homemade Queso Fresco
To keep your freshly made queso fresco at its best, proper storage is key. Transfer the cheese to an airtight container. For optimal freshness, you can wrap it loosely in a piece of fresh cheesecloth or parchment paper before placing it in the container. Store it in the coldest part of your refrigerator. Homemade queso fresco will typically last for 7-10 days. If you notice any signs of spoilage, such as an off smell, discoloration, or mold, it’s best to discard it.
More of our Favorite Cheesemaking Adventures…
Expand Your Cheesemaking Skills with These Recipes
If you enjoyed making queso fresco, you’re ready to explore more delicious homemade cheese recipes! Dive into these other favorites from our kitchen:
- How to Make Ricotta Cheese
- How to Make Paneer
- How to Make Mascarpone Cheese
Queso Fresco Recipe: Your Guide to Fresh Homemade Cheese
Embark on a delightful culinary journey by making your own queso fresco from scratch! This easy-to-follow recipe yields a fresh, versatile cheese perfect for countless dishes, from tacos to salads.
By: Erin Harris
Ingredients
Equipment Needed:
- Cheesecloth
- Digital thermometer
- Colander
- Mixing bowl
- Heavy-bottom stainless steel pot (1-gallon capacity minimum)
- Large whisk
- Slotted spoon
- 1 (2-lb) cheese mold or 2 (1-lb) cheese molds (alternatively, a glass container with drainage)
Cheese Ingredients:
- 1 gallon organic pasteurized whole milk (non-UHT is essential)
- ½ teaspoon single-strength liquid animal or vegetable rennet (recommended brand)
- 1 teaspoon kosher salt
Instructions
- Heat the Milk: Pour the milk into your heavy-bottomed pot. Whisk gently to ensure any cream dissolves. Heat over medium-low heat, stirring occasionally, until the milk reaches exactly 109°F (43°C) on your digital thermometer (approx. 18 minutes). Remove from heat immediately.
- Add Rennet: Whisk in the rennet thoroughly into the warmed milk for about 30 seconds.
- Set the Curds: Cover the pot with a lid and let it stand undisturbed at room temperature for 1 hour, allowing the milk to coagulate into a firm curd.
- Check and Cut Curds: After 1 hour, gently test the curd’s firmness with a small knife; it should resemble firm custard. Using a large whisk, carefully cut the curd into ¼-inch pieces.
- Settle Curds: Let the cut curds sit in the pot for 5-10 minutes to allow them to sink to the bottom and separate further from the whey.
- Prepare Colander: While curds settle, line a colander with a damp cheesecloth, ensuring plenty of overhang. Place the colander in a large bowl to collect whey.
- Transfer Curds: Using a slotted spoon, carefully transfer the curds from the pot into the cheesecloth-lined colander.
- Drain Whey: Gather the corners of the cheesecloth, lift, and gently squeeze the curds by hand for 8-10 minutes to thoroughly drain excess whey.
- Final Drain: Return the twisted cheesecloth with curds to the colander and let it drain for another 10 minutes. Discard the collected whey.
- Season the Cheese: Open the cheesecloth and transfer the curds to a medium bowl. Break up the cheese with clean hands, sprinkle with kosher salt, and gently mix until well incorporated. (Optional: Add desired herbs or spices here).
- Mold the Cheese: Line your cheese mold(s) with a fresh piece of damp cheesecloth. Press the seasoned curds into the mold, filling it evenly.
- Initial Press: Fold the cheesecloth over the top of the curds and apply light pressure with a press or a heavy object. Let it sit for 10 minutes.
- Flip and Chill: Carefully unmold the cheese, flip it over, and return it to the cheesecloth-lined mold. Press again gently. Place the mold on a rimmed baking sheet in the refrigerator and chill for at least 1 hour, or ideally 4-6 hours, to allow the cheese to firm up and set its shape.
- Serve and Store: Unmold the chilled queso fresco. Serve immediately by crumbling or cutting into wedges. Store any leftovers in an airtight container in the refrigerator for up to 7-10 days.
Nutrition
Calories: 178 kcal
,
Carbohydrates: 4 g
,
Protein: 10 g
,
Fat: 14 g
,
Fiber: 0 g
,
Sugar: 4 g
Nutrition information is automatically calculated and should only be used as an approximation.
Loved this recipe? Leave a comment below!
Don’t forget to tag your beautiful creations on social media with the hashtag #cheeseknees. We’d absolutely love to see what you’re whipping up in your kitchen!