
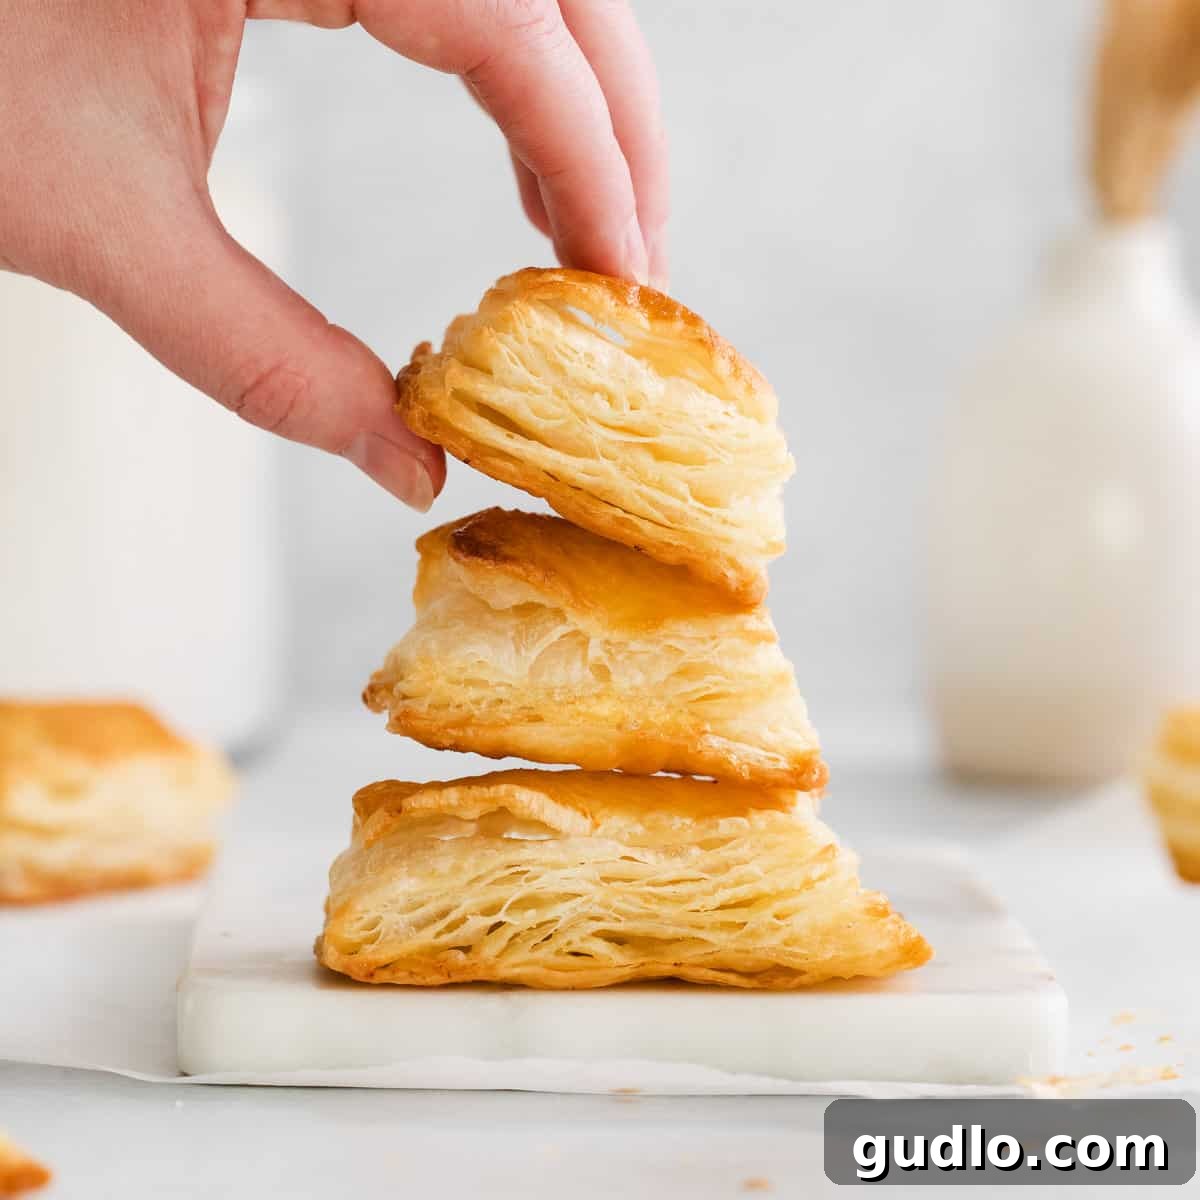
Discover the joy of crafting your own incredibly flaky and delicious homemade puff pastry. This simple, 4-ingredient recipe guides you through creating a versatile dough that’s perfect for elevating both sweet and savory dishes. Forget bland, store-bought alternatives – our method guarantees a light, airy, and utterly irresistible result every single time. Prepare to transform humble ingredients into a culinary masterpiece that will impress everyone.
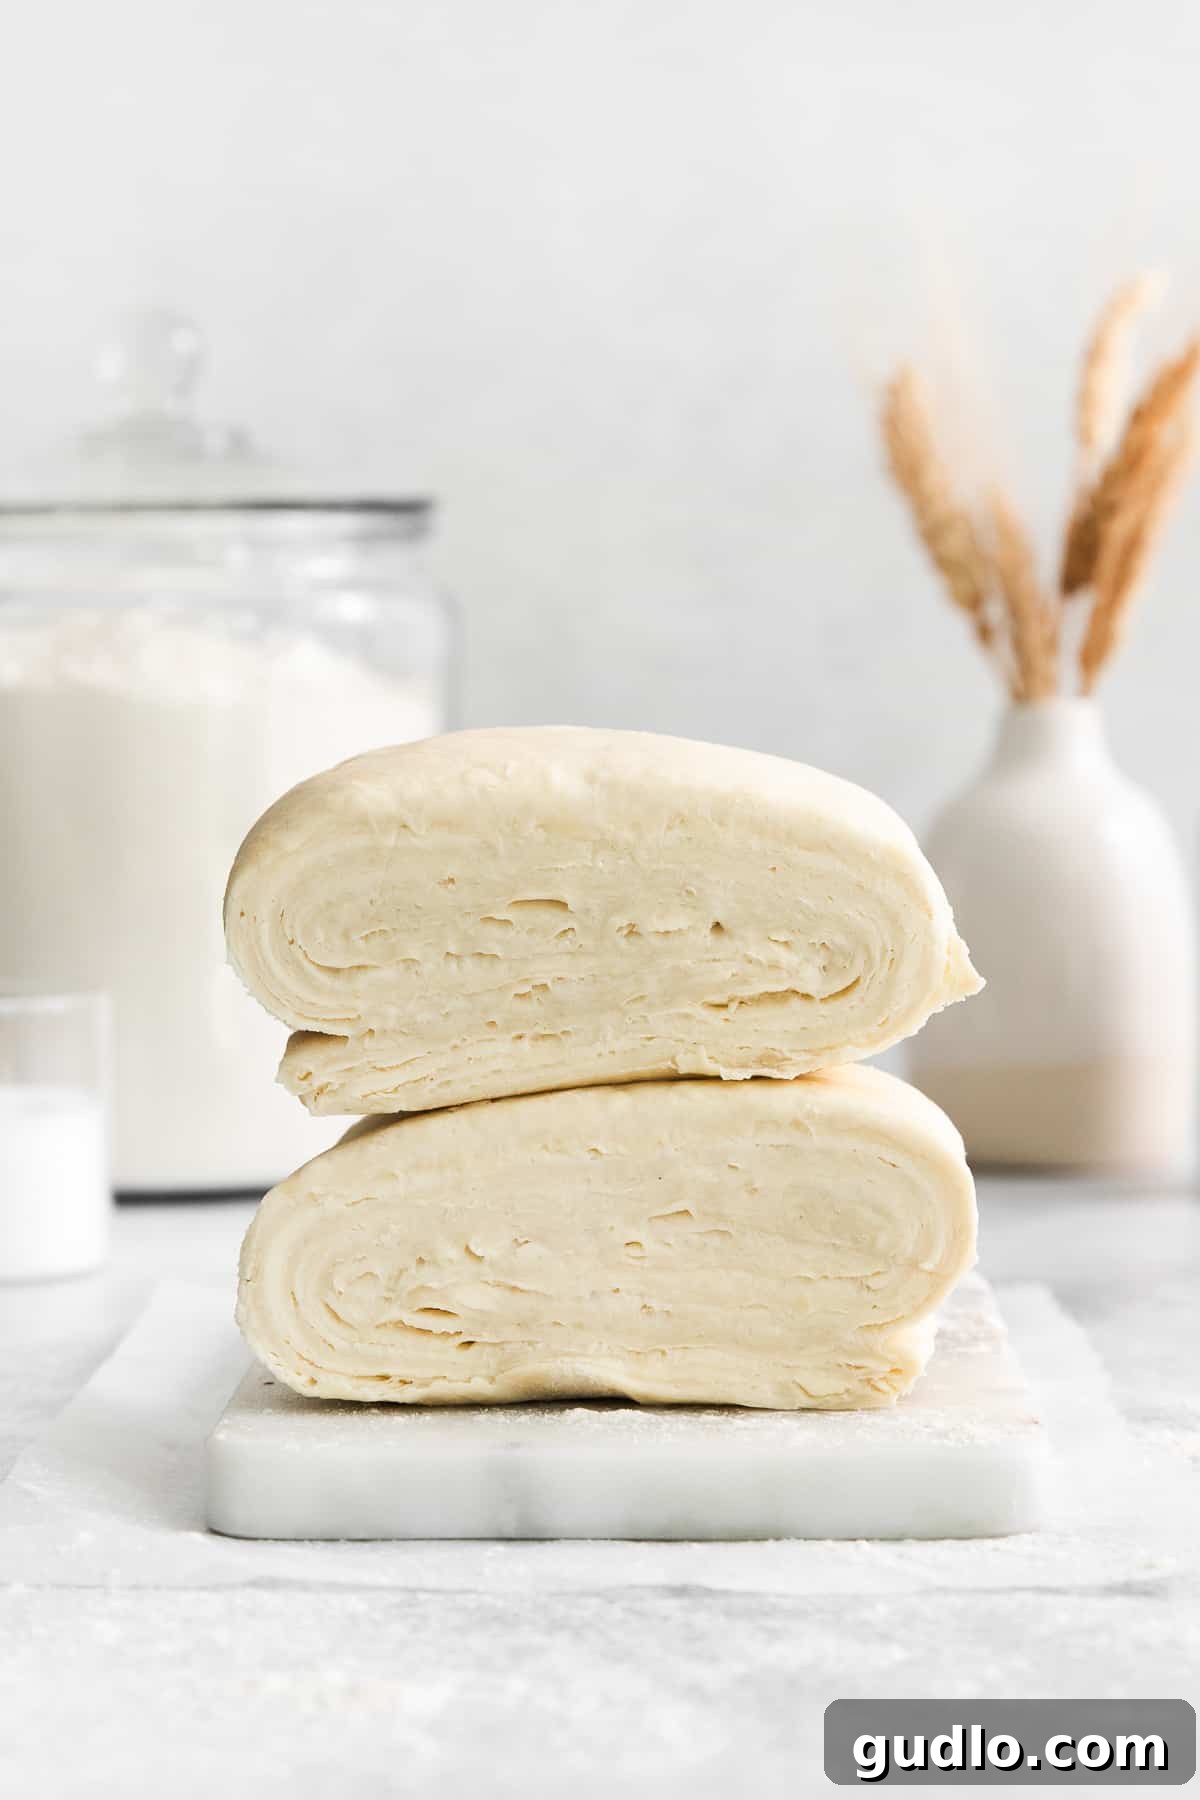
The BEST Homemade Puff Pastry Recipe: A Game Changer for Your Kitchen
When it comes to baking, few things impress quite like homemade puff pastry. Its distinct layers, delicate crispness, and ethereal flakiness elevate any dish, from elegant desserts to hearty main courses. Many home bakers shy away from making it from scratch, believing it to be overly complicated or time-consuming. However, our simple recipe is here to demystify the process, proving that a superior puff pastry can be created right in your own kitchen with minimal effort.
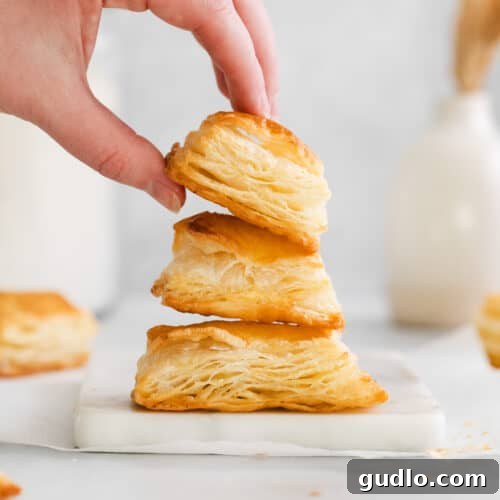
This method focuses on achieving a perfectly laminated dough using just four common ingredients: flour, butter, salt, and water. The result is a pastry that is not only far superior in taste and texture to anything you can buy at the store, but also provides immense satisfaction knowing you’ve crafted it yourself. Imagine the rich, buttery aroma filling your home as your creations bake to a golden-brown perfection. Once you experience the difference, you’ll never go back to store-bought.
This incredible dough is wonderfully versatile. It’s perfect for our savory ham and cheese hand pies, offering a delightfully flaky crust for a comforting meal. Or, if you prefer something sweet, use it to craft a delectable sweet cream cheese Danish, with its rich filling nestled in airy layers. The culinary possibilities are truly endless once you master this fundamental and rewarding baking skill.
Why You’ll Fall in Love with This Homemade Puff Pastry Recipe
- Surprisingly Simple: Despite its reputation, this recipe uses straightforward techniques and minimal ingredients, making it accessible for bakers of all experience levels.
- Unrivaled Versatility: This dough is your blank canvas for a vast array of culinary creations, equally suited for sweet tarts, savory turnovers, elegant appetizers, and comforting main dishes.
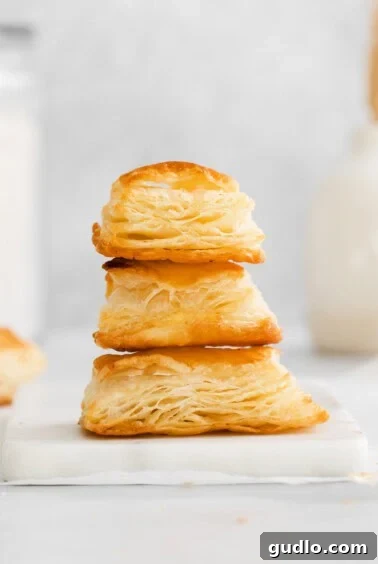
- Consistently Fluffy and Flaky: Follow our steps to achieve that coveted, cloud-like texture with countless delicate layers that melt in your mouth every single time.
- Superior Taste and Texture: Experience a richer, more authentic butter flavor and a lighter, crispier crumb that far surpasses the often dense and bland characteristics of store-bought alternatives.
- Economical Choice: Crafting your own puff pastry is often more budget-friendly than continuously purchasing pre-made sheets, especially for frequent bakers or larger batches.
- Impressive Results: Delight your family and friends with a homemade treat that not only tastes incredible but also looks like it came straight from a gourmet patisserie.
- Master a Core Baking Skill: Learning to make puff pastry from scratch is a rewarding endeavor that builds confidence and expands your baking repertoire significantly.
Homemade Puff Pastry Ingredients: The Foundation of Flakiness and Flavor
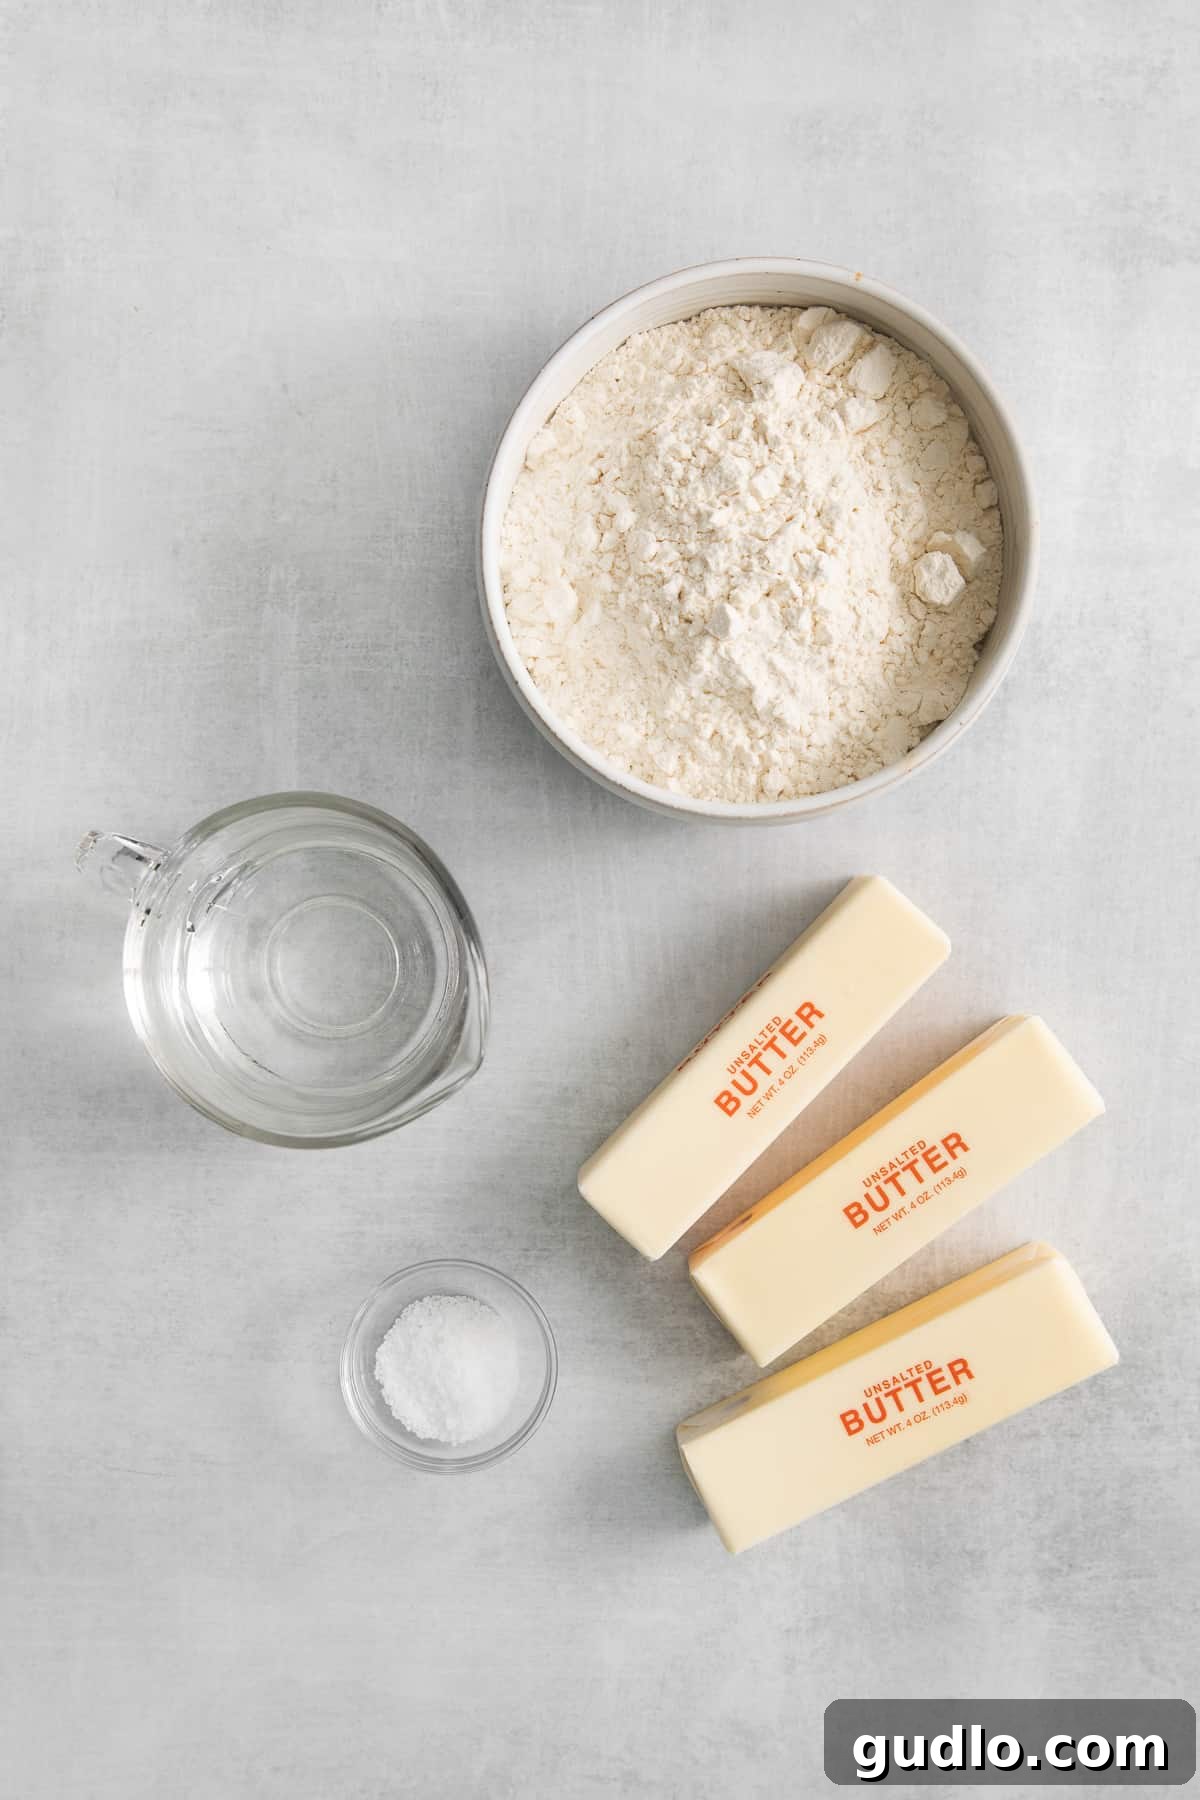
Crafting exceptional puff pastry requires just a handful of quality ingredients, each playing a crucial role in developing that signature light and flaky texture. Understanding the specific function and importance of these ingredients will not only guide you to perfect results but also deepen your appreciation for the art of pastry making.
- All-purpose flour: This fundamental ingredient provides the structure for our dough. All-purpose flour is specifically recommended for its balanced protein content, which offers sufficient gluten development for elasticity without making the dough overly tough. The gluten network is essential for the dough to be rolled thinly and stretched without tearing, a key aspect of lamination. We have not tested this recipe with other types of flour, such as bread flour (which has higher protein and can lead to a chewier texture) or pastry flour (which has lower protein and may not provide enough structure), so we strongly advise against substitutions to ensure the best possible outcome for both flakiness and ease of handling.
- Kosher salt: More than just a seasoning, a modest amount of kosher salt is vital for two primary reasons. Firstly, it significantly enhances the overall flavor profile of the puff pastry, providing a necessary counterpoint to the richness of the butter. This balance ensures the pastry tastes delicious whether used in sweet or savory applications. Secondly, salt plays an important role in strengthening the gluten network within the flour, contributing to a more manageable and extensible dough. A well-developed gluten network helps the dough hold its shape and allows it to be rolled out repeatedly without breaking, which is crucial for achieving distinct layers during the lamination process.
- Unsalted butter: This is arguably the most critical ingredient, directly responsible for puff pastry’s incredible layers, golden color, and rich, irresistible flavor. The absolute key here is to use *very cold* unsalted butter. Our technique involves grating the cold butter through a cheese grater directly into the flour. This ingenious method creates numerous tiny, evenly distributed butter flakes throughout the dough. As the pastry bakes at a high temperature, these discrete pockets of butter melt and release steam. This steam pushes the thin layers of dough apart, creating the characteristic “puff” and countless airy strata. Using unsalted butter allows you precise control over the overall salt content of your pastry. We highly recommend against substituting margarine or other butter alternatives; these products often contain higher water content and different fat compositions (like trans fats or oils), which will severely compromise the texture, flakiness, and flavor of your homemade puff pastry. Invest in good quality unsalted butter for the best results.
- Ice water: Maintaining a consistently cold temperature throughout the preparation process is paramount for successful puff pastry, and ice water is an indispensable tool for this. Cold water prevents the butter from melting prematurely and incorporating into the flour, which would inhibit the formation of distinct layers. It also helps to control gluten development; overly warm water can activate gluten too quickly, leading to a dough that is tough and shrinks when rolled. By adding ice water gradually, you ensure the dough comes together into a cohesive mass without becoming sticky or warm, thereby preserving the integrity of those vital, separate butter pockets that are essential for creating the signature puff and flakiness.
How to Make Homemade Puff Pastry: Your Detailed Guide to Lamination and Layers
Creating homemade puff pastry is a deeply rewarding process that, once understood, is surprisingly manageable and incredibly satisfying. Follow these detailed, step-by-step instructions to achieve perfect, airy layers every time. Remember, patience and a gentle hand are your best allies when working with this delicate dough!
Step 1: Combine Dry Ingredients & Grate Cold Butter
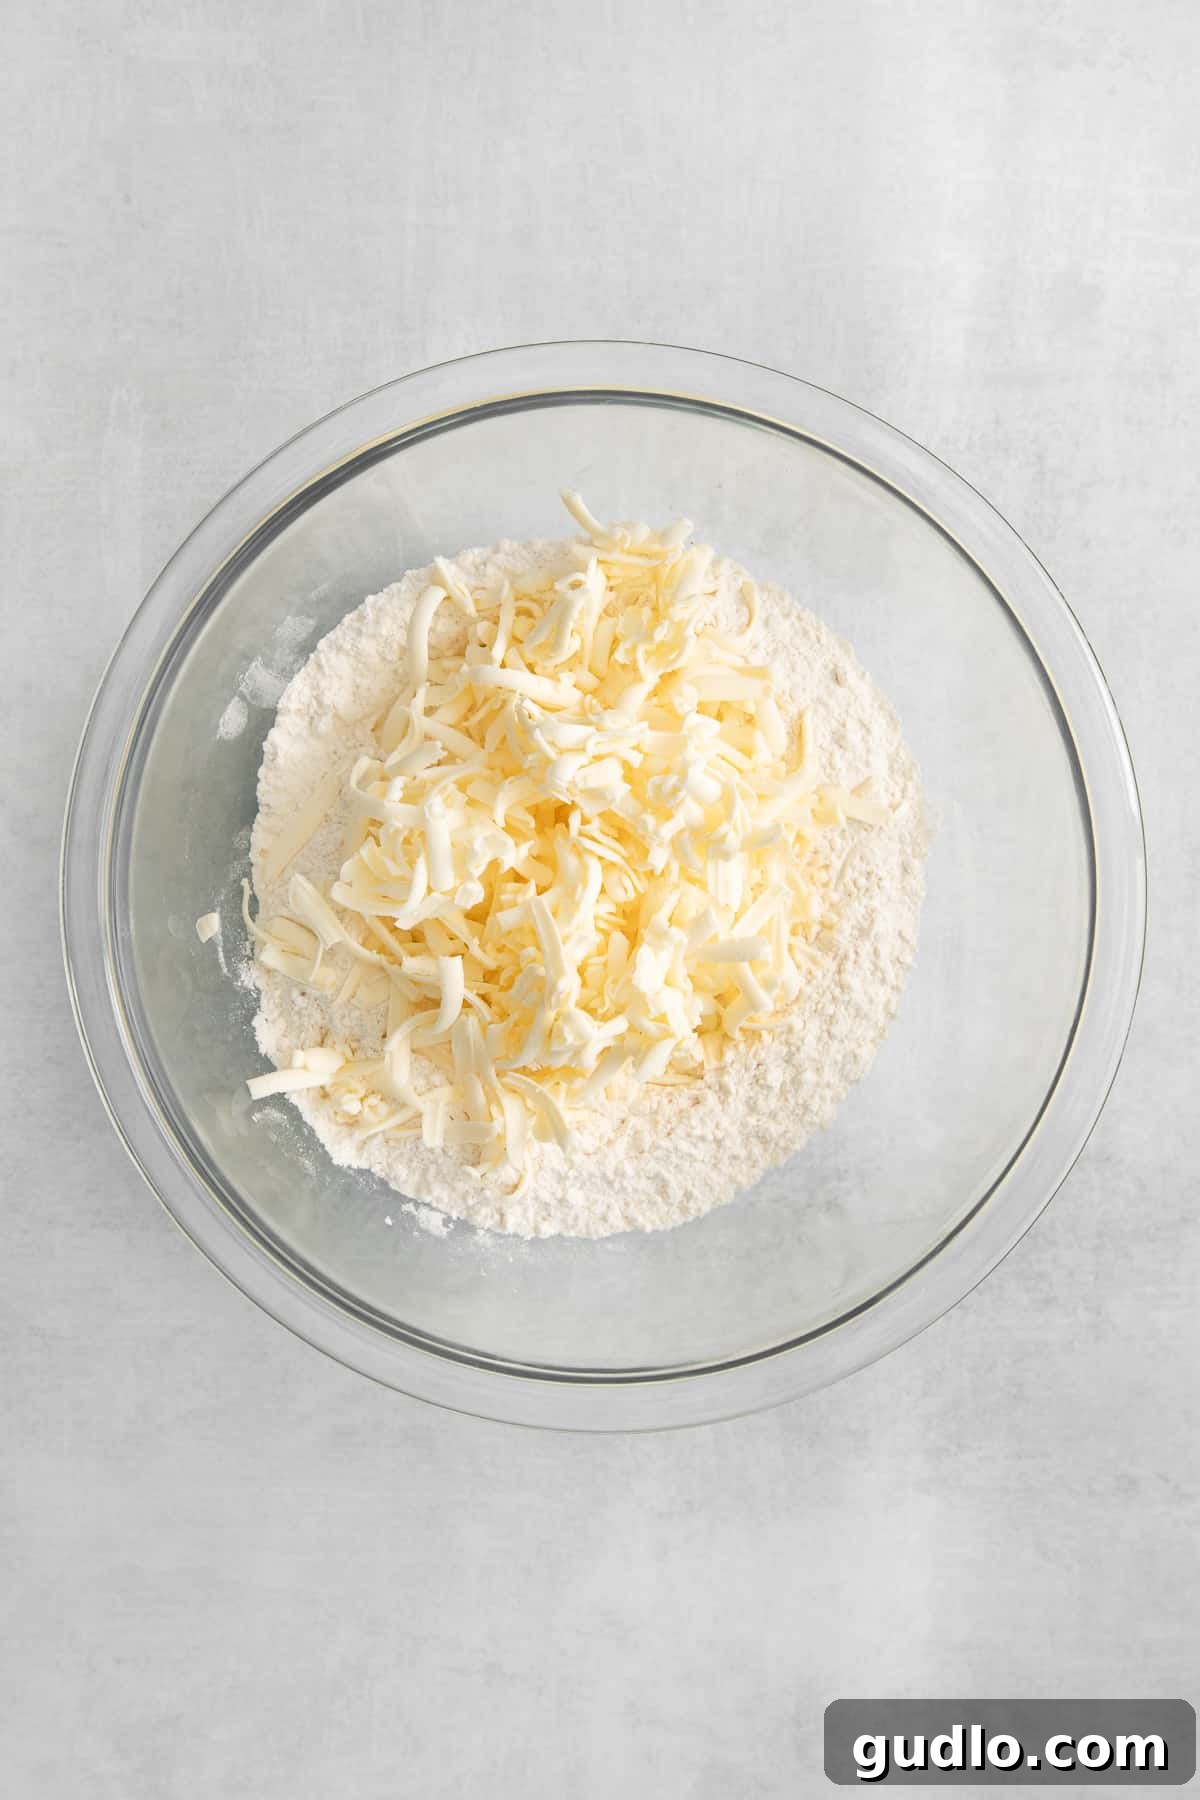
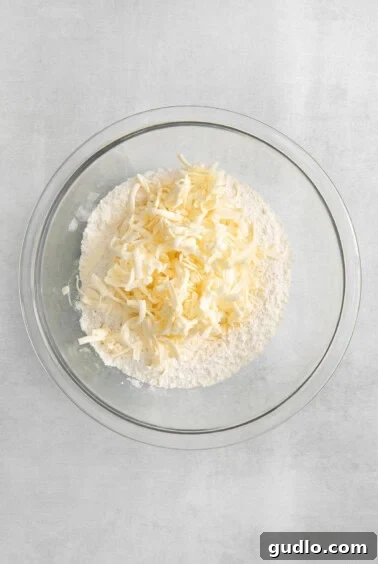
Start by taking a large mixing bowl. Add your 2 cups of all-purpose flour and 1 teaspoon of kosher salt. Use a whisk to thoroughly combine these dry ingredients, ensuring that the salt is evenly distributed throughout the flour. This prevents any pockets of excessive saltiness and ensures consistent flavor. Next, retrieve 1 stick (approximately 1/2 cup or 113g) of your *very cold* unsalted butter from the refrigerator. Using the coarse side of a cheese grater, grate this stick of butter directly into the flour mixture. The aim is to create small, distinct flakes of butter. Gently toss the grated butter with the flour using your fingertips or a pastry blender, ensuring each tiny piece of butter is coated with flour. This initial incorporation helps prevent the butter from clumping together and lays the groundwork for creating countless, separate layers.
Step 2: Form the Dough with Ice Water
Now, it’s time to bring the dough together. Gradually add 6 tablespoons of ice-cold water to the butter-flour mixture. Start by adding 4 tablespoons, then mix. Use a sturdy spoon or your hands to gently combine the ingredients. The mixture should begin to resemble coarse crumbs. Continue mixing as you add the remaining 2 tablespoons. The dough should start to come together into a shaggy, somewhat crumbly mass. Continue mixing until a cohesive ball of dough forms. The key here is to add just enough water for the dough to bind, but not so much that it becomes sticky or overly wet. If, after adding all 6 tablespoons, the dough still feels a little dry or crumbly and won’t form a ball, add more ice water, one tablespoon at a time, mixing well after each addition, until a soft but not sticky ball is achieved. Avoid overworking the dough at this stage, as excessive kneading can develop too much gluten too quickly, leading to a tough finished pastry. Mix only until just combined.
Step 3: First Chill – Rest the Dough and Soften Remaining Butter
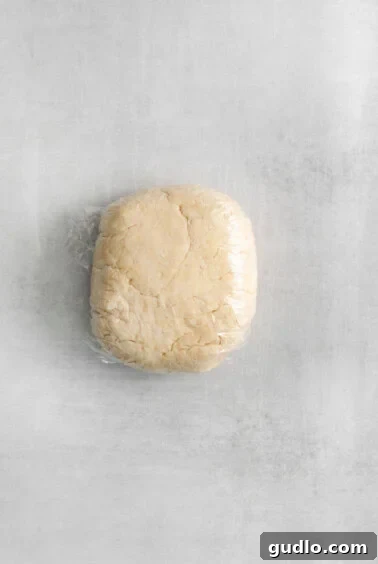
Once your dough ball is formed, wrap it tightly in plastic wrap. This step is crucial for preventing the dough from drying out and, more importantly, for allowing the gluten network to relax. Place the wrapped dough in the refrigerator to chill for at least 1 hour. This chilling period serves multiple purposes: it firms up the butter pieces within the dough, making them less likely to melt during rolling, and it allows the gluten to rest, which makes the dough significantly easier to roll out later without shrinking back. While your dough is chilling, take the remaining 2 sticks (approximately 1 cup or 226g) of unsalted butter out of the refrigerator and allow them to come to room temperature. You want this butter to be soft and pliable, but not melted or greasy, for the next crucial lamination steps.
Step 4: Roll and Spread the First Butter Layer (The First “Turn”)
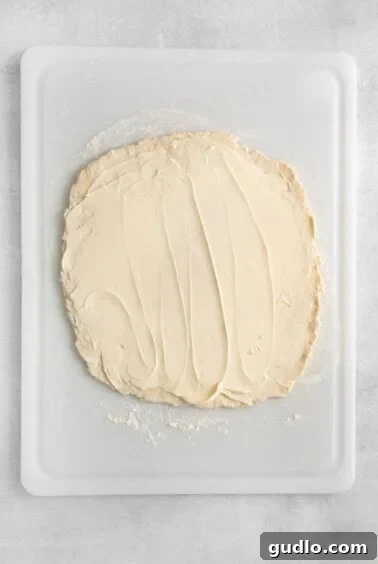
Lightly flour your clean work surface. Unwrap the chilled dough and place it on the floured surface. Using a rolling pin, carefully roll out the dough into a square approximately 12×12 inches (30×30 cm). Aim for an even thickness across the entire square. Next, retrieve one of your softened sticks of butter. Using an offset spatula, the back of a spoon, or even your clean fingers, evenly spread this softened butter over two-thirds of the rolled-out dough. Make sure to leave one-third of the dough bare on one side. The butter layer should be consistent in thickness, but avoid spreading it right to the very edges of the dough, as this can cause it to ooze out during folding.
Step 5: Execute the First Dough Fold (First Lamination)
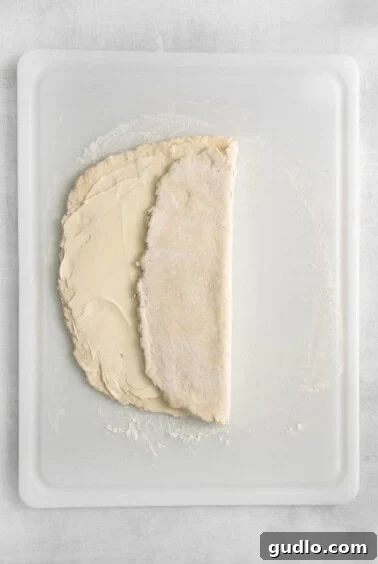
Now comes the classic puff pastry fold, often referred to as a “turn.” Take the bare one-third section of the dough and gently fold it over the middle section that is covered with butter. Then, take the remaining butter-covered one-third and fold it over the previous fold, creating a neat, three-layer package, much like folding a business letter. This folding action encapsulates the butter within layers of dough. Gently press the edges of the folded dough to seal them. Rotate the dough 90 degrees (so the open edges are now positioned to your left and right, ready for the next roll). Wrap the folded dough tightly in plastic wrap and return it to the refrigerator for another 1 hour. This chilling time is absolutely essential for the butter to re-firm and for the gluten to relax once more, which prevents the butter from squeezing out during the next rolling stage and ensures the layers remain distinct.
Step 6: Repeat Lamination with the Second Butter Layer (The Second “Turn”)
After the dough has chilled sufficiently for the second time, remove it from the refrigerator. Place it back on your lightly floured work surface, ensuring that the open end of the folded dough is facing you (this helps maintain the orientation for consistent layers). Roll the dough out again to approximately 12×12 inches (30×30 cm), just as you did before, maintaining an even thickness. This time, spread the second softened stick of butter over two-thirds of the dough, leaving one-third bare. Repeat the folding process precisely as described in Step 5: fold the bare third over the middle, then fold the remaining butter-covered third over the top. Gently seal the edges. Wrap the dough tightly in plastic wrap once more and refrigerate for a final 1 hour. This second turn significantly increases the number of butter and dough layers within your pastry, which is the secret to achieving maximum puff, flakiness, and tenderness upon baking.
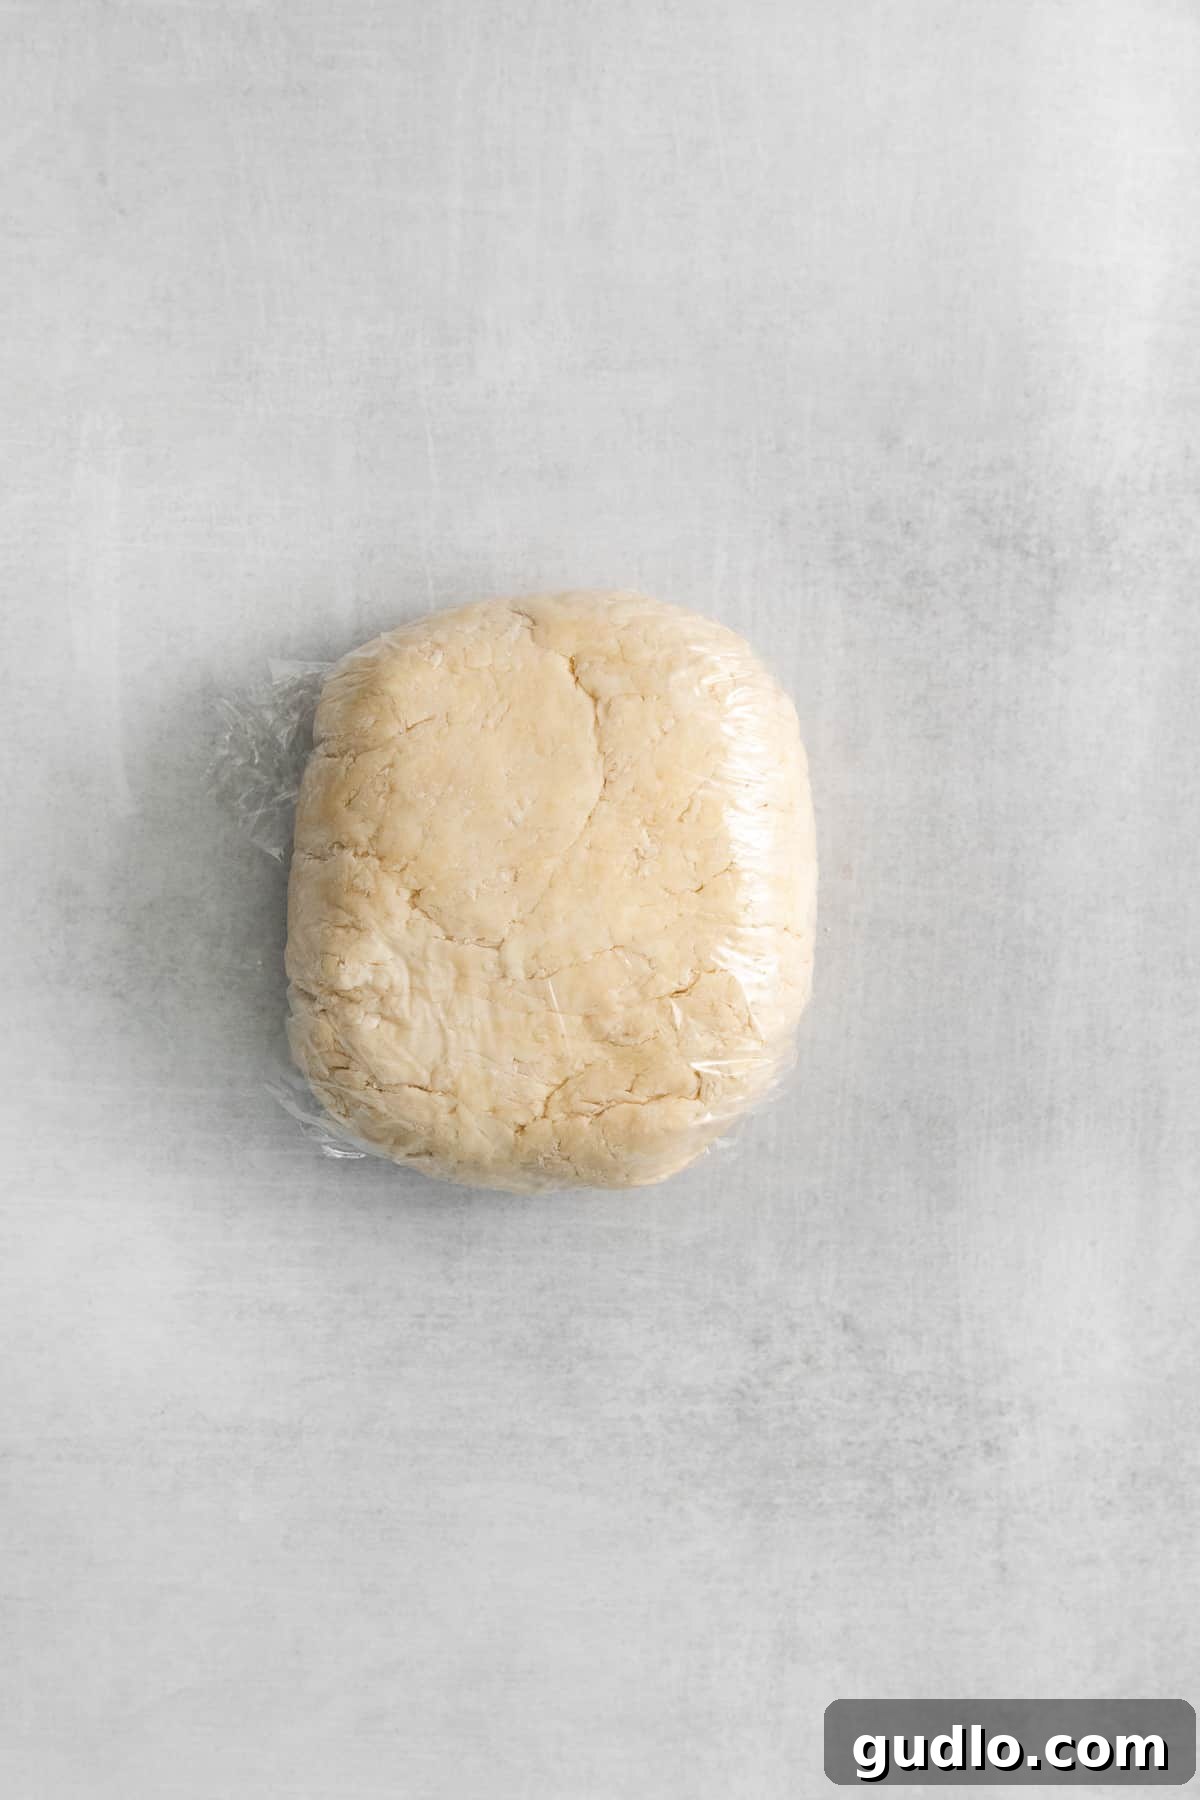
Step 7: Final Roll Out & Prepare for Baking
Once the final chilling period is complete, your puff pastry dough is ready for its ultimate transformation into a glorious baked good. Remove it from the fridge and place it on a lightly floured surface. Using your rolling pin, roll the dough out to your desired thickness and shape, typically a rectangle measuring roughly 10×16 inches (25×40 cm) for a standard sheet. At this stage, you can use the entire sheet for a large tart or divide it into smaller portions depending on your specific recipe needs. Ensure an even thickness across the entire rolled-out dough for uniform baking and consistent puffing.
Step 8: Preheat Oven & Bake
Preheat your oven to 375℉ (190°C). Carefully transfer your rolled-out puff pastry onto a baking sheet, which can be lined with parchment paper for easy cleanup and to prevent sticking. If you’re baking the pastry on its own, without fillings, you may wish to prick it lightly with a fork in several places (a process called “docking”) to prevent excessive puffing in unwanted areas, especially if you want a flatter base for toppings. Bake for approximately 20 minutes, or until the pastry is beautifully golden brown, wonderfully puffed, and crisp to the touch. The exact baking time may vary based on your oven’s calibration and the specific thickness of your pastry, so keep a watchful eye on it! Once baked, allow it to cool slightly before using it immediately in any recipe of your choice, or prepare it for proper storage.
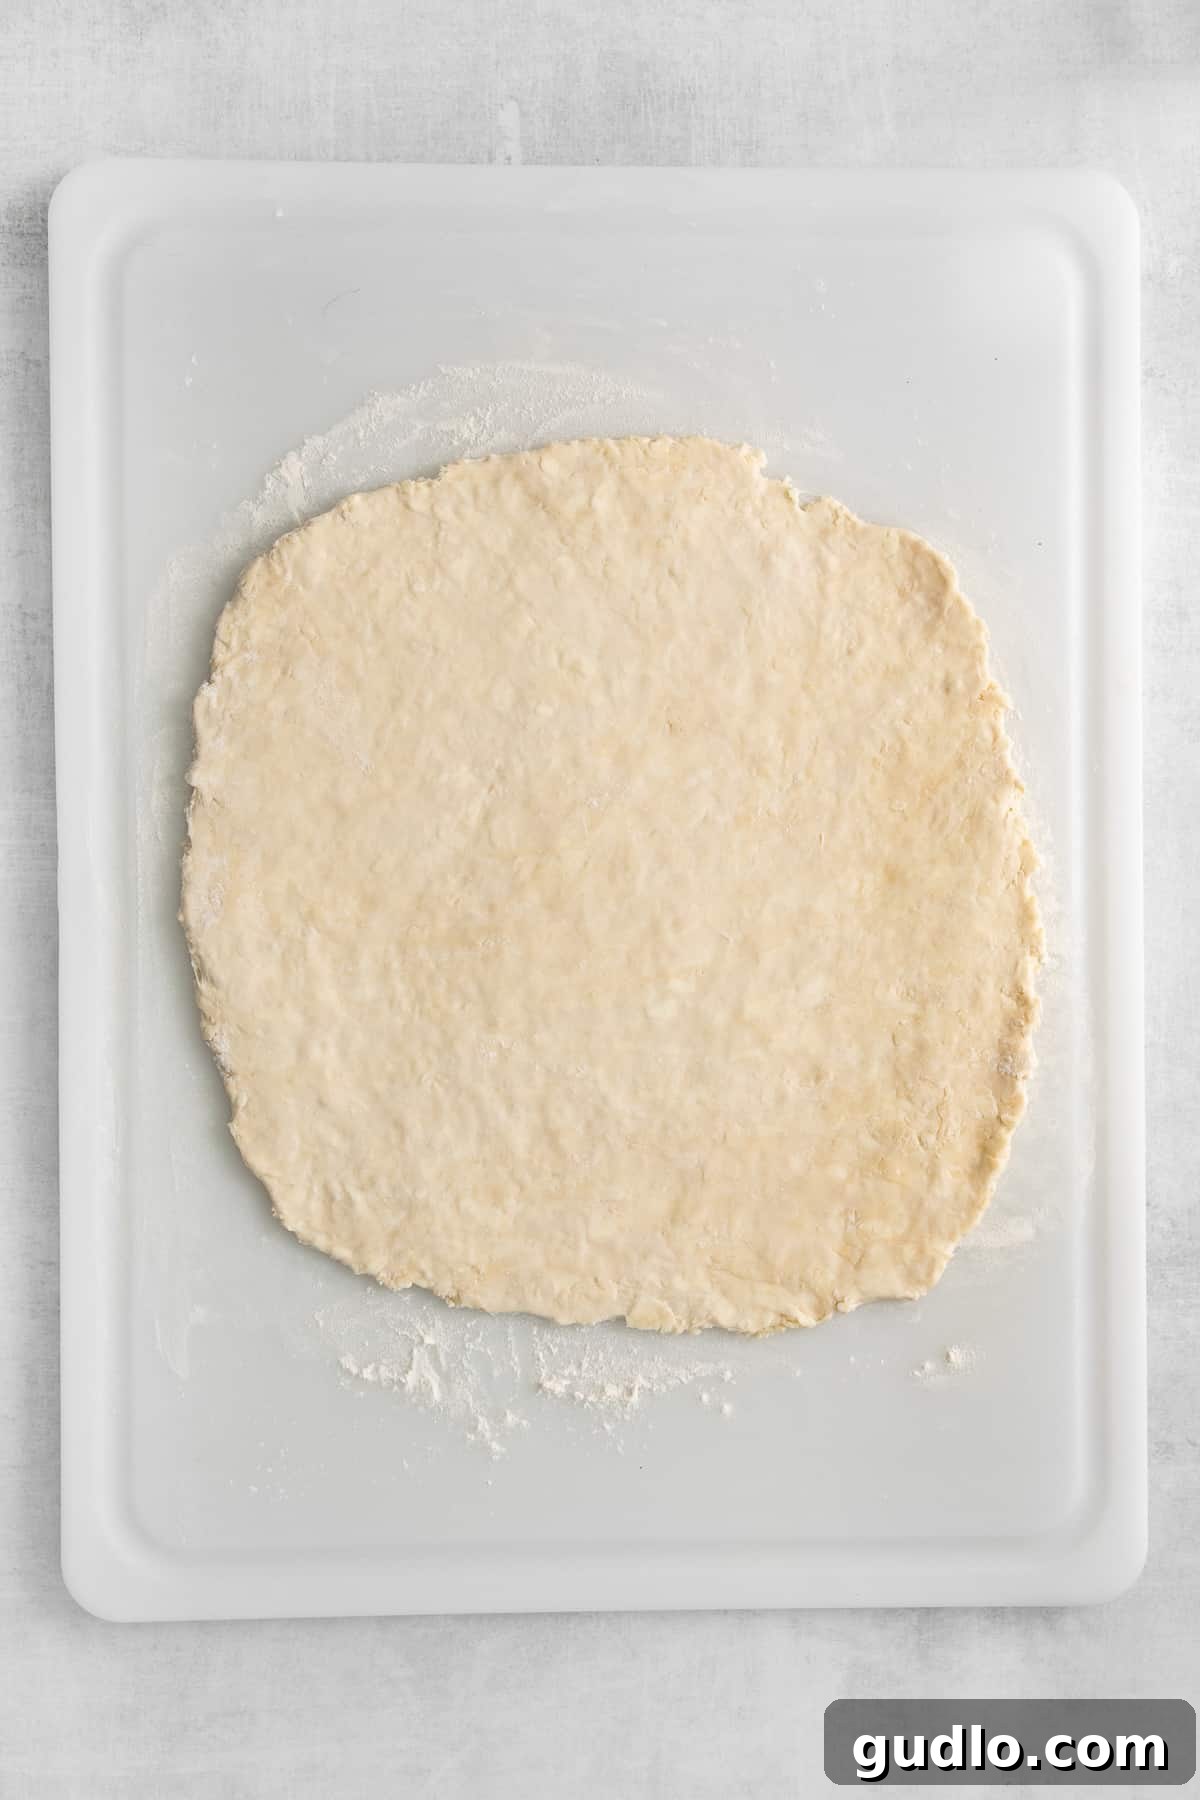
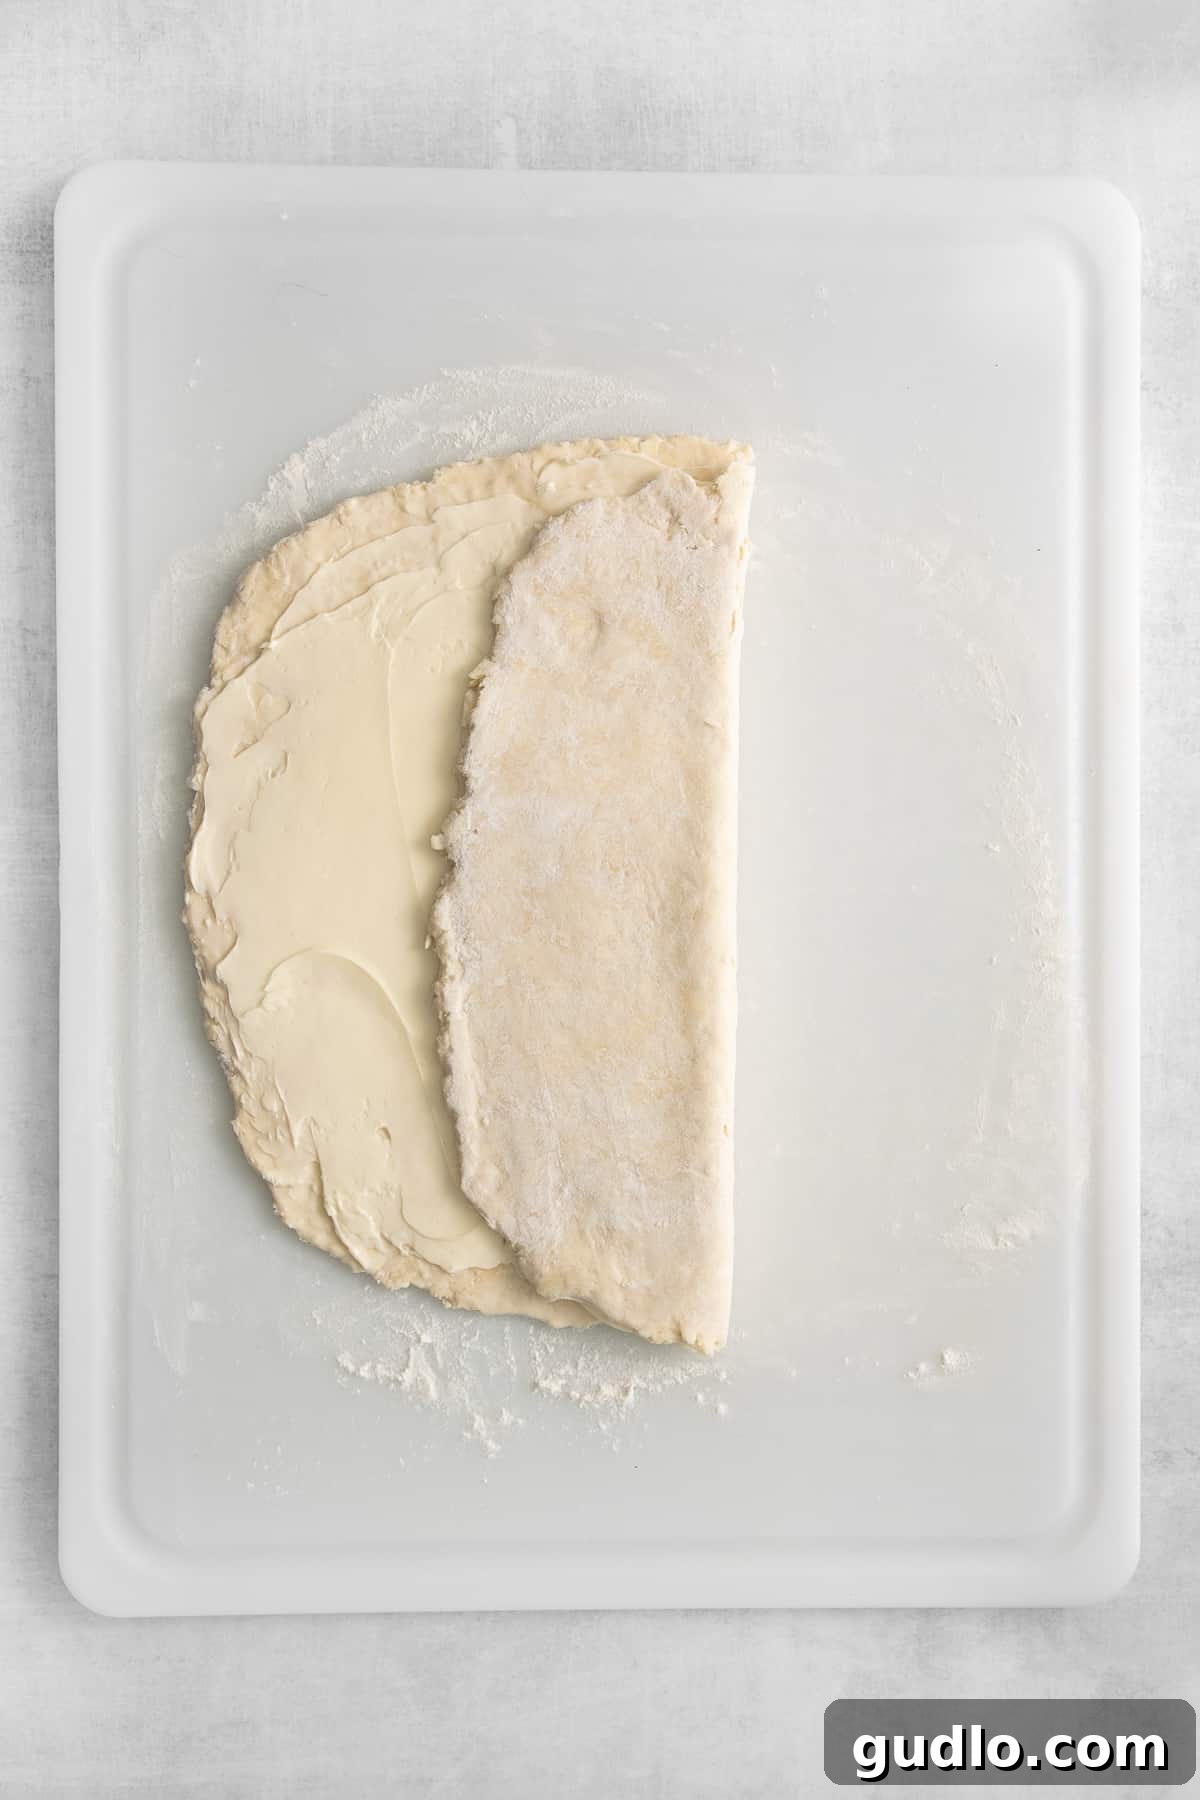
Top Tips for Homemade Puff Pastry Success: Ensuring Flawless Results
Achieving perfect puff pastry requires a little practice and attention to detail, but these expert tips will help ensure your success and make the entire process even smoother, leading to consistently flaky and delicious results:
- Maintain Cold Temperatures: This is the absolute golden rule of puff pastry. Work quickly, especially during the rolling and folding stages, to prevent the butter from melting. If your kitchen is warm, or if you notice the butter starting to soften excessively or ooze out, do not hesitate to pop the dough back into the refrigerator for 10-15 minutes before continuing. Cold butter creates distinct layers; melted butter incorporates into the dough, resulting in a tougher, less flaky pastry. A cool work surface (like marble or granite) can also be beneficial.
- Expedite Chilling with the Freezer (Use with Caution): While refrigeration is ideal for a slow, even chill, if you’re truly short on time, you can carefully use the freezer during the chilling intervals. Freeze the dough for approximately half the time you would refrigerate it (e.g., 30 minutes instead of 1 hour). However, be extremely careful not to let it freeze solid, as frozen dough becomes brittle and can crack or tear when rolled, ruining the delicate layers. Check its flexibility frequently.
- Handle with a Gentle Touch: Puff pastry dough, especially during the lamination process, should be handled gently. Overworking or stretching the dough aggressively can over-develop the gluten, leading to a tough finished product that shrinks back excessively. Use a light, even pressure when rolling it out.
- Strive for Uniform Thickness: At each rolling stage, strive to achieve an even thickness across the entire sheet of dough. This is crucial for ensuring consistent layers and even puffing during baking. Uneven thickness can lead to some parts puffing more than others, or even burning prematurely.
- Prevent Sticking, Don’t Over-Flour: Use just enough flour on your work surface and rolling pin to prevent the dough from sticking. Too much flour can be absorbed by the dough, making it dry, difficult to roll, and potentially interfering with the lamination process. Brush off any excess flour from the dough before folding.
- The Importance of Resting: Do not skip or shorten the chilling times! These resting periods are absolutely crucial for allowing the gluten to relax (making the dough easier to roll) and for the butter to firm up again (preventing it from melding with the dough). Rushing this process will inevitably result in a dough that is difficult to work with and a pastry that doesn’t puff properly or evenly.
- Consider Quick “Croissants”: While true croissants involve a yeast dough and a more complex lamination, this puff pastry can create a delightful, quicker alternative. After the final roll-out (following Step 7), cut the dough into 10 large triangles. Starting from the wide base of each triangle, roll it tightly towards the point. Gently curve the ends inwards to form a crescent shape. The bake time would remain similar (around 20 minutes at 375℉ / 190°C), yielding deliciously flaky, buttery “mock” croissants that are wonderful for breakfast or a sweet treat.
FAQs: Your Questions About Homemade Puff Pastry Answered
Absolutely! While store-bought puff pastry offers convenience, there is simply no comparison to the taste and texture of homemade. Our recipe yields a pastry that is significantly puffier, lighter, and flakier, with a much richer, authentic buttery flavor. The subtle crispness, delicate layers, and melt-in-your-mouth quality of homemade pastry are unparalleled, making the effort entirely worthwhile for truly exceptional baked goods. You will not only taste the difference, but you’ll also impress yourself and your guests.
To bake puff pastry on its own, first, roll your prepared dough out to your desired thickness (for example, a 10×16 inch rectangle). You can then cut it into squares, strips, circles, or other decorative shapes. Place the pieces on a baking sheet lined with parchment paper. For savory applications, you might lightly prick the surface with a fork (“docking”) to prevent excessive puffing in certain areas, ensuring a flatter base for toppings. For dessert shells or vol-au-vents, you might want maximum puff, so avoid docking. Preheat your oven to 375℉ (190°C) and bake for approximately 15-20 minutes, or until the pastry is gorgeously golden brown, beautifully puffed, and crisp throughout. If it starts to brown too quickly, you can reduce the oven heat slightly or loosely tent it with aluminum foil.
Generally, yes, making your own puff pastry is often more economical than consistently purchasing good-quality, pre-made versions from the store. The primary ingredients – flour, butter, salt, and water – are relatively inexpensive kitchen staples. The true “cost” involved is primarily the time required for preparation, particularly the chilling periods between folds. However, if you prioritize exceptional flavor, superior texture, and genuinely enjoy the process of baking from scratch, the time investment is undeniably well worth the monetary savings and the incredible final product.
Absolutely! One of the great advantages of homemade puff pastry is that it’s excellent for making ahead. You can store the prepared dough, once all the folds are complete, tightly wrapped in several layers of plastic wrap. It will keep well in the refrigerator for up to 3 days. For longer storage, you can freeze the dough for up to 3 months. This makes it a fantastic meal-prep component, allowing you to have high-quality, homemade pastry on hand whenever culinary inspiration strikes.
If you notice your butter starting to melt, become soft, or ooze out of the dough while you are rolling, immediately stop working. Gently transfer the dough back into its plastic wrap and place it in the refrigerator for 15-20 minutes. This will allow the butter to firm up again. Working in a cool kitchen environment, on a cool surface (like marble or granite), and handling the dough quickly and lightly are crucial steps to prevent this issue. You can also lightly flour your rolling pin to reduce friction, which generates heat.
Delicious Recipes to Make with Your Homemade Puff Pastry
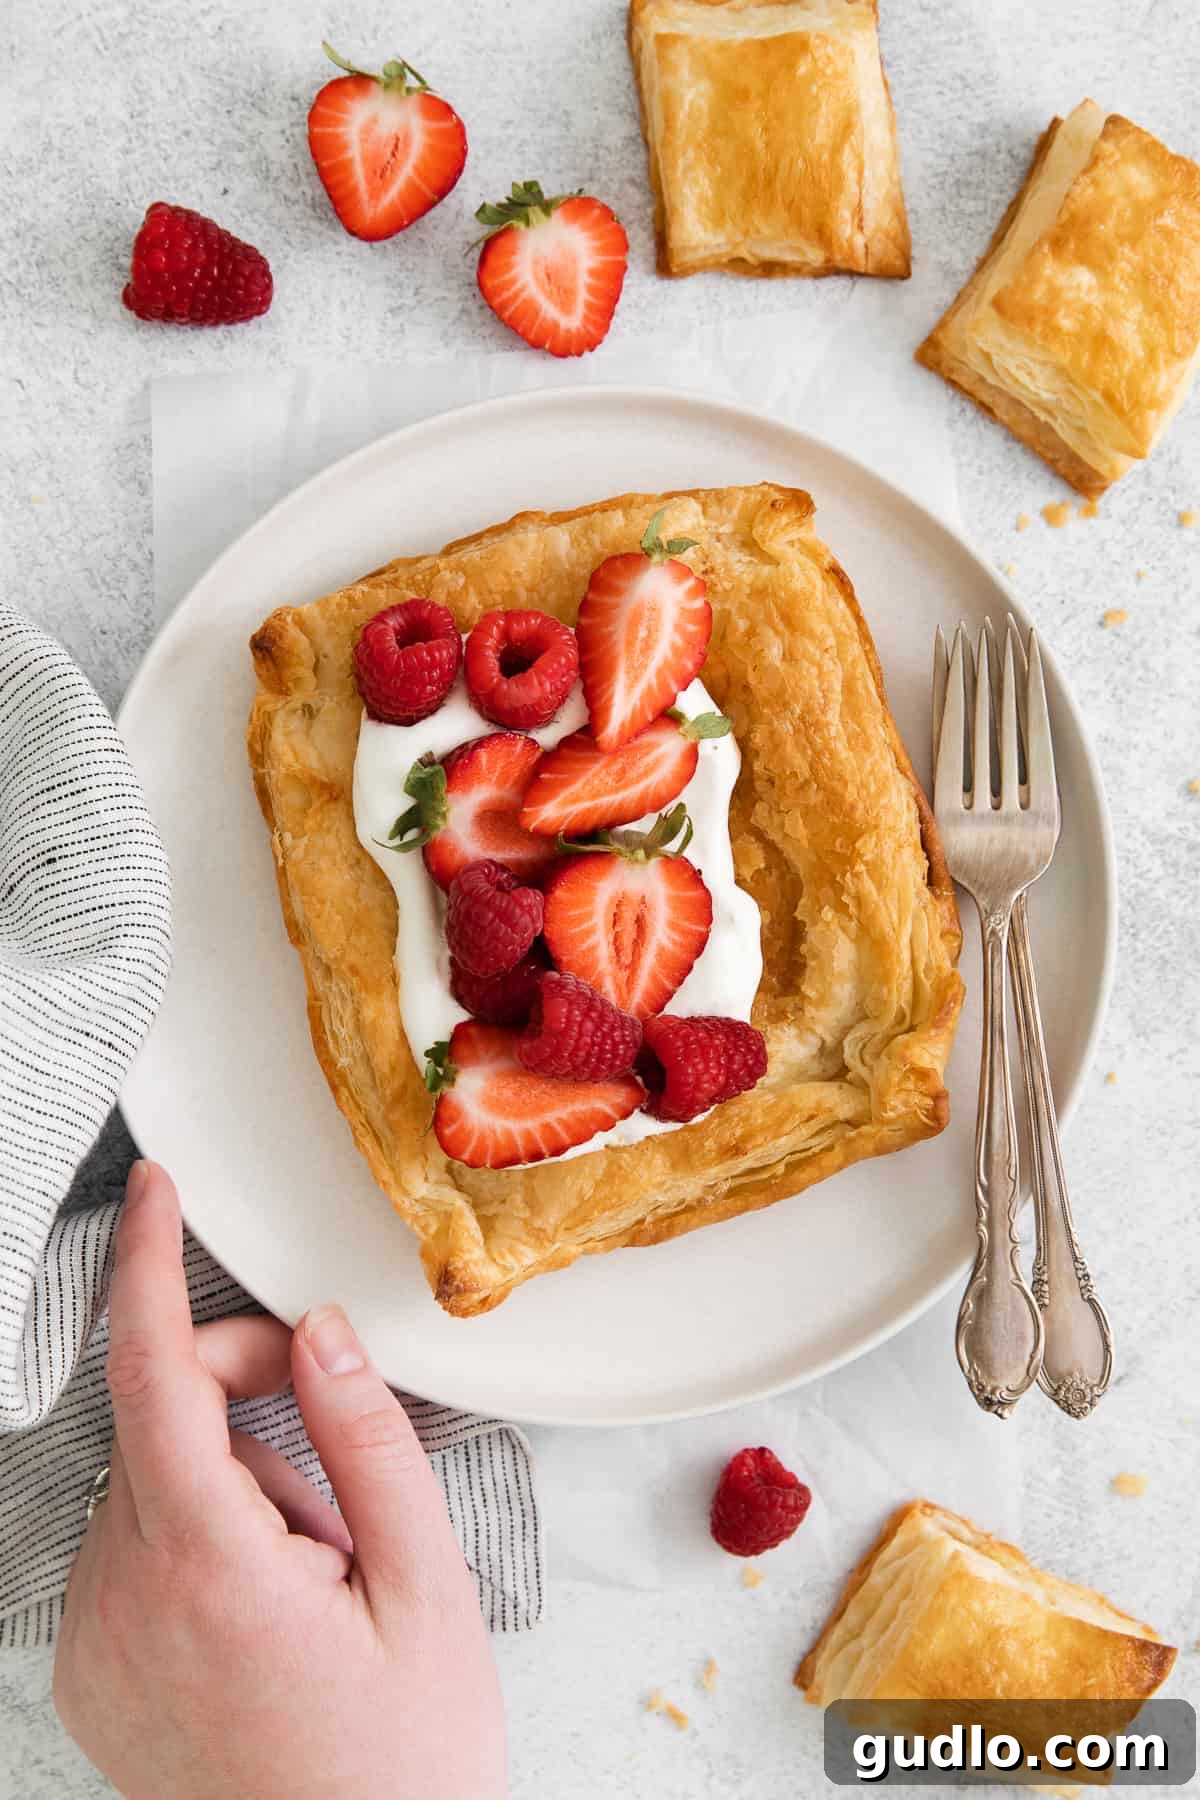
The versatility of homemade puff pastry knows no bounds! Once you’ve mastered this fundamental recipe, you’ll find endless opportunities to incorporate this flaky dough into both sweet and savory culinary creations. Whether you’re craving something indulgent or a hearty, satisfying treat, your beautifully crafted pastry is the perfect base. Here are some of our favorite ways to put your golden, buttery dough to excellent use:
- Decadent Chocolate Raspberry Cinnamon Rolls: A delightful and rich twist on classic cinnamon rolls, featuring sweet raspberries and melty chocolate wrapped in airy puff pastry layers.
- Savory Ham and Cheese Hand Pies: Perfect for a quick lunch, an elegant appetizer, or a comforting snack, these individual pies are filled with a luscious blend of savory ham and gooey cheese.
- Elegant Baked Brie in Puff Pastry: An incredibly impressive yet deceptively easy appetizer, featuring warm, perfectly melted brie cheese encased in a golden, crisp puff pastry shell, often served with fruit or jam.
- Easy Tomato Tart: A vibrant and flavorful dish that beautifully showcases fresh, ripe summer tomatoes baked atop a flaky puff pastry base, often complemented with herbs and cheese.
- Sweet Cream Cheese Danish: Recreate a beloved bakery-style breakfast or brunch pastry at home, with a rich, tangy cream cheese filling nestled perfectly within delicate, buttery layers of puff pastry.
- Mini Sausage Rolls: A crowd-pleasing party snack! Simply cut your puff pastry into strips, wrap them around cocktail sausages or seasoned sausage meat, and bake until golden brown and crisp.
- Apple Turnovers: A classic dessert. Fill squares of puff pastry with a sweet, spiced apple filling, fold them into triangles, crimp the edges, and bake until beautifully golden and puffed.
- Puff Pastry Pizza: Use a sheet of homemade puff pastry as a wonderfully crispy and light base for your favorite pizza toppings for a quick and gourmet weeknight meal.
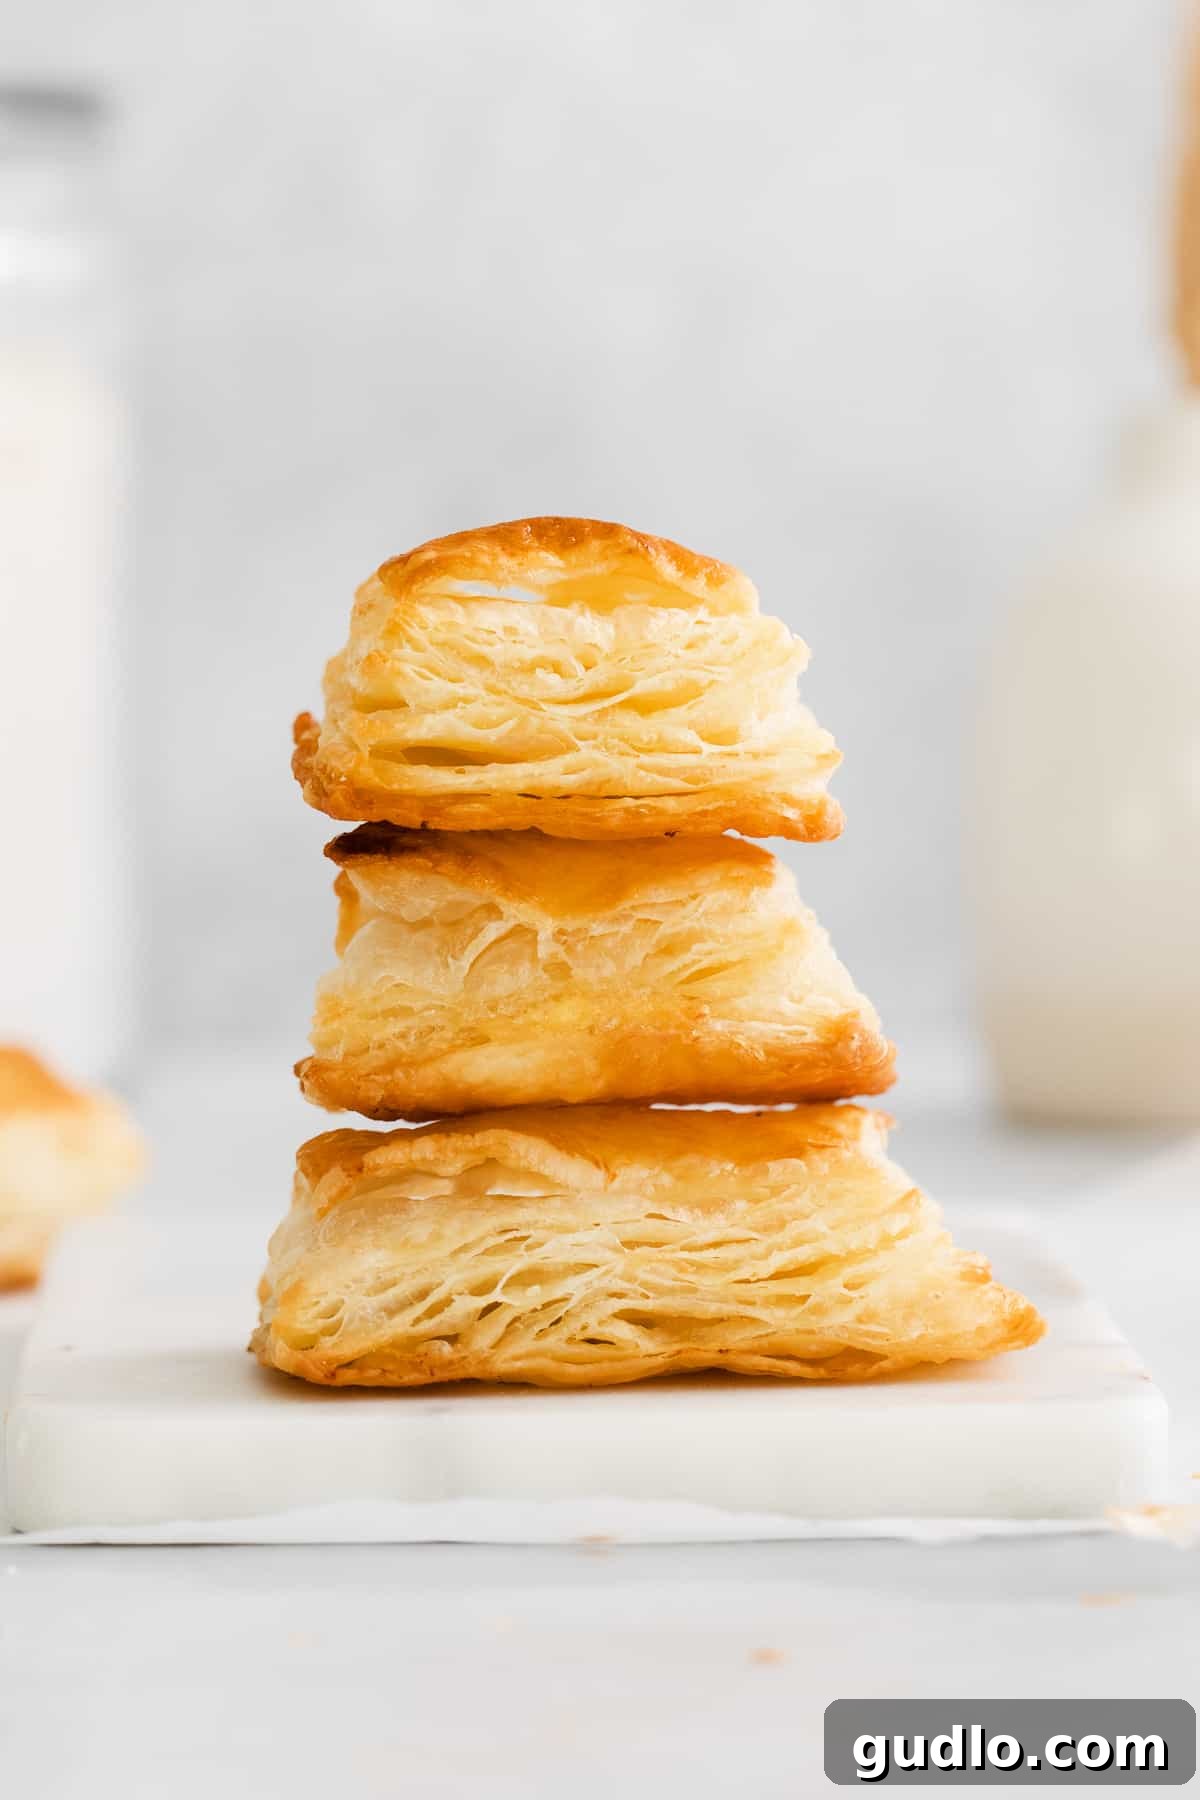
Storage and Freezing Homemade Puff Pastry: Prepare Ahead!
Having a batch of freshly made homemade puff pastry ready in your fridge or freezer is a fantastic asset for any home baker, streamlining future baking projects and ensuring delicious results on demand. Proper storage techniques are key to preserving your hard work and the quality of your dough!
- Refrigerator Storage: Once your puff pastry dough is fully prepared and all the lamination folds are complete, it’s essential to wrap it very tightly. Use several layers of plastic wrap, ensuring that absolutely no air can reach the dough. Air exposure can cause the dough to dry out, leading to cracks and a less pliable texture. Store the tightly wrapped dough in the coldest part of your refrigerator for up to 3 days. When you’re ready to use it, simply remove it from the fridge about 10-15 minutes beforehand. This brief period at room temperature will allow the butter to soften just enough, making the dough more pliable and easier to roll without cracking or tearing.
- Freezer Storage: For longer-term storage, homemade puff pastry freezes exceptionally well, making it perfect for meal prepping. After wrapping it tightly in plastic wrap (as described for refrigeration), place the wrapped dough inside an additional layer of protection, such as an airtight freezer bag or a rigid, freezer-safe container. This double layer of protection is crucial to prevent freezer burn, which can compromise both the texture and flavor of the dough. Store the puff pastry in the freezer for up to 3 months. Clearly label the package with the date to keep track of its freshness.
- Thawing Frozen Puff Pastry: When you’re ready to use your frozen puff pastry, transfer it from the freezer to the refrigerator and allow it to thaw slowly overnight. This gradual thawing process is vital. Avoid thawing the dough at room temperature, as rapid temperature changes can cause the butter to melt and separate from the dough before it’s ready to be worked with. This premature melting can ruin the delicate layers and compromise the pastry’s ability to puff. Once fully thawed in the fridge, handle the dough as you would freshly made dough, ensuring it’s still cold but pliable before rolling.
Explore More Delicious Puff Pastry Creations
If you’ve enjoyed the rewarding process of making and using this wonderful homemade puff pastry, you’ll love diving into even more recipes that highlight its incredible texture and versatility. Expand your culinary repertoire and impress your taste buds with these inspiring ideas. Each recipe offers a unique way to enjoy the flaky perfection of your handcrafted dough:
- Decadent Chocolate Raspberry Puff Pastry Rolls: A sweet treat combining fruit, chocolate, and flaky pastry.
- Hearty Ham and Cheese Puff Pastry Hand Pies: A savory and satisfying snack or light meal.
- Gourmet Baked Brie Wrapped in Puff Pastry: An impressive appetizer perfect for entertaining.
- Refreshing Easy Tomato Puff Pastry Tart: A simple yet elegant way to celebrate fresh tomatoes.
- Classic Cream Cheese Puff Pastry Danish: Enjoy a bakery favorite made with your own flaky dough.
- Asparagus and Prosciutto Bundles: Quick and elegant appetizers, perfect for spring gatherings.
- Mushroom and Thyme Tart: A rustic and savory tart showcasing earthy mushrooms on a crisp pastry base.
- Sweet Fruit Galettes: An easy, free-form dessert where puff pastry cradles seasonal fruits like apples, peaches, or berries.
Homemade Puff Pastry Recipe
Make this 4-ingredient homemade puff pastry to use in sweet or savory recipes. It’s easy to make, and better than store-bought!
- By: Emily Richter
- Prep Time: 3 hours 30 minutes (includes chilling)
- Cook Time: 20 minutes
- Total Time: 3 hours 50 minutes
- Servings: 8
Ingredients
- 2 cups all-purpose flour
- 1 teaspoon kosher salt
- 1.5 cups unsalted butter, divided (approximately 3 sticks total)
- 10 tablespoons of ice water
Instructions
-
Place the flour and salt into a large bowl and whisk together. Grate 1 stick of cold butter into the flour mixture. Mix the grated butter and flour together with your fingertips until the butter pieces are coated.

-
Gradually add 6 tablespoons of ice-cold water to the butter-flour mixture and mix until a cohesive dough ball is formed. If necessary, add 1-2 more tablespoons of ice water until a soft, non-sticky ball forms. Wrap the dough ball tightly in plastic wrap and refrigerate for 1 hour. Meanwhile, let the remaining 2 sticks of butter come to room temperature to soften.
-
Lightly flour your work surface. Roll out the chilled dough to approximately a 12×12 inch square. Evenly spread 1 stick of the softened butter over two-thirds of the dough, leaving one-third bare.
-
Fold the bare third of the dough over the butter-covered middle section, then fold the remaining butter-covered third over the top, creating three distinct layers. Wrap the dough tightly in plastic wrap and refrigerate for 1 hour.
-
Repeat steps 3 and 4 one more time with the second stick of softened butter. Ensure the dough is chilled for 1 hour after this second fold as well.
-
After the final chilling period, remove the dough. Roll it out to your desired final thickness, typically a rectangle of roughly 10×16 inches. The dough can be used whole or divided.
-
Preheat your oven to 375℉ (190°C). Place the rolled-out puff pastry on a baking sheet (lined with parchment paper if desired) and bake for 20 minutes, or until golden brown, beautifully puffed, and crisp.
Tips & Notes
- For faster chilling, you can place the dough in the freezer for shorter periods (e.g., 30 minutes instead of 1 hour), but be careful not to let it freeze solid.
- To make quick “croissants”: after the final roll-out (Step 6), cut the dough into 10 large triangles. Roll each triangle from the wide base to the tip and curve slightly. Bake time remains the same (approx. 20 minutes at 375℉ / 190°C).
Nutrition information is automatically calculated and provided as an approximation only.
Love this homemade puff pastry recipe? Share your thoughts and leave a comment below!
Don’t forget to tag your beautiful creations on social media with the hashtag #cheeseknees. We’d absolutely love to see what delicious dishes you’re whipping up with your flaky, homemade pastry!