
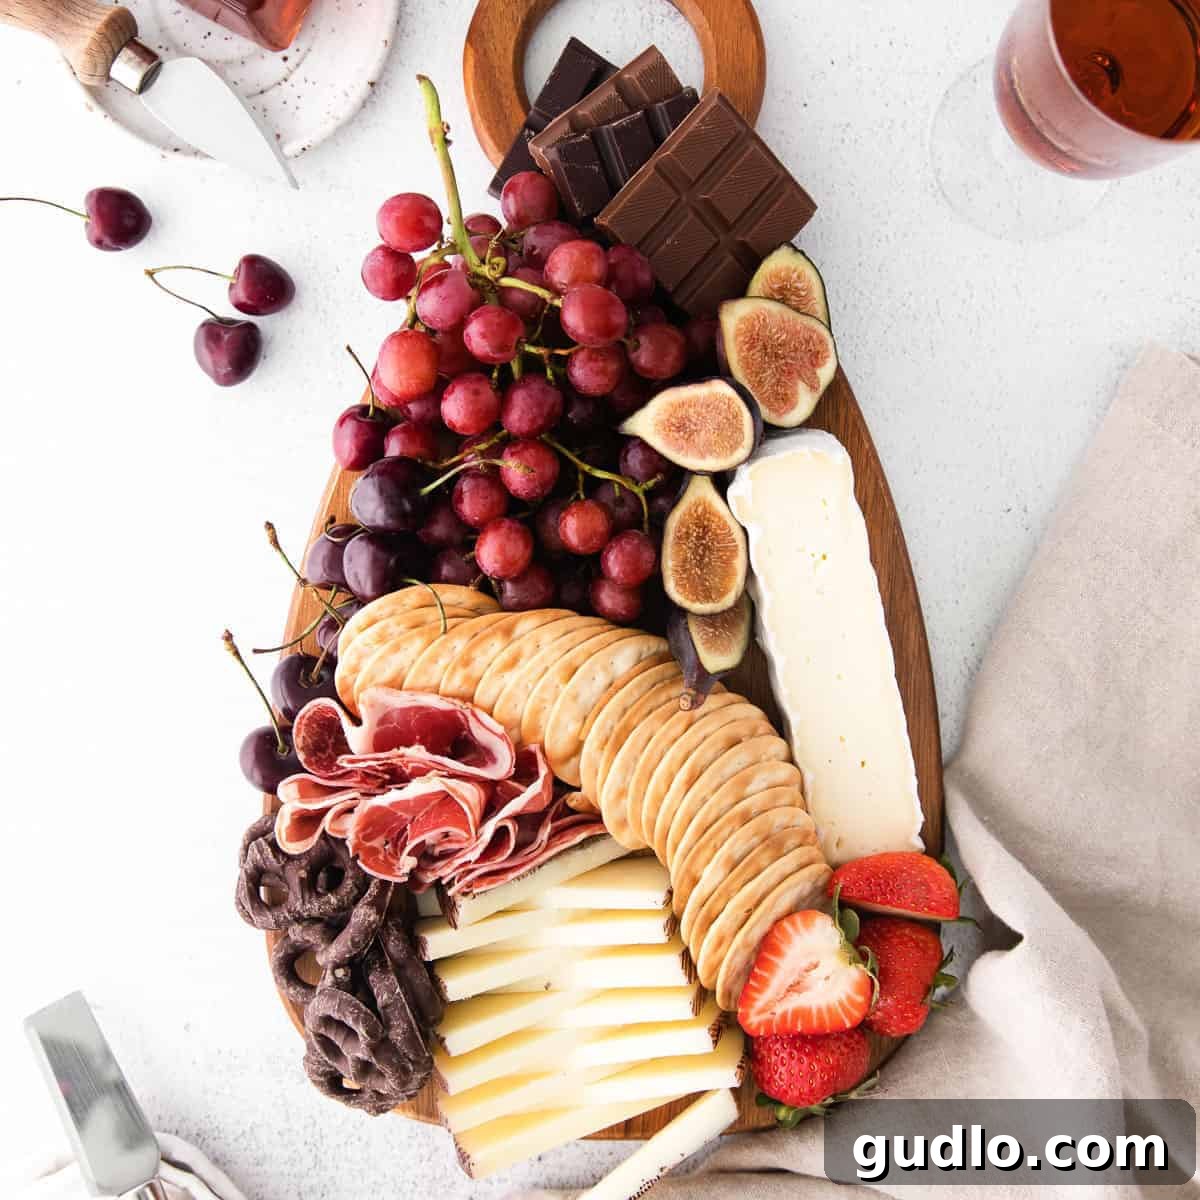
Crafting the Ultimate Chocolate and Cheese Board: A Guide to Sweet & Savory Indulgence
Elevate any gathering with a stunning and delectable **chocolate and cheese board**. This guide will walk you through simple tips and tricks to assemble an appetizer that’s both beautiful and bursting with flavor, perfect for impressing guests or enjoying a sophisticated treat.
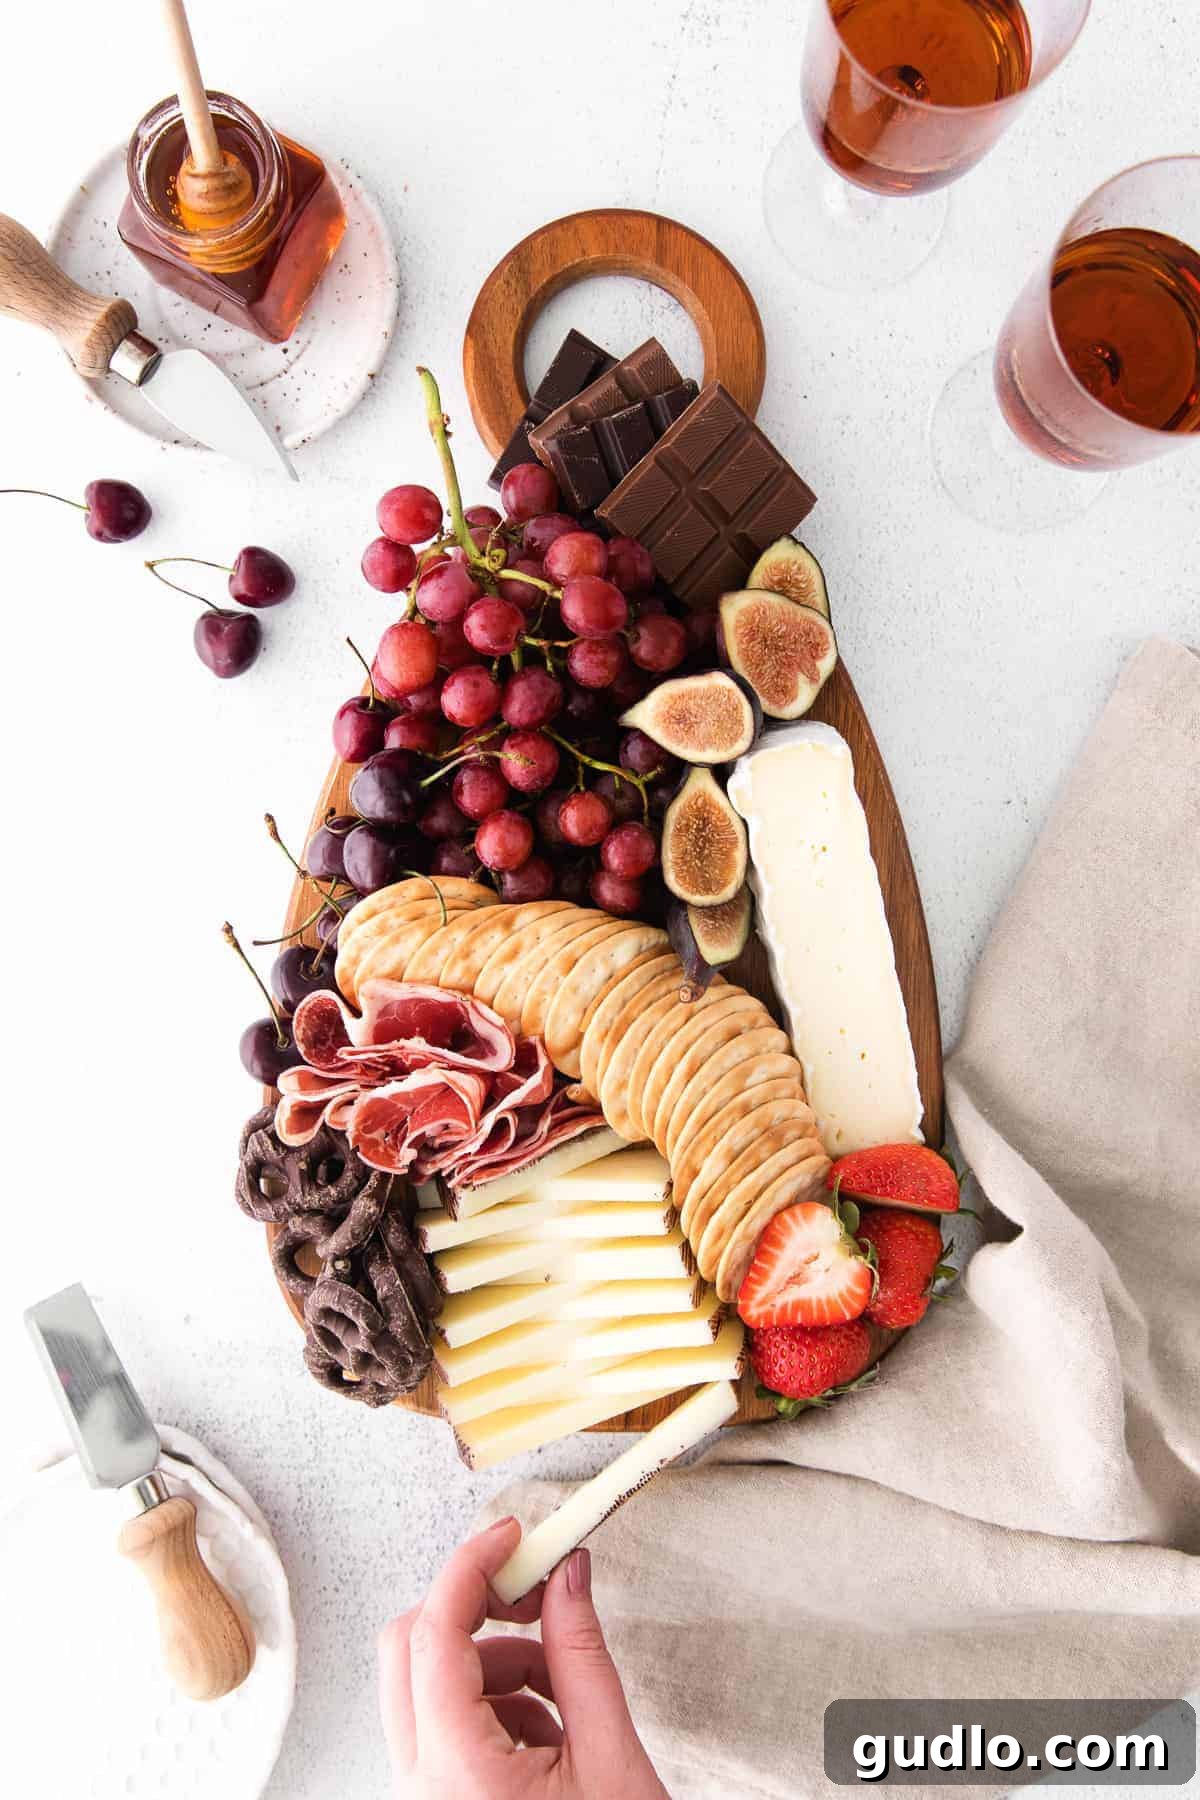
Unleash Your Inner Host: Master the Chocolate and Cheese Board
Are you ready to create the most delicious and visually appealing chocolate and cheese board for your next party or get-together? Whether it’s a cozy evening with loved ones or a grand celebration, a well-curated sweet and savory platter is always a showstopper. This comprehensive guide will teach you everything you need to know, from selecting the perfect ingredients to arranging them with flair.
The secret to an exceptional chocolate and cheese board lies in more than just selecting great varieties of cheese and chocolate. It’s about thoughtfully combining elements that complement each other, creating a harmonious blend of flavors and textures that tantalize the palate. Imagine creamy brie with dark chocolate, or the salty crunch of a cracker meeting the sweetness of a fresh fig – that’s the magic we’re aiming for.
Before You Begin: The Art of Flavor & Texture
The most memorable chocolate and cheese boards boast a dynamic variety of flavors and textures. As you select your ingredients, consciously think about how each item will interact with its neighbors. Aim for a mix of sweet, savory, salty, tart, creamy, crunchy, and chewy. Placing complementary ingredients near each other on your board encourages delightful flavor combinations.
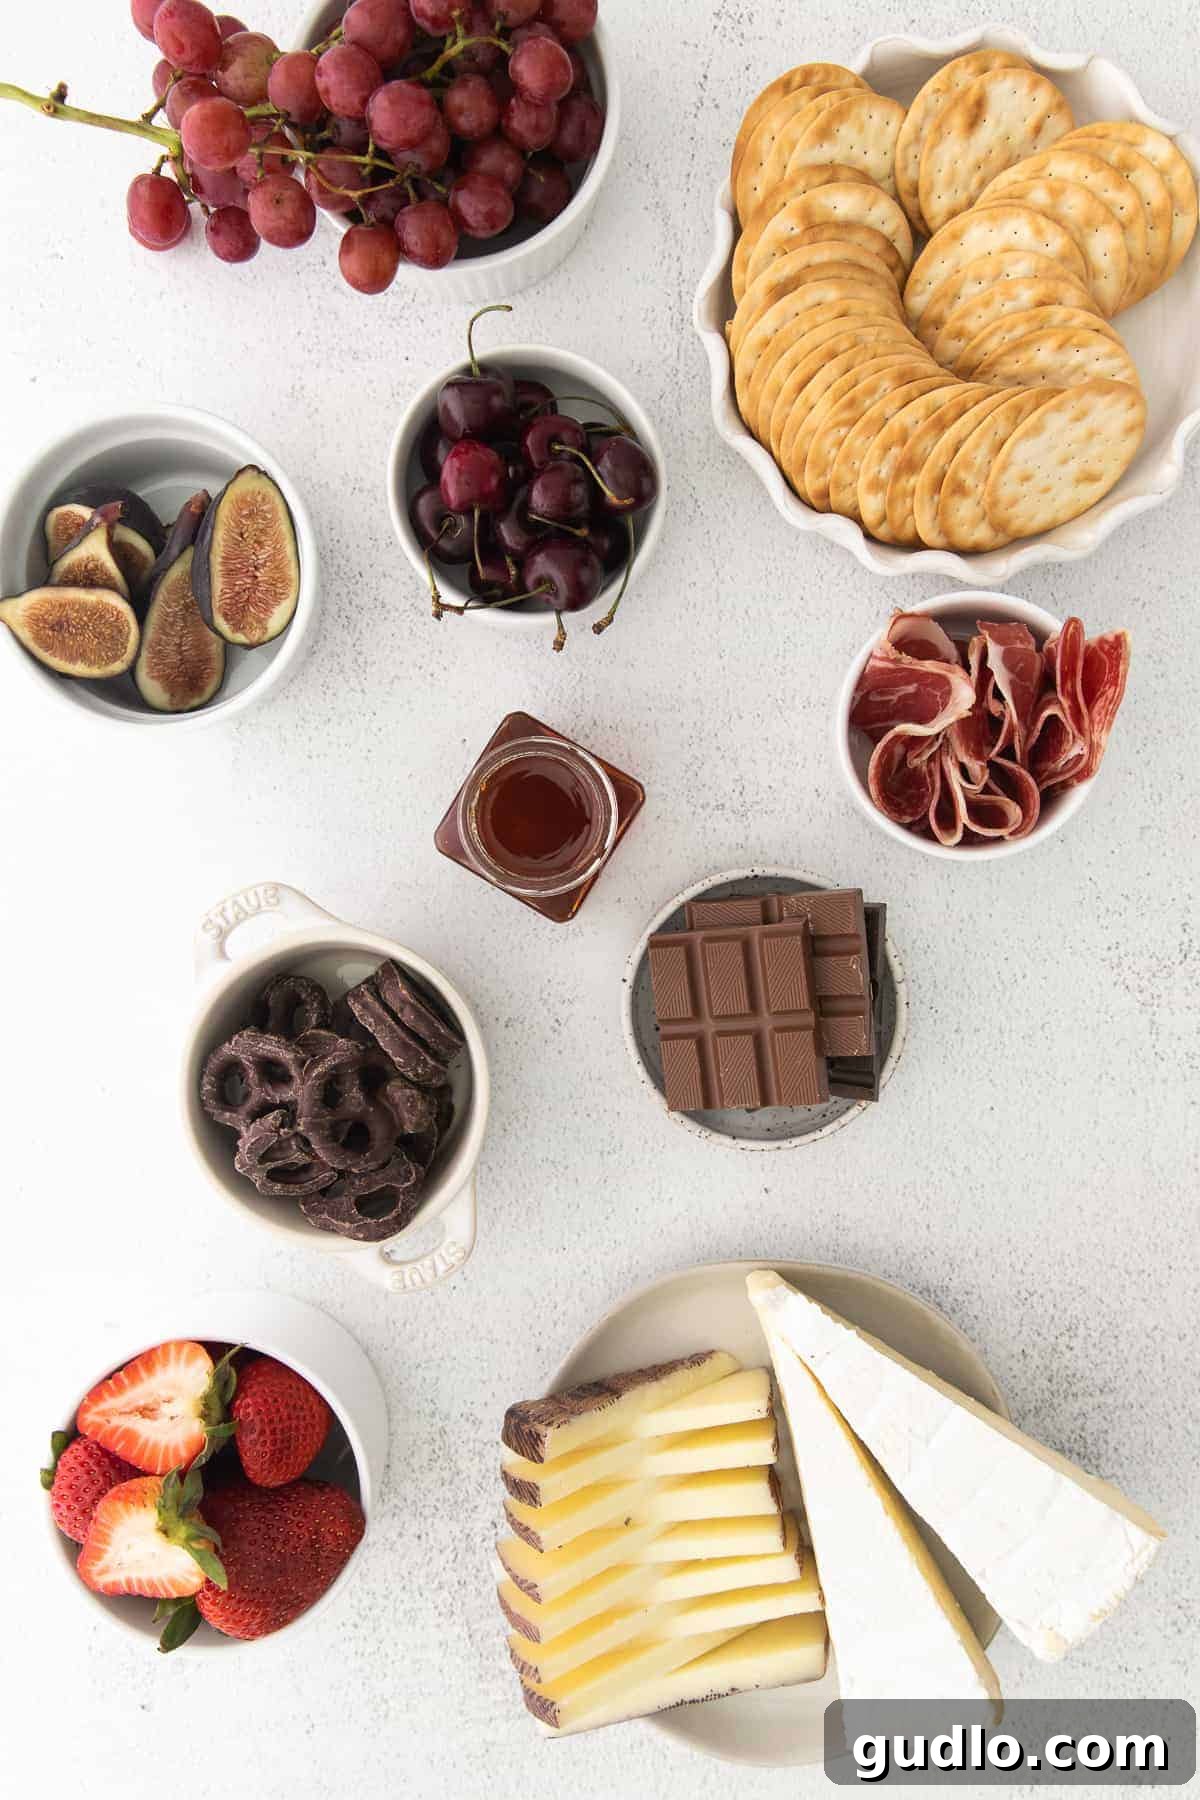
Curating Your Board: Selecting Exquisite Cheeses, Chocolates, and Accompaniments
A truly spectacular chocolate and cheese board begins with mindful ingredient selection. Don’t rush this step; take your time to choose items that not only taste wonderful on their own but also enhance one another. Here’s how to build a diverse and exciting collection:
Choosing Your Cheeses
Aim for 2-4 different types of cheese to offer a range of experiences. Consider various categories:
- Soft & Creamy: A classic like **Brie** or Camembert offers a rich, buttery texture. A fresh goat cheese (chèvre) provides a tangy contrast.
- Semi-Hard: **Manchego** (as used in our example) is a fantastic choice with its nutty, slightly sweet profile. Gouda, Havarti, or a mild cheddar also work beautifully.
- Hard & Aged: Parmigiano-Reggiano, aged cheddar, or Gruyere add a sharp, complex flavor and a crumbly texture.
- Blue Cheese (Optional): For adventurous palates, a Gorgonzola or Roquefort can add a pungent, creamy, and salty kick that pairs surprisingly well with dark chocolate and sweet fruits.
For a board serving 4 people, a quarter-pound of each chosen cheese is a good starting point.
Selecting Your Chocolates
Just like cheese, variety is key for chocolate. Include different cacao percentages and flavor profiles:
- Dark Chocolate: Essential for its bitterness and depth, which beautifully cuts through creamy cheeses. Choose bars with 60-80% cacao.
- Milk Chocolate: Offers a sweeter, milder flavor that appeals to a broader audience and pairs well with softer, milder cheeses and berries.
- White Chocolate: While technically not chocolate (it lacks cocoa solids), its creamy sweetness can be a delightful addition, especially with tart fruits.
- Flavored Chocolates: Consider bars with sea salt, nuts, caramel, or fruit infusions for an extra layer of complexity.
Perfecting Your Accompaniments
These are the supporting cast that truly makes your board shine, offering crunch, sweetness, tang, and visual appeal:
- Fresh Fruits: **Grapes** (red and green), **figs** (halved), **strawberries**, **cherries**, raspberries, and apple slices are colorful, refreshing, and provide a natural sweetness.
- Dried Fruits: Apricots, dates, cranberries, and golden raisins offer concentrated sweetness and a chewy texture that complements nuts and cheeses.
- Nuts: Almonds (roasted or candied), walnuts, pecans, and pistachios add a delightful crunch and earthy notes.
- Crackers & Bread: A variety of textures and flavors is best. Plain **water crackers** are neutral, allowing cheese and chocolate to shine. Add artisan bread, breadsticks, or even subtly sweet crackers for different pairing options.
- Cured Meats: Thinly sliced **salami** (like Genoa or coppa) or prosciutto offer a savory, salty counterpoint to the sweets.
- Spreads & Dips: Honey, fig jam, apricot preserves, or even a decadent chocolate-hazelnut spread can elevate the experience.
- Extra Sweet Treats: **Chocolate-covered pretzels**, small truffles, or delicate cookies add an extra layer of indulgence.
Building Your Beautiful Board: A Step-by-Step Assembly Guide
Now that you have your ingredients, it’s time for the fun part: arranging them into a work of art. Remember, the goal is an abundant, inviting, and visually dynamic display.
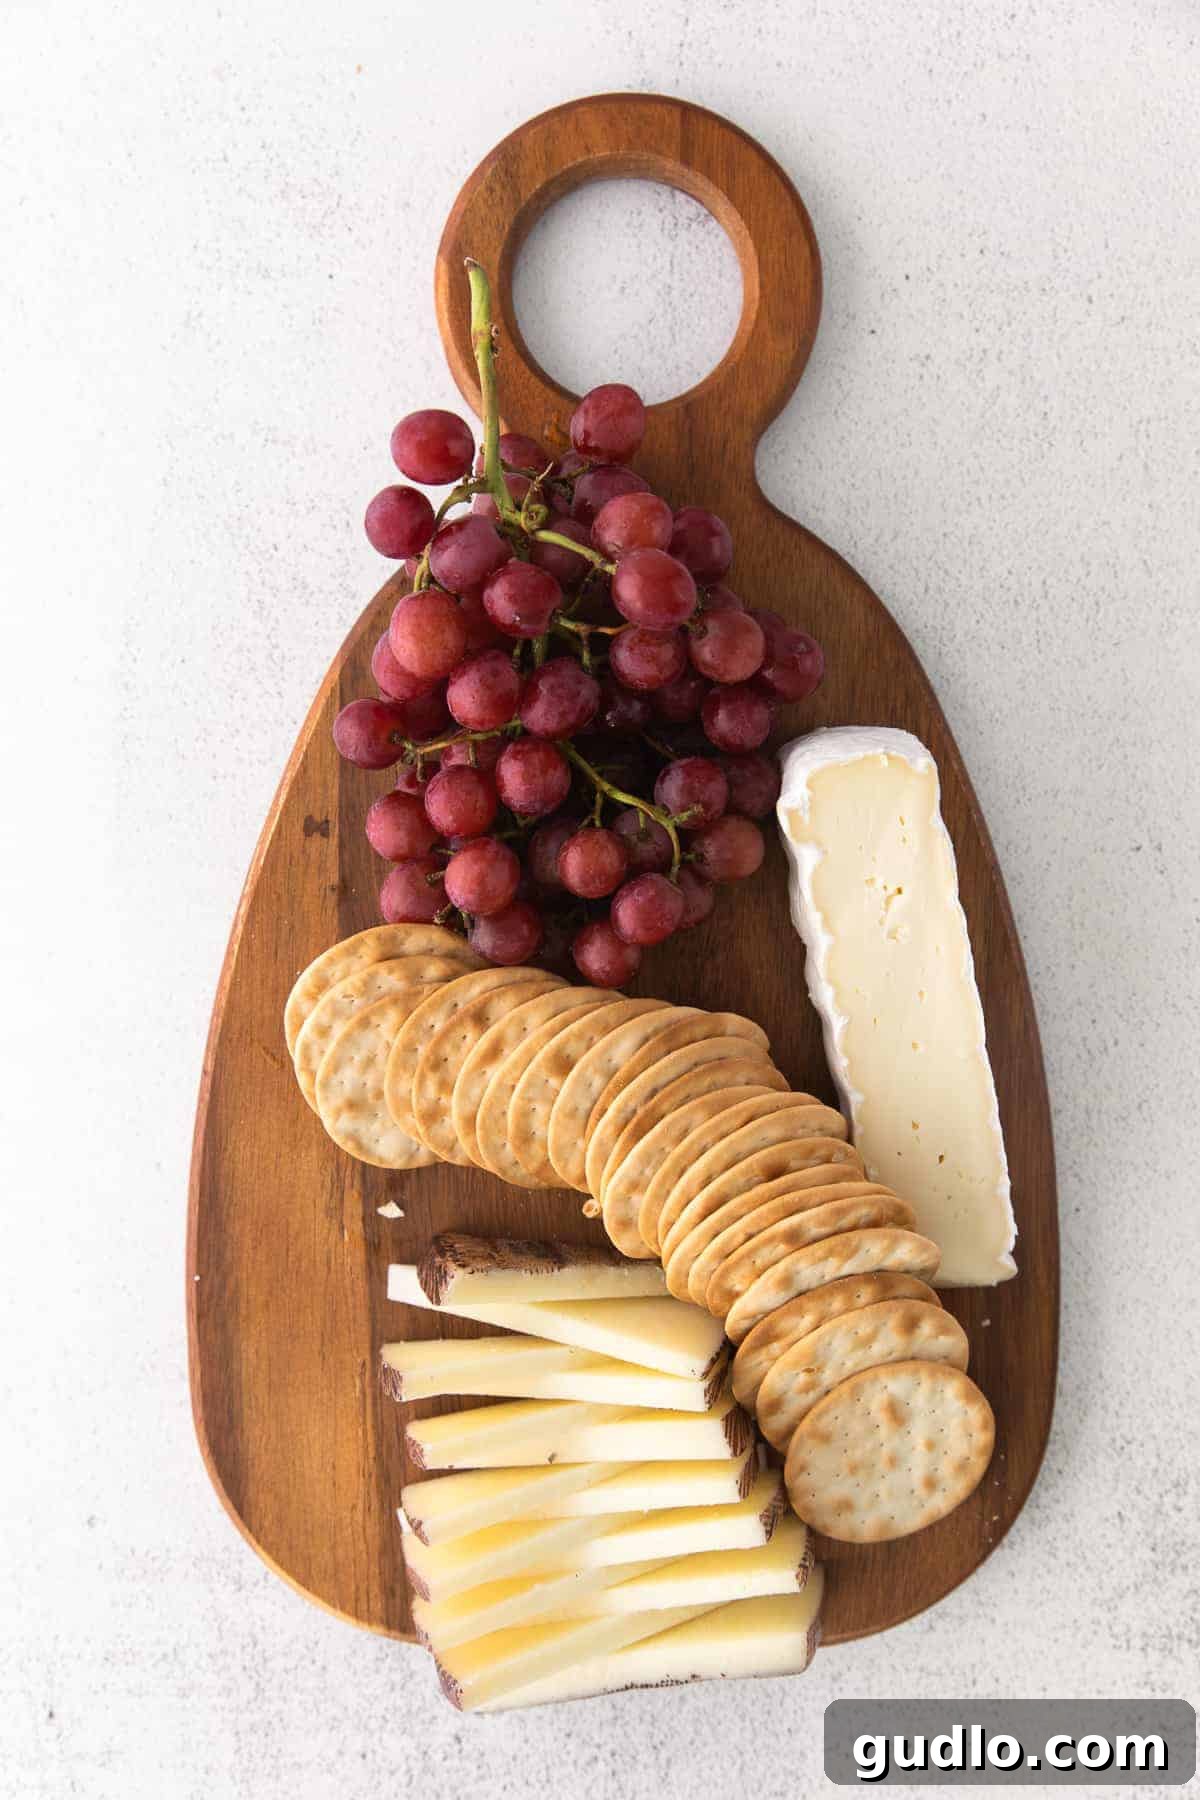
Step 1: Anchor with Your Largest Ingredients
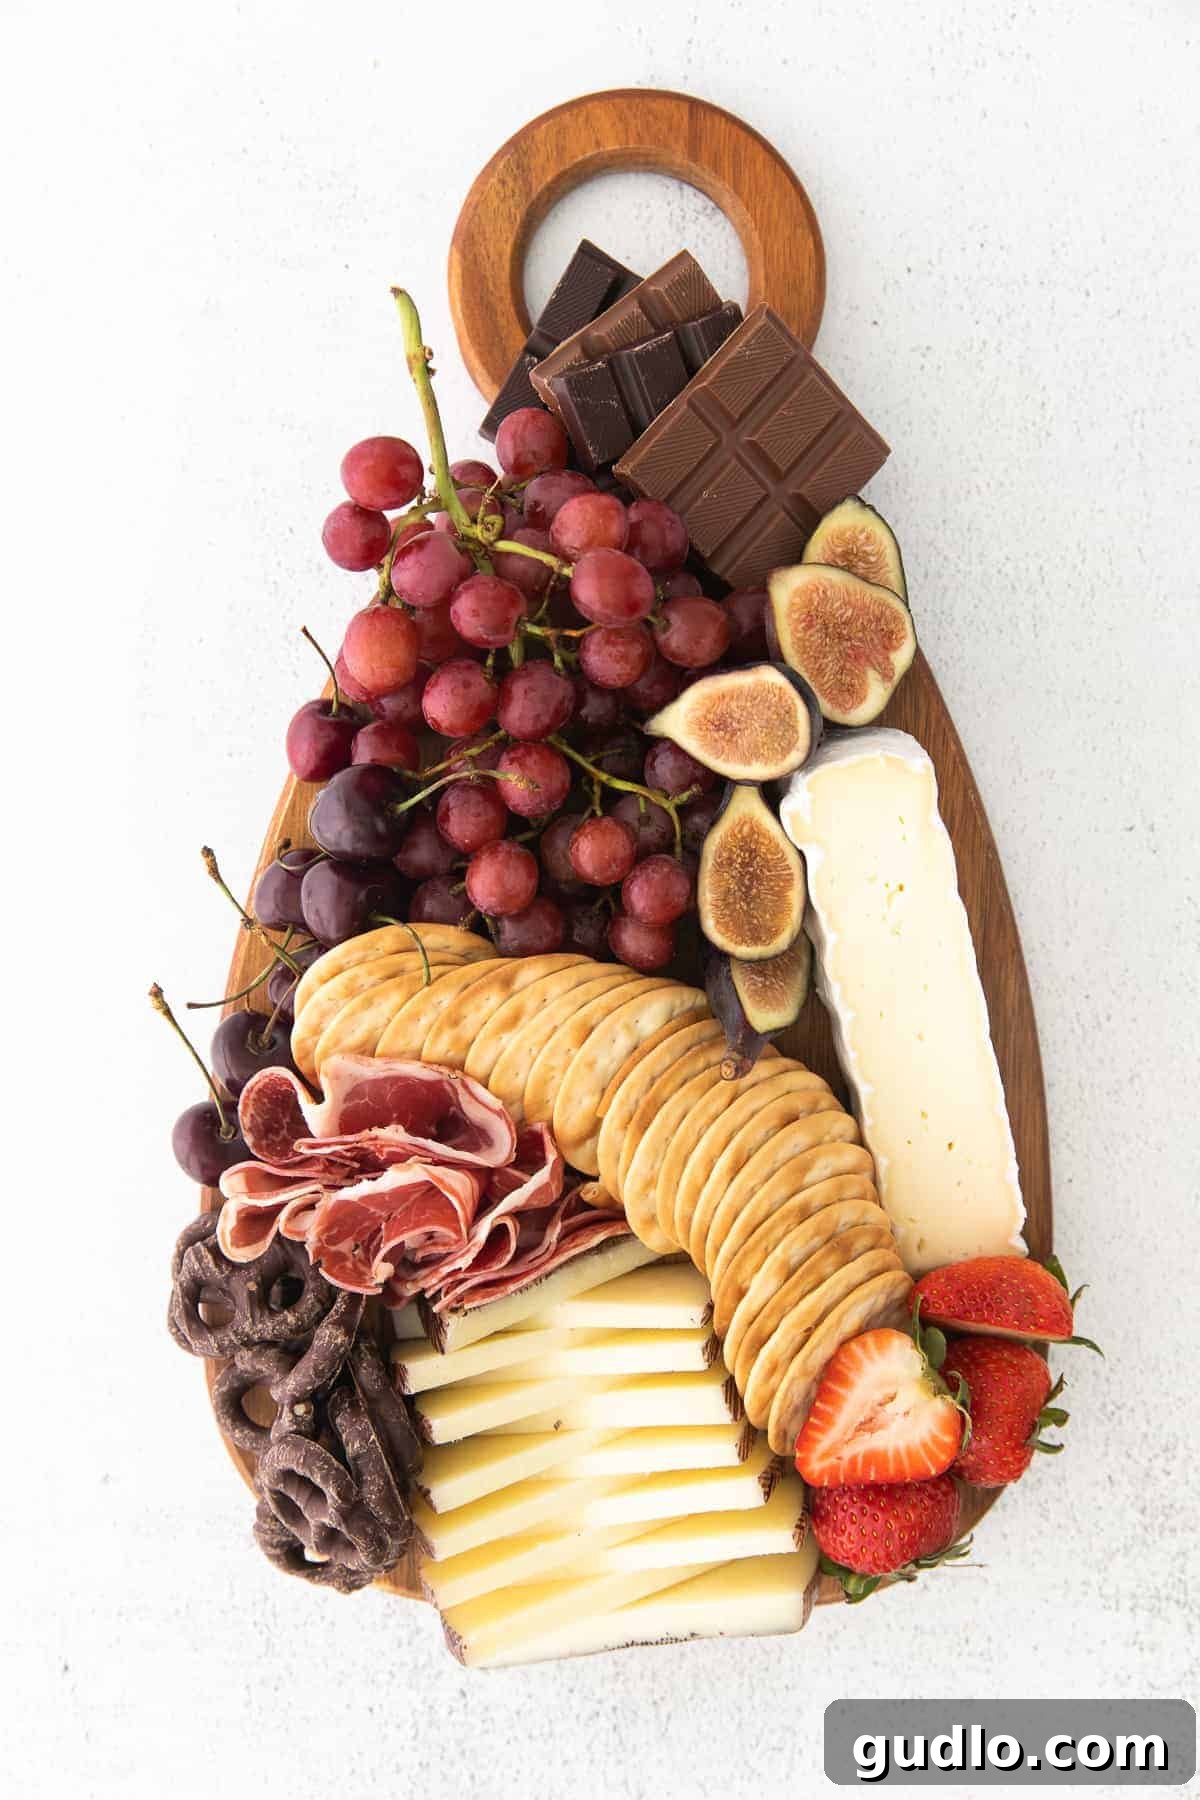
Begin by placing your biggest items on the board. These “anchor” pieces create the initial structure and visual balance. In our case, this includes generous clusters of **grapes** and your main blocks of cheese, such as **brie and manchego**. We recommend pre-slicing some of the harder cheeses, like manchego, into triangles or cubes to make them easier for guests to grab. However, leaving a wedge whole can also look impressive and rustic if that’s your preference. Position these items strategically, leaving space for other elements to fill in around them.
Step 2: Create Visual Flow and Movement with Crackers
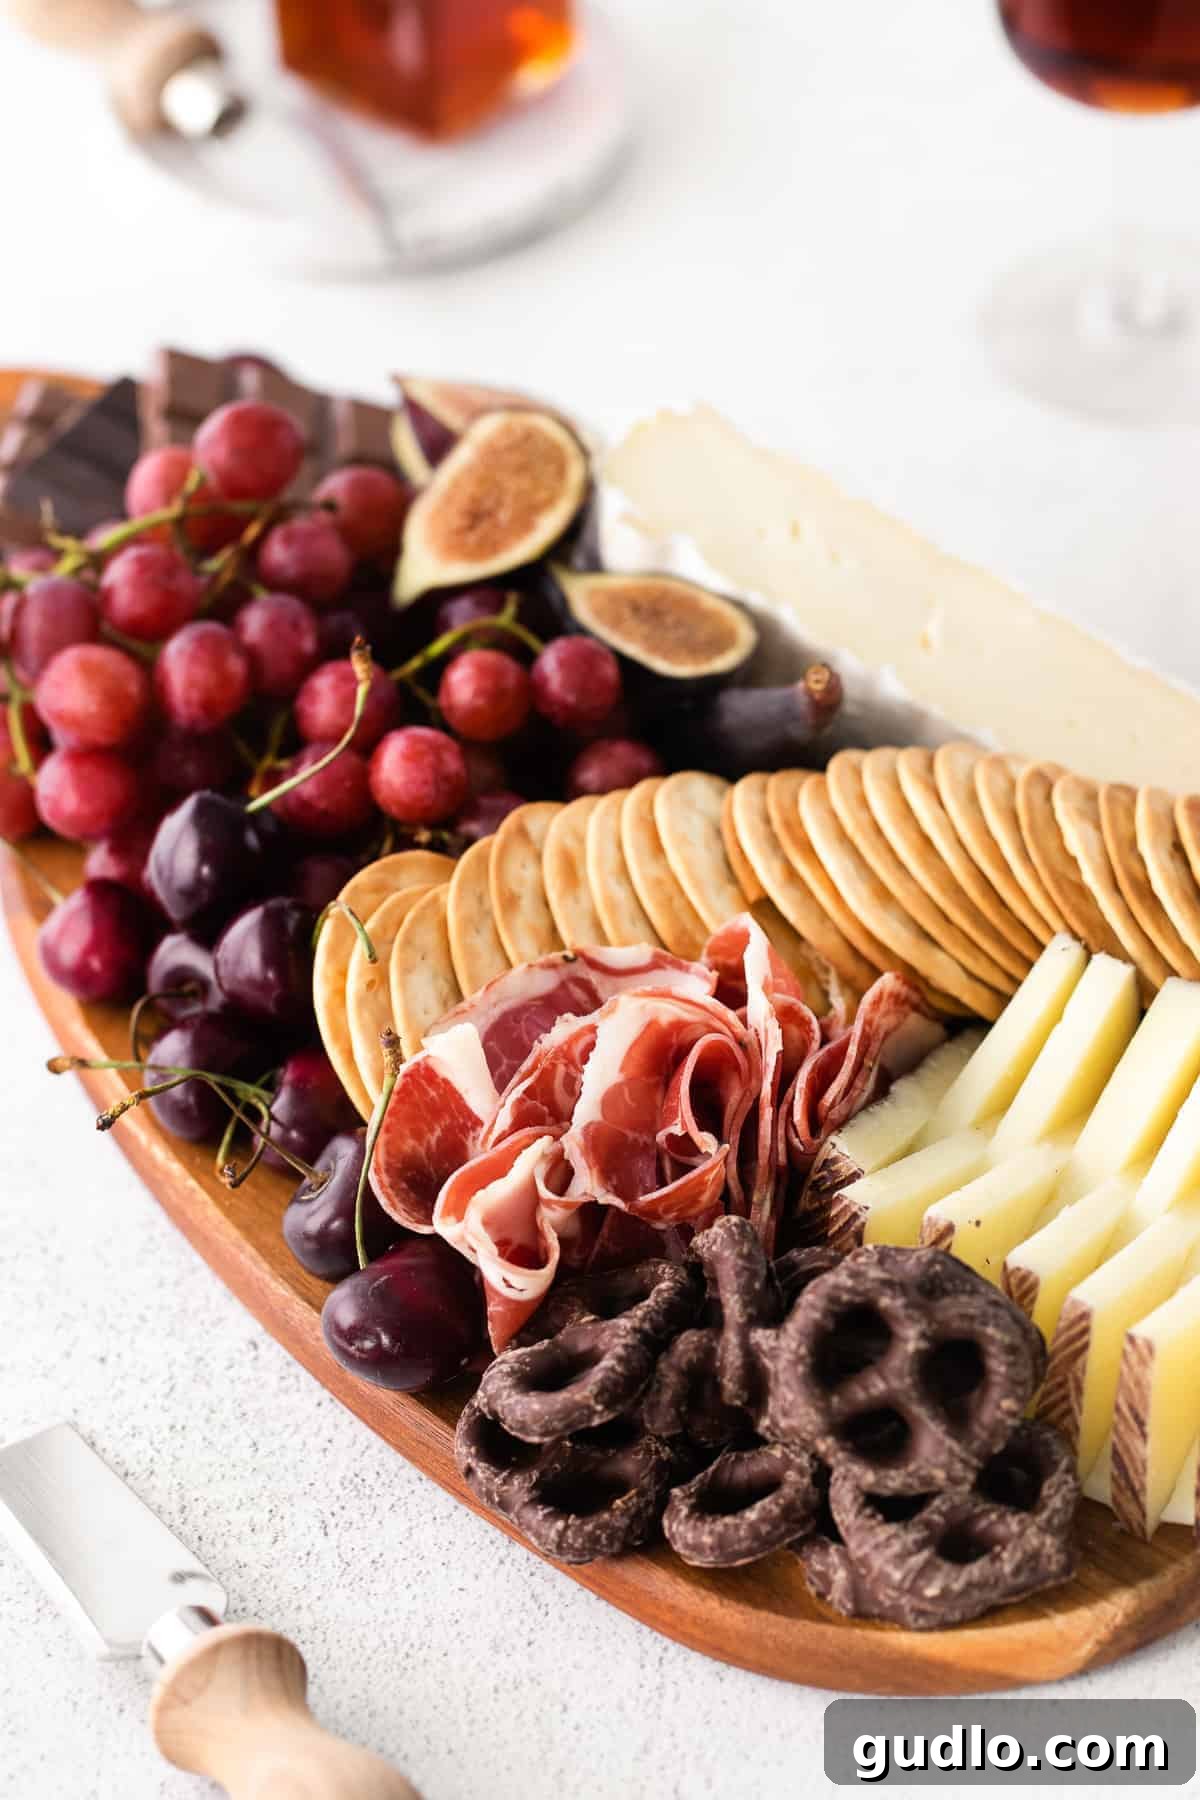
Next, introduce elements that guide the eye and add dynamic flow to your board. Crackers are perfect for this. **Spread the water crackers in a graceful line through the middle of the board**, or along one side, creating a natural path. This not only makes them easily accessible but also breaks up large sections of cheese and fruit, adding visual interest. Think of them as bridges between different flavor islands.
Step 3: Introduce the Chocolate and Savory Stars
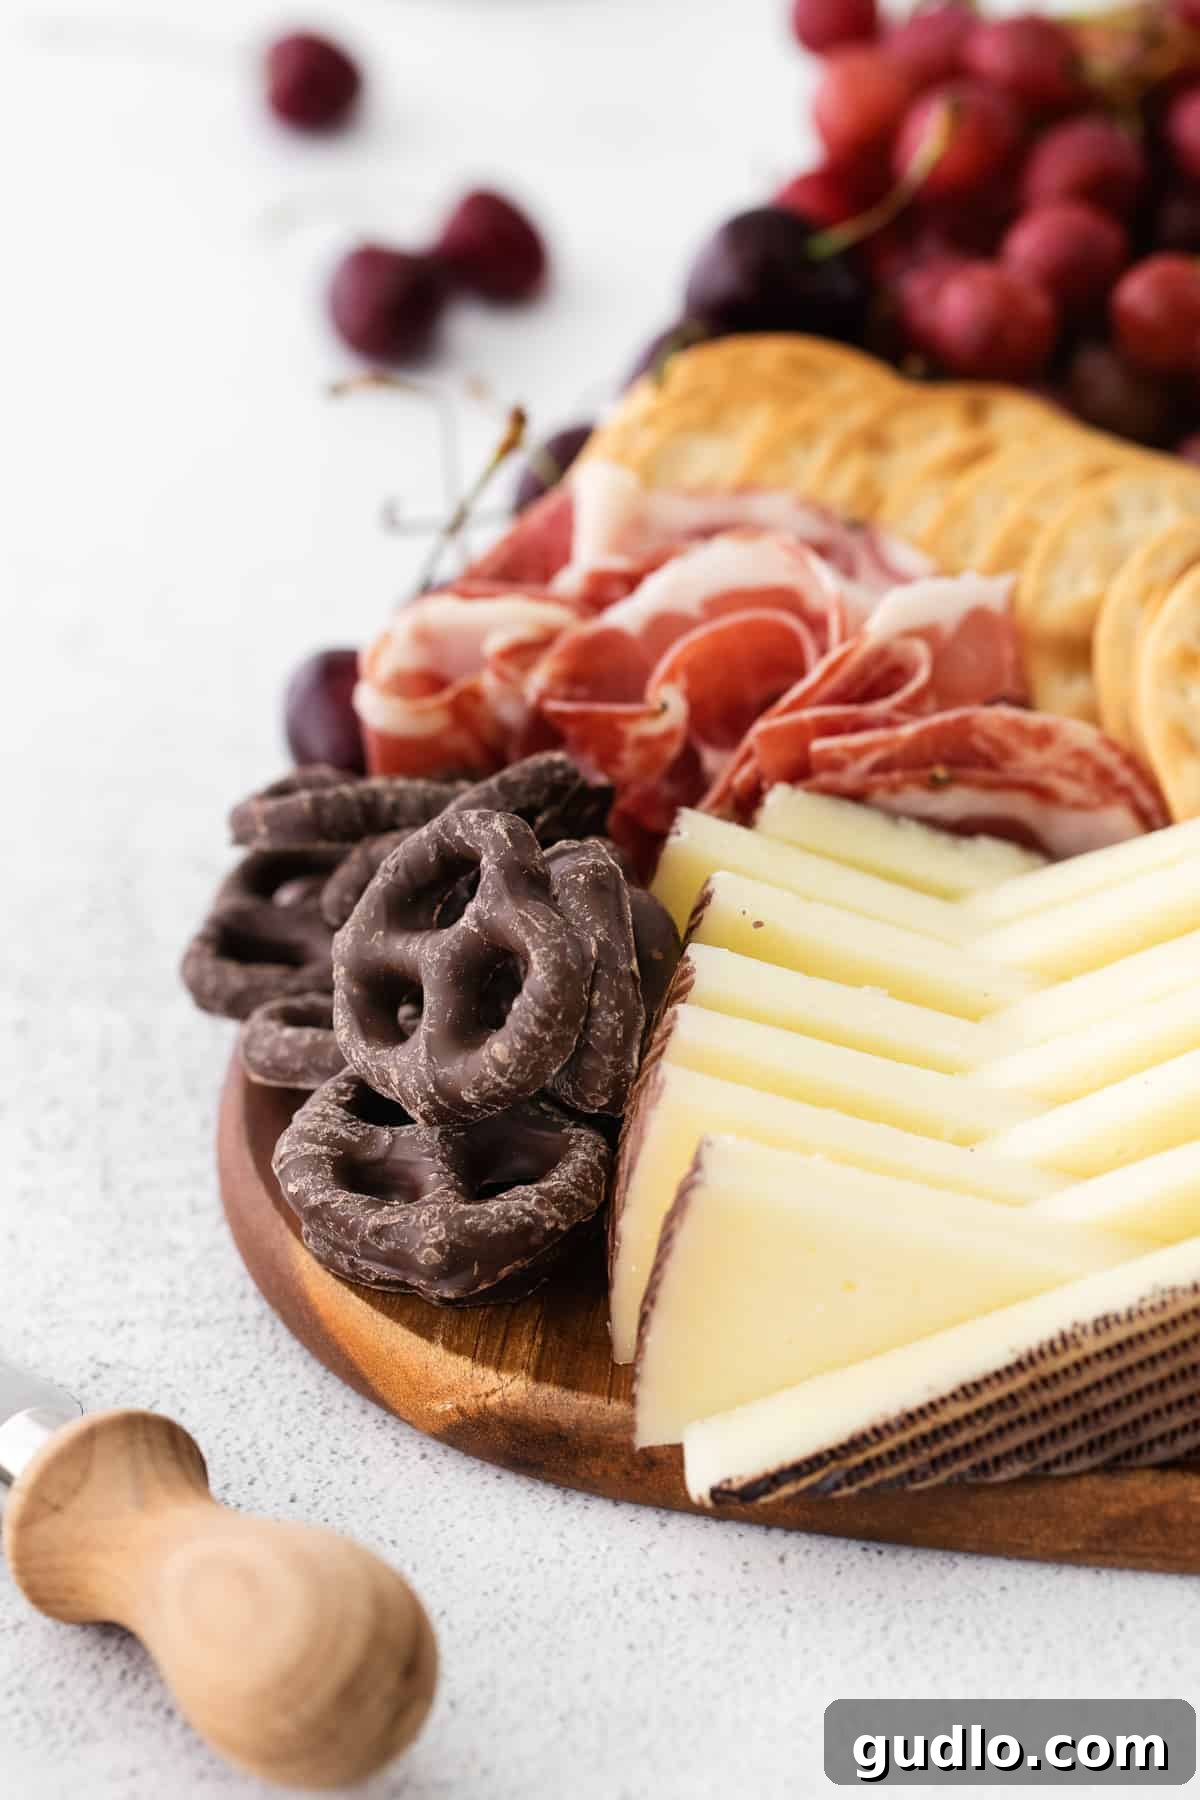
With your anchors and flow established, it’s time to add your next largest elements that are central to the board’s theme: **chocolate bars, salami, and chocolate-covered pretzels**. Arrange these items in distinct, generous clumps. Don’t scatter them too thinly; grouping them creates visual impact and emphasizes their presence. Break chocolate bars into a few pieces to make them more inviting and easier to pick up.
Step 4: Fill the Gaps with Smaller Delights for Abundance
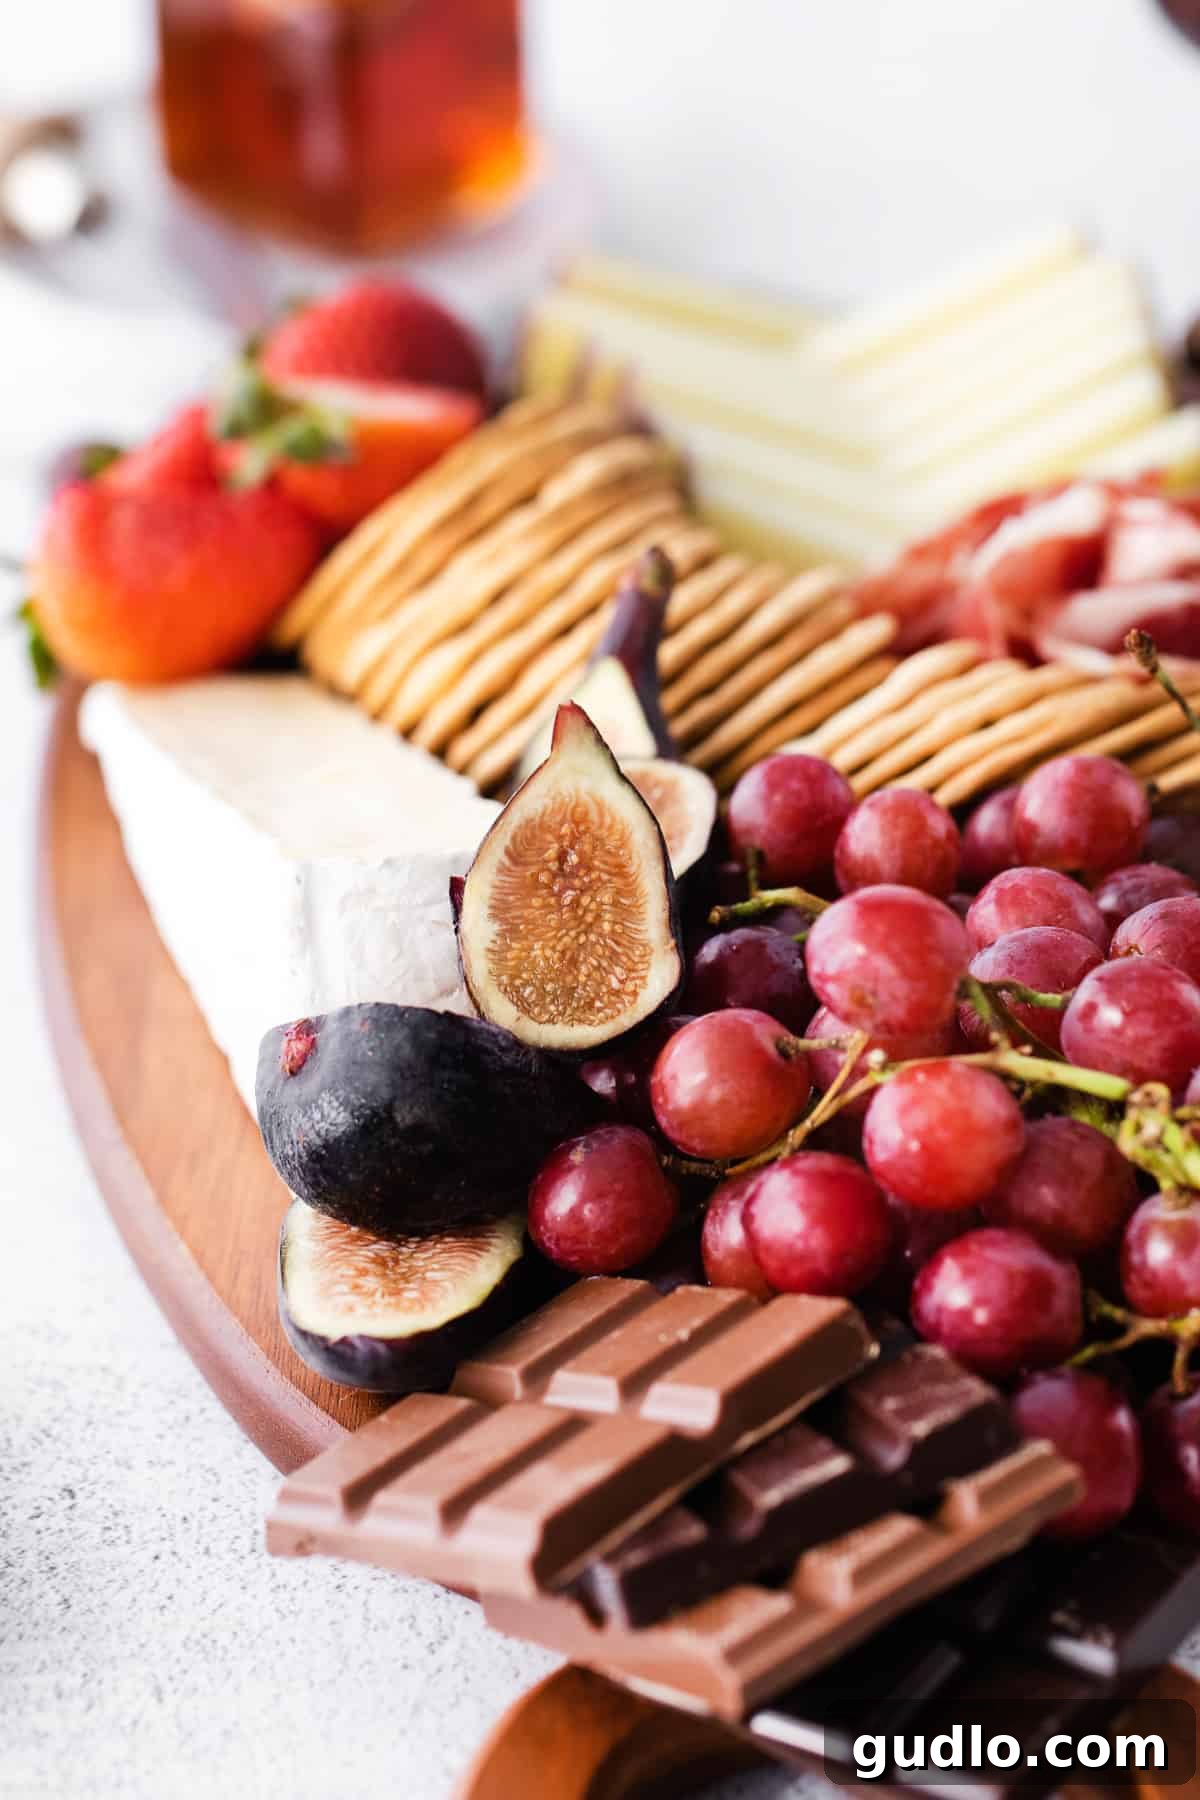
This is where your board truly comes alive and achieves that coveted abundant look. Use your remaining smaller ingredients – fresh **figs**, luscious **strawberries**, and vibrant **cherries** – to fill in any visible gaps. Tuck them into every nook and cranny. Don’t be afraid to pile them high! This step adds a riot of color, texture, and unexpected treats, making the board irresistible.
Step 5: The Finishing Touches & Immediate Enjoyment
Once everything is artfully arranged, give your board a final once-over. Ensure all items are easily accessible. Add any small serving utensils (see tips below). Then, serve immediately and revel in your beautiful, delicious creation! Freshness is key for many of these ingredients.
Expert Tips for an Unforgettable Chocolate and Cheese Board
#1 TIP – Aim for Abundance!
This is arguably the most crucial tip for any charcuterie or cheese board: make it look incredibly abundant! Your goal is to cover as much of the board’s surface as possible. A full board signals generosity and makes guests feel welcome to indulge. It also prevents the board from looking sparse or picked over too quickly. Don’t be shy about layering and piling ingredients; an overflowing board is far more appealing than an empty one.
Pre-Cut for Ease and Engagement
A simple yet effective trick to encourage guests to enjoy the board is to pre-cut some of your cheeses. Many people hesitate to be the first to slice into a pristine block of cheese. By providing ready-to-grab pieces, you remove this social barrier. For instance, we sliced the **manchego** into easy-to-handle triangles and cut the **brie** in half, placing one piece on its side to make it appear more inviting and accessible. This small effort goes a long way in making your guests comfortable.
Don’t Forget the Utensils!
Presentation isn’t just about the food; it’s also about hygiene and convenience. Ensure you have plenty of appropriate utensils available. Provide individual cheese knives for different cheeses, small tongs for cured meats and larger fruits, and toothpicks for smaller items. This allows everyone to grab their desired food without using their hands, promoting good hygiene and a more pleasant experience for all.
Embrace Creativity with Ingredients
Don’t have every ingredient listed in our example on hand? No problem! The beauty of a chocolate and cheese board is its flexibility. Feel free to make substitutions based on what’s available, in season, or simply what you love. Think about similar flavor profiles and textures:
- Cheese: Swap out brie for Camembert, or manchego for a sharp cheddar or aged gouda.
- Fresh Fruit: Pears, kiwi, or mandarins can replace figs or strawberries.
- Dried Fruit: Dates, prunes, or dried apricots are excellent alternatives.
- Bite-sized Chocolates: Mini chocolate truffles, chocolate-covered nuts, or even gourmet chocolate cookies can replace standard chocolate bars or pretzels.
- Nuts: Any variety you enjoy will work: pecans, cashews, or even macadamia nuts.
- Crackers: Explore different shapes, flavors (rosemary, olive oil), or even thin slices of baguette.
The key is to maintain a balance of flavors and textures, always aiming for contrast and complement.
Temperature Matters for Taste
For optimal flavor and texture, serve cheeses at room temperature. Take them out of the refrigerator at least 30-60 minutes before serving. Cold cheese tends to be less flavorful and harder in texture. Similarly, while chocolate doesn’t need to be room temperature, ensure it’s not too cold from refrigeration, as this can dull its flavor. Fruits and cured meats are best served cool but not icy.
Choosing Your Canvas: What Kind of Board Should I Use?
While specialty cheese boards are lovely, you absolutely don’t need to splurge on an expensive, dedicated board. Almost any flat surface can be transformed into a beautiful serving platter! Don’t feel pressured to buy something fancy; creativity is your best tool. Consider these common household items:
- Cutting Boards: Wooden or bamboo cutting boards are perfect and often already in your kitchen.
- Baking Sheet: A clean, flat baking sheet can work in a pinch, especially for larger gatherings.
- Shallow Casserole Dish: For a board with slightly raised edges, a shallow casserole dish can contain items well.
- Marble Slab: A marble pastry board or cheese board keeps ingredients cool, which is ideal for cheese.
- Directly on the Counter/Table: For an exceptionally large display, you can even assemble your spread directly on a clean countertop or dining table! Just make sure to lay down some parchment or butcher paper first to protect the surface and make cleanup a breeze.
Picking the Right Board Size for Your Occasion
Once you’ve gathered all your delicious elements, determining the right size board for your creation can feel intimidating, but it doesn’t have to be! The key is to match the board size to the number of guests and the role the board plays (appetizer, main feature, dessert).
Large Boards (18-24 inches)
For generous crowds, large parties, or when the cheese board is a main feature, opt for the biggest board you have. A board in the 18-24-inch range allows for ample space to showcase a wide variety of cheeses, chocolates, and accompaniments, ensuring everyone gets a taste.
Medium Boards (10-12 inches)
For an intimate afternoon cheese board among friends, a substantial appetizer for a small group, or a supplementary snack, something in the 10-12-inch range is ideal. This size provides enough room for 3-4 cheeses and a good selection of supporting ingredients without being overwhelming.
Small Boards (6-8 inches)
For a personal cheese board for one or two people, or as part of a larger multi-course meal, we typically suggest a board that’s 6-8 inches. This size is perfect for a curated selection of 1-2 cheeses and a few choice pairings, making it feel special and intimate.
Remember, if you find yourself without a suitable board, don’t hesitate to assemble your delightful display directly on a clean counter or dining table! Just make sure to put down some parchment or butcher paper first to protect the surface and minimize cleanup. This also allows for incredibly expansive and impressive spreads.
Storage: Preserving Leftovers
Did your guests not finish everything? Don’t let those delicious leftovers go to waste! Proper storage will ensure you can enjoy them for days to come.
- Cheese: For optimal freshness and to prevent drying out, we recommend wrapping each block of cheese tightly in parchment paper first, then placing them in a large, airtight plastic bag or container. This allows the cheese to breathe slightly while preventing it from absorbing other odors. Most properly stored hard and semi-hard cheeses will last up to 2 weeks in the refrigerator, while soft cheeses should be consumed within 3-5 days.
- Fruits, Meats, and Chocolates: Separate these items for storage. Store fresh fruits in individual airtight containers in the refrigerator. Cured meats should also be stored in an airtight container or re-wrapped tightly. Chocolate is best stored in a cool, dry place away from direct sunlight, in its original packaging or an airtight container, and does not typically require refrigeration.
Chocolate and Cheese Board Recipe
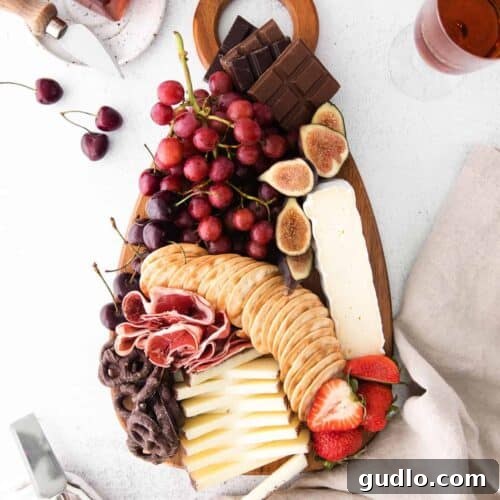
This chocolate and cheese board is a perfect appetizer to fancy up any occasion. Learn how to make it with our easy step-by-step instructions.
By: Emily Richter
Preparation Details
- Prep Time: 20 minutes
- Cook Time: 0 minutes
- Total Time: 20 minutes
- Servings: 4
Ingredients
- ¼ lb. double cream brie
- ¼ lb. 12-month aged manchego
- 1 bunch grapes
- 1 box plain water crackers
- ¼ cup chocolate covered pretzels
- 2 chocolate bars (a mix of dark and milk is recommended)
- 1 oz. salami, thinly sliced
- ½ cup figs, halved
- ½ cup strawberries
- ¼ cup cherries
Instructions
- First, add your largest ingredients to the board. In this recipe, these are the grapes, brie, and manchego. For easier serving, you can slice the manchego into triangles, but leaving the wedge whole is also an option if preferred.
- Next, introduce visual movement to the board! This is often easiest to achieve with crackers. Spread the water crackers in a line through the middle of the board, or down the side, to create a flowing arrangement.
- Now it’s time to fill in the board with your next largest elements: the chocolate bars, salami, and chocolate-covered pretzels. Arrange these items in substantial clumps so they are clearly visible and enticing.
- The final step is to fill in any remaining gaps to ensure the board looks abundant and inviting. Use your remaining small ingredients, such as the figs, strawberries, and cherries, to generously cover any bare spots.
- Serve immediately and enjoy your beautifully crafted board! Store any leftover elements in separate airtight containers in the refrigerator for up to three days.
Nutrition
Calories: 546 kcal, Carbohydrates: 44 g, Protein: 16 g, Fat: 30 g, Fiber: 3 g, Sugar: 14 g
Nutrition information is automatically calculated and should only be used as an approximation.
More of our Favorite Appetizers
Cheesy Appetizers
- How to Make a Cheese Board
- Baked Brie with Fig Jam
- Cream Cheese Stuffed Mushrooms
- Nacho Cheese Sauce
- Pizza Soft Pretzels