

Searching for an appetizer that is both effortlessly simple to prepare and undeniably delicious? Look no further than these incredible Cream Cheese Sausage Balls! These savory, cheesy bites are destined to become your go-to recipe for any gathering. Serve them alongside our perfectly zesty and creamy garlic sauce for an unforgettable flavor experience that will have everyone asking for the recipe.

We confidently declare these the best sausage balls you’ll find, especially when paired with their signature creamy dipping sauce. They offer a delightful balance of rich, savory flavor and a tender, cheesy texture that makes them irresistible. For an epic appetizer spread, consider pairing these with other delightful starters such as Spinach Artichoke Stuffed Mushrooms, a decadent Cheeseburger Dip, or our popular Pizza Dip with Focaccia. These combinations guarantee a party table full of flavor and fun!
Why You’ll Love These Cream Cheese Sausage Balls
Beyond their incredible taste, there are so many reasons these Cream Cheese Sausage Balls deserve a spot in your recipe collection. They are incredibly versatile, perfect for game days, holiday parties, potlucks, or even a simple family snack. The combination of savory sausage with the rich, tangy cream cheese creates a flavor profile that is both comforting and exciting. Plus, the recipe is straightforward, requiring minimal effort for maximum impact. They are a true crowd-pleaser that appeals to all ages, making them ideal for any occasion where delicious, easy-to-eat finger food is a must. Prepare to be showered with compliments!
Essential Cream Cheese Sausage Ball Ingredients
Crafting these perfectly delicious cream cheese sausage balls requires just a few key ingredients, primarily falling into the cheese, meat, and seasoning categories. Each component plays a crucial role in achieving that sought-after creamy texture and robust flavor profile:
Cheesy Foundation
- Full-fat cream cheese: This is the secret to their incredibly creamy, tangy, and rich texture. Using full-fat ensures a lush mouthfeel that truly elevates the sausage balls. Make sure it’s softened to room temperature for easier mixing.
- Shredded yellow cheddar cheese: Adds a classic, sharp, and irresistibly gooey element to these savory bites. The cheddar melts beautifully, enhancing the overall flavor and contributing to their comforting appeal.
Savory Meat Base
- Ground Italian pork sausage: The star of the show, providing a robust, savory, and perfectly spiced meaty flavor. Italian sausage typically comes pre-seasoned with fennel, garlic, and other herbs, which adds a fantastic depth of flavor to the balls without needing many additional spices.
Flavor & Structure Enhancers
- Plain bread crumbs: These are essential for binding the ingredients together, adding structure to the sausage balls, and preventing them from becoming too dense. They also contribute to a pleasant texture.
- Fresh chives: A touch of finely minced fresh chives brings a subtle oniony freshness and a vibrant pop of green, which beautifully balances the richness of the cheese and sausage.
- Maple syrup: Don’t skip this! A hint of maple syrup introduces a delicious, subtle sweetness that perfectly complements the savory notes of the sausage and cheese, creating a well-rounded flavor.
- Garlic powder: Because everything is better with garlic! Garlic powder infuses the sausage balls with an aromatic, savory depth that is absolutely essential.
- All-purpose flour: This acts as a binding agent, ensuring the sausage mixture holds its shape perfectly when rolled into balls and bakes consistently.
Crafting the Perfect Zesty Garlic Dipping Sauce
While these cream cheese sausage balls are undeniably savory and delicious on their own, the accompanying dipping sauce truly transforms them into an extraordinary appetizer. This sauce is designed to be the perfect complement: equal parts creamy and tangy, with just a hint of heat to tantalize your taste buds. Here’s what you’ll need to create this flavor-packed dip:
- 2% Greek yogurt: Forms the creamy, thick base of the sauce, offering a delightful tanginess and a healthy boost of protein.
- Hot sauce: Just a couple of teaspoons turn up the temperature, adding a gentle warmth and an exciting kick that elevates the overall flavor profile without being overpowering. Adjust to your preferred spice level.
- Garlic paste: Provides a concentrated, pungent garlic flavor that rounds out the sauce beautifully. It’s more intense and smoother than minced garlic, ensuring even distribution throughout the dip.
- Fresh lemon juice: A squeeze of fresh lemon juice is crucial for brightness, cutting through the richness of the sausage balls and adding a refreshing, zesty lift to the sauce.
- Salt: A pinch of salt enhances all the other flavors, adding a necessary backbone to the dip and ensuring every component shines.
Looking for different flavors or options in a dipping sauce? These versatile meat balls also pair wonderfully with classic honey mustard, tangy barbecue sauce, or a creamy ranch dressing. Feel free to experiment with your favorite dips!
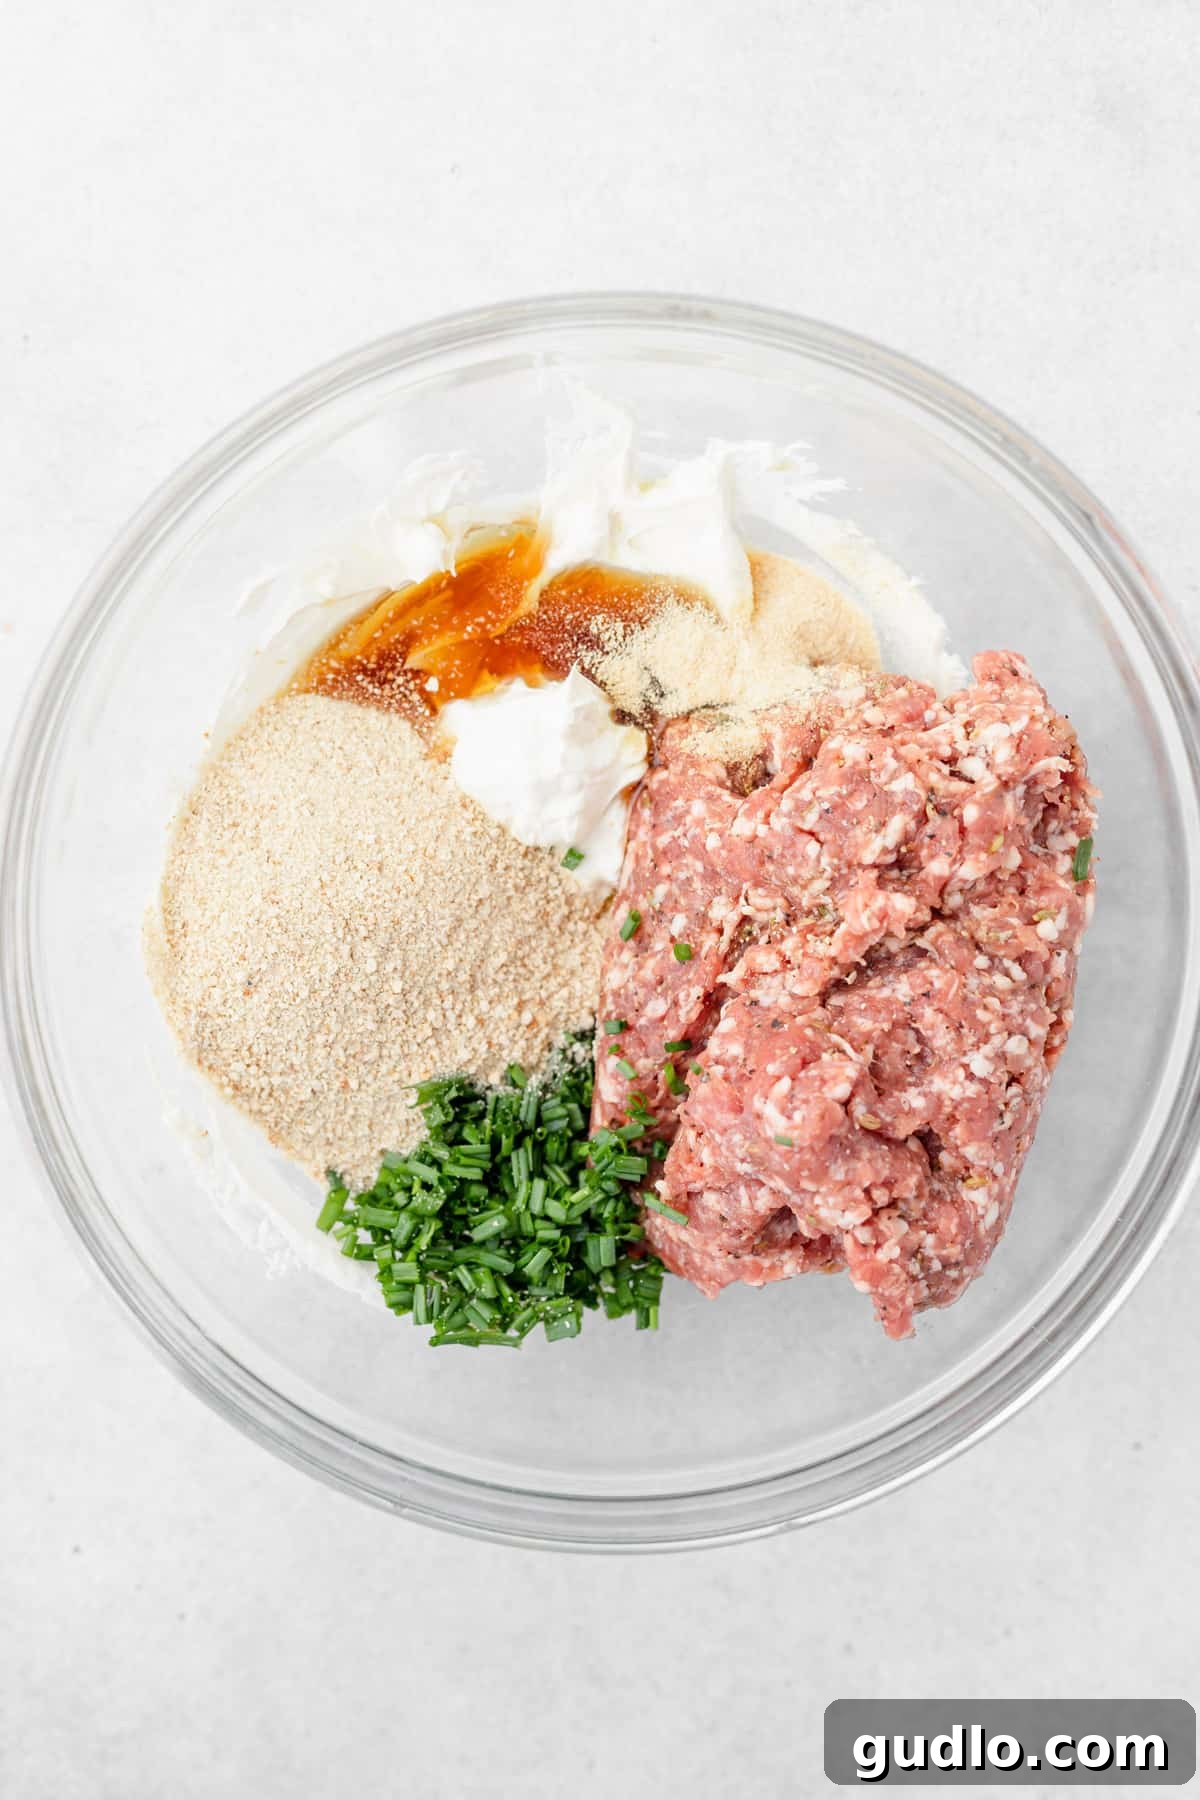
How to Make Cream Cheese Sausage Balls (Step-by-Step Guide)
Creating these delectable Cream Cheese Sausage Balls is a straightforward process. Follow these easy steps for perfect results every time:
Step 1: Preheat and Prepare Your Workspace
Begin by preheating your oven to 350ºF (175ºC). Line a large baking sheet with parchment paper to prevent sticking and ensure easy cleanup. Alternatively, you can lightly spray the baking sheet with non-stick cooking spray.
Step 2: Create the Sausage Ball Mixture
Place the softened full-fat cream cheese into a large mixing bowl. Using an electric mixer (a stand mixer works wonderfully for this), cream the cream cheese until it is smooth and lump-free. This ensures an even distribution of creaminess throughout the sausage balls.
Next, add all the remaining sausage ball ingredients to the bowl, EXCEPT for the all-purpose flour. This includes the ground Italian pork sausage, shredded yellow cheddar cheese, plain bread crumbs, fresh chives, maple syrup, garlic powder, salt, and ground pepper. Using the electric mixer once more, combine all these ingredients thoroughly until well incorporated. Scrape down the sides of the bowl as needed to ensure everything is mixed.
Finally, with the mixer running on low speed, slowly add the all-purpose flour to the sausage mixture. Mix just until the flour is fully combined and no dry streaks remain. Avoid overmixing, which can make the sausage balls tough.
Step 3: Form the Sausage Balls
Now comes the fun part! Using a cookie scoop (approximately 2 tablespoons in size) to ensure uniform portions, scoop out the sausage mixture. Roll each portion gently between your palms to form small, round balls. Evenly space the formed sausage balls on your prepared baking sheet. Continue this process until all of the mixture has been used.

Step 4: Bake and Prepare the Dipping Sauce
Carefully place the baking sheet with the sausage balls into the preheated oven. Bake at 350ºF (175ºC) for 25 minutes, or until they are golden brown and cooked through.
While the sausage balls are baking, take this opportunity to whip up your delicious garlic dipping sauce. In a medium bowl, combine all the ingredients for the sauce: Greek yogurt, hot sauce, garlic paste, fresh lemon juice, and a pinch of salt. Whisk everything together until it’s smooth and well combined. Set it aside.
After 25 minutes, remove the sausage balls from the oven. For an extra cheesy touch, sprinkle a little extra shredded cheddar cheese over the top of each hot sausage ball. Return them to the oven for an additional 2-3 minutes, just until the cheese is beautifully melted and bubbly. This step adds an extra layer of gooey goodness!
Step 5: Serve and Enjoy!
Once the sausage balls are out of the oven and the cheese is melted, transfer them to a serving platter. Garnish generously with a sprinkle of fresh chives for added flavor and visual appeal. Arrange the sausage balls around a bowl of the prepared zesty garlic dipping sauce. For convenient dipping, we recommend inserting a toothpick into each sausage ball. Now, gather your loved ones and prepare to ENJOY these irresistible cheesy, meaty delights!
How to Serve Cream Cheese Sausage Balls
These cheesy, meaty morsels are incredibly versatile and shine brightest when served alongside other delightful party recipes. They make a fantastic addition to any appetizer spread, bringing a hearty and satisfying element. Consider pairing them with these crowd-pleasing dishes for a truly memorable feast:
- Homemade Pizza: A classic pairing that complements the savory notes of the sausage balls.
- Baked Mac and Cheese Cups: Offer another cheesy, comforting option that kids and adults alike will love.
- Cheeseburger Sliders: Creates a mini-meal theme with various bite-sized savory options.
- Pimento Cheese Pinwheels: Adds another creamy, flavorful cheese-based appetizer to the mix.
Whether it’s a holiday party, a game day celebration, or just a casual get-together, these Cream Cheese Sausage Balls are guaranteed to be a hit!

Frequently Asked Questions (FAQ)
Absolutely! This is an excellent recipe for scaling up. If you’re hosting a larger gathering or simply want to have more delicious appetizers on hand, feel free to double or even triple the ingredients. Just be sure to use larger mixing bowls and potentially multiple baking sheets to avoid overcrowding, which can affect even cooking.
Yes, these sausage balls freeze beautifully, making them a fantastic make-ahead option! For best results, we recommend freezing them after they have been fully cooked. Allow the sausage balls to cool completely to room temperature. Then, transfer them to a freezer-safe bag or an airtight container, ensuring they are packed without too much air. They can be stored in the freezer for up to 3 months. When ready to enjoy, simply follow our reheating instructions below.
We recommend using ground Italian pork sausage for its rich flavor profile, which often includes savory spices like fennel and garlic. However, you can experiment with mild or spicy Italian sausage based on your preference. For a lighter option, ground chicken or turkey sausage can also be used, though the flavor will be slightly different.
Ingredient Modifications for Customization
One of the best things about this recipe is how easily it can be adapted to your taste preferences or what you have on hand. Don’t hesitate to get creative!
- Flour Alternatives: While all-purpose flour provides excellent structure, some recipes opt for Bisquick baking mix instead. If using Bisquick, you might need to adjust other dry ingredients slightly as Bisquick contains leavening agents and salt.
- Cheese Varieties: The type of cheddar cheese can greatly influence the final flavor. Feel free to swap the mild yellow cheddar with sharp cheddar cheese for a bolder taste, pepper jack cheese for a spicy kick, or colby jack cheese for a milder, creamier melt. A blend of cheeses can also be delightful.
- Sausage Options: While ground Italian pork sausage is our top recommendation, you can certainly combine it with or entirely swap it for ground turkey sausage or chicken sausage for a leaner alternative. Ensure the ground meat is well-seasoned if you deviate from Italian sausage to maintain a flavorful base.
- Herb Variations: If fresh chives aren’t available, you can use a smaller amount of dried chives or finely minced fresh parsley for a different fresh note.
Storage Instructions
Proper storage ensures your delicious cream cheese sausage balls stay fresh and tasty for longer. Once cooled completely, place any leftover sausage balls in an airtight container. Store them in the refrigerator for up to 5 days. This makes them perfect for meal prepping or enjoying as a quick snack throughout the week.
How to Reheat Cream Cheese Sausage Balls
These savory meatballs reheat incredibly well, tasting almost as good as fresh! Here’s how to bring them back to their delicious best:
Reheating from Refrigerated
Remove the sausage balls from the refrigerator. Arrange them in a single layer in a baking pan. Cover the pan loosely with aluminum foil to prevent them from drying out. Reheat in a preheated oven at 350°F (175°C) for 10-12 minutes, or until they are heated through to the center. For an extra fresh touch, top with a sprinkle of fresh chives before serving immediately!
Reheating from Frozen
If reheating from frozen, there are a couple of methods:
Oven Method: Place the frozen sausage balls in a casserole dish. You can drizzle them with a little olive oil to help retain moisture. Cover the dish tightly with aluminum foil and bake in a preheated oven at 350ºF (175ºC) for 20-30 minutes, or until thoroughly heated. Remove the foil for the last 5 minutes if you prefer a slightly crisper exterior.
Slow Cooker Method: For a gentler reheat, or if you’re serving a larger batch and want to keep them warm, add the frozen meatballs to a slow cooker. Add 1-2 tablespoons of broth (chicken or vegetable) to prevent them from drying out. Cook them on low for 2-3 hours, stirring occasionally, until heated through. This method keeps them moist and tender.

More of our Favorite…
Irresistible Cheesy Appetizers
- Elegant Cheese Board
- Spicy Buffalo Chicken Nachos
- Gourmet Baked Brie with Fig Jam
- Sweet Cream Cheese Fruit Dip
- Decadent Cream Cheese Stuffed Mushrooms
Cream Cheese Sausage Balls
Linley Richter
Prep:
15
Cook:
25
Total:
40
12

Ingredients
Sausage Balls
- 4 oz. full-fat cream cheese, softened
- 1 lb. ground Italian sausage
- 1 cup shredded yellow cheddar cheese, + more for topping
- 1/2 cup plain bread crumbs
- 1/3 cup chives, finely minced (+more for topping)
- 2 tablespoons maple syrup
- 1/4 teaspoon salt
- 1/8 teaspoon ground pepper
- 1 teaspoon garlic powder
- 1 cup all-purpose flour
Garlic Sauce
- 2/3 cup 2% Greek yogurt
- 2 teaspoons hot sauce
- 1.5 teaspoons garlic paste
- 2 teaspoon fresh lemon juice
- pinch of salt
Instructions
-
Preheat your oven to 350ºF (175ºC) and prepare a baking sheet by lining it with parchment paper or spraying it with non-stick cooking spray.
-
Place the softened cream cheese into a large mixing bowl. Use an electric mixer to cream the cream cheese until it is smooth and free of lumps.
-
Add the ground Italian sausage, shredded yellow cheddar cheese, plain bread crumbs, fresh chives, maple syrup, salt, ground pepper, and garlic powder to the bowl. Use the electric mixer to thoroughly combine all these ingredients.
-
Gradually add the all-purpose flour to the sausage mixture, mixing on low speed until it is just combined and evenly incorporated.
-
Using a 2-tablespoon cookie scoop, portion the sausage mixture and roll each portion into a small, uniform ball between your palms. Arrange the sausage balls on the prepared baking sheet, ensuring they are spaced apart.
-
Place the baking sheet into the preheated oven and bake for 25 minutes, or until the sausage balls are cooked through and lightly golden.
-
While the sausage balls are baking, prepare the garlic sauce: In a medium bowl, combine Greek yogurt, hot sauce, garlic paste, fresh lemon juice, and a pinch of salt. Mix until smooth and well combined. Set aside.
-
After 25 minutes, remove the sausage balls from the oven. Sprinkle additional shredded cheddar cheese over each ball. Return them to the oven for an additional 2-3 minutes, just until the cheese is melted and bubbly.
-
Remove from the oven, garnish with fresh chives, and serve immediately with the zesty garlic sauce.
Nutrition
Calories:
315 kcal
,
Carbohydrates:
23 g
,
Protein:
14 g
,
Fat:
18 g
,
Fiber:
1 g
,
Sugar:
5 g
Nutrition information is automatically calculated, so should only be used as an approximation.
Love this recipe? Leave a comment below!
Don’t forget to tag your posts on social media with the hashtag #cheeseknees, we’d love to see what you’re up to!
These Cream Cheese Sausage Balls are more than just an appetizer; they are a guaranteed hit that brings joy and deliciousness to any occasion. With their rich, savory flavor, cheesy goodness, and the perfect zesty dipping sauce, they are incredibly easy to make and even easier to devour. Whether you’re hosting a grand party or enjoying a cozy night in, this recipe promises satisfaction. So, roll up your sleeves, gather your ingredients, and get ready to create an unforgettable snack that will have everyone reaching for more!