
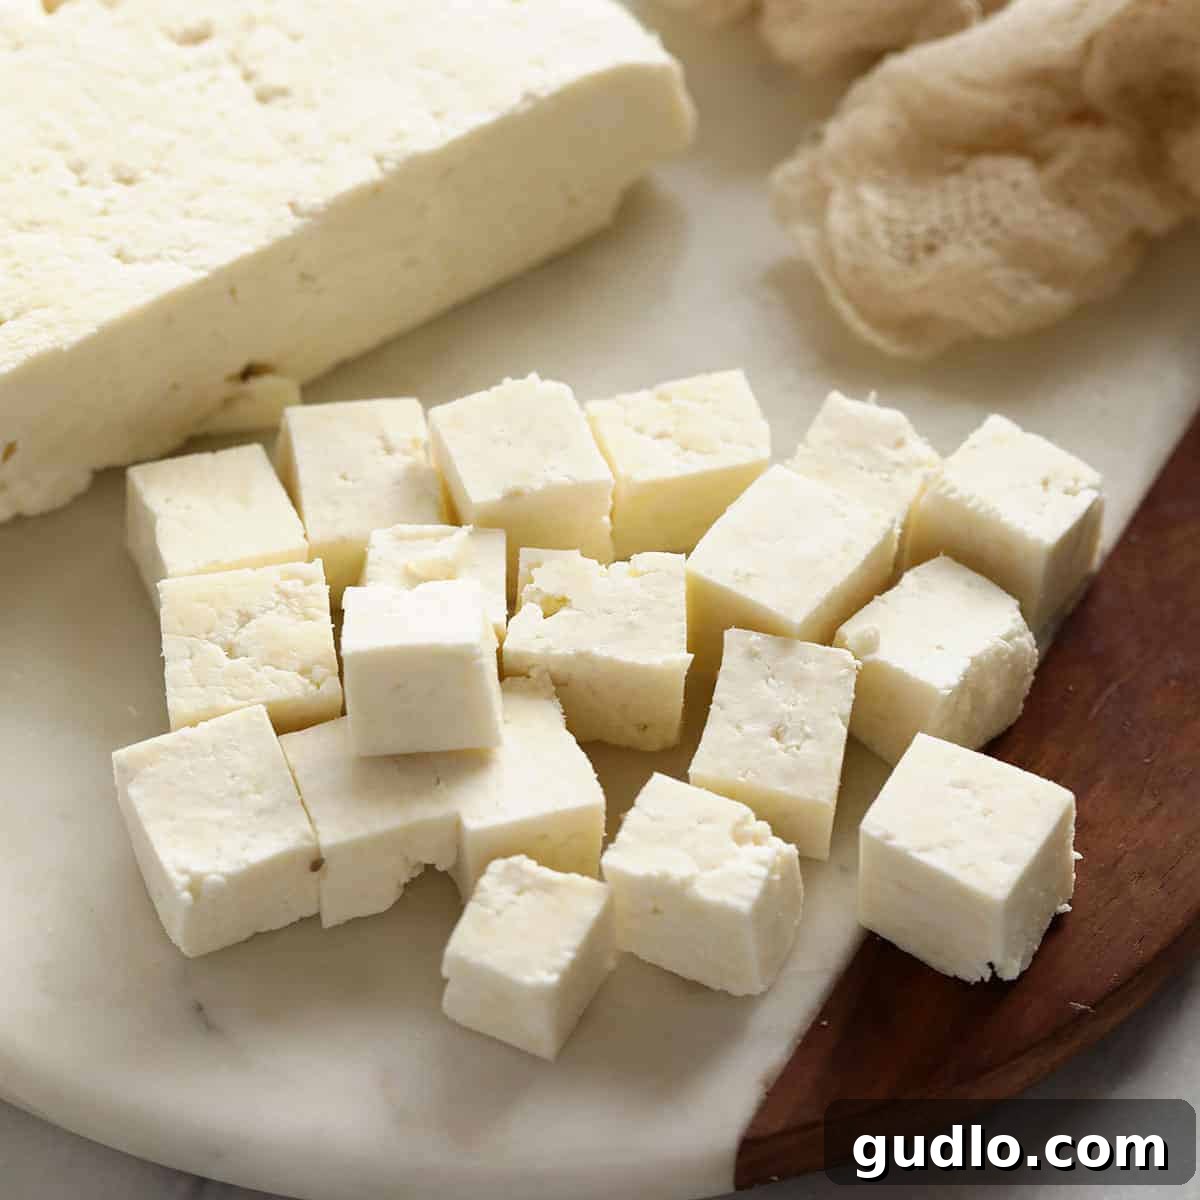
Embark on a culinary journey to create fresh, delectable paneer right in your own kitchen! This detailed guide unveils the simple secrets to making homemade paneer, a versatile Indian cheese that’s surprisingly easy to prepare. In just a few hours, you can craft perfectly soft, non-melting cheese cubes, ready to elevate your favorite dishes. Say goodbye to store-bought options and hello to the unparalleled taste and texture of truly fresh paneer.
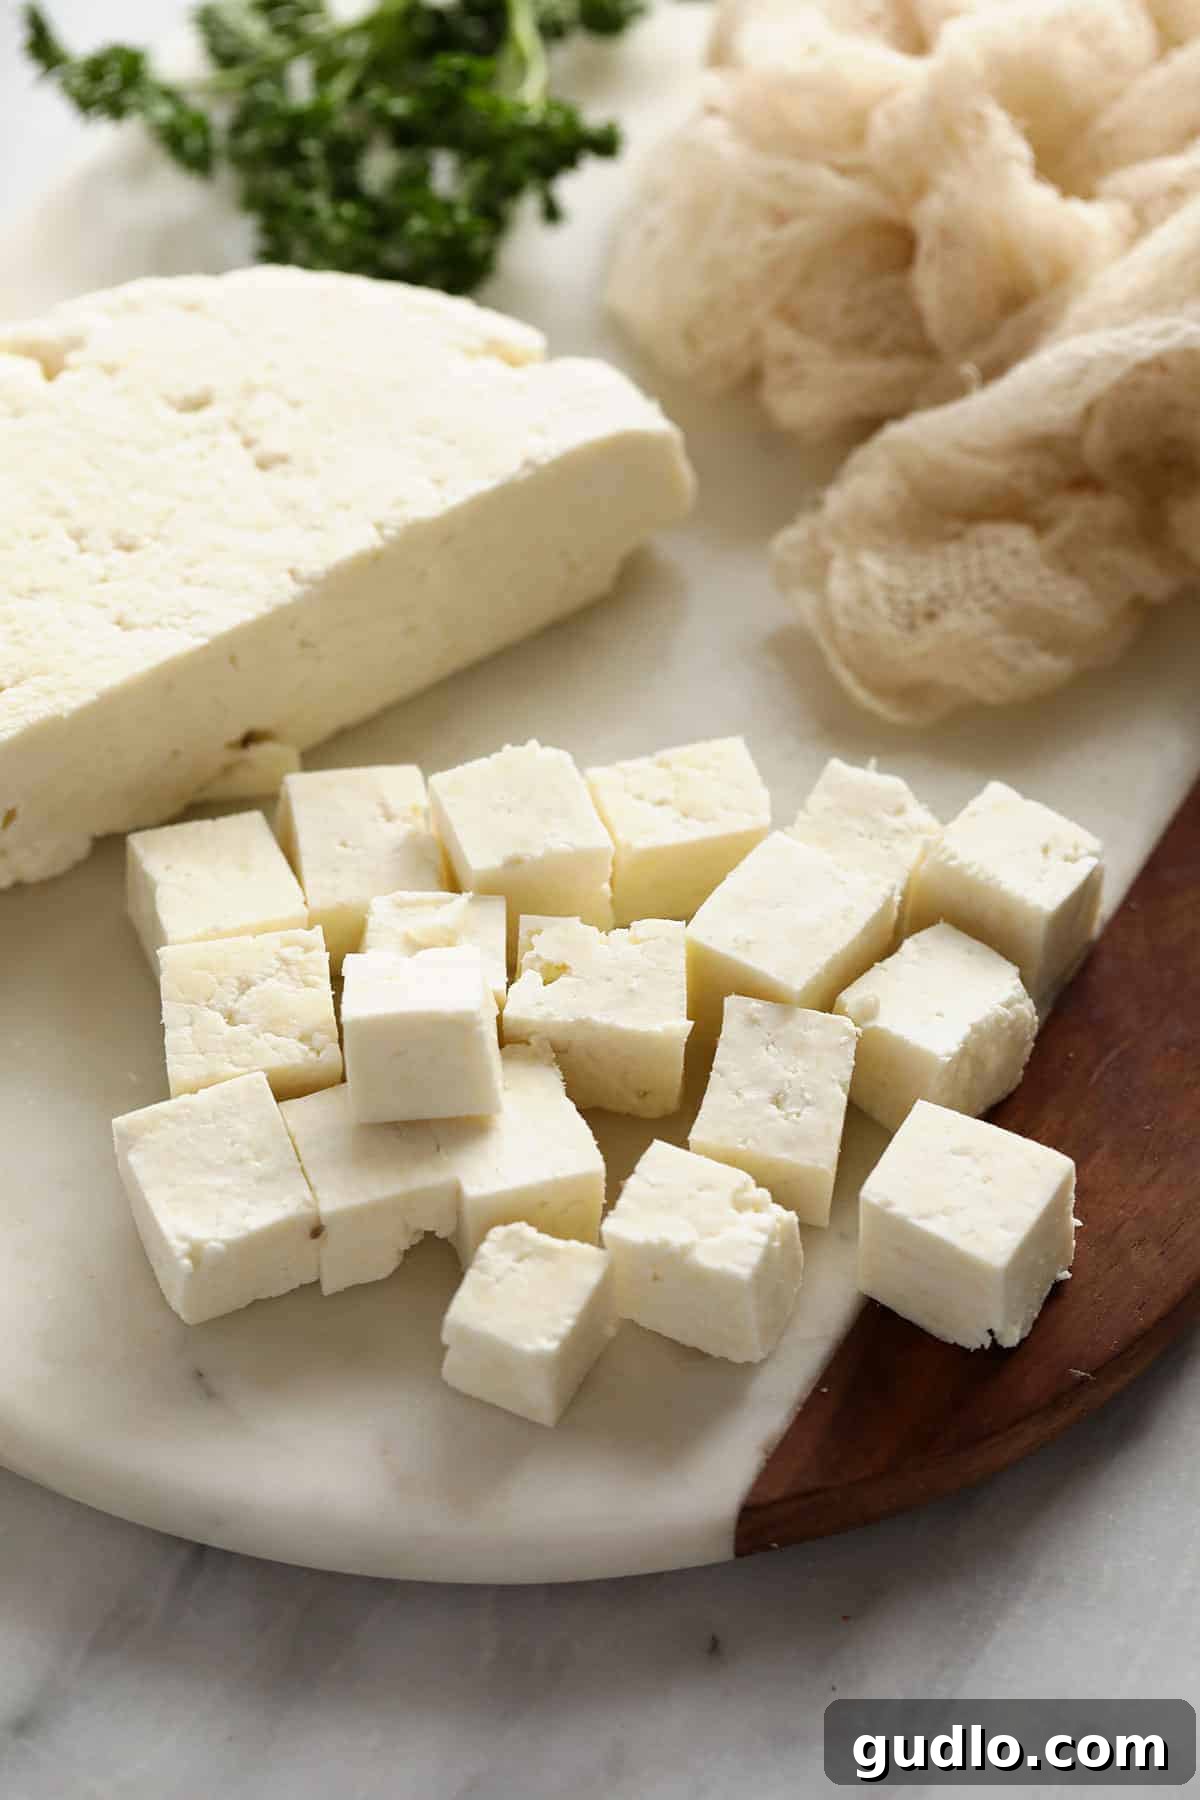
What Exactly is Paneer?
If you’ve ever savored the rich, creamy texture of cheese cubes nestled in a vibrant Indian curry or enjoyed a flavorful vegetarian stir-fry, it’s highly probable you’ve experienced the delight of paneer cheese. Paneer is a unique fresh cheese, celebrated globally for its mild flavor and distinctive non-melting quality, making it a staple in South Asian cuisine, particularly in India.
Paneer is fundamentally a direct-acid cheese, a category distinguished by its straightforward production method. Unlike many aged cheeses that rely on cultures and rennet for coagulation, paneer is made by introducing an acidic agent—such as lemon juice or vinegar—to warm milk. This acid causes the milk proteins to coagulate, forming solid curds that are then separated from the liquid whey. These curds are pressed into a firm, cohesive mass, yielding the fresh cheese we know as paneer.
The practice of making direct-acid cheese is ancient, with its origins tracing back to the earliest forms of cheesemaking. This simple yet effective technique has given rise to a variety of fresh cheeses across different cultures and continents. These cheeses are typically consumed fresh, offering a pure dairy flavor and a texture that ranges from soft and crumbly to firm and sliceable.
Beyond paneer, a few other well-known examples of direct-acid cheeses include:
- Queso Blanco: A popular Latin American cheese, often used in savory dishes and known for its similar non-melting property.
- Ricotta: An Italian whey cheese, traditionally made from the whey leftover from other cheese productions, often enhanced with a little acid to precipitate more protein.
- Mascarpone: A luxurious Italian cream cheese, thickened by adding citric acid or tartaric acid to cream, resulting in a rich, spreadable texture.
Understanding paneer as a direct-acid cheese helps clarify its unique culinary characteristics, especially its ability to hold its shape beautifully even when subjected to high heat, a feature that makes it exceptionally versatile in cooking.
Essential Facts About Paneer: What Makes It Special?
What is the origin and cultural significance of paneer?
Paneer holds immense importance in Northern Indian cuisine, where a predominantly vegetarian diet is common, and dairy products serve as a primary source of protein and essential nutrients. Its exact origin is debated, with theories pointing to Persian or Afghan influences, or even independent development within the Indian subcontinent. Regardless, paneer has been deeply integrated into Indian culinary traditions for centuries, playing a central role in celebratory feasts, everyday meals, and religious offerings. It’s not just a food item; it’s a cultural cornerstone, symbolizing purity and sustenance, especially in regions like Punjab, Uttar Pradesh, and Rajasthan.
What does paneer taste like?
Since paneer is a mild, unsalted cheese, it doesn’t possess a strong, assertive flavor of its own. Instead, its beauty lies in its neutrality and incredible absorbency. It acts like a culinary sponge, readily soaking up the rich, bold, and aromatic flavors of the spices, gravies, and marinades it is cooked with. This characteristic makes it a perfect canvas for complex flavor profiles found in dishes like Palak Paneer (spinach and paneer), Matar Paneer (peas and paneer), or Shahi Paneer (royal paneer curry).
Does paneer melt when heated?
One of paneer’s most defining and fascinating properties is its resistance to melting. Unlike many common cheeses such as cheddar or mozzarella, paneer will not melt into a gooey liquid when heated. This is due to its production process: the milk proteins are coagulated by direct acid, which creates a tightly bound structure with a lower calcium content and a different pH level compared to melting cheeses. This structural difference means paneer retains its shape and firm texture even at high temperatures, making it ideal for grilling, frying, and simmering in curries without disintegrating.
Can you fry or grill paneer?
Absolutely! Its non-melting nature makes paneer exceptionally well-suited for various cooking methods that involve direct heat. When pan-fried, paneer cubes develop a wonderfully crispy, golden-brown exterior while remaining soft and tender on the inside. This crispy texture adds a delightful contrast to many dishes. Moreover, paneer can be threaded onto skewers and grilled over an open flame, imparting a delicious smoky element to your meal. Its ability to hold shape and absorb marinades makes it a fantastic, high-protein alternative to meat in kebabs and other grilled vegetarian preparations.
What is the texture of paneer?
The texture of homemade paneer is often described as firm yet tender, moist, and slightly crumbly, though it can vary slightly depending on how much it’s pressed. It’s frequently compared to firm tofu due to its dense, spongy consistency, which allows it to absorb liquids without falling apart. This textural similarity also means that paneer can often be used as a direct replacement for tofu in many savory dishes, offering a dairy-based alternative with a subtly different mouthfeel and nutritional profile. Properly made paneer should be smooth, uniformly white, and free from excessive dryness or rubberiness.
Essential Tools for Homemade Paneer
Making paneer doesn’t require specialized, expensive equipment. Most items you likely already have in your kitchen, making this a truly accessible DIY project. Having the right tools, however, ensures a smoother process and a more consistent result.
Equipment Needed:
- Cheesecloth: Essential for straining the curds. Choose a fine-mesh, unbleached variety for best results. You’ll need a large enough piece to line your colander and gather into a bag.
- Digital Kitchen Thermometer: Crucial for accurately monitoring milk temperature. Precision here ensures proper curd formation.
- 2 Gallon Heavy-Bottom Stainless Steel Pot: A large pot is needed to prevent milk from boiling over, and a heavy bottom helps distribute heat evenly and prevents scorching.
- Stainless Steel or Plastic Whisk/Spatula: For stirring the milk to prevent scorching and gently combining the acid.
- Stainless Steel or Plastic Colander: To hold the cheesecloth and curds for draining.
- Ladle: Useful for gently pouring the curds and whey into the colander, minimizing mess.
- Deep Pot or Bowl: To catch the whey when the paneer is hanging.
- Optional: Cheese Press or Heavy Weight: For achieving a denser, more uniformly shaped block of paneer. This could be a stack of heavy cans, books, or a dedicated cheese press.
Simple Ingredients for Homemade Paneer
The beauty of paneer lies in its simplicity, requiring only two main ingredients. The quality of these ingredients significantly impacts the final taste and texture of your homemade cheese.
Understanding Your Acid: Vinegar Substitutes
This recipe primarily calls for white vinegar (typically 5% acidity), which acts as the coagulant to separate the milk into curds and whey. White vinegar is preferred for its neutral flavor, ensuring your paneer remains mild. However, you have excellent alternatives:
- Fresh Lemon Juice: For every 10 tablespoons of white vinegar, you can substitute with approximately ½ cup (120ml) of freshly squeezed lemon juice. Lemon juice imparts a very subtle tang and fresh aroma, which some prefer. Ensure it’s fresh for the best results.
- Citric Acid: If you prefer a more consistent and potent coagulant, a small amount of citric acid powder dissolved in water can be used. Typically, 1-2 teaspoons dissolved in ½ cup of warm water is sufficient for 1 gallon of milk, but always follow package instructions.
Experiment to find your preferred acid, noting that stronger acids may yield a slightly firmer paneer.
Ingredients:
- 1 Gallon Whole Milk: For the best, creamiest paneer, use full-fat whole milk. Avoid ultra-pasteurized (UHT) milk if possible, as it sometimes struggles to form firm curds due to altered protein structures. Fresh, regular pasteurized whole milk is ideal.
- 10 Tbsp White Vinegar, 5% acidity (or equivalent lemon juice/citric acid solution)
Step-by-Step Guide: Crafting Your Own Homemade Paneer
Making paneer is a truly rewarding experience, especially for beginners in cheesemaking. The process is straightforward, requiring patience and attention to a few key temperatures. Follow these simple steps to transform milk into delicious, fresh paneer.
Step 1: Warm the Milk and Introduce the Acid
Your journey begins by pouring one gallon of whole milk into a large, heavy-bottomed stainless steel pot. A heavy bottom is crucial as it helps distribute heat evenly, significantly reducing the risk of the milk scorching and sticking to the bottom. Place the pot over medium-high heat. As the milk warms, stir it frequently with a whisk or spatula. This constant stirring is vital to prevent the milk proteins from settling and burning, which can impart an undesirable taste to your paneer.
Carefully monitor the milk’s temperature with your digital kitchen thermometer. You want to bring the milk to a precise 195°F (90°C). As it approaches this temperature, you’ll notice the milk becoming frothy and beginning to gently simmer around the edges. Once the target temperature is reached, immediately remove the pot from the heat.
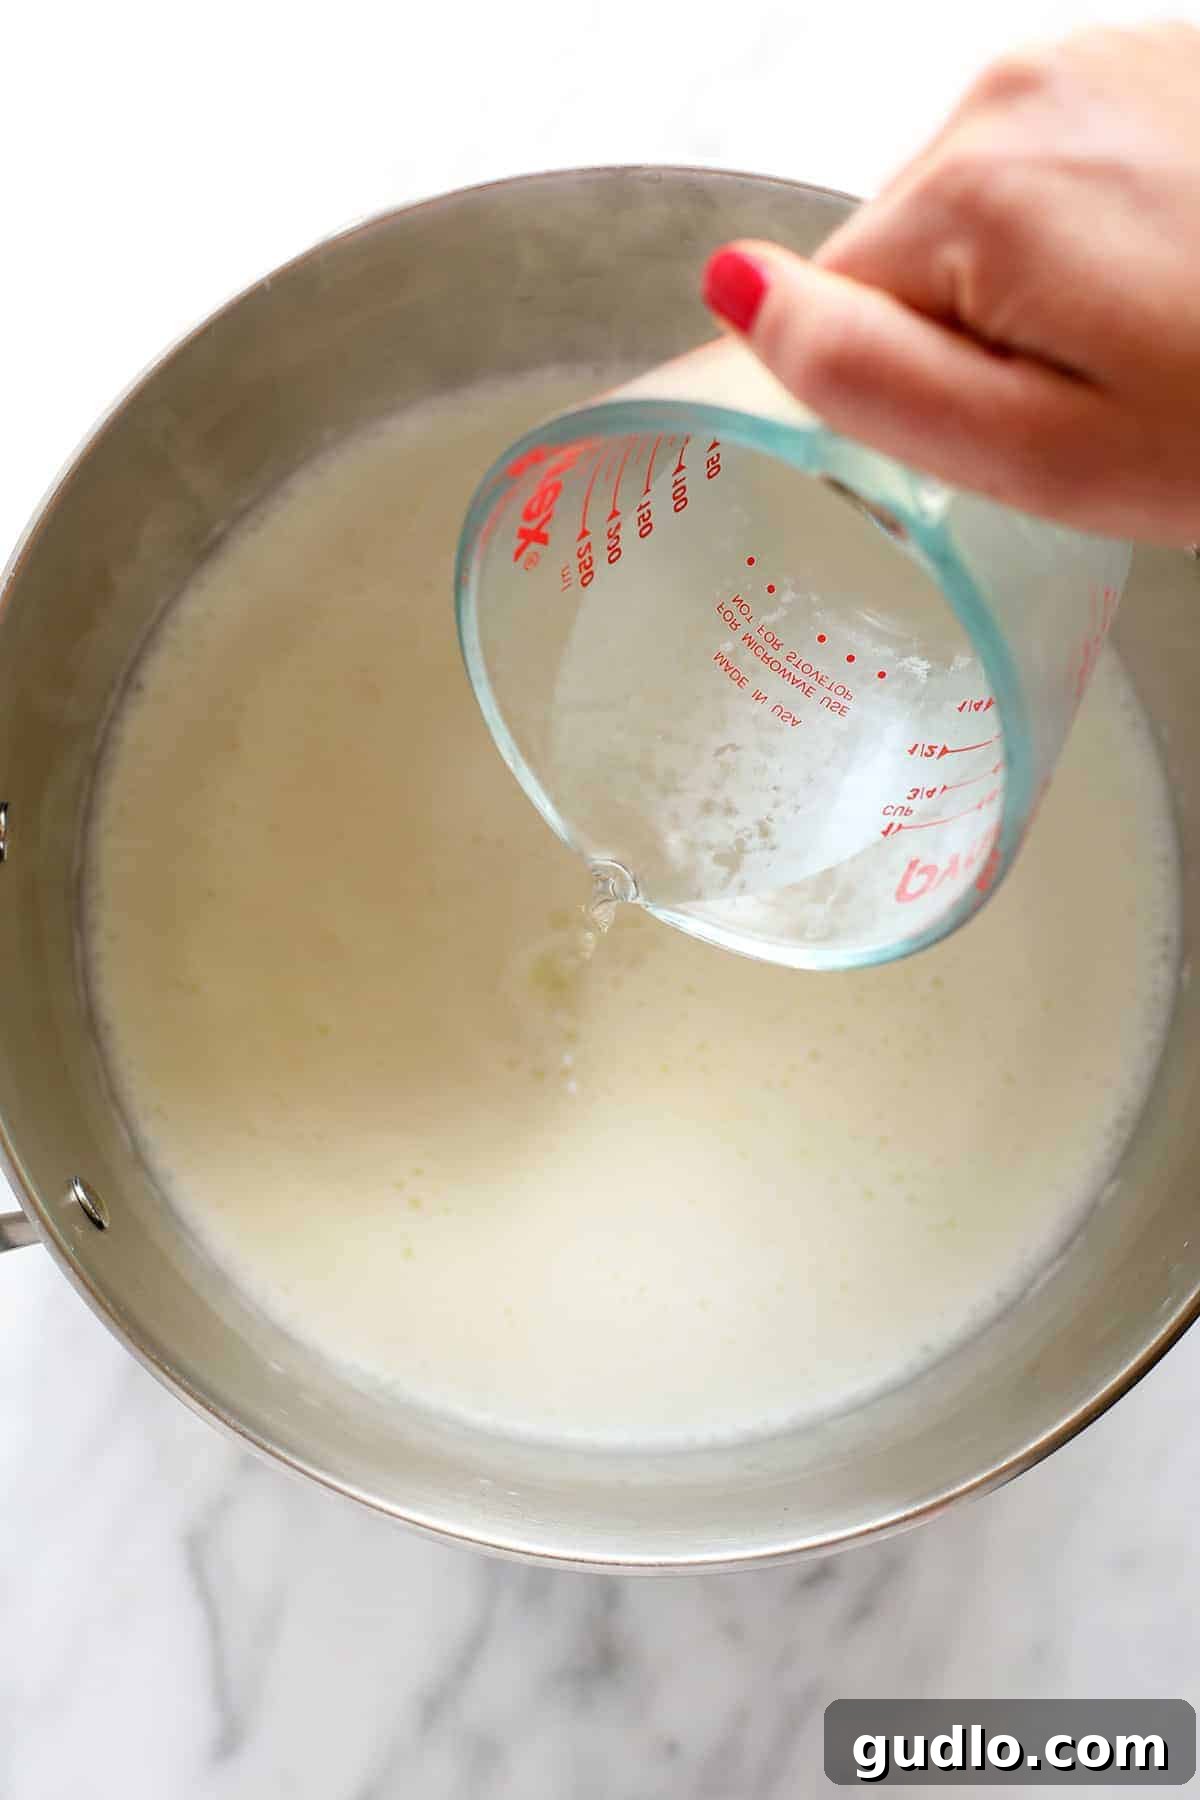
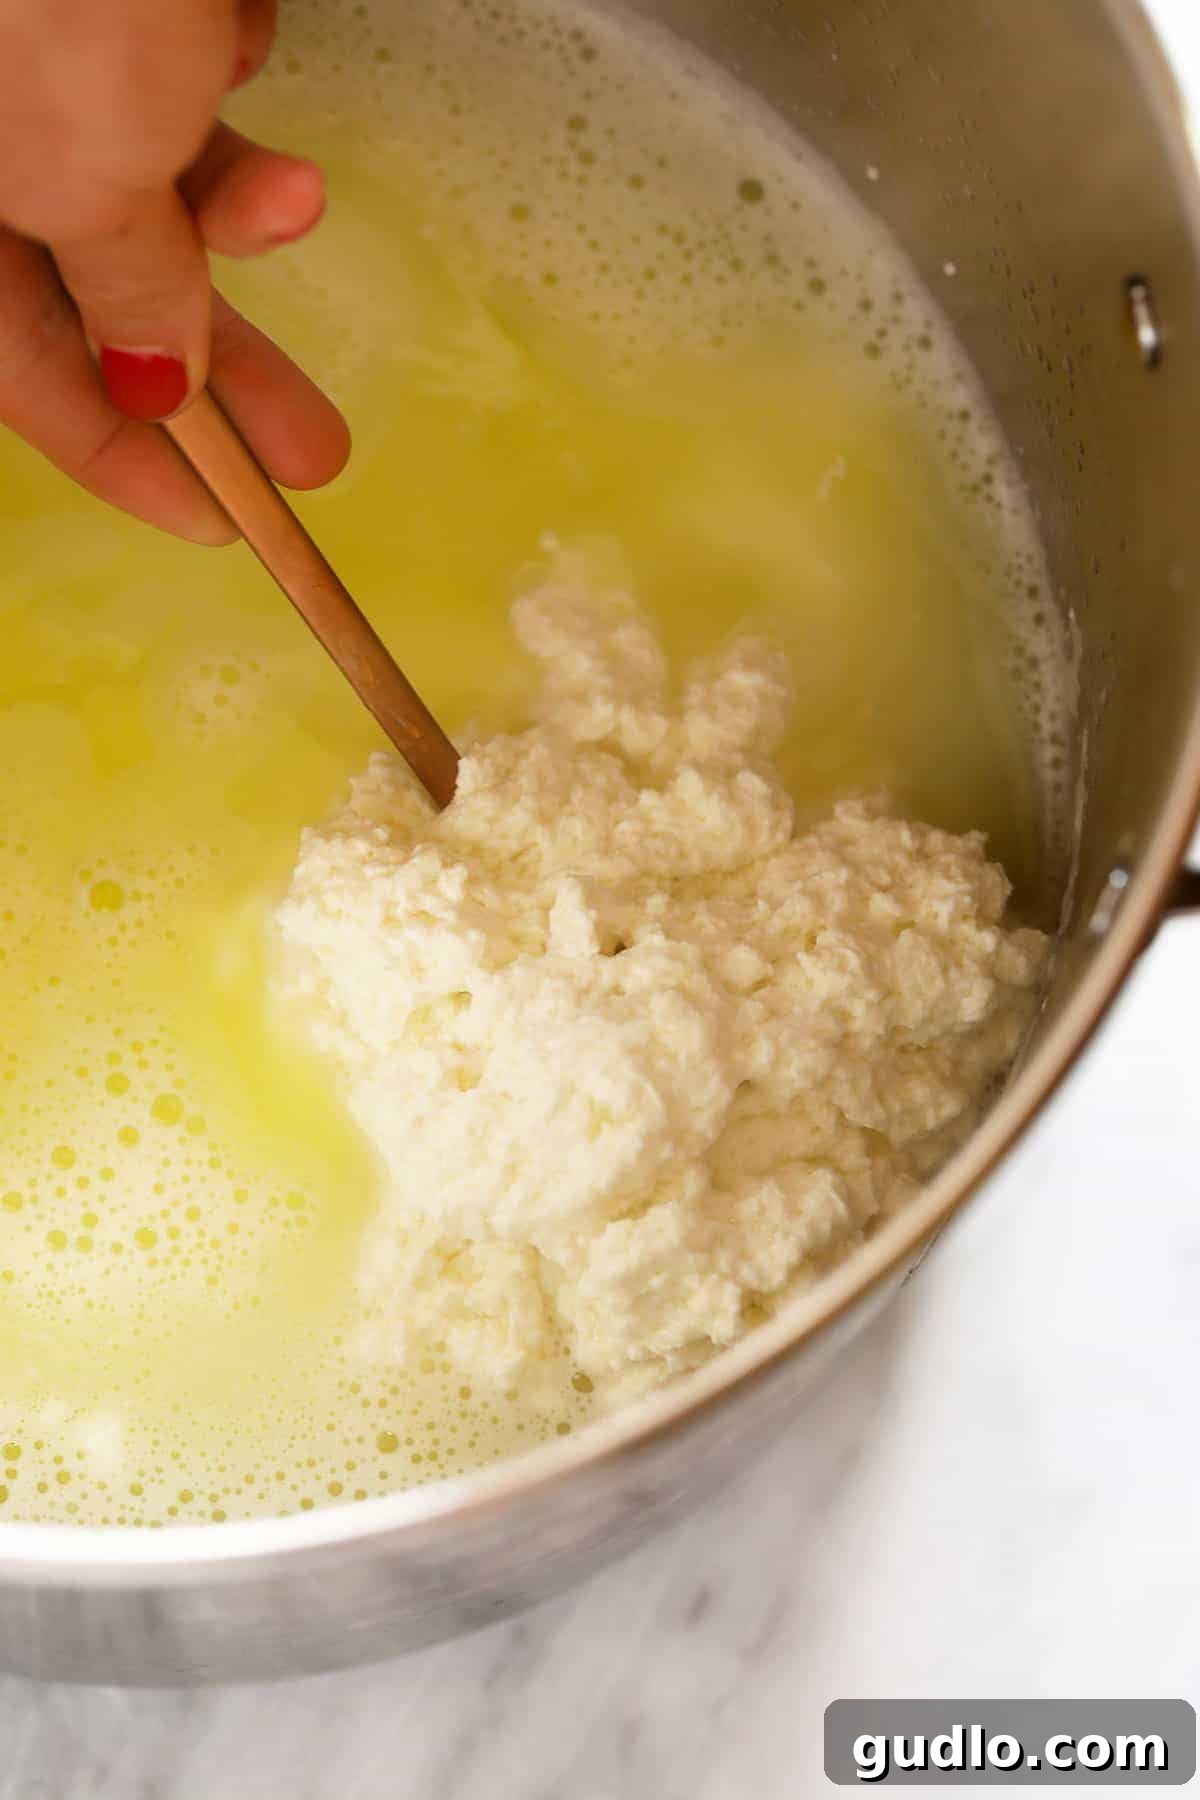
Now, it’s time to add the acid. Pour the 10 tablespoons of white vinegar (or your chosen substitute) into the hot milk all at once. Begin to stir the milk and vinegar together very slowly and gently, for approximately one minute. Within moments, you should observe a magical transformation: the milk will begin to separate, forming distinct white curds that clump together, leaving behind a greenish-yellow, watery liquid known as whey. This separation is the goal.
Troubleshooting Tip: If, after one minute of stirring, the curds have not clearly formed and separated from the whey, don’t panic! This simply means the milk needed a little more acid to fully coagulate. Add an additional 1-2 tablespoons of vinegar (or lemon juice) to the milk, stir gently for another 30 seconds, and you should see the curds come together.
Step 2: Cool the Curds and Initial Drain
Once the curds have clearly formed and are separated from the whey, carefully move the pot containing the curds and whey to your sink. Gently run a slow, steady stream of cool tap water into the curds. The purpose of this step is twofold: first, it rapidly cools the curds, preventing them from cooking further and becoming rubbery; second, it helps wash away any excess acidity from the vinegar, contributing to a sweeter, milder-tasting paneer. Be mindful not to let the water flow too strongly, as this could cause you to lose precious curds down the drain.
Continue running the cool water and stirring the curds gently until their temperature drops to approximately 115°F (46°C). This cooling period is important for achieving the desired texture in your final paneer block.
Step 3: Strain the Curds
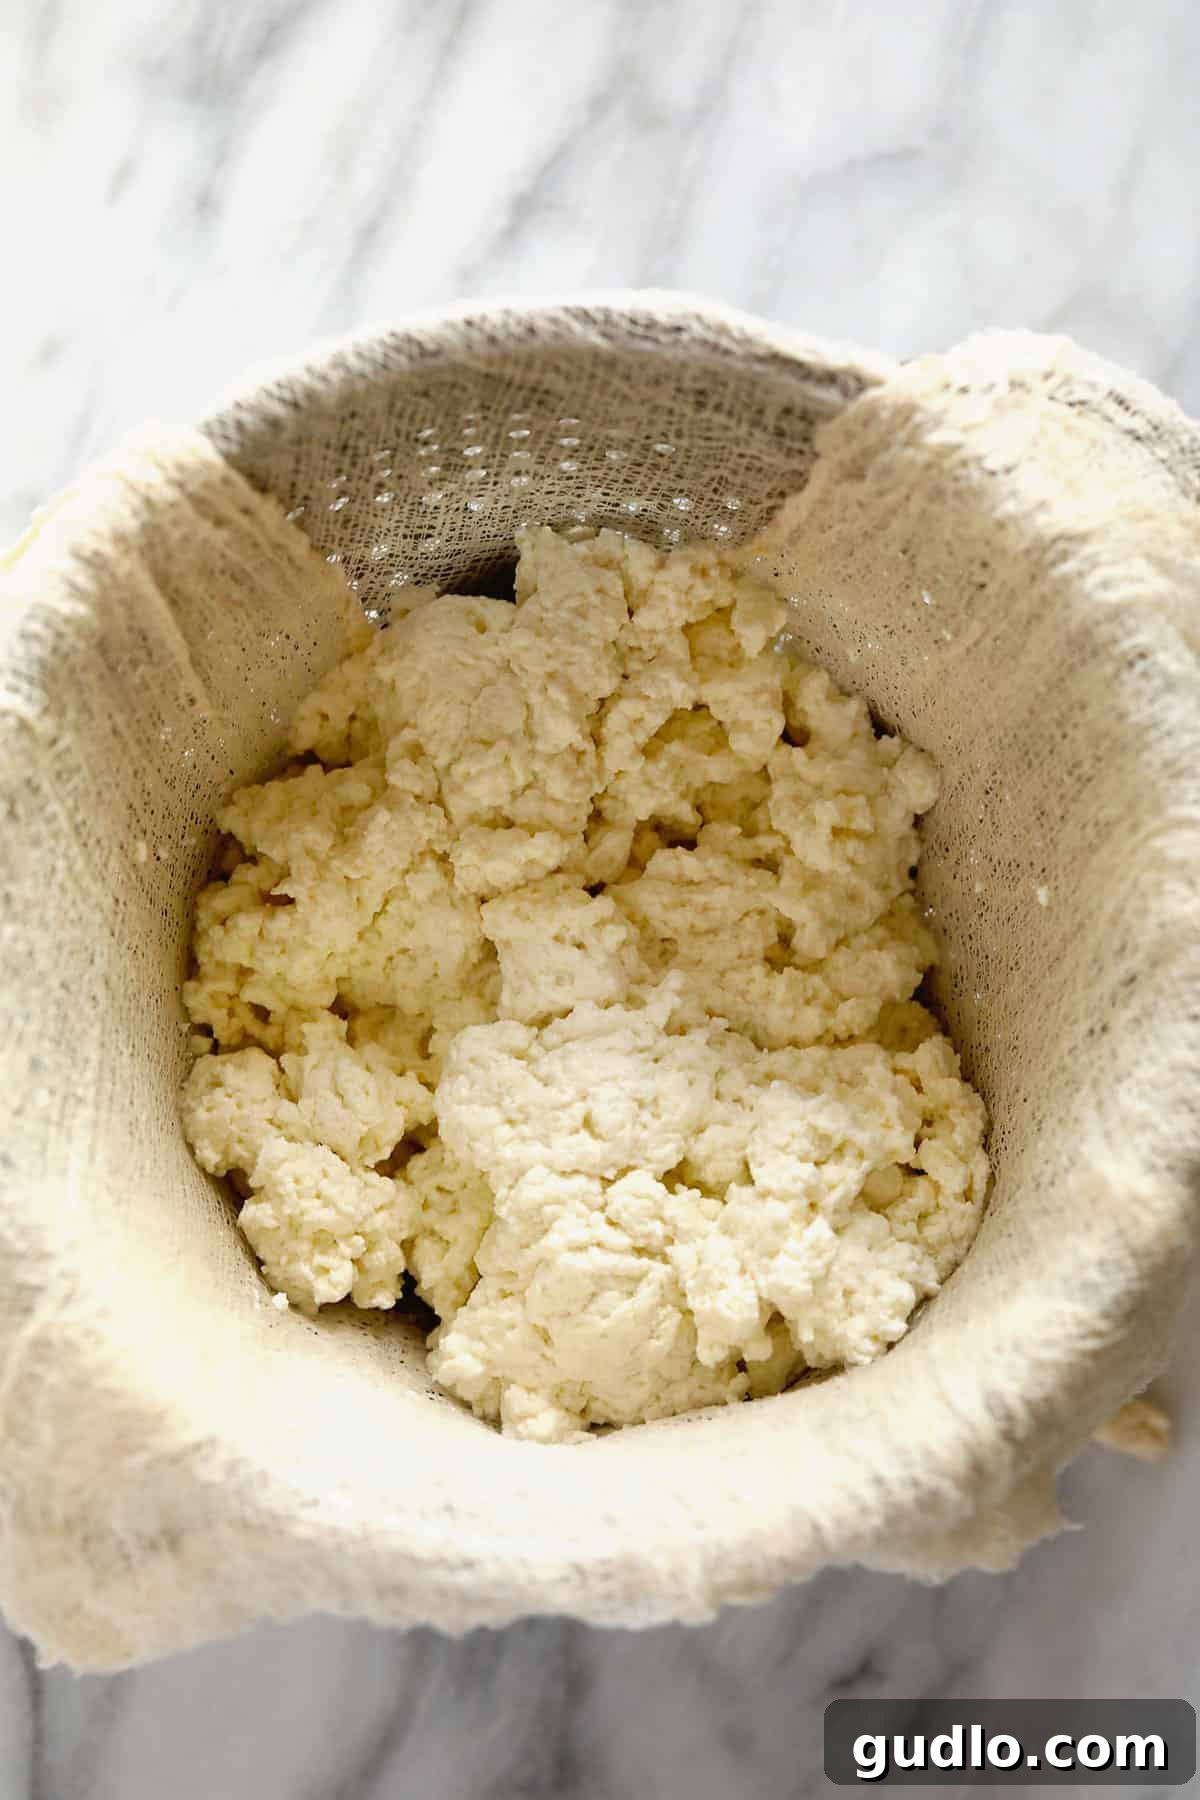
With your curds cooled, it’s time for the straining process. Retrieve your colander that you lined with the clean, rinsed cheesecloth (ensure it’s damp, as this prevents curds from sticking). Carefully pour the entire contents of the pot—curds and whey—into the cheesecloth-lined colander. The cheesecloth will capture all the solid curds, allowing the liquid whey to drain through. Let the curds drain freely in the colander for just about 1 minute. This initial draining helps remove the bulk of the whey quickly.
Step 4: Twist and Hang the Paneer for Further Drainage
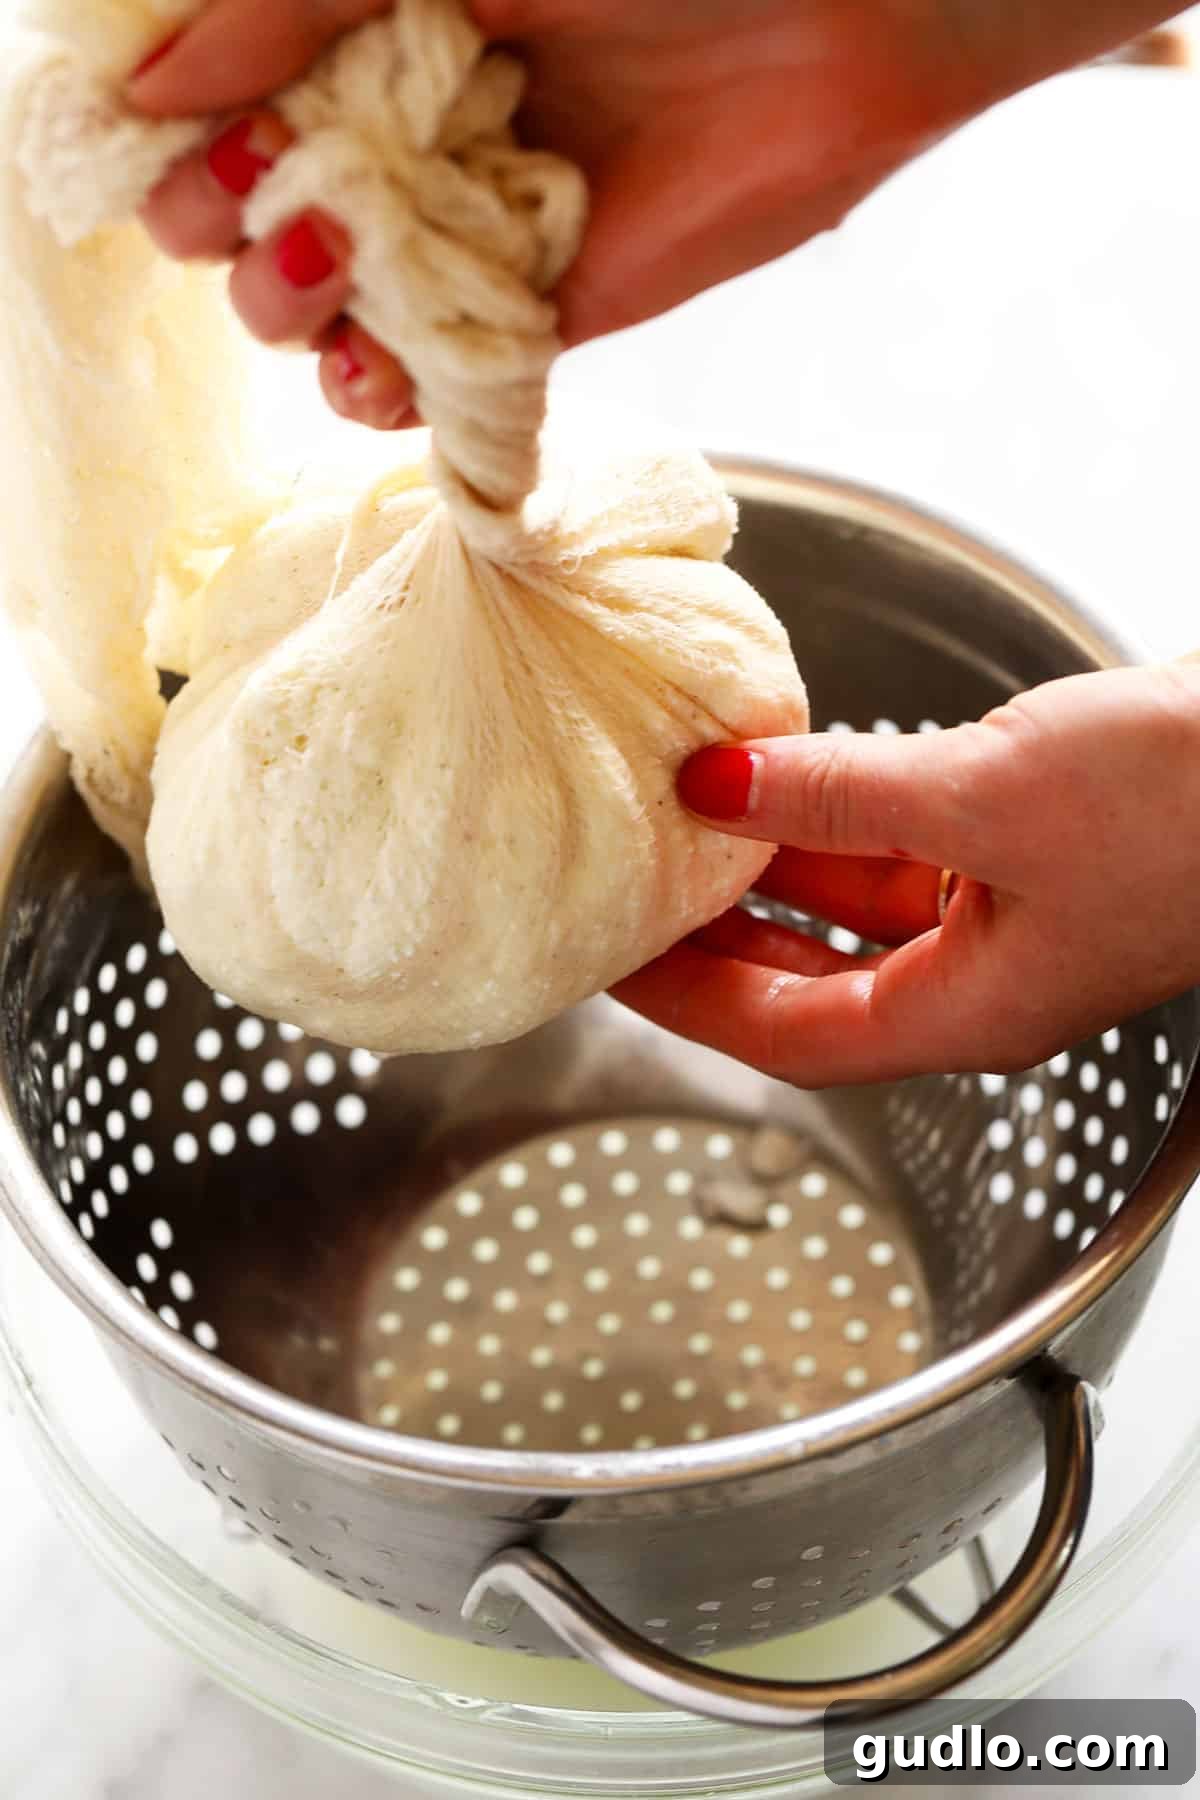
Once the initial minute of draining is complete and most of the free-flowing whey has passed through, it’s time to gather and gently press your paneer. Carefully gather all four corners of the cheesecloth, bringing them together to form a tight bundle around the curds. Loosely tie these corners together, creating a makeshift bag. Now, with the bundle secured, begin to gently twist the cheesecloth just above the mass of curds. This twisting action applies gentle pressure, coaxing out more residual whey from the cheese.
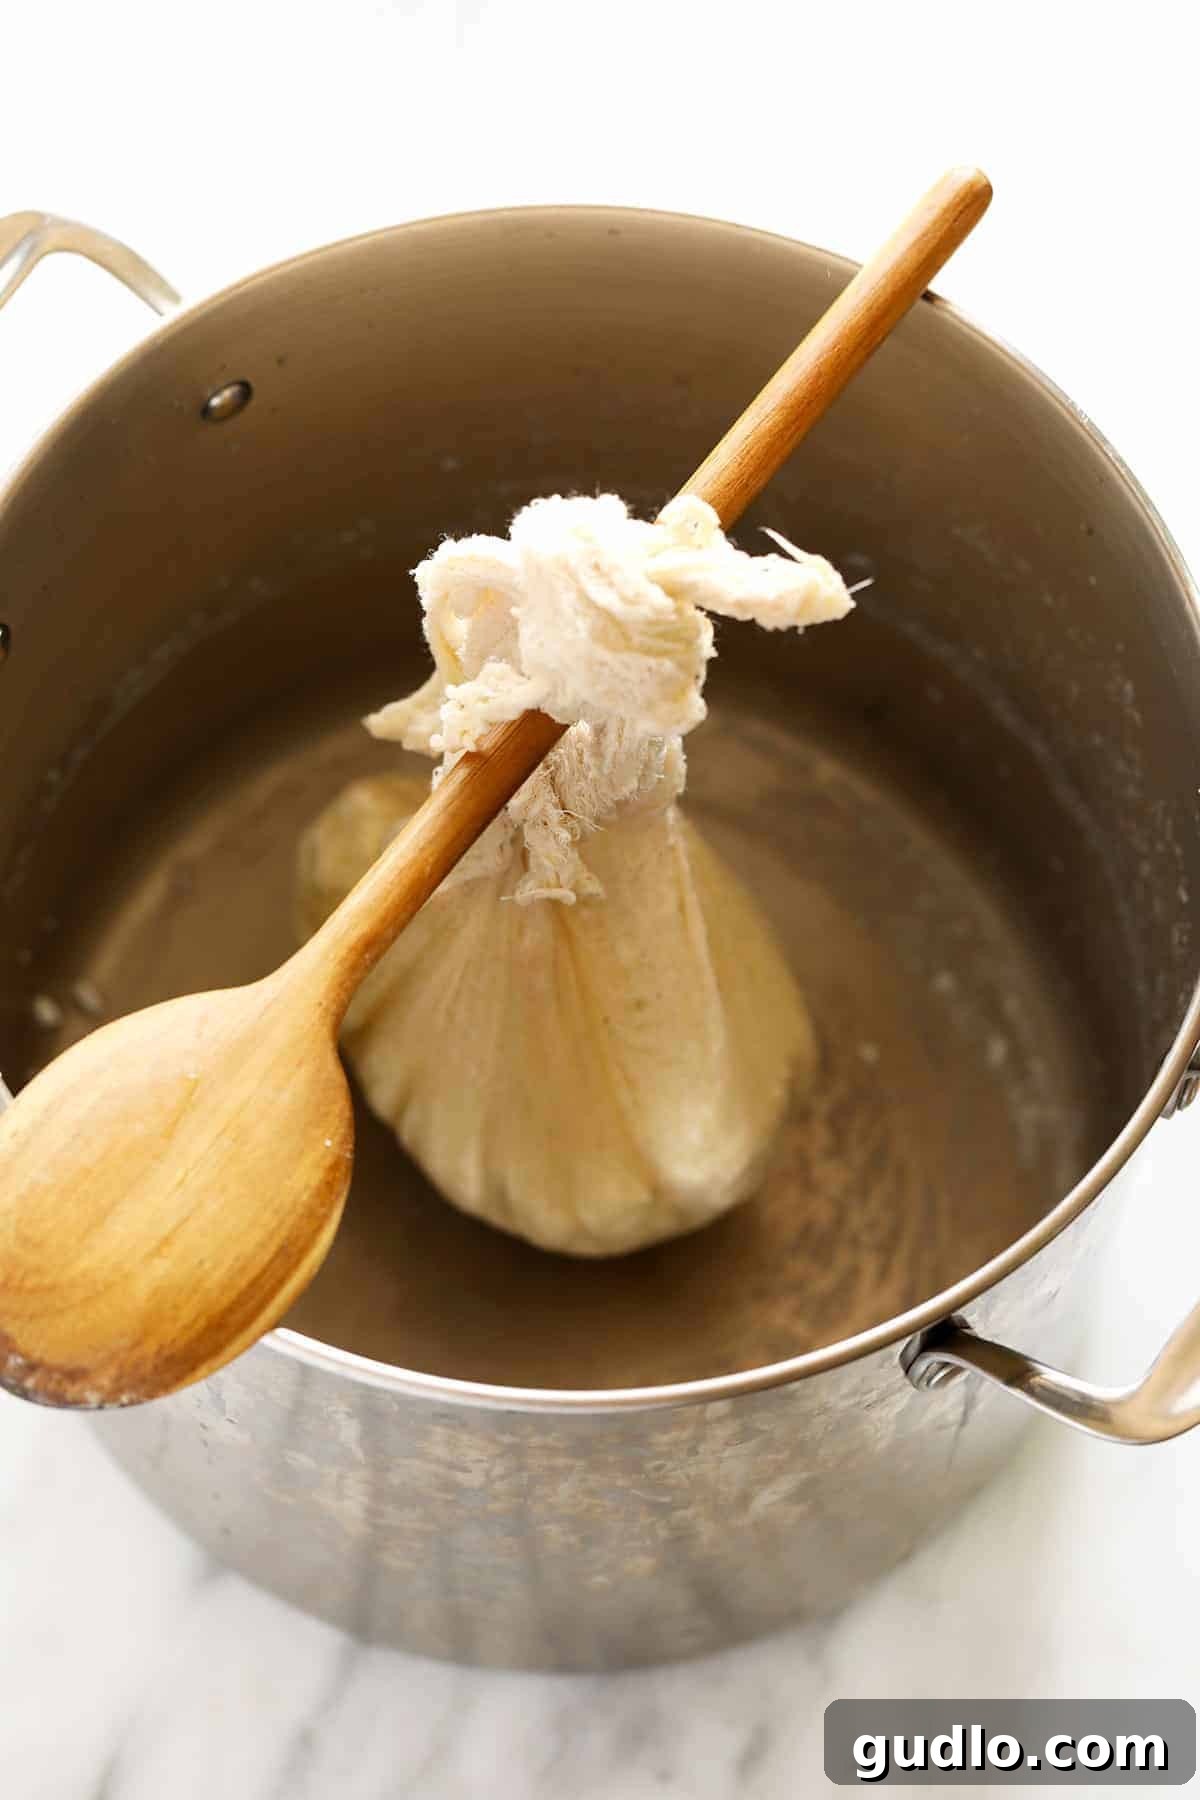
After a minute or two of gentle twisting, untie the knot, flip the mass of cheese over within the cloth, and re-tie the corners. The next crucial step is to hang this cheesecloth bag. You can suspend it from the neck of your kitchen sink faucet or, more elegantly, from the handle of a wooden spoon placed across the top of a deep pot or bowl. This setup allows any remaining whey to slowly drip away, ensuring your paneer continues to firm up. Let the cheese hang and drain for approximately 1 hour. This duration is sufficient for a moderately firm paneer, perfect for most culinary applications.
Step 5: Optional – Pressing Your Paneer for Firmer Texture
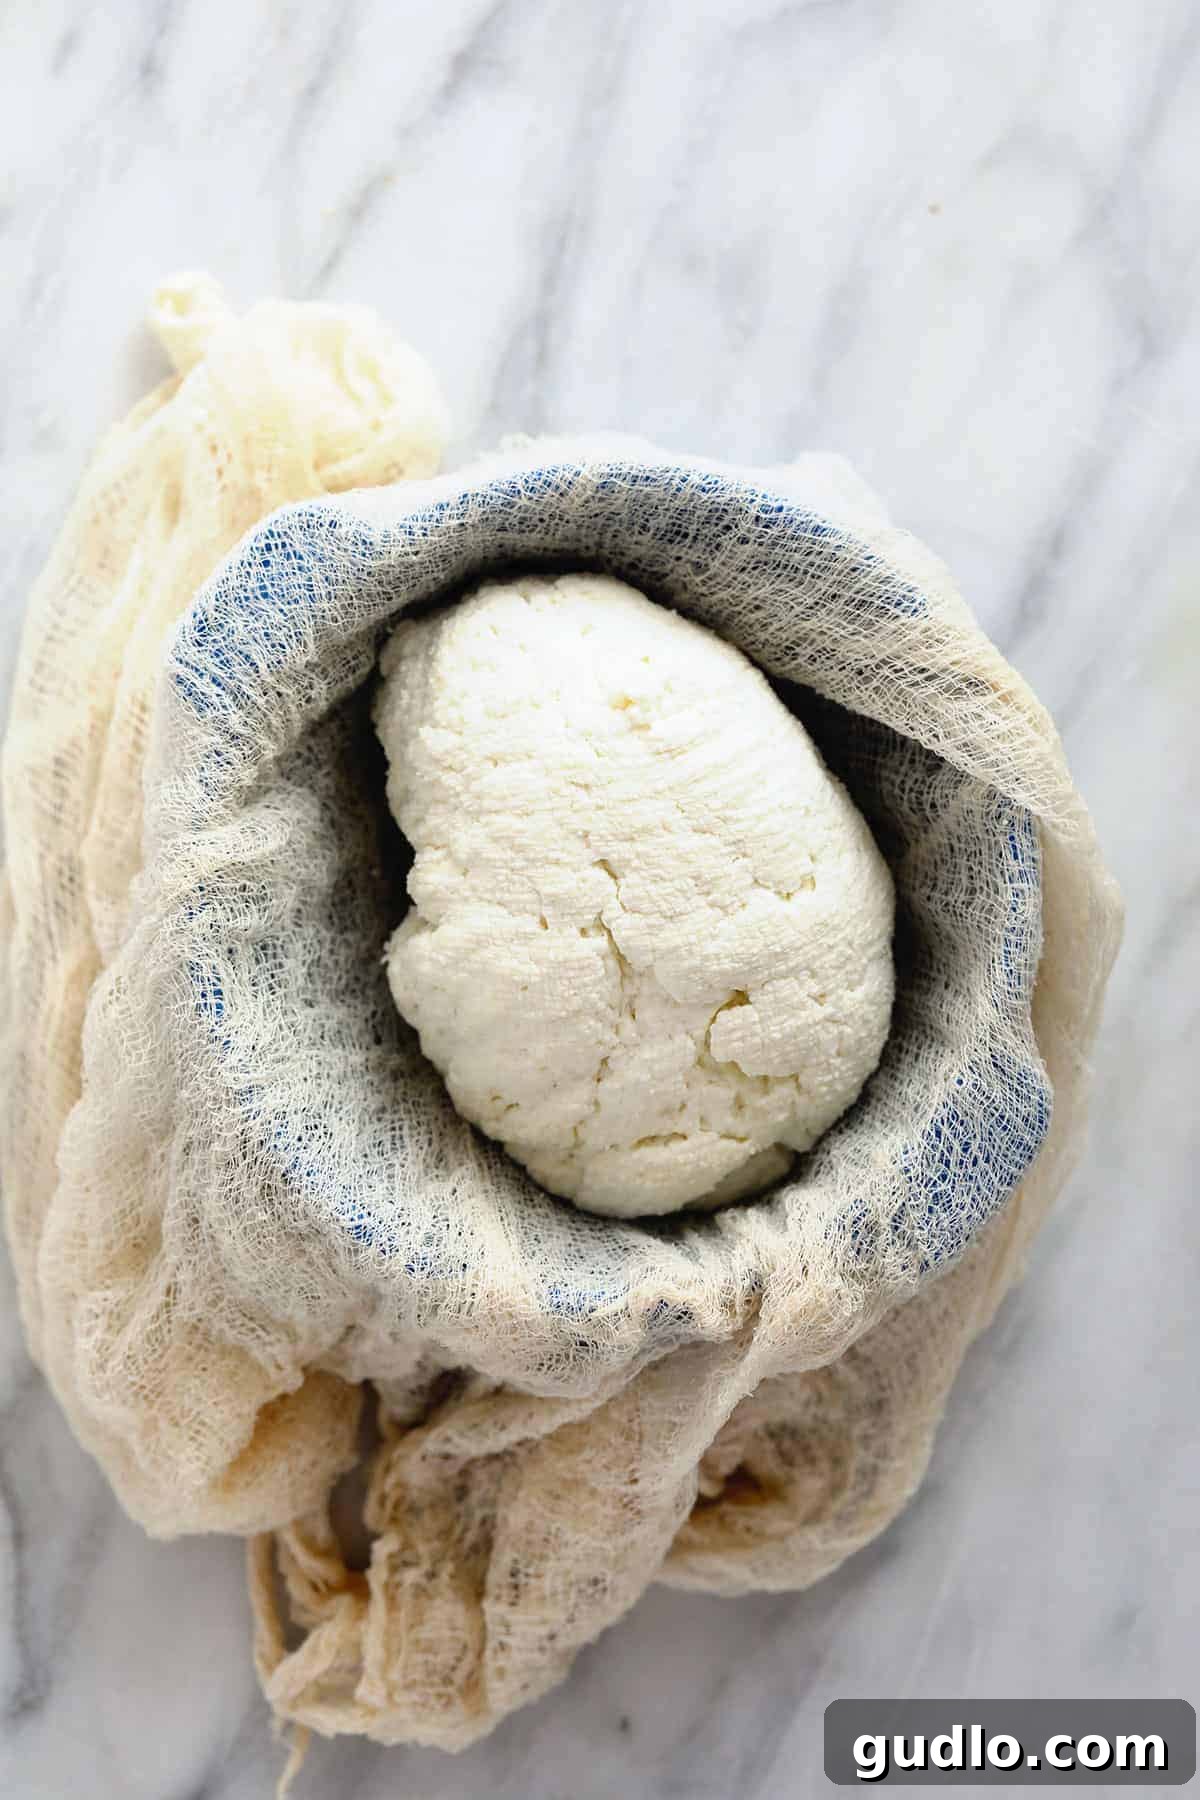
For a beautiful, free-form block of paneer with a slightly softer consistency, the hand-twisting and hanging method described above is often sufficient. The cheesecloth cradles the fresh curd, allowing you to gently mold it into a rustic shape as excess whey drains. This yields a paneer that is wonderfully moist and tender, ideal for crumbling into dishes or for curries where a softer texture is desired.
However, if you desire a denser, firmer, and more uniformly shaped block of paneer – perfect for slicing, frying, or grilling – you can opt for an additional pressing step. After the initial hanging and draining for one hour, gently unwrap the paneer from the cheesecloth. Reshape it within a fresh piece of cheesecloth into a square or rectangular block. Then, place the cloth-wrapped paneer between two flat dinner plates or cutting boards. On top of the upper plate, place a heavy weight – ideally around 5-10 pounds (2-4.5 kg). You can use a stack of heavy cans, books, or even a dedicated cheese press if you have one. Allow the paneer to press for an additional 2 hours. This consistent pressure expels more whey, resulting in a significantly firmer, more cohesive block that holds its shape beautifully when cut.
The choice between a softer, free-form paneer and a firmer, pressed block depends entirely on your culinary plans. Both are delicious and have their place in various recipes.
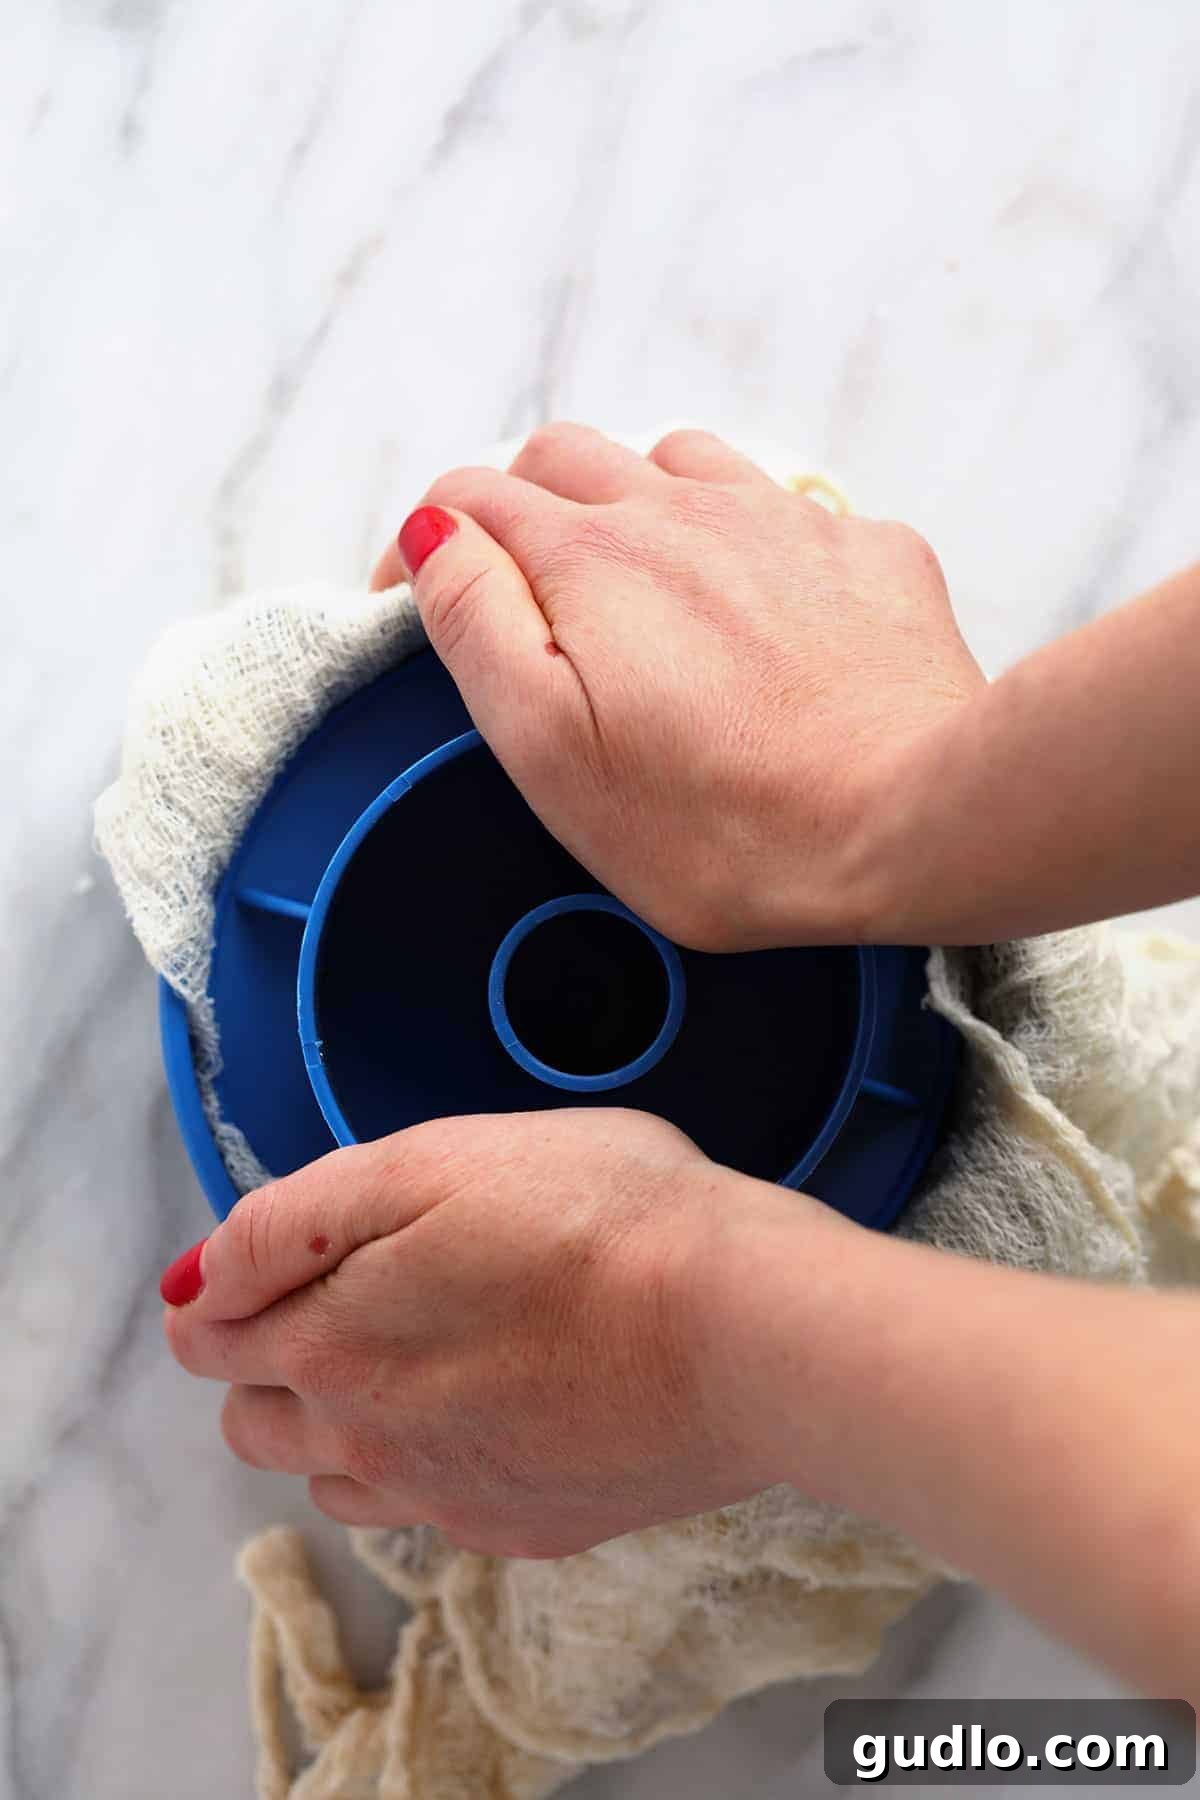
Step 6: Soaking Paneer in Cool Water (The Sweetening Secret)
Once your paneer has drained and, if desired, been pressed to your desired firmness, there’s one final, optional but highly recommended step: soaking it in cool water. After unwrapping the paneer from the cheesecloth, gently place the fresh block into a bowl filled with cool, clean water. Let it soak for about 2 hours. This process is a subtle but effective technique to enhance the final taste and texture of your paneer.
The cool water helps to further draw out any lingering residual acidity from the vinegar, which can sometimes impart a slight tartness. By reducing this acidity, the natural sweetness of the milk proteins comes to the forefront, resulting in a paneer with a cleaner, milder, and sweeter flavor profile. Additionally, this soaking helps to firm up the paneer’s exterior ever so slightly, making it even more resilient for cooking while maintaining its internal tenderness.
This simple step ensures your homemade paneer reaches its full potential, offering a truly fresh and balanced taste that will shine in any dish.
Delicious Ways to Serve Homemade Paneer
One of the greatest appeals of paneer is its incredible versatility. Since it has no added salt or cultures for preservation and a wonderfully mild flavor, it’s a blank canvas ready to absorb the flavors of your culinary creations. Paneer is best served fresh, showcasing its pure dairy taste and tender texture. Here are just a few of our favorite ways to enjoy homemade paneer:
- Pan-Fried and Served Over a Salad: Cut paneer into cubes or sticks, pan-fry until golden brown and crispy, then add as a delicious, high-protein topping to fresh green salads. Drizzle with a light vinaigrette.
- Folded into Palak Paneer (YUM!): This classic Indian dish combines creamy spinach gravy with tender paneer cubes. The paneer perfectly complements the earthy, spiced spinach.
- In a Delicious Butter Tomato Sauce: Think Murgh Makhani (Butter Chicken) but vegetarian! Simmer paneer in a rich, velvety tomato-based sauce, often with butter, cream, and aromatic spices for a truly indulgent meal.
- Grilled Paneer Skewers: Marinate paneer cubes with yogurt and spices, then thread them onto skewers with vegetables like bell peppers and onions. Grill until charred and smoky for a fantastic appetizer or main course.
- Paneer Bhurji (Scrambled Paneer): A quick and flavorful dish where crumbled paneer is cooked with onions, tomatoes, and spices, similar to scrambled eggs. Perfect for breakfast or a light meal.
- Paneer Tikka: A popular appetizer where marinated paneer cubes are traditionally baked in a tandoor oven, but can be easily grilled or pan-fried at home.
- Stuffed Parathas: Grated paneer mixed with spices makes a delectable filling for Indian flatbreads, offering a wholesome and satisfying meal.
- Sweet Delights: Paneer is also a key ingredient in many Indian desserts like Rasgulla, Rasmalai, and Sandesh, showcasing its delightful versatility beyond savory dishes.
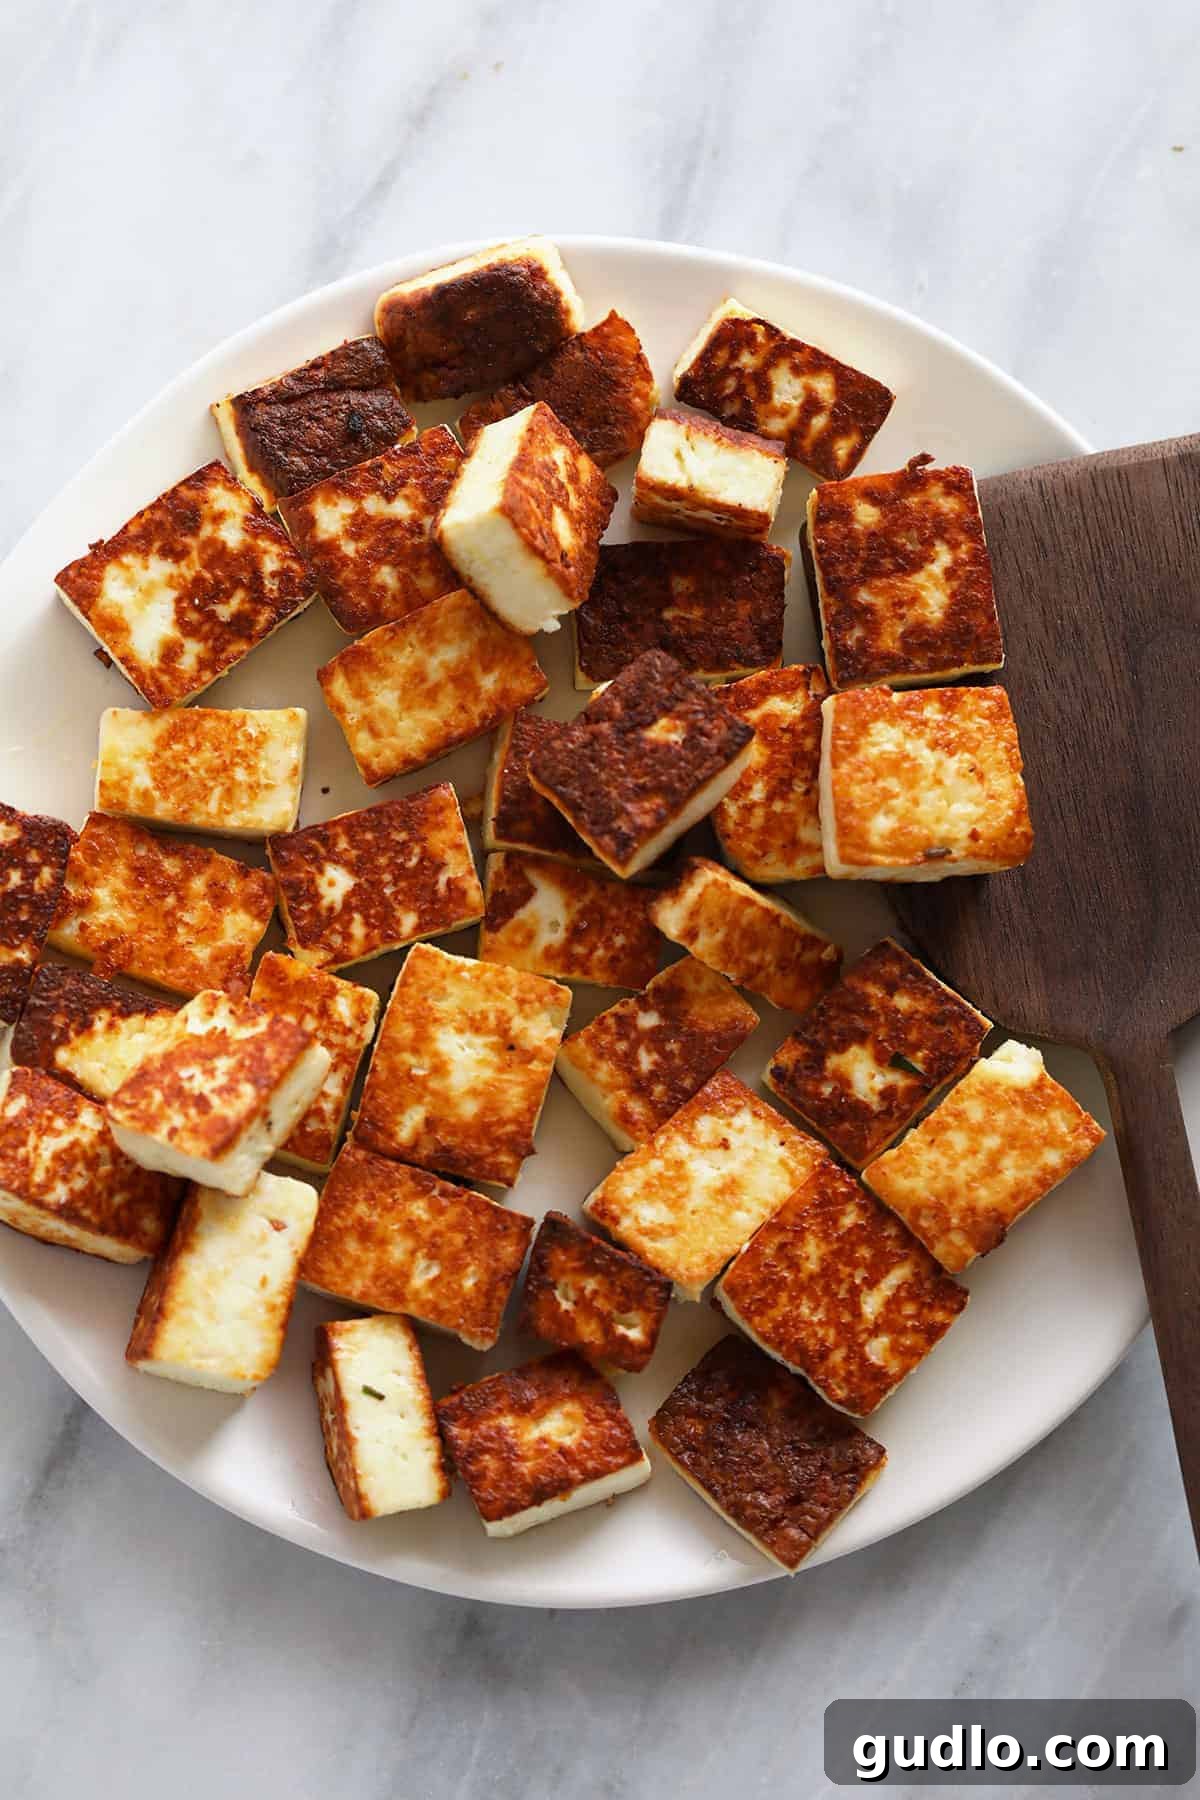
Storing Your Homemade Paneer
To keep your fresh homemade paneer at its best, proper storage is key. Paneer, being a fresh cheese without added salt or preserving cultures, has a relatively short shelf life compared to aged cheeses. The best way to store it is to place the entire block in an airtight container filled with cool water, ensuring the paneer is completely submerged. This method keeps the paneer moist and prevents it from drying out. Stored this way in the refrigerator, homemade paneer will remain fresh and delicious for up to 5 days. Remember to change the water daily to maintain freshness.
Can You Freeze Paneer for Longer Storage?
Yes, paneer can be successfully frozen for extended storage, typically for up to 1 month, and sometimes even longer if properly prepared. To freeze paneer, ensure it is thoroughly drained and patted completely dry with paper towels. Wrap the block tightly in several layers of plastic wrap, then place it in an airtight freezer-safe bag or container. Double-wrapping helps prevent freezer burn and minimizes excess moisture buildup within the cheese, which can alter its texture.
Thawing and Use: When you’re ready to use frozen paneer, thaw it slowly in the refrigerator overnight. Once thawed, you might notice a slight change in texture; it may become a little crumbly or spongy. To mitigate this, gently press out any excess water, then pat it very dry with paper towels before using. For best results, consider frying or crumbling thawed paneer, as its texture might not be ideal for dishes requiring precise slicing.
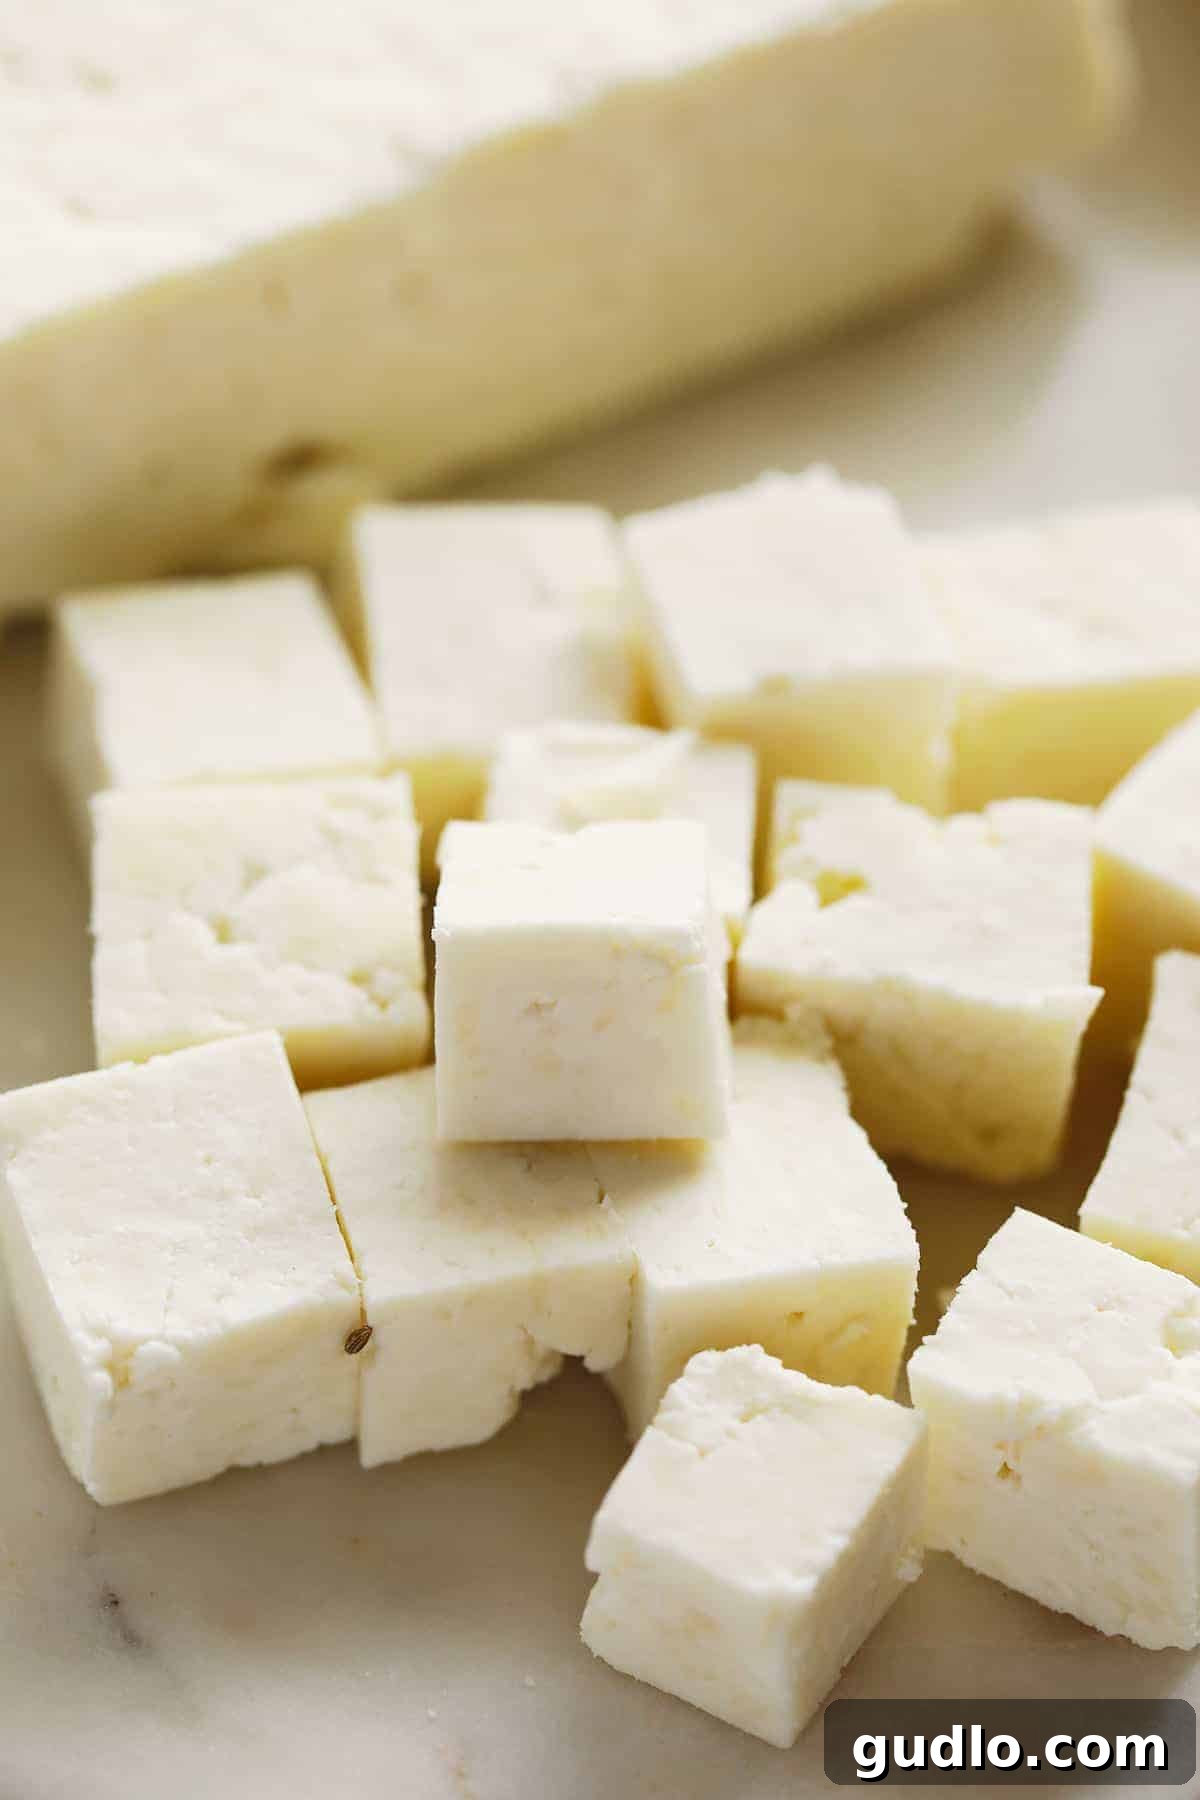
More of our Favorite Homemade Cheese Recipes…
Explore More Homemade Cheese & Dairy Recipes!
If you’ve enjoyed the rewarding process of making your own paneer, you’ll love venturing into other simple homemade cheese and dairy delights. These recipes are perfect for expanding your culinary skills and enjoying fresh, natural ingredients.
- How to Make Homemade Queso Fresco: Discover another delicious direct-acid cheese, perfect for Mexican cuisine.
- How to Make Ricotta Cheese from Scratch: Learn to transform leftover whey or fresh milk into this creamy, versatile Italian cheese.
- Best Homemade Mac and Cheese Sauce: While not a cheese you make, master a velvety cheese sauce that elevates any pasta dish.
Easy Homemade Paneer Recipe
Prep: 3 hours
Cook: 15 minutes
Total: 3 hours 15 minutes
Print Recipe
(Please note: The original interactive email form has been removed to comply with the “no JavaScript” requirement. You can manually sign up for our recipes on our website.)
Ingredients
1x
2x
3x
1x
2x
3x
Equipment Needed:
- Cheesecloth (fine-mesh, unbleached)
- Digital kitchen thermometer
- 2 gallon heavy-bottom stainless steel pot
- Stainless steel or plastic whisk/spatula
- Stainless steel or plastic colander
- Ladle
- Deep pot or bowl (to catch whey)
Ingredients:
- 1 gallon whole milk, (non-UHT recommended for best results)
- 10 tbsp white vinegar, (5% acidity, or ½ cup fresh lemon juice)
Instructions
-
Preparation & Sanitation: Begin by ensuring all your equipment and surfaces are spotlessly clean and sterilized. This is crucial for successful cheesemaking.
-
Set Up Cheesecloth: Prepare your cheesecloth by rinsing it thoroughly with hot water, then wringing out the excess moisture. Line a colander with the damp cheesecloth and set it aside in your sink.
-
Warm the Milk: Pour the gallon of whole milk into a large, heavy-bottomed pot. Place the pot over medium-high heat.
-
Reach Temperature: Heat the milk to 195°F (90°C), stirring often with a whisk or spatula. This frequent stirring prevents the milk from sticking to the bottom of the pot and scorching. The milk will appear frothy and begin to gently simmer as it nears the correct temperature.
-
Add Acid & Coagulate: Once the milk reaches 195ºF, remove it from the heat. Add the 10 tablespoons of white vinegar (or chosen substitute) all at once. Stir the milk very slowly and gently for 1 minute. You should observe the curds forming and separating from the greenish-yellow whey almost immediately. If separation doesn’t occur, add another 1-2 tablespoons of vinegar and stir again for 30 seconds.
-
Cool Curds: Move the pot to the sink. Run a gentle, continuous stream of cold tap water into the curds. Stir gently to cool them, being careful not to lose any curds into the sink. This step helps stop the cooking process and rinses away excess acid.
-
Strain Curds: Once the curds cool to 115°F (46°C), carefully pour the entire contents (curds and whey) into the cheesecloth-lined colander. Allow the curds to drain for 1 minute.
-
Gather & Twist: When most of the whey has drained, gather all four corners of the cheesecloth to form a bag around the curds. Loosely tie the corners together. Gently twist the cloth to wring out more whey.
-
Flip & Hang: Untie the cloth, flip the mass of cheese over, and re-tie the corners. Hang the cheesecloth bag from a sturdy point, like a sink faucet or a wooden spoon placed across a deep pot, to catch any further draining whey. Allow it to hang and drain for approximately 1 hour for a tender paneer.
-
Optional Pressing for Firmer Paneer: For a denser, firmer cheese, after the 1-hour hang, unwrap the paneer. Reshape it in a fresh cheesecloth, place it between two dinner plates, and put a heavy weight (e.g., a 5-10 lb object) on top. Press for up to 2 hours.
-
Sweeten with Water Bath: Remove the paneer from the cloth and place it in a bowl of cool water for 2 hours. This step helps draw out any remaining acidity and sweetens the cheese, enhancing its flavor.
-
Serve & Store: Your homemade paneer is now ready! Serve it immediately, or store it in an airtight container submerged in cool water in the refrigerator for up to 5 days. Remember to change the water daily.
Tips & Notes
- Milk Quality: For the best results, always use fresh, full-fat whole milk. Avoid ultra-pasteurized (UHT) milk if possible, as it can sometimes yield crumbly curds.
- Acid Adjustment: The exact amount of acid needed can vary slightly depending on the milk and the acid’s strength. Always have a little extra on hand, especially for your first attempt.
- Storage: If you don’t plan to use all your paneer right away, tightly wrap it in several layers of plastic wrap, then place it in an airtight freezer-safe bag. It can be frozen for up to 1 month. Thaw in the refrigerator and pat dry before use.
- Whey Use: Don’t discard the leftover whey! It’s rich in nutrients and can be used in baking (breads, pancakes), smoothies, or as a nutritious liquid for cooking grains.
Nutrition Information (per serving, approximately)
Carbohydrates: 29 g,
Protein: 21 g,
Fat: 21 g,
Fiber: 0 g,
Sugar: 29 g
Nutrition information is automatically calculated and should only be used as an approximation. Actual values may vary based on specific ingredients and preparation methods.
Loved this recipe? Leave a comment below!
Don’t forget to tag your posts on social media with the hashtag #cheeseknees. We’d love to see your delicious homemade paneer creations!
Share this recipe with your friends!