
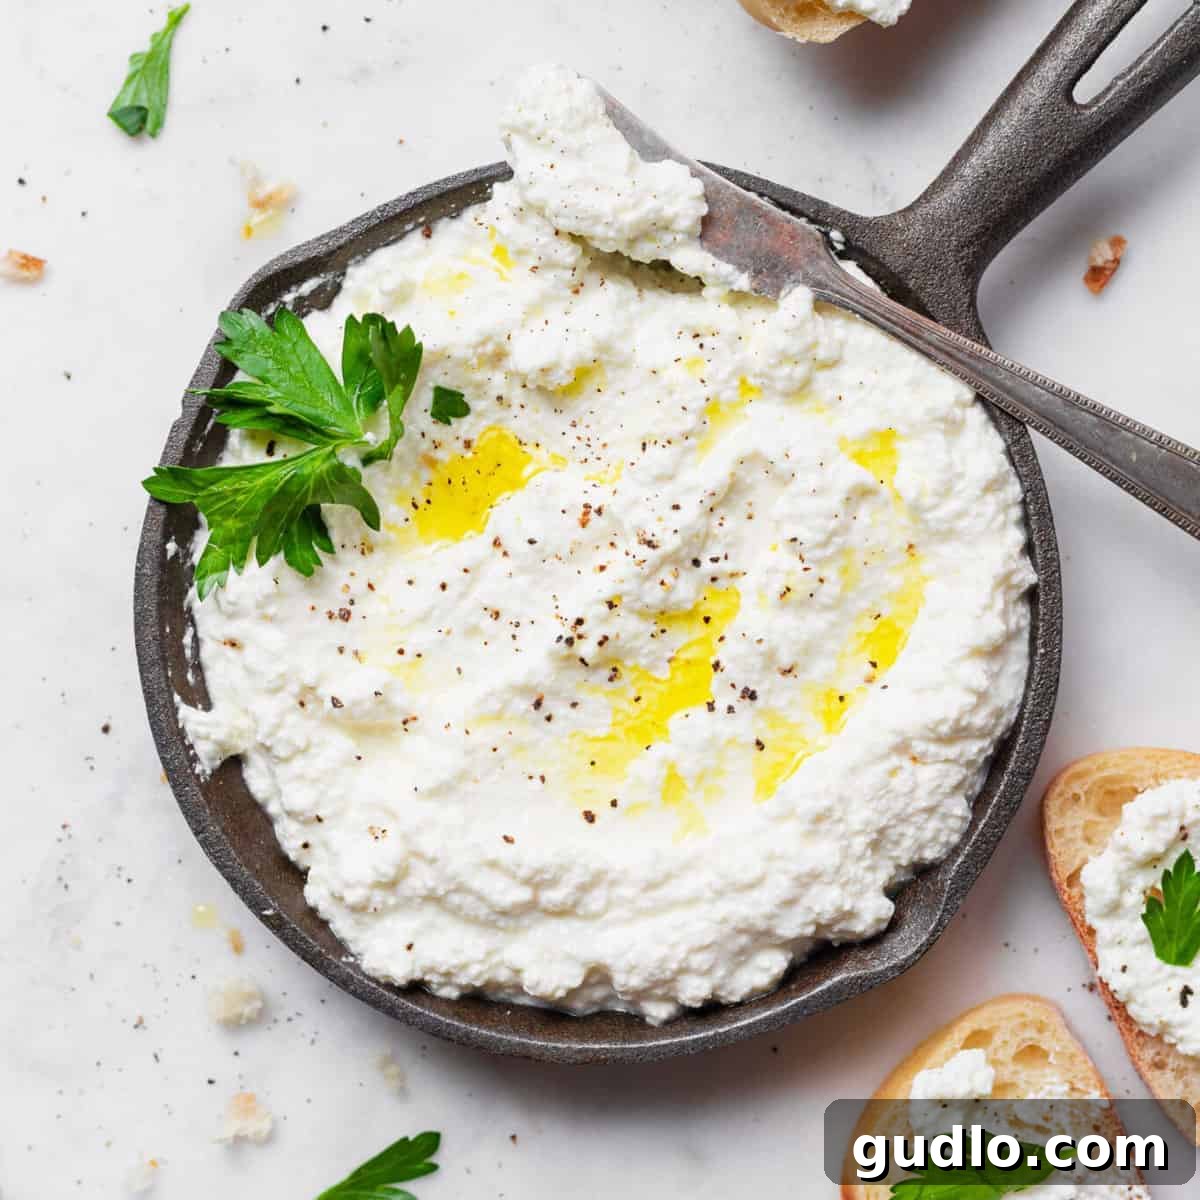
Homemade ricotta cheese is a truly brilliant and rewarding starting point for anyone interested in delving into the art of home cheesemaking. There’s a certain magic and deep satisfaction in transforming simple, fresh milk and cream into delicate, pillowy curds and rich whey. This process isn’t just incredibly gratifying; it’s also surprisingly straightforward and yields a wonderfully versatile ingredient for your kitchen.
In this comprehensive guide, we will walk you through everything you need to know about ricotta, from its origins and uses to a detailed, step-by-step tutorial on how to make ricotta cheese right in your own home. Get ready to explore the delicious possibilities!
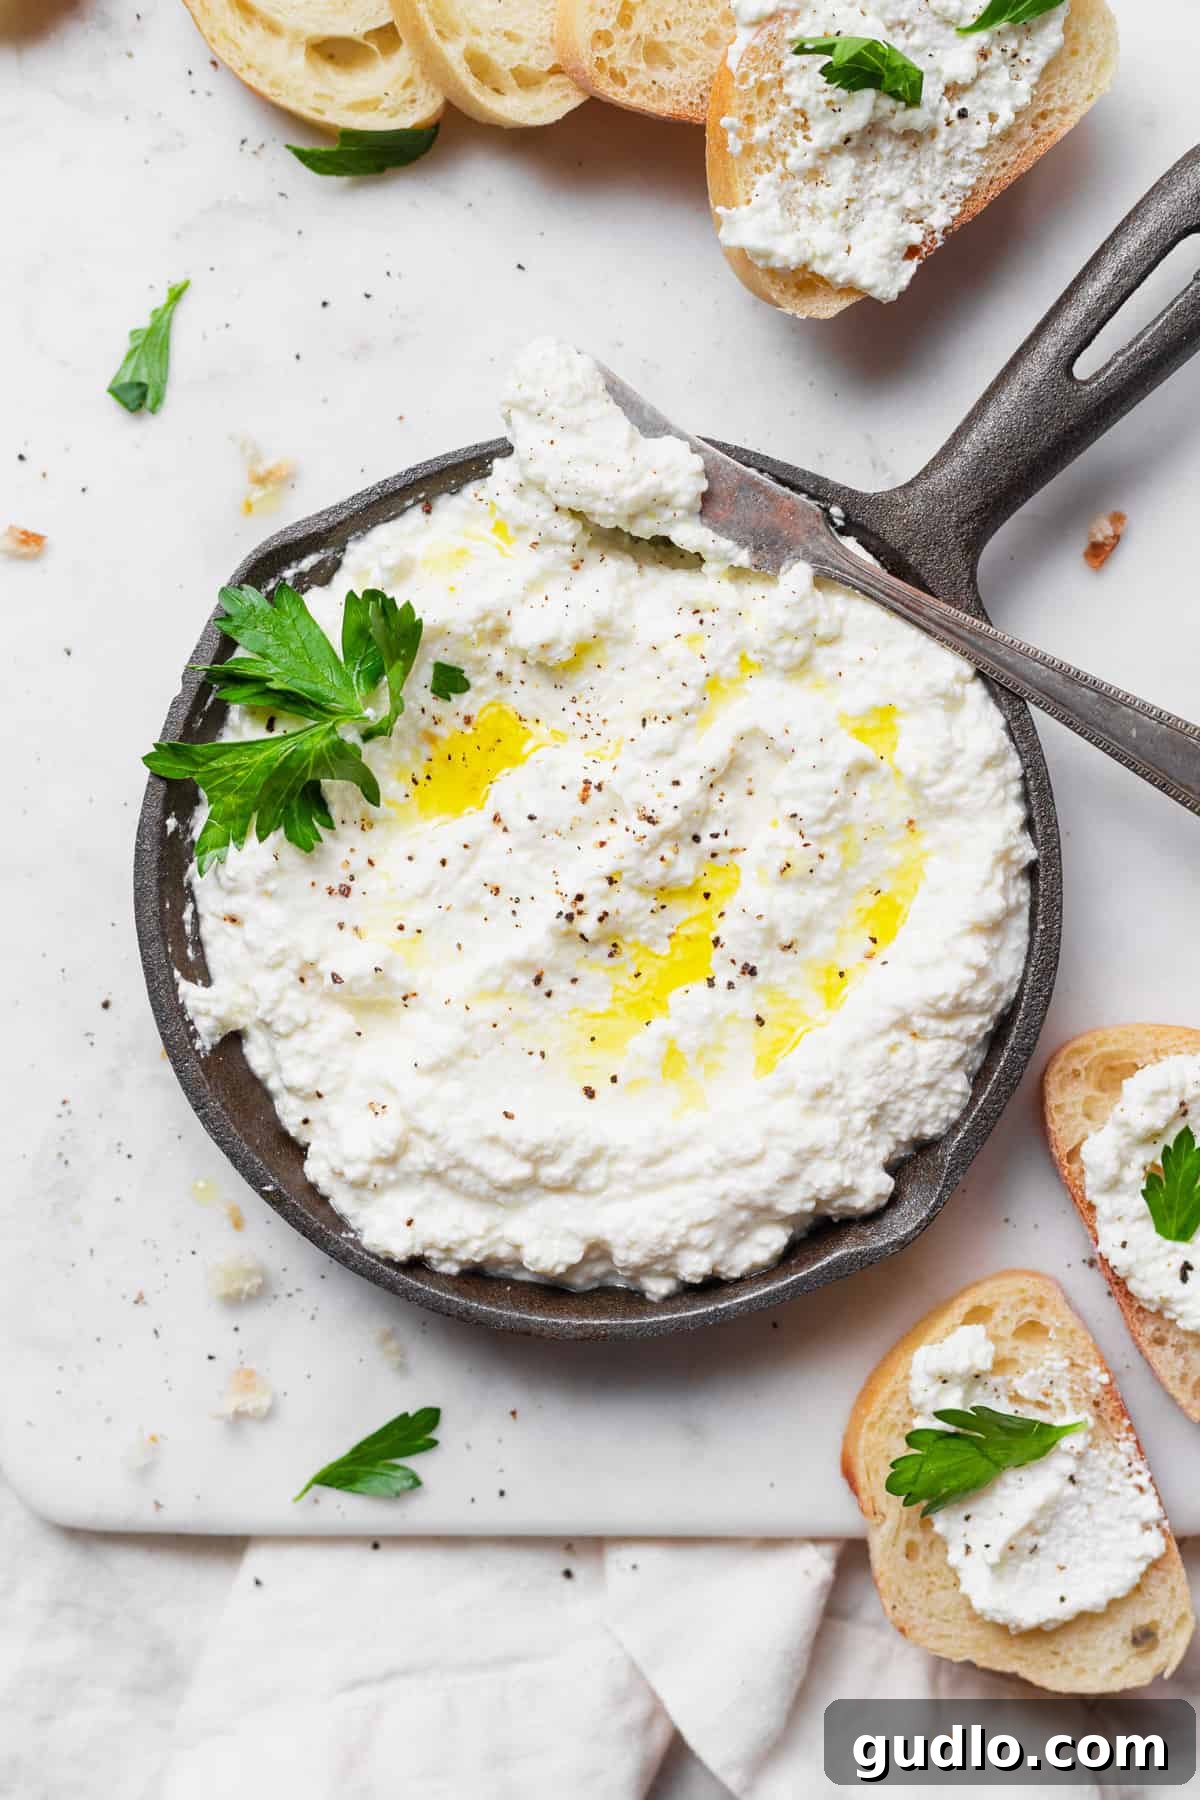
The idea of making cheese at home might initially seem daunting or complex, but we’re here to demystify the process. With the expert guidance of Erin Harris, a professionally trained chef and esteemed cheesemonger, also known as The Cheese Poet, you’ll gain all the specialized knowledge required to create perfect ricotta cheese with confidence.
Whether your culinary vision involves serving your freshly prepared homemade ricotta cheese recipe as a delightful dip or spread, or incorporating it into more elaborate dishes like savory pasta fillings (hello, amazing ricotta gnocchi!), this article will provide you with all the essential information and techniques to master homemade ricotta. Prepare to impress yourself and your guests with this fresh, flavorful staple!
What is Ricotta Cheese? The Italian Delight Explained
Ricotta is an Italian term describing a luxuriously soft, fresh, and slightly sweet cheese. Its name, “ricotta,” literally translates to “re-cooked” or “recooked,” which perfectly hints at its traditional method of production. Historically, ricotta was made from the leftover whey—the watery by-product—after cheese production, primarily from sheep, cow, goat, or Italian water buffalo milk. When this whey is gently heated to a specific temperature and combined with an acidic agent, the remaining albumin and globulin proteins, which didn’t coagulate during the initial cheesemaking, solidify into new, delicate curds.
While traditional ricotta utilizes whey, our homemade ricotta cheese recipe employs a similar coagulation technique but starts with fresh whole milk and a touch of cream. This contemporary approach offers several advantages: it yields a significantly greater quantity of ricotta, results in a richer and creamier texture, and uses readily available ingredients found in most grocery stores. The principle remains the same: controlled heat and acidity cause the milk proteins to separate, forming those coveted soft curds. This method makes it incredibly accessible for home cooks to produce high-quality ricotta without needing access to large volumes of whey from other cheesemaking processes.
Should you ever find yourself with a substantial amount of leftover whey from making other cheeses (perhaps mozzarella or cheddar), you can certainly experiment with making authentic, traditional ricotta. It’s a fantastic way to minimize waste and truly appreciate the full cycle of cheesemaking!
The Versatility of Ricotta Cheese in the Kitchen
Ricotta is an indispensable ingredient in Italian cuisine, celebrated for its mild flavor and creamy texture, making it a beloved component in a vast array of recipes. Its light, delicate character allows it to adapt seamlessly to both sweet and savory applications, acting as a perfect base for fillings, toppings, and enriching agents.
You’ll frequently find ricotta playing a starring role in classic Italian dishes:
- Pasta: It’s the soul of many baked pasta dishes like lasagna and stuffed shells, providing a rich, creamy filling. It also adds delightful lightness to fresh pasta dough or can be dolloped directly onto sauced pasta for a fresh finish.
- Pizza: A spoonful of ricotta can elevate a simple pizza, offering a cool, creamy contrast to savory toppings and tangy tomato sauce.
- Desserts: Ricotta shines in sweets, contributing moisture and a delicate texture to traditional Italian treats such as crisp cannoli, fluffy ricotta pie, cheesecakes, and even pancakes.
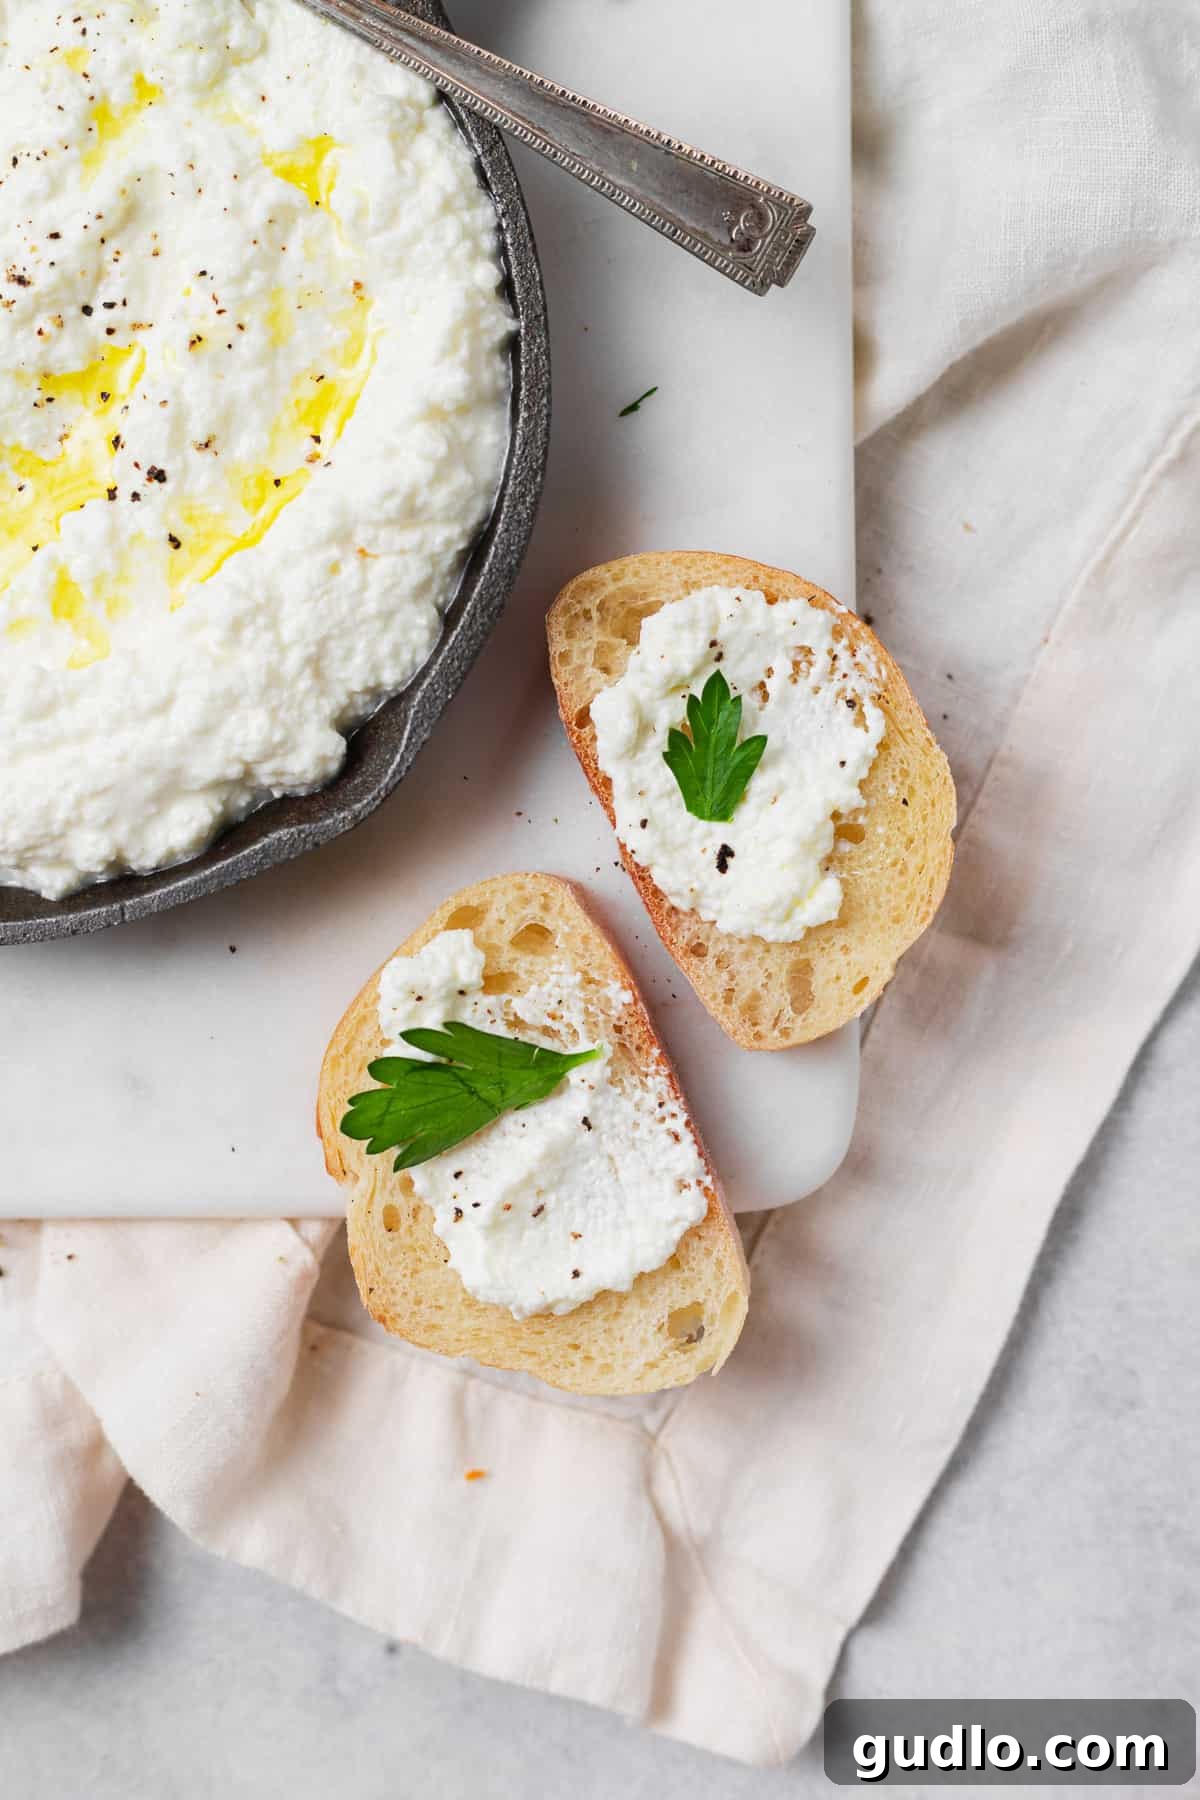
- Spreads and Dips: Enjoyed simply with a drizzle of olive oil, a sprinkle of fresh herbs, and a crack of black pepper, it makes for an elegant appetizer when served with crusty bread or crackers.
- Breakfast: Stir it into scrambled eggs, layer it into parfaits with fruit and granola, or use it to make light and airy ricotta pancakes.
- Savory Fillings: Beyond pasta, ricotta is excellent in savory tarts, frittatas, and vegetable dishes, adding moisture and richness.
Ricotta is best savored when it’s very fresh, highlighting its delicate flavor and smooth texture. It is not designed for aging, unlike many other cheeses. For optimal taste and quality, try to use your homemade ricotta within a week. If you find yourself with more than you can consume in that timeframe, it can be frozen for up to one month in a tightly sealed, airtight container. Freezing might alter the texture slightly, making it a bit grainier, but it will still be perfectly suitable for cooked dishes.
Essential Ingredients for Perfect Homemade Ricotta Cheese
One of the most appealing aspects of making ricotta from scratch is the minimal number of ingredients required. You only need four basic items to begin your cheesemaking adventure, all easily found at your local grocery store:
- Whole Milk (3.25% fat): This forms the base of our ricotta, providing the majority of the proteins and fat that will coagulate into delicious curds. The higher fat content of whole milk contributes to a richer, creamier final product.
- Whipping Cream (35% fat): Adding a touch of heavy cream enhances the richness and luxurious smoothness of the ricotta, giving it that characteristic melt-in-your-mouth texture.
- White Vinegar: This is our acidic agent, crucial for lowering the pH of the milk and initiating the coagulation process. Vinegar is a readily available and neutral-tasting acid that won’t impart unwanted flavors.
- Kosher Salt: A small amount of salt is added to season the ricotta, enhancing its natural flavors and balancing the slight sweetness of the milk.
As mentioned, cow’s milk is a popular choice, but it’s not the only type of milk you can use to make ricotta cheese. The most critical factor, regardless of the animal source, is to ensure the milk is incredibly fresh and, most importantly, not ultra-pasteurized (UHT).
What Kind of Milk Can You Use for Ricotta Cheese?
Ricotta can be made from a variety of milks, each imparting a subtle difference in flavor and texture:
- Cows’ Milk: The most common choice for its availability and classic, mild flavor.
- Sheep’s Milk: Offers a slightly tangier, richer ricotta, often used in traditional Italian recipes.
- Goat’s Milk: Produces a ricotta with a distinct, earthy, and slightly tart flavor profile.
- Water Buffalo Milk: Creates an incredibly rich and creamy ricotta, similar to that used for fresh mozzarella.
- Or a Mixture of Milks! Feel free to experiment with combinations to find your preferred taste and texture.
Fresh, Fresh, Fresh! The Golden Rule for Ricotta
No matter which type of milk you select for your homemade ricotta, its freshness is paramount. It should always be very fresh and, crucially, not ultra-pasteurized (UHT). You can easily verify this by carefully reading the label on your milk carton.
Ultra-pasteurized milk undergoes a super-heating process that significantly alters its protein structure, preventing proper curd formation necessary for cheesemaking. Attempting to make ricotta with UHT milk will almost certainly result in failure, as the curds simply won’t set correctly. Remember, the cornerstone of producing exceptional cheese is always to begin with the freshest possible ingredients and thoroughly clean, sanitized equipment. These two factors are more critical than any other in ensuring a successful batch of homemade ricotta.
Essential Equipment for Your Homemade Ricotta Kitchen
Making ricotta at home doesn’t require a specialized cheesemaking kit. Most of the tools you’ll need are likely already in your kitchen. For this homemade ricotta cheese recipe, gather the following essential equipment:
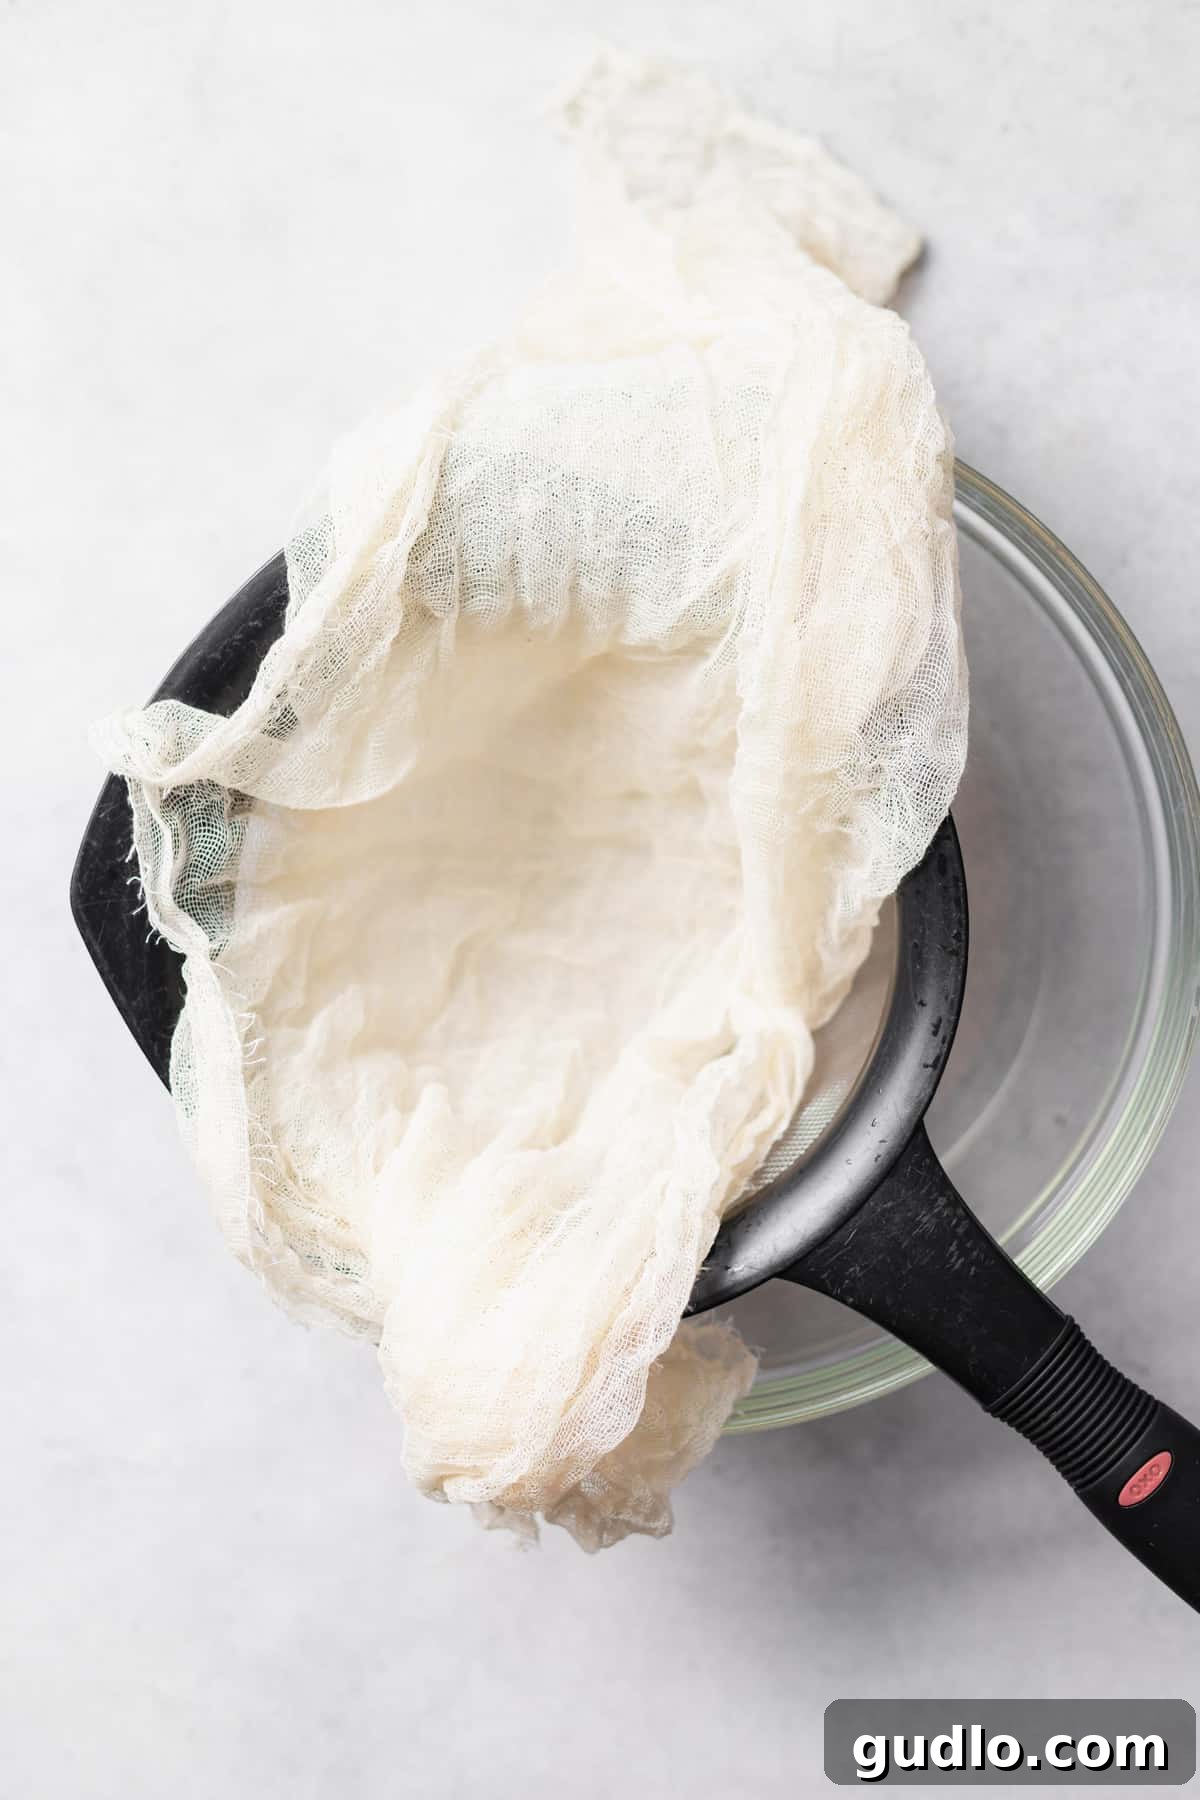
- Cheesecloth: This porous fabric is indispensable for separating the delicate ricotta curds from the whey. Look for a high-quality, unbleached cheesecloth, preferably with a fine weave. Folding it multiple times (3-4 layers) ensures effective straining.
- Non-Reactive Colander: A colander, typically made from stainless steel or plastic, will hold the cheesecloth and curds, allowing the whey to drain away. It’s crucial that it’s non-reactive to prevent any metallic flavors from leaching into your delicate ricotta.
- Non-Reactive Bowl: This bowl sits beneath your colander to collect the draining whey. Ensure it’s large enough to accommodate the colander comfortably and hold all the liquid without overflowing. Stainless steel, glass, or ceramic bowls are excellent non-reactive options.
- Non-Reactive Heavy-Bottom Saucepan: A large, sturdy saucepan is needed to heat the milk and cream. A heavy bottom helps distribute heat evenly and prevents scorching, which is vital for preventing burnt flavors in your ricotta. Again, stainless steel or enamel-coated cast iron are good non-reactive choices.
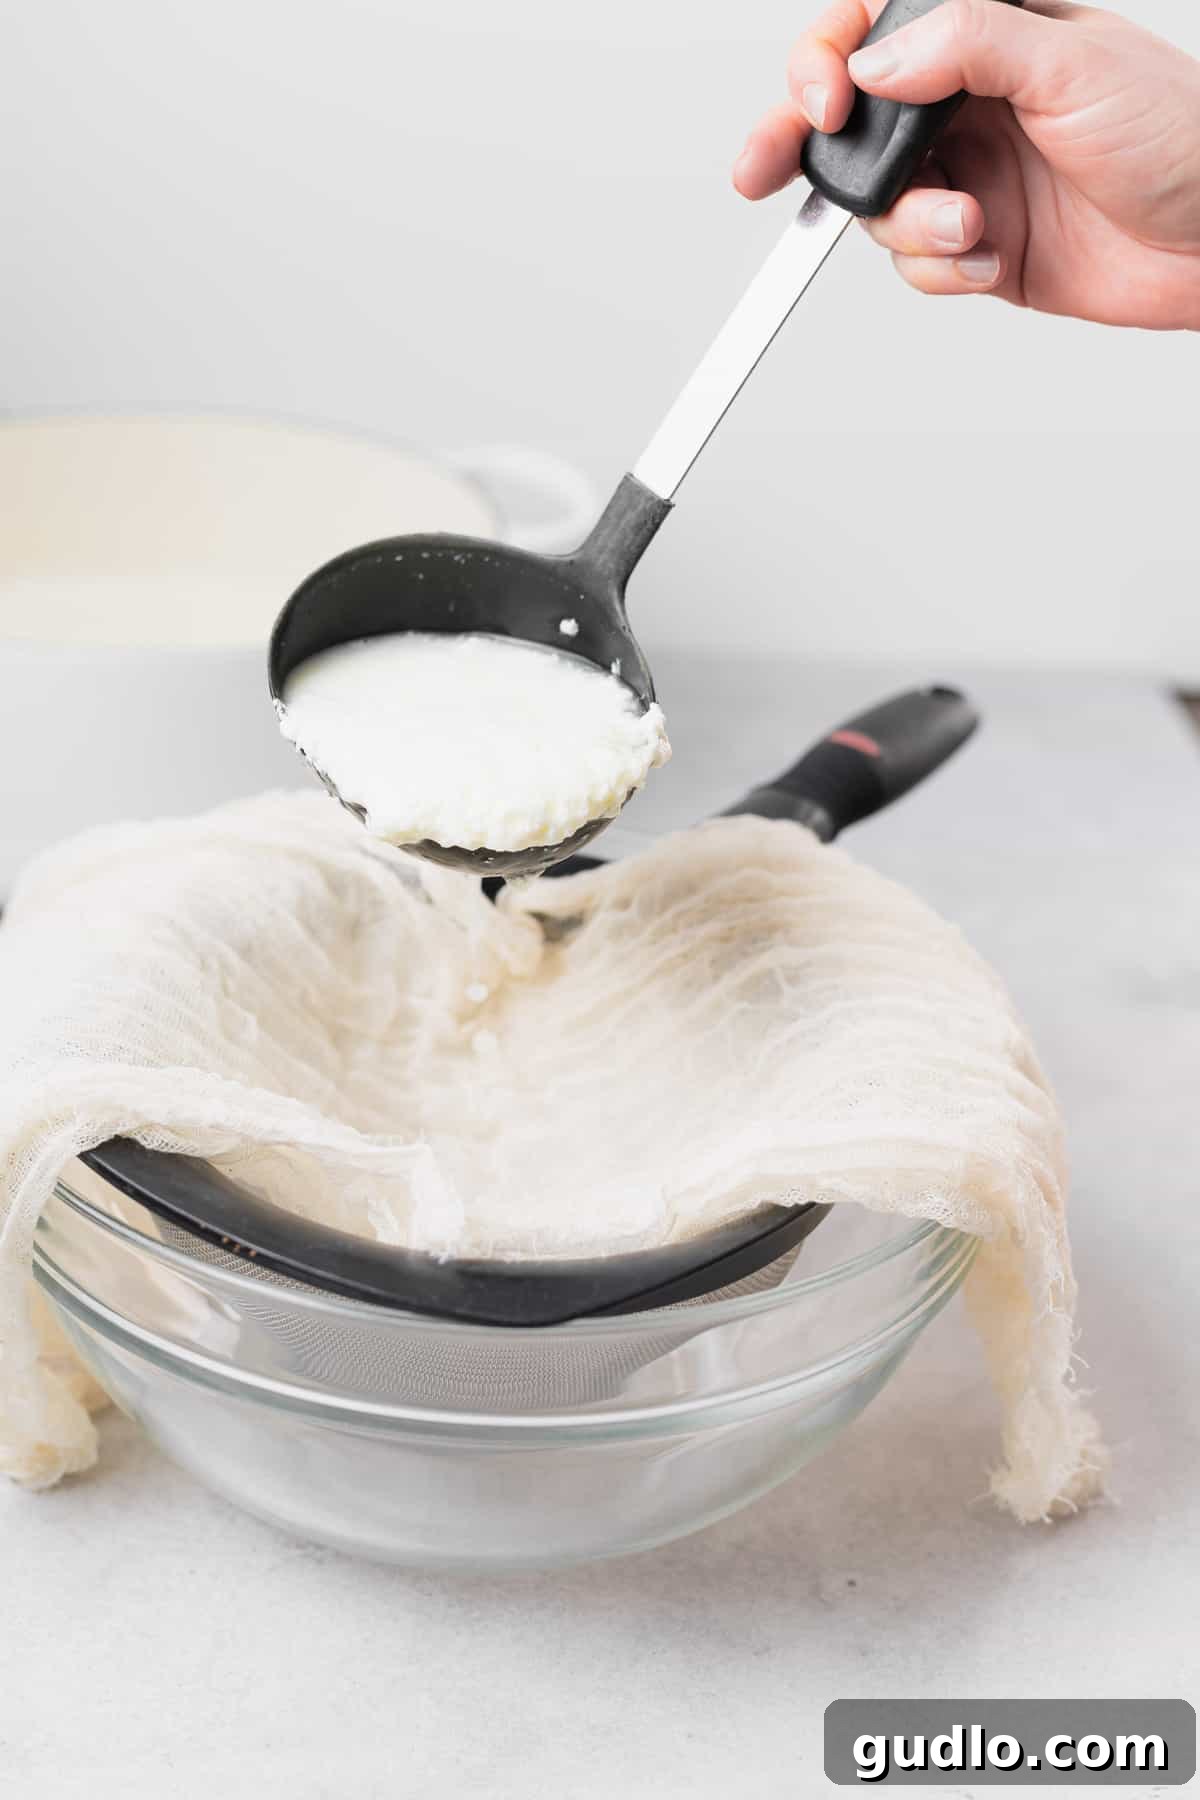
- Ladle: A ladle with a deep bowl is perfect for gently scooping the delicate curds and whey mixture from the saucepan into the prepared cheesecloth-lined colander. This minimizes disturbance to the fragile curds.
- Wooden Spoon or Heat-Resistant Spatula: Use this for gently stirring the milk and cream as it heats. Wooden or silicone tools are preferred because they won’t scratch your saucepan and don’t conduct heat as quickly as metal.
- Thermometer (Candy or Digital Instant-Read): This is arguably the most critical piece of equipment for this ricotta recipe. Achieving the precise temperature of 192ºF (88ºC) is essential for proper curd formation. An accurate thermometer ensures your milk reaches this target temperature before you add the acid and turn off the heat.
What does ‘non-reactive’ mean? When we refer to ‘non-reactive’ cookware, it means materials that do not chemically react with acidic ingredients. Certain metals, like aluminum or cast iron (if not properly seasoned), can react with acids (like vinegar), potentially imparting a metallic taste or discoloration to your food. Stainless steel, glass, and enamel-coated cookware are excellent examples of non-reactive materials, making them ideal for cheesemaking.
Step-by-Step Guide: How to Make Ricotta Cheese at Home
Making homemade ricotta is a surprisingly simple process that yields incredible results. Follow these steps for a perfect batch every time:
- Prepare Your Draining Station: Begin by setting up your colander and bowl. Place a large, non-reactive bowl on your countertop. Then, line your non-reactive colander with cheesecloth. For best results, fold your cheesecloth over itself 3 or 4 times to create a thicker, more effective straining layer. Ensure the cheesecloth is large enough to completely cover the inside of the colander with some overhang. Briefly run the folded cheesecloth under cold water, then wring it out thoroughly to make it damp. This prevents the curds from sticking. Place the damp, lined colander inside the large bowl. Set this assembly aside; it will be ready to receive your fresh curds.
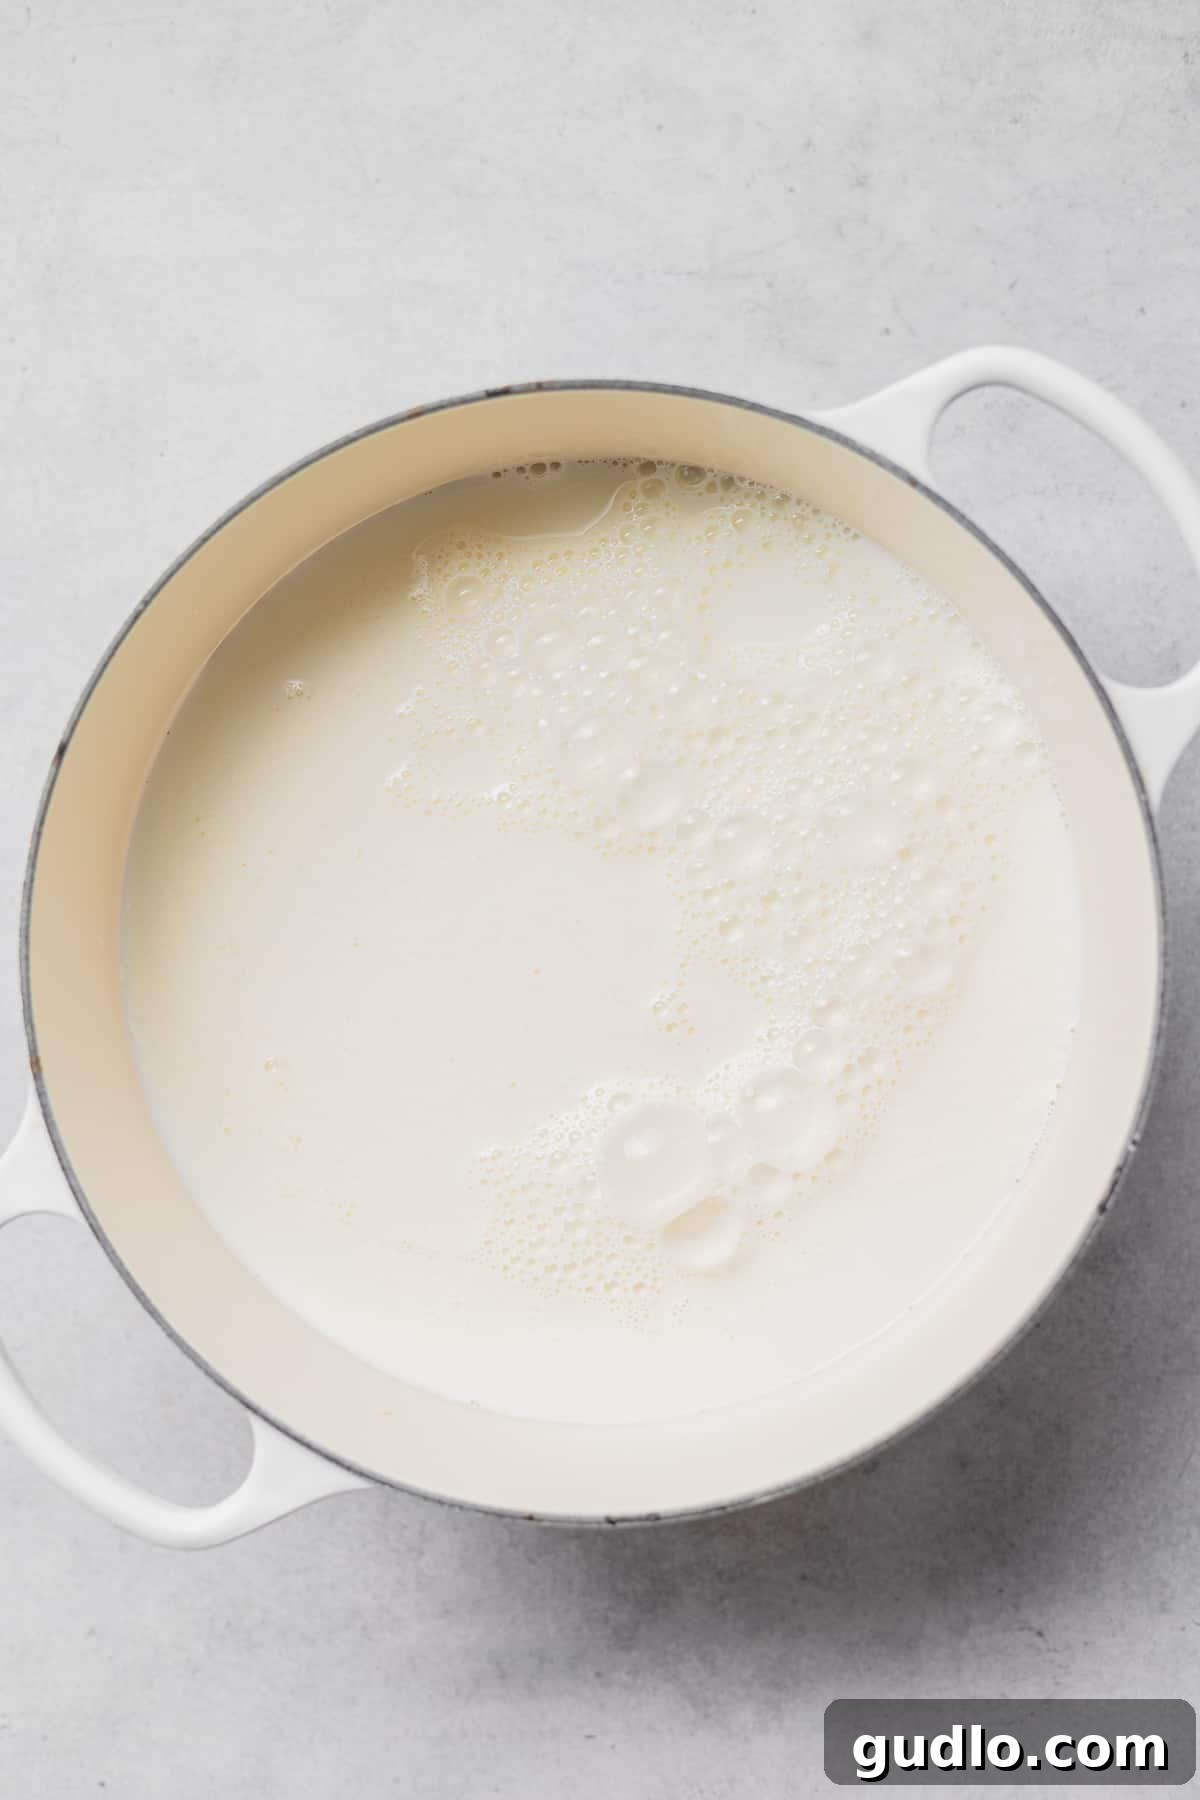
- Heat the Milk Mixture: Pour the whole milk, whipping cream, and kosher salt into your heavy-bottomed, non-reactive saucepan. Place the saucepan over medium heat. Stir the mixture occasionally with a wooden spoon or heat-resistant spatula to prevent the milk from scorching on the bottom of the pot. Attach your thermometer to the side of the saucepan, ensuring the tip is submerged in the liquid but not touching the bottom. Slowly heat the mixture until it reaches a precise temperature of 192ºF (88ºC). This typically takes about 15-20 minutes. Once the target temperature is reached, immediately remove the saucepan from the heat source. Stir in the white vinegar completely. The milk will begin to curdle almost instantly, separating into distinct curds and a yellowish-greenish liquid (whey).
- Rest and Coagulate: After stirring in the vinegar, cover the saucepan with a lid. Allow the mixture to rest undisturbed for 15 minutes. This crucial resting period gives the proteins ample time to fully coagulate and form solid, distinct curds. Resist the urge to peek or stir during this time.
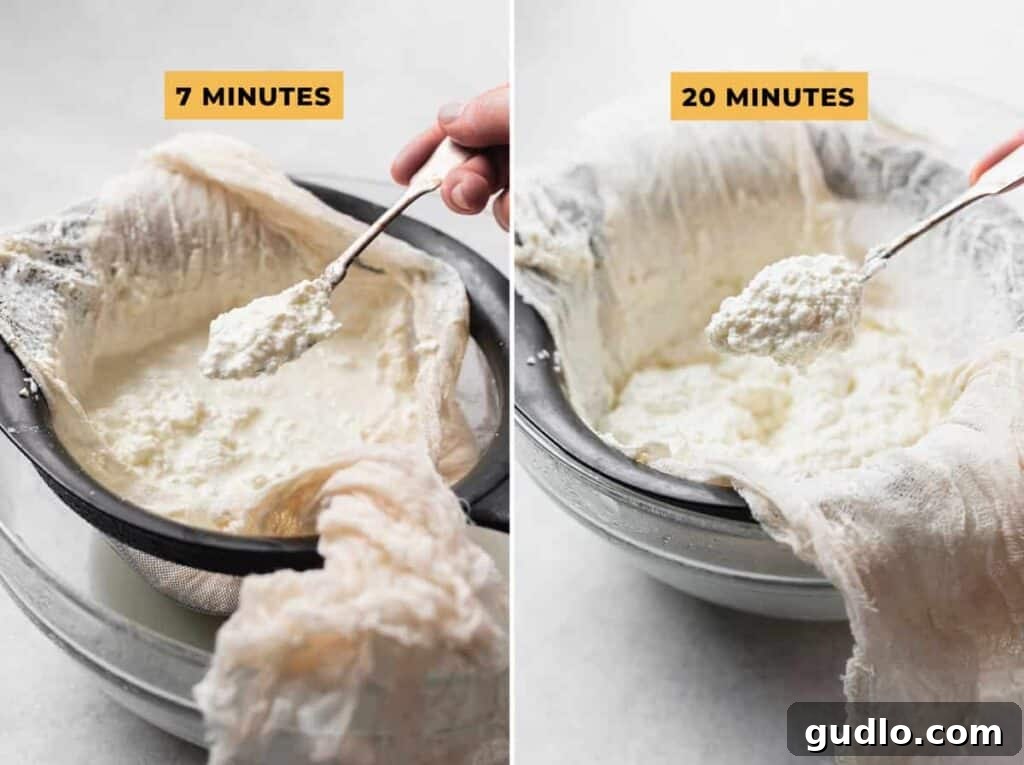
- Drain the Ricotta: Gently remove the lid from your saucepan. Using your ladle, carefully spoon the formed ricotta curds and the remaining whey into your prepared cheesecloth-lined colander. Be gentle to avoid breaking up the delicate curds too much. Once all the curds and whey have been transferred to the colander, allow it to drain. The draining time will directly influence the final consistency of your ricotta. For a wonderfully creamy, moist ricotta that’s perfect for spreading or dolloping, drain for approximately 5-7 minutes. If you prefer a drier, firmer ricotta, suitable for baking or thicker fillings, allow it to drain for up to 20 minutes, or even slightly longer.
- Serve or Store: Your homemade ricotta cheese is now ready! For the most exquisite flavor and texture, use it immediately while it’s still warm. Alternatively, transfer the drained ricotta to an airtight container and refrigerate it. It will maintain its freshness and quality for up to 7 days. Enjoy your incredibly fresh, homemade creation!
Frequently Asked Questions About Ricotta Cheese
Absolutely! Fresh ricotta is a wholesome and nutritious cheese. It’s naturally low in sodium (unless additional salt is generously added during preparation) and can be easily adapted to fit various dietary needs. If you’re looking to limit fat intake, you can omit the whipping cream from this recipe. While removing the cream will result in a slightly lower yield (approximately 2 cups instead of 2.5 cups) and a less creamy texture, the ricotta will still be delicious and a healthy addition to your diet. Ricotta is a good source of protein, calcium, and other essential nutrients, making it a valuable component of a balanced diet.
While ricotta and cottage cheese share some similarities in their fresh, soft curd nature and mild flavor, they are not the same. Ricotta typically boasts a much smoother, finer, and more delicate curd texture compared to the often chunkier, more granular curds of cottage cheese. The production methods also differ; ricotta is traditionally made from re-cooked whey, whereas cottage cheese is made from milk curds that are washed to remove lactic acid. Despite their differences, ricotta can often be used as a suitable substitute for cottage cheese in many recipes, particularly in savory applications like lasagna, casseroles, or even fluffy pancakes, where their mild taste profiles can interchange effectively.
If you find yourself without ricotta or need an alternative, several ingredients can serve as a decent substitute depending on the recipe’s requirements:
- Cream Cheese: For recipes requiring a thick, creamy filling, especially in sweet pastries or filled pasta, cream cheese can work well. It offers a similar richness but with a slightly tangier flavor and denser texture.
- Cottage Cheese: As mentioned, cottage cheese is a popular substitute for ricotta in savory dishes like lasagna, baked ziti, and pancake batters. For a smoother texture closer to ricotta, you can blend or process cottage cheese until it reaches a finer consistency.
- Fromage Blanc or Quark: These fresh, soft, unaged cheeses have a smooth, creamy texture and mild tang that can mimic ricotta in many applications, particularly spreads and desserts.
- Mascarpone: For very rich, creamy applications, especially desserts, mascarpone can be a decadent substitute, though its fat content is considerably higher.
Choose your substitute carefully, considering the desired texture, flavor profile, and fat content of your original recipe.
Exciting Homemade Ricotta Cheese Variations
Once you’ve mastered the basic homemade ricotta recipe, feel free to experiment with these simple variations to tailor it to your taste:
Lemon Zest Ricotta: For a brighter, more aromatic ricotta, replace the white vinegar with an equal amount of freshly squeezed lemon juice. The fresh citrus notes will beautifully complement the creamy cheese. Keep in mind that the acidity of lemons can vary, so you might need to add up to 1 tablespoon more lemon juice if you find the curds aren’t setting quite right.
Extra Creamy Ricotta: If you desire an even richer, more luxurious spread, gently stir in ¼ cup of additional whipping cream (35% fat) into the finished, drained ricotta. This will enhance its velvety texture and make it incredibly decadent for serving with fruit or on toast.
Herb & Garlic Ricotta: For a savory twist, fold in finely chopped fresh herbs like chives, parsley, or basil, along with a crushed garlic clove, into the finished ricotta. A pinch of black pepper will round out the flavors, perfect for crostini or as a sandwich spread.
Sweet Ricotta: Transform your ricotta into a dessert component by stirring in a tablespoon of honey or maple syrup and a dash of vanilla extract. This is delightful with fresh berries or as a filling for sweet crepes.
Creative Uses for Leftover Whey
Don’t discard the yellowish liquid that drains from your ricotta! This nutrient-rich byproduct, known as whey, is a valuable ingredient with numerous uses in the kitchen and beyond. While it takes a significant amount of whey to make a small amount of traditional ricotta, here are other fantastic ways to utilize it:
- Baking: Replace water or milk with whey in recipes for bread, pancakes, muffins, or even pizza dough. The acidity and nutrients in the whey can tenderize gluten and add a subtle tang, enhancing the flavor and texture of your baked goods.
- Soups and Stews: Use whey as a flavorful liquid base for vegetable soups, broths, or stews. It adds depth and a slight umami character.
- Smoothies: A small amount of whey can be added to fruit smoothies for an extra protein and mineral boost.
- Cooking Grains: Cook rice, quinoa, or other grains in whey instead of water for added flavor and nutrients.
- Lactofermentation: Whey is an excellent starter for lacto-fermenting vegetables, such as sauerkraut or pickles.
- Compost or Pet Food: If not for human consumption, a little whey can be added to your compost pile or mixed into pet food (in moderation, especially for dogs, due to lactose content).
Storing Your Homemade Ricotta Cheese
To preserve the freshness and delicate flavor of your homemade ricotta cheese, proper storage is key. Transfer your freshly made ricotta into an airtight container immediately after draining. Store it in the coldest part of your refrigerator. Homemade ricotta is a fresh cheese and is not intended for extended aging; it will typically remain fresh and delicious for up to 7 days. Beyond this period, its quality will begin to decline, and it may develop a sour taste.
Can You Freeze Ricotta Cheese?
Yes, you can freeze ricotta cheese, which is a great option if you’ve made a large batch or want to extend its shelf life. Ricotta can be frozen for up to 1 month. To freeze, transfer the ricotta into a freezer-safe, airtight container, ensuring there is minimal air exposure, and seal it tightly. Place it in the freezer.
To thaw: Simply transfer the frozen ricotta from the freezer to the refrigerator and allow it to thaw overnight. Be aware that freezing can sometimes alter the texture of ricotta, making it slightly grainier or more watery upon thawing. While it may not retain the exact delicate creaminess of fresh ricotta, it will still be perfectly suitable for cooked dishes like lasagna, baked goods, or sauces where the texture change will be less noticeable.
Delicious Ways to Serve Homemade Ricotta Cheese
One of the most profound joys of making ricotta at home is the opportunity to enjoy it when it’s still warm and incredibly fresh. Its mild, sweet, and creamy nature makes it a perfect canvas for both simple and sophisticated flavor combinations.
- Savory Indulgence: For a quintessential experience, generously dollop your still-warm homemade ricotta onto your favorite crusty bread, artisanal crackers, or fresh-cut vegetables like cucumber slices or bell pepper strips. Drizzle it liberally with really high-quality extra virgin olive oil, add a fresh cracking of black pepper, and perhaps a sprinkle of flaky sea salt and a few fresh herbs like basil or chives. This simple preparation truly allows the ricotta’s delicate flavor to shine.
- Sweet Treat: If you have a sweet tooth, transform your fresh ricotta into a delightful dessert. Replace the olive oil with a generous drizzle of your favorite local honey or maple syrup. Serve it alongside fresh fruit such as ripe figs, juicy strawberries, delicate pear slices, or a medley of berries. A sprinkle of chopped nuts or a dusting of cinnamon can add extra layers of flavor and texture. It also makes an exquisite filling for crepes or a topping for fruit tarts.
- Breakfast Boost: Swirl a spoonful into oatmeal, spread it on toast with avocado, or use it as a creamy base for eggs benedict.
- Pasta Perfection: Stir into warm pasta with a little pasta water and herbs for an instant creamy sauce, or use as a filling for ravioli or manicotti.
- Pizza Topping: Add dollops to pizza after baking for a cool, creamy contrast to hot ingredients.
More of our Favorite…
Ricotta Cheese Recipes to Explore
Once you’ve tasted the freshness of homemade ricotta, you’ll want to incorporate it into everything. Here are some of our favorite recipes featuring this versatile cheese:
- Light and Fluffy Ricotta Cookies
- Pillowy Ricotta Pancakes for Brunch
- Classic Meat Lasagna with Rich Ricotta Layers
- Creamy Italian Ricotta Cheesecake
- Hearty Lasagna Soup with a Dollop of Ricotta
- Explore ALL Our Ricotta Cheese Recipes!
Homemade Ricotta Cheese Recipe
This homemade ricotta cheese recipe, crafted by Erin Harris, uses simple ingredients like whole milk, whipping cream, white vinegar, and kosher salt to create a deliciously fresh and creamy cheese.
Prep Time: 5 minutes
Cook Time: 40 minutes
Total Time: 45 minutes
Yields: Approximately 2.5 cups (5 servings)
Ingredients
- 1/2 gallon whole milk (3.25% fat, ensure it’s fresh and NOT ultra-pasteurized, UHT)
- ½ cup whipping cream (35% fat)
- 3 tablespoons white vinegar
- ½ teaspoon kosher salt
Instructions
- Prepare Draining Station: First, prepare your colander by lining it with cheesecloth. Fold the cheesecloth over itself 3 or 4 times, ensuring it’s a piece large enough to completely cover the colander with some overhang. Wet the cheesecloth and wring it out, then place it over the colander inside a large bowl. Set aside.
- Heat Ingredients: Add all of the milk, cream, and salt to a heavy-bottomed, non-reactive saucepan. Slowly heat the mixture over medium heat, stirring occasionally to prevent scorching. Use a thermometer to monitor the temperature until it reaches exactly 192ºF (88ºC). This typically takes 15-20 minutes. Remove the saucepan from the heat, and stir in all of the white vinegar.
- Rest and Coagulate: Cover the pot with a lid and allow the mixture to rest undisturbed for 15 minutes. During this time, the curds will fully form and separate from the whey.
- Drain the Ricotta: Gently ladle the ricotta (both the curds and whey) into your prepared cheesecloth-lined colander. Allow it to drain. The final consistency of the ricotta depends on how long you drain it: for a creamy ricotta, drain for 5-7 minutes. For a drier, firmer ricotta (ideal for baking), drain for up to 20 minutes.
- Serve or Store: Use the homemade ricotta immediately for the best taste and texture, or transfer it to an airtight container and refrigerate for up to one week.
Tips & Notes for Success
- Milk Type is Crucial: Always use fresh whole milk that is NOT ultra-pasteurized (UHT). Ultra-pasteurized milk will not allow for proper curd formation, resulting in a failed batch. Check the carton label carefully.
- Storage: Homemade ricotta is best enjoyed fresh. Store it in an airtight container in the refrigerator for up to 1 week.
- Freezer Instructions: To freeze, transfer the ricotta into an airtight, freezer-safe container and freeze for up to 1 month. To use, simply let it thaw overnight in the refrigerator. Note that freezing may slightly alter the texture.
- This recipe typically yields about 2.5 cups of fresh ricotta.
- Ensure your homemade ricotta is sufficiently drained, especially if you plan to use it in baking or as a filling for pasta. Excessively watery ricotta can negatively impact the outcome of your recipe.
- Reusing Cheesecloth: After use, wash your cheesecloth thoroughly in diluted bleach water, rinse well, and hang it to dry. High-quality cheesecloth can be reused many times.
- Texture Control: The duration of draining directly affects the ricotta’s texture. Draining for a shorter period yields a creamier, moister ricotta (great for spreads), while longer draining times result in a drier, firmer ricotta (excellent for baking or dense fillings).
Nutrition Information (Approximate per serving)
Calories: 180 kcal
Carbohydrates: 8 g
Protein: 12 g
Fat: 12 g
Fiber: 0 g
Sugar: 4 g
Nutrition information is automatically calculated and should only be used as an approximation.
Love this recipe? Share your thoughts!
Don’t forget to tag your culinary creations on social media with the hashtag #cheeseknees. We’d absolutely love to see what delicious dishes you’re whipping up with your homemade ricotta!