
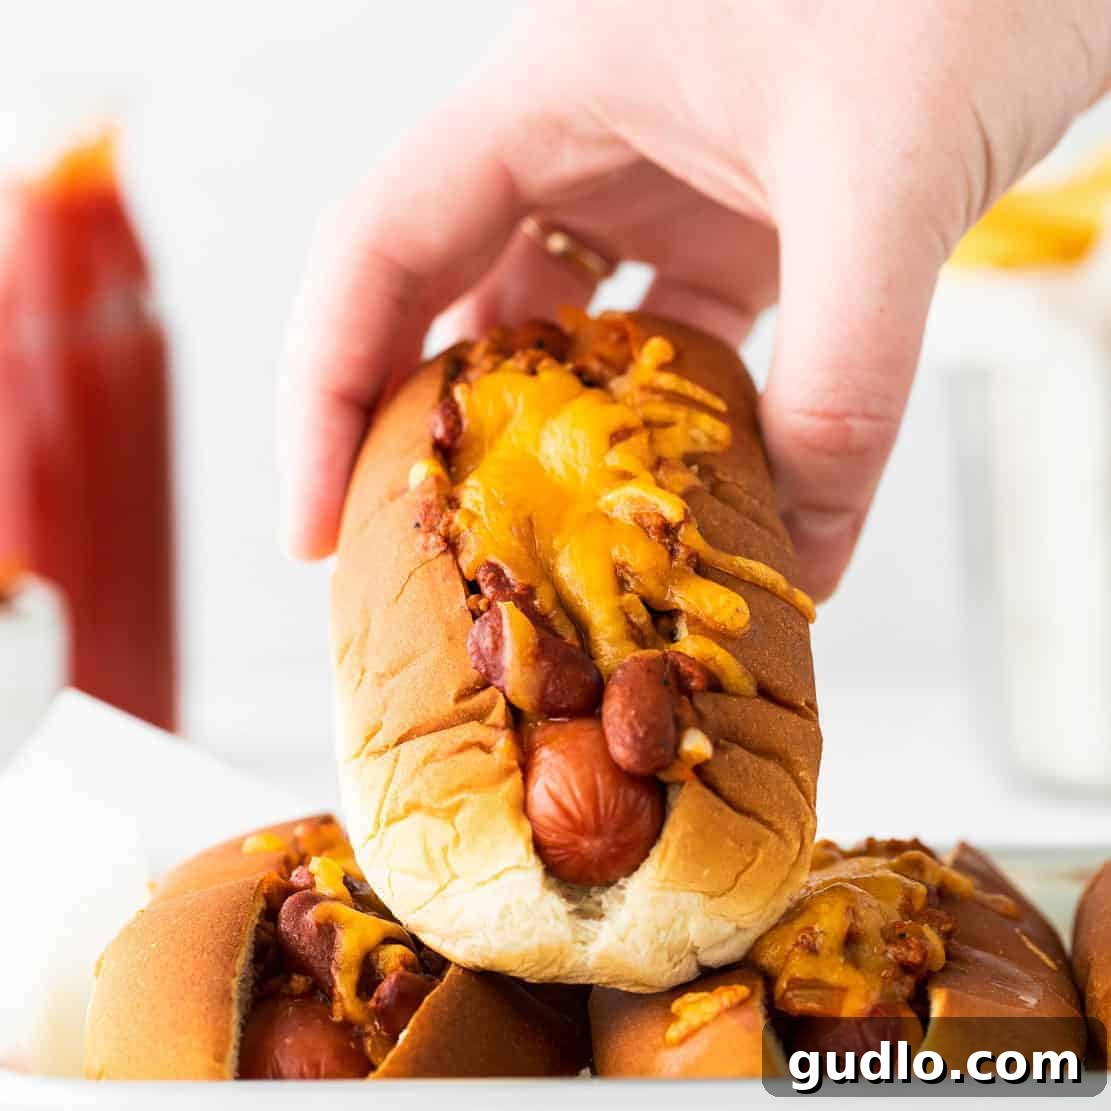
Ready to turn your classic hot dog into a culinary masterpiece? Our delicious chili cheese dog recipe is here to elevate your mealtime. Forget boring weeknight dinners; these dogs are crafted with a simple yet incredibly flavorful homemade meat and bean chili, nestled around your favorite hot dog, all perfectly housed in a soft bun, and crowned with a generous blanket of ooey-gooey melted cheddar cheese. It’s a guaranteed crowd-pleaser that transforms a humble frankfurter into a satisfying and utterly delightful experience.

Upgrade Your Hot Dogs: The Ultimate Chili Cheese Experience!
Say goodbye to uninspired hot dogs forever! It’s time to give your trusty frankfurters a spectacular upgrade by transforming them into glorious chili cheese dogs. This isn’t just about adding a topping; it’s about crafting a harmonious blend of savory, spicy (if you like!), and cheesy flavors that redefine the humble hot dog. By generously topping your hot dog with a rich, homemade chili and a luscious layer of melted cheddar, you’re not just creating a snack, you’re assembling a hearty, full-fledged meal. We’re all about making every bite count, and these chili cheese dogs certainly deliver on that promise!
What exactly is a chili dog? A chili dog is a beloved American classic featuring a cooked hot dog placed in a bun, generously smothered with a hearty meat chili, and often topped with shredded cheese and other optional garnishes.
Why This Chili Cheese Dog Recipe Shines
Effortlessly Delicious Homemade Chili: No need for complex recipes here! Our chili cheese dog recipe uses a straightforward, easy-to-follow chili recipe that’s packed with flavor, making it accessible for any home cook. It’s rich, savory, and the perfect complement to your hot dog.
Your Hot Dog, Your Way: This recipe is incredibly versatile. Whether you prefer all-beef, pork, turkey, or even plant-based hot dogs, feel free to use your absolute favorite brand and style. The chili is the star, ready to embrace any dog you choose.
Perfect for Gatherings & Leftovers: Whether you’re hosting a backyard barbecue, planning a casual family dinner, or simply craving indulgent comfort food, this recipe is designed to serve 6. It’s ideal for feeding a small crowd, or if you’re cooking for fewer, you’ll have delightful leftovers to enjoy later!
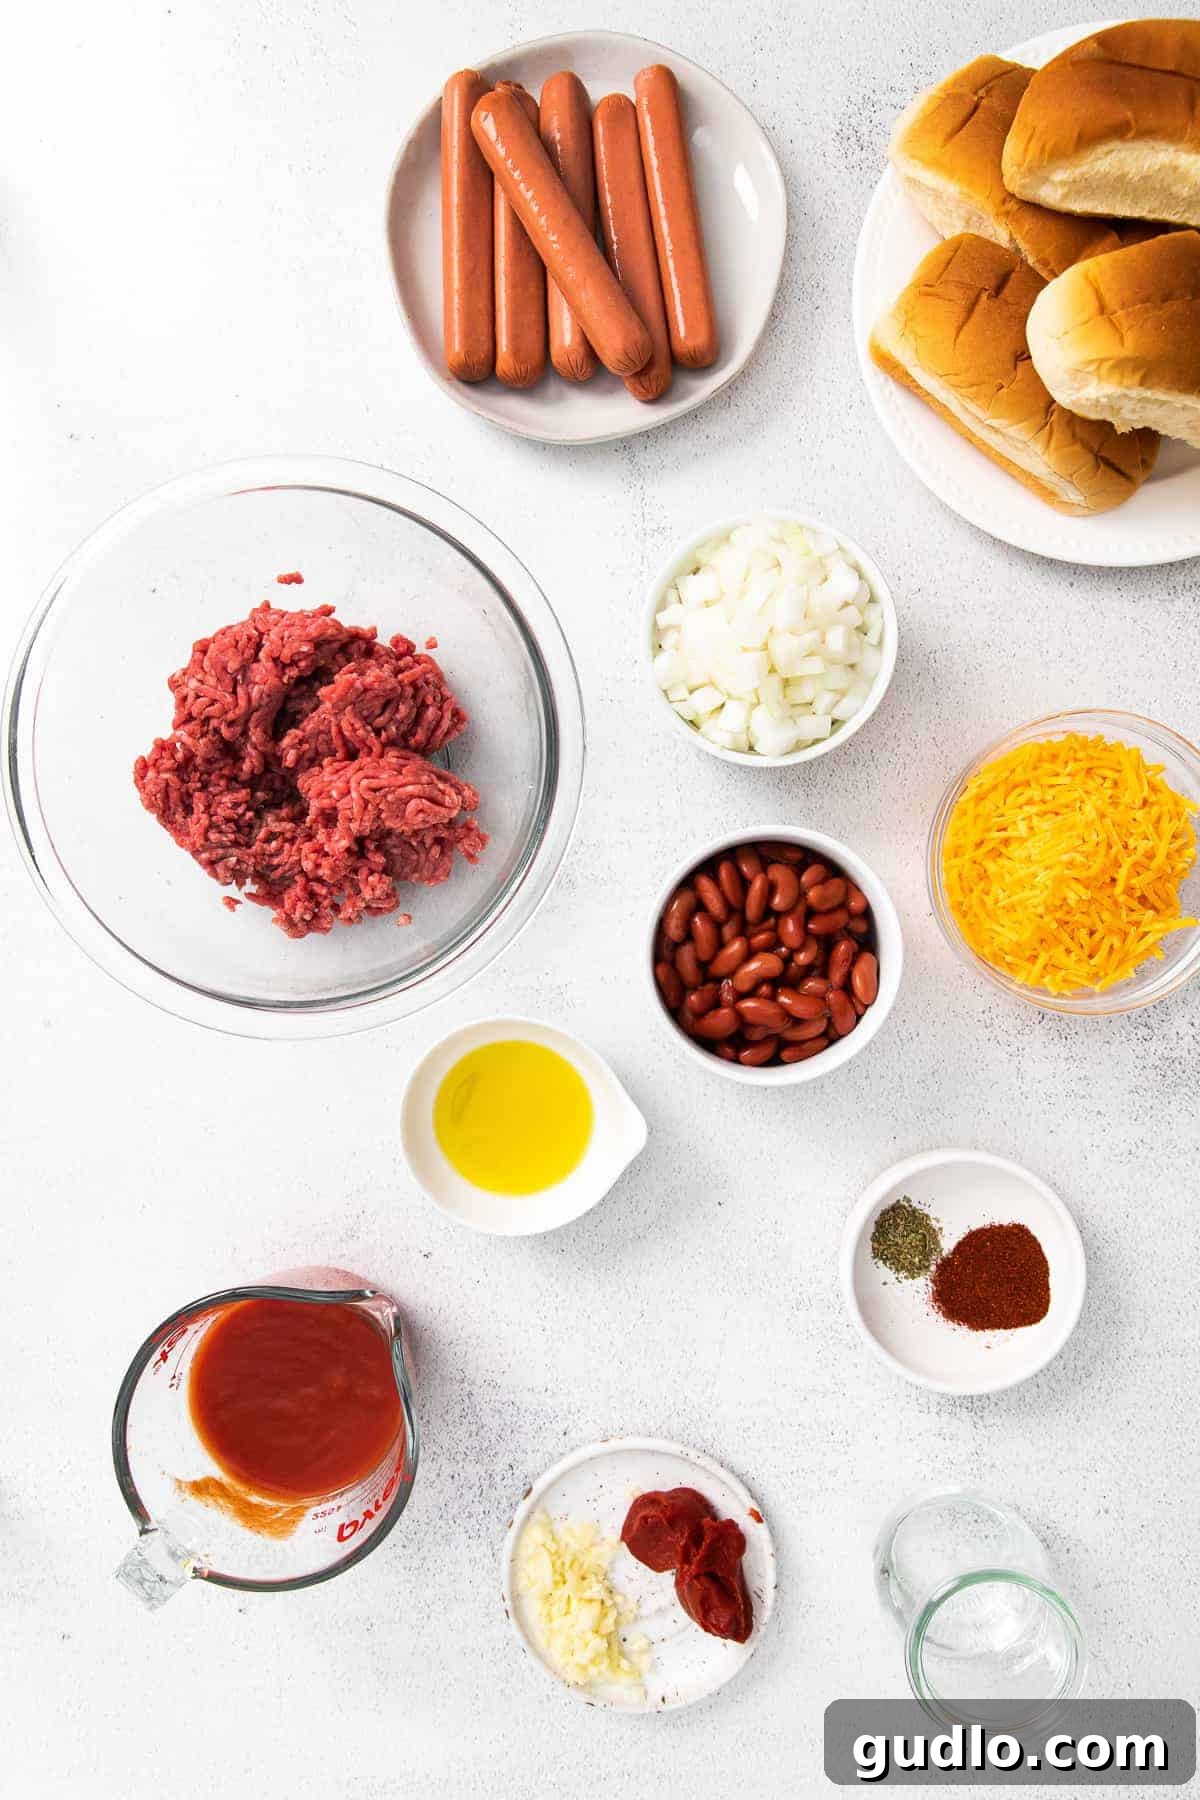
Essential Ingredients for Your Chili Cheese Dogs
Beyond the hot dogs, buns, and cheese that form the foundation of this iconic dish, you’ll need a handful of pantry staples for our simple homemade chili. Each ingredient plays a crucial role in building the deep, satisfying flavors of this comfort food classic.
- Ground Beef: We recommend 80/20 lean ground beef for the best balance of flavor and texture in the chili.
- Olive Oil: Essential for sautéing our aromatics and building the flavor base.
- Yellow Onion: Diced finely, it adds a foundational sweetness and savory depth to the chili.
- Garlic: Freshly minced garlic is non-negotiable for that aromatic kick.
- Tomato Paste: A concentrated burst of tomato flavor that enriches the chili’s body and color.
- Tomato Sauce: Forms the liquid base of our chili, providing tang and moisture.
- Water: To achieve the perfect chili consistency.
- Kidney Beans: Drained and rinsed, they add texture, substance, and classic chili flavor.
- Chili Powder: The quintessential spice that defines the character of our chili. Use a good quality blend for best results.
- Worcestershire Sauce: A secret weapon for adding a complex, umami depth that rounds out the flavors.
- Dried Oregano (Optional): For an extra layer of herbaceous aroma.
- Hot Dogs: Your preferred brand and type. All-beef dogs like Nathan’s are a popular choice for their snap and flavor.
- Hot Dog Buns: Soft, fresh buns are key. Consider brioche or potato buns for an extra treat.
- Cheddar Cheese: Freshly shredded medium or sharp cheddar melts beautifully and provides that signature gooey finish.
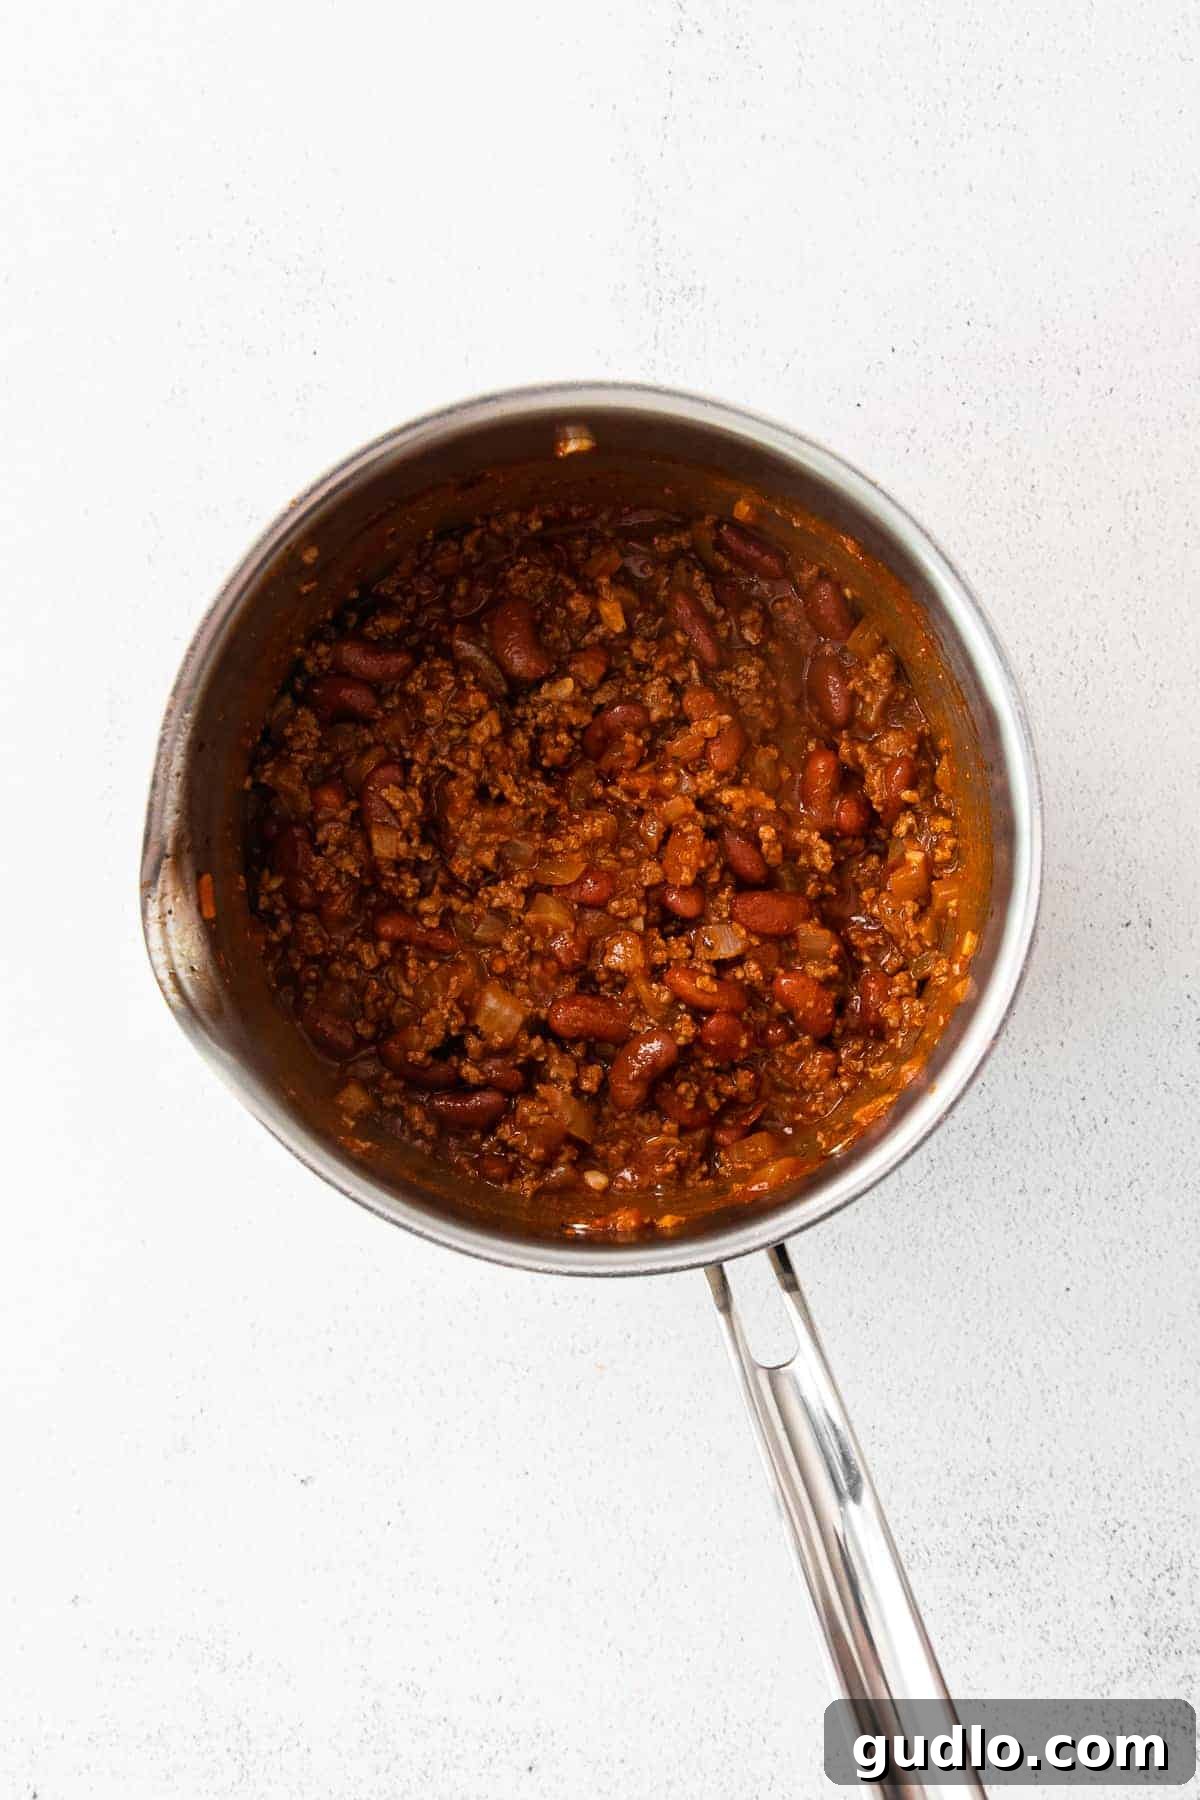
Customize Your Chili: Make It Truly Yours
While our homemade chili recipe is fantastic on its own, feel free to adapt it to your taste and schedule. The beauty of a chili cheese dog lies in its versatility, allowing you to tailor the chili component to your preference.
Experiment with Different Chili Recipes: If you already have a go-to chili recipe that you adore, don’t hesitate to use it! This chili dog recipe is designed to be flexible, so make it your own by incorporating your favorite blend of spices and ingredients.
Opt for Canned Chili for Convenience: Pressed for time or simply looking for a shortcut? Absolutely! Canned chili can be a perfectly acceptable base for your chili dogs. Just heat it thoroughly and spoon it over your hot dogs for a quicker meal. Look for a brand with a robust flavor profile.
Turn Up the Heat: Craving a spicier kick? It’s easy to add some heat to your chili. Incorporate a few tablespoons of either mild green chiles for a subtle warmth or finely diced jalapeños (with or without seeds, depending on your desired spice level) for a bolder punch. A pinch of cayenne pepper or a dash of your favorite hot sauce can also do the trick.
Meat Alternatives: For a lighter option or dietary preference, consider using ground turkey or a plant-based ground meat substitute in place of ground beef for the chili. Adjust cooking times as needed.
Bean Varieties: While kidney beans are traditional, feel free to swap them out for pinto beans, black beans, or a combination for a different texture and flavor profile.
How to Craft the Perfect Homemade Chili Cheese Dogs
Step 1: Prepare Your Rich Homemade Chili
Begin by browning your ground beef. Add ½ pound of ground beef to a large saucepan or Dutch oven and cook over medium-high heat. Break up the meat with a spoon as it cooks until it is thoroughly browned, about 5-8 minutes. Once cooked, remove the beef from the pan and set it aside, draining any excess grease. Next, add 2 tablespoons of olive oil to the same pan. Toss in 1 small diced yellow onion and sauté for about 5 minutes, stirring occasionally, until the onion becomes tender and translucent. Then, add 2 minced garlic cloves and 2 tablespoons of tomato paste, cooking for another minute until fragrant. Return the browned ground beef to the pan. Stir in ½ cup of tomato sauce, 2 cups of water, one 15 oz. can of drained and rinsed red kidney beans, 1 tablespoon of chili powder, and ¼ teaspoon of Worcestershire sauce, along with the optional ¼ teaspoon of dried oregano. Bring the mixture to a boil, then reduce the heat to low, cover, and let it simmer gently for 15 minutes, stirring occasionally, allowing the flavors to meld beautifully. Once done, remove the chili from the heat and keep it warm while you prepare the hot dogs.
Step 2: Cook Your Hot Dogs to Perfection
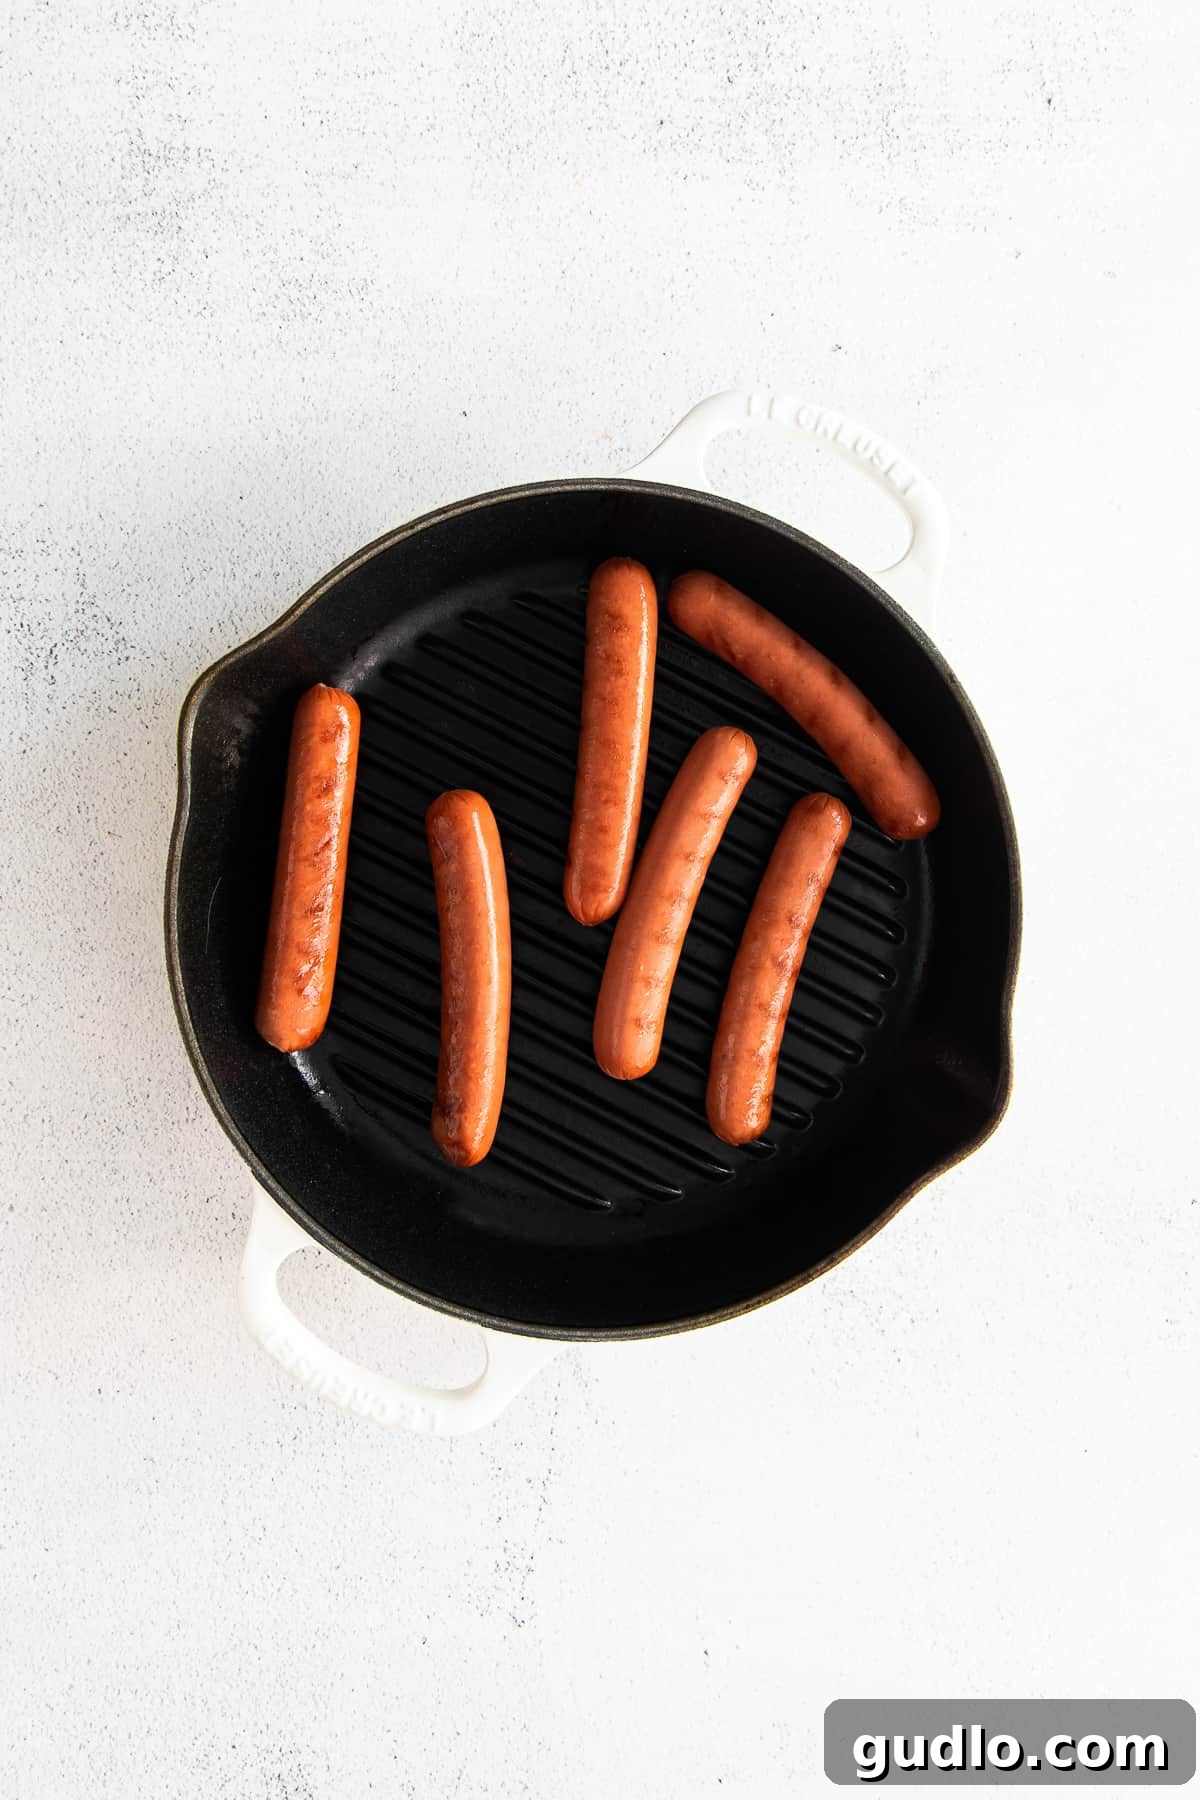
While your chili is simmering and developing its robust flavors, it’s time to prepare the star of the show: the hot dogs. Most hot dogs are sold fully cooked, so this step is primarily about heating them through and achieving a desirable texture. We highly recommend grilling or pan-sautéing your hot dogs for about 5-8 minutes over medium-high heat until they develop a slight char and a satisfying snap. This method imparts a much better flavor and texture than simply microwaving, though that option is available if you’re in a pinch. Whichever method you choose, aim for evenly heated and slightly crisp hot dogs.

Step 3: Assemble Your Chili Cheese Dog Masterpieces
Preheat your oven to 400°F (200°C). Carefully slice 6 hot dog buns about three-quarters of the way through, making sure not to cut them completely in half. Place the opened buns cut-side up on a baking sheet. You can lightly toast them in the oven for about 5 minutes for a sturdier base, if desired. Once the buns are ready, place one cooked hot dog into each bun. Now comes the exciting part: generously top each hot dog with about 2-3 tablespoons of your warm, homemade chili, adjusting the quantity to your liking. Follow the chili with a liberal sprinkle of 2-3 tablespoons of freshly shredded cheddar cheese over each dog. Using freshly shredded cheese, rather than pre-shredded, often results in a smoother, gooier melt.
Step 4: Bake for a Gooey, Melty Finish
With your chili cheese dogs assembled, place the baking sheet into your preheated 400°F (200°C) oven. Bake for approximately 8-10 minutes, or until the cheddar cheese is completely melted, bubbly, and slightly golden in spots. This baking step not only ensures the cheese is perfectly gooey but also warms everything through, melding all the flavors together for that ultimate comfort food experience.
Step 5: Serve Immediately and Enjoy
Once the cheese is melted to perfection, remove your piping hot chili cheese dogs from the oven. Serve them immediately while they are warm and the cheese is still wonderfully gooey. These are best enjoyed fresh off the tray. Don’t forget to offer a selection of your favorite additional toppings to let everyone customize their perfect chili cheese dog!

Elevate Your Dog: Creative Topping Ideas
While chili and cheese are a classic combination, there’s no reason not to get creative and “doctor up” your dogs even more! Here are some fantastic ideas to take your chili cheese dogs to the next level of deliciousness:
- Diced Onions: Finely chopped raw white or red onions add a delightful crunch and pungent bite that cuts through the richness.
- Diced Jalapeños: For those who love a bit of heat, fresh or pickled diced jalapeños bring a spicy kick and vibrant flavor.
- Hot Sauce: A few dashes of your favorite hot sauce can add an extra layer of flavor and heat.
- Sweet or Dill Relish: Adds a tangy, slightly sweet, or briny counterpoint to the savory chili.
- Caramelized Onions: For a more sophisticated touch, sweet, slow-cooked caramelized onions offer a deep, savory sweetness.
- Mustard: A squiggly line of yellow or Dijon mustard provides a classic hot dog flavor.
- Sour Cream or Greek Yogurt: A dollop can add a cooling creaminess, especially if your chili is spicy.
- Chopped Cilantro: For a fresh, herbaceous garnish.
- Crumbled Bacon: Everything’s better with bacon!

Tips for the Best Chili Cheese Dogs
- Don’t Skimp on Simmer Time: Allow the chili to simmer for the full 15 minutes. This is crucial for the flavors to fully develop and meld.
- Toast Your Buns: Lightly toasting the buns before assembly creates a barrier against the chili’s moisture, preventing sogginess and adding a pleasant texture.
- Freshly Shredded Cheese is King: Pre-shredded cheese often contains anti-caking agents that can hinder a smooth melt. Shredding your own cheddar ensures the creamiest, goo-iest results.
- Drain Excess Fat: After browning the ground beef, make sure to drain any excess fat. This prevents your chili from becoming greasy.
- Don’t Overload: While it’s tempting to pile on the chili and cheese, be mindful not to overstuff your buns to prevent a messy eating experience.
Frequently Asked Questions About Chili Cheese Dogs
Can I make the chili ahead of time?
Absolutely! The chili can be made up to 3 days in advance. In fact, many people find that chili tastes even better the next day as the flavors have more time to deepen. Store it in an airtight container in the refrigerator and reheat gently on the stovetop or in the microwave before assembling your hot dogs.
How do I store leftover chili cheese dogs?
For the best experience, chili cheese dogs are meant to be eaten fresh. We don’t recommend storing them assembled, as the buns tend to become soggy. However, you can store any leftover chili separately in an airtight container in the refrigerator for up to 3 days. Leftover cooked hot dogs can also be stored separately for a day or two and reheated.
What are some great side dishes to serve with chili cheese dogs?
Classic sides that pair wonderfully include French fries, onion rings, potato salad, coleslaw, corn on the cob, or a simple green salad for a fresh contrast. For a full diner experience, add a milkshake!
Can I use different types of meat for the chili?
Yes! While ground beef is traditional, you can easily substitute it with ground turkey, ground chicken, or even a plant-based ground meat alternative. Adjust cooking times and seasonings as needed to match your chosen protein.
Is there a way to make this recipe vegetarian?
Certainly! Use vegetarian hot dogs and a plant-based ground meat substitute for the chili. Ensure any other ingredients like Worcestershire sauce are vegetarian-friendly (some contain anchovies). You’ll still achieve a wonderfully flavorful vegetarian chili cheese dog!
More of our Favorite Delicious…
Hearty Dinner Ideas
- Comforting Lasagna Soup
- Savory Keto Quesadillas
- Classic Rigatoni Pie
- Layered Taco Lasagna
Chili Cheese Dog
Elevate your hot dog experience with this ultimate homemade chili cheese dog recipe! Featuring a rich, simple chili and perfectly melted cheddar cheese, these dogs are a game-changer.
By: Lee Funke
Prep Time: 15 mins
Cook Time: 20 mins
Total Time: 35 mins
Servings: 6

Ingredients
For the Chili
- ½ pound ground beef (80/20 recommended)
- 2 tablespoons olive oil
- 1 small yellow onion, diced (about 1 cup)
- 2 garlic cloves, minced
- 2 tablespoons tomato paste
- ½ cup tomato sauce
- 2 cups water
- 15 oz. can red kidney beans, drained and rinsed
- 1 tablespoon chili powder
- ¼ teaspoon Worcestershire sauce
- ¼ teaspoon dried oregano (optional)
For the Hot Dogs
- 6 all-beef hot dogs (such as Nathan’s Brand)
- 6 hot dog buns
- 1 cup cheddar cheese, shredded
- Prepared Chili (from above)
Instructions
Chili Preparation
- Heat a large saucepan or Dutch oven over medium-high heat. Add the ground beef and cook for 5-8 minutes, stirring occasionally, until thoroughly browned. Drain any excess fat and remove the beef from the pan.
- Add the olive oil and diced onion to the same pan. Sauté for about 5 minutes, stirring frequently, until the onion becomes tender and translucent.
- Stir in the minced garlic and tomato paste, cooking for just one minute more until fragrant.
- Return the browned ground beef to the pan. Add the tomato sauce, water, drained and rinsed kidney beans, chili powder, Worcestershire sauce, and optional dried oregano.
- Bring the mixture to a boil, then reduce the heat to low and let it simmer gently for 15 minutes, stirring occasionally to prevent sticking and allow flavors to meld.
- Once the chili is ready, remove it from the heat and set it aside while you prepare the hot dogs.
Hot Dog Assembly & Baking
- Preheat your oven to 400°F (200°C).
- Cook your hot dogs using your preferred method: grill, pan-fry, or sauté for 5-8 minutes over medium-high heat until they are warmed through and have a nice texture.
- Carefully slice the hot dog buns open, ensuring you don’t cut them completely in half. Place the opened buns cut-side up on a baking sheet.
- Bake the buns for 8 minutes, or just until they’re lightly toasted on top, creating a sturdy base for your chili dogs.
- Place one cooked hot dog into each toasted bun.
- Generously top each hot dog with 2-3 tablespoons of the prepared chili, adjusting the amount to your preference.
- Sprinkle 2-3 tablespoons of shredded cheddar cheese over the chili on each hot dog.
- Return the assembled chili cheese dogs to the oven and bake for another 8-10 minutes, or until the cheese is beautifully melted and bubbly.
- Serve immediately and enjoy your ultimate homemade chili cheese dogs! For best results, do not store the assembled hot dogs as the buns can become soggy. Store any leftover chili separately in an airtight container in the refrigerator for up to three days.
Nutrition Information (Approximate per serving)
- Calories: 658 kcal
- Carbohydrates: 56 g
- Protein: 34 g
- Fat: 33 g
- Fiber: 12 g
- Sugar: 7 g
Nutrition information is automatically calculated and should be used as an approximation.
Conclusion
There you have it – the ultimate guide to creating a chili cheese dog experience that will delight your senses and satisfy your cravings. This recipe offers a harmonious blend of rich, savory chili, perfectly cooked hot dogs, and gooey melted cheddar, all coming together in a symphony of comfort food flavors. Whether it’s for a casual family meal, a game day gathering, or simply a treat for yourself, these homemade chili cheese dogs are sure to become a beloved favorite. So roll up your sleeves, gather your ingredients, and get ready to enjoy a truly memorable meal that proves hot dogs are anything but boring!
Love this recipe? We want to hear from you! Leave a comment below!
Don’t forget to tag your culinary creations on social media with the hashtag #cheeseknees. We’d absolutely love to see your delicious chili cheese dogs!