
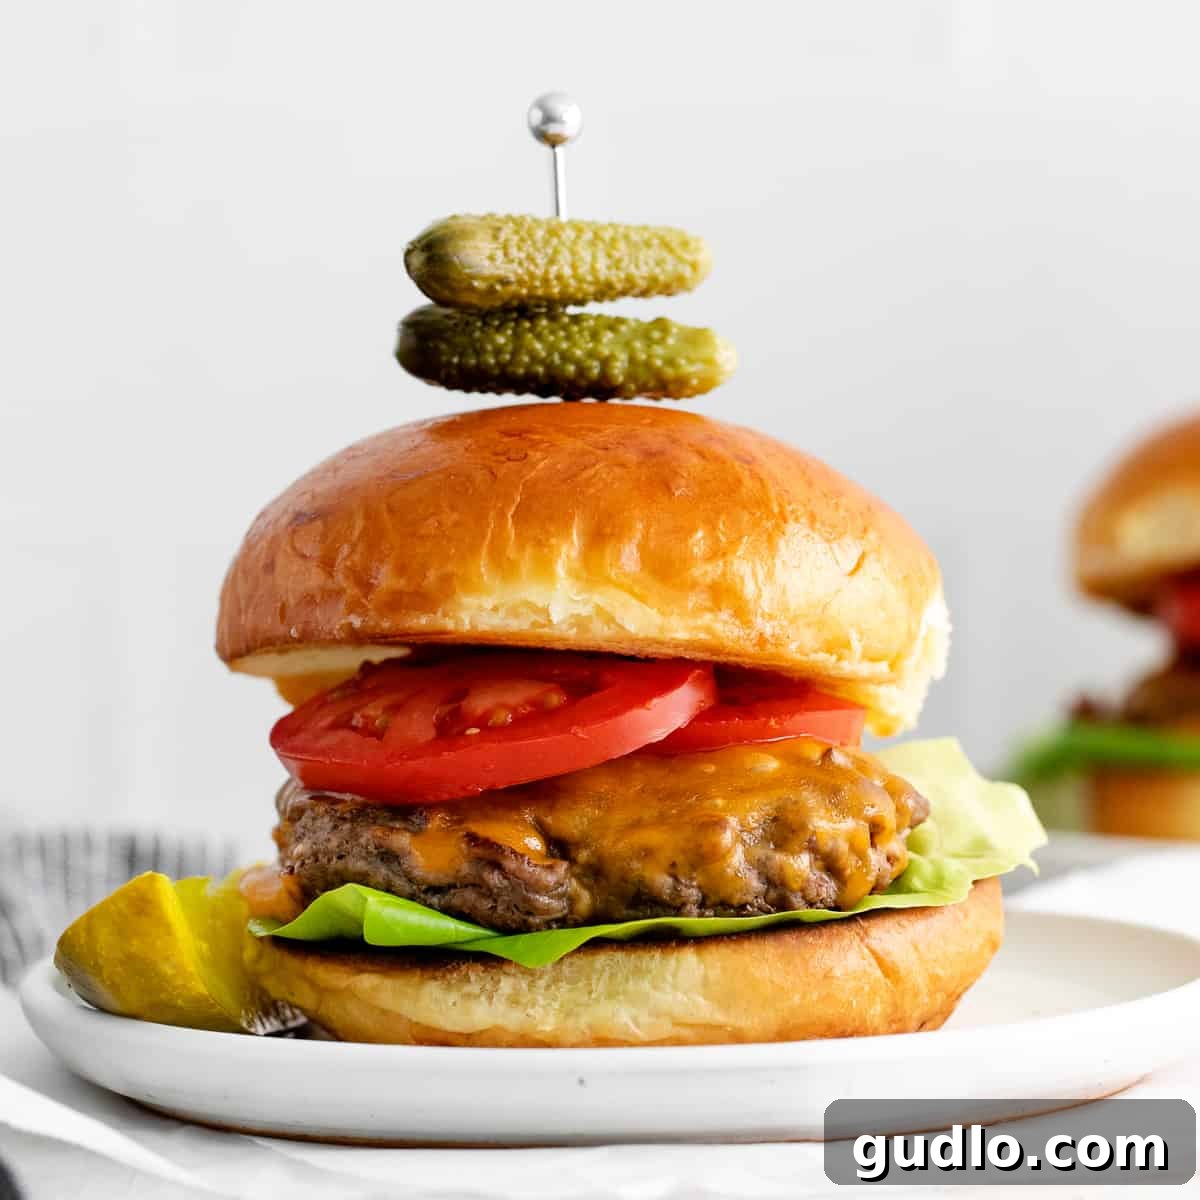
Welcome to the ultimate guide for crafting the best simple cheeseburgers you’ve ever tasted! Forget dry, lackluster patties; this recipe guarantees perfectly juicy, flavor-packed burgers every single time. Get ready to elevate your burger game and enjoy a truly delicious meal.
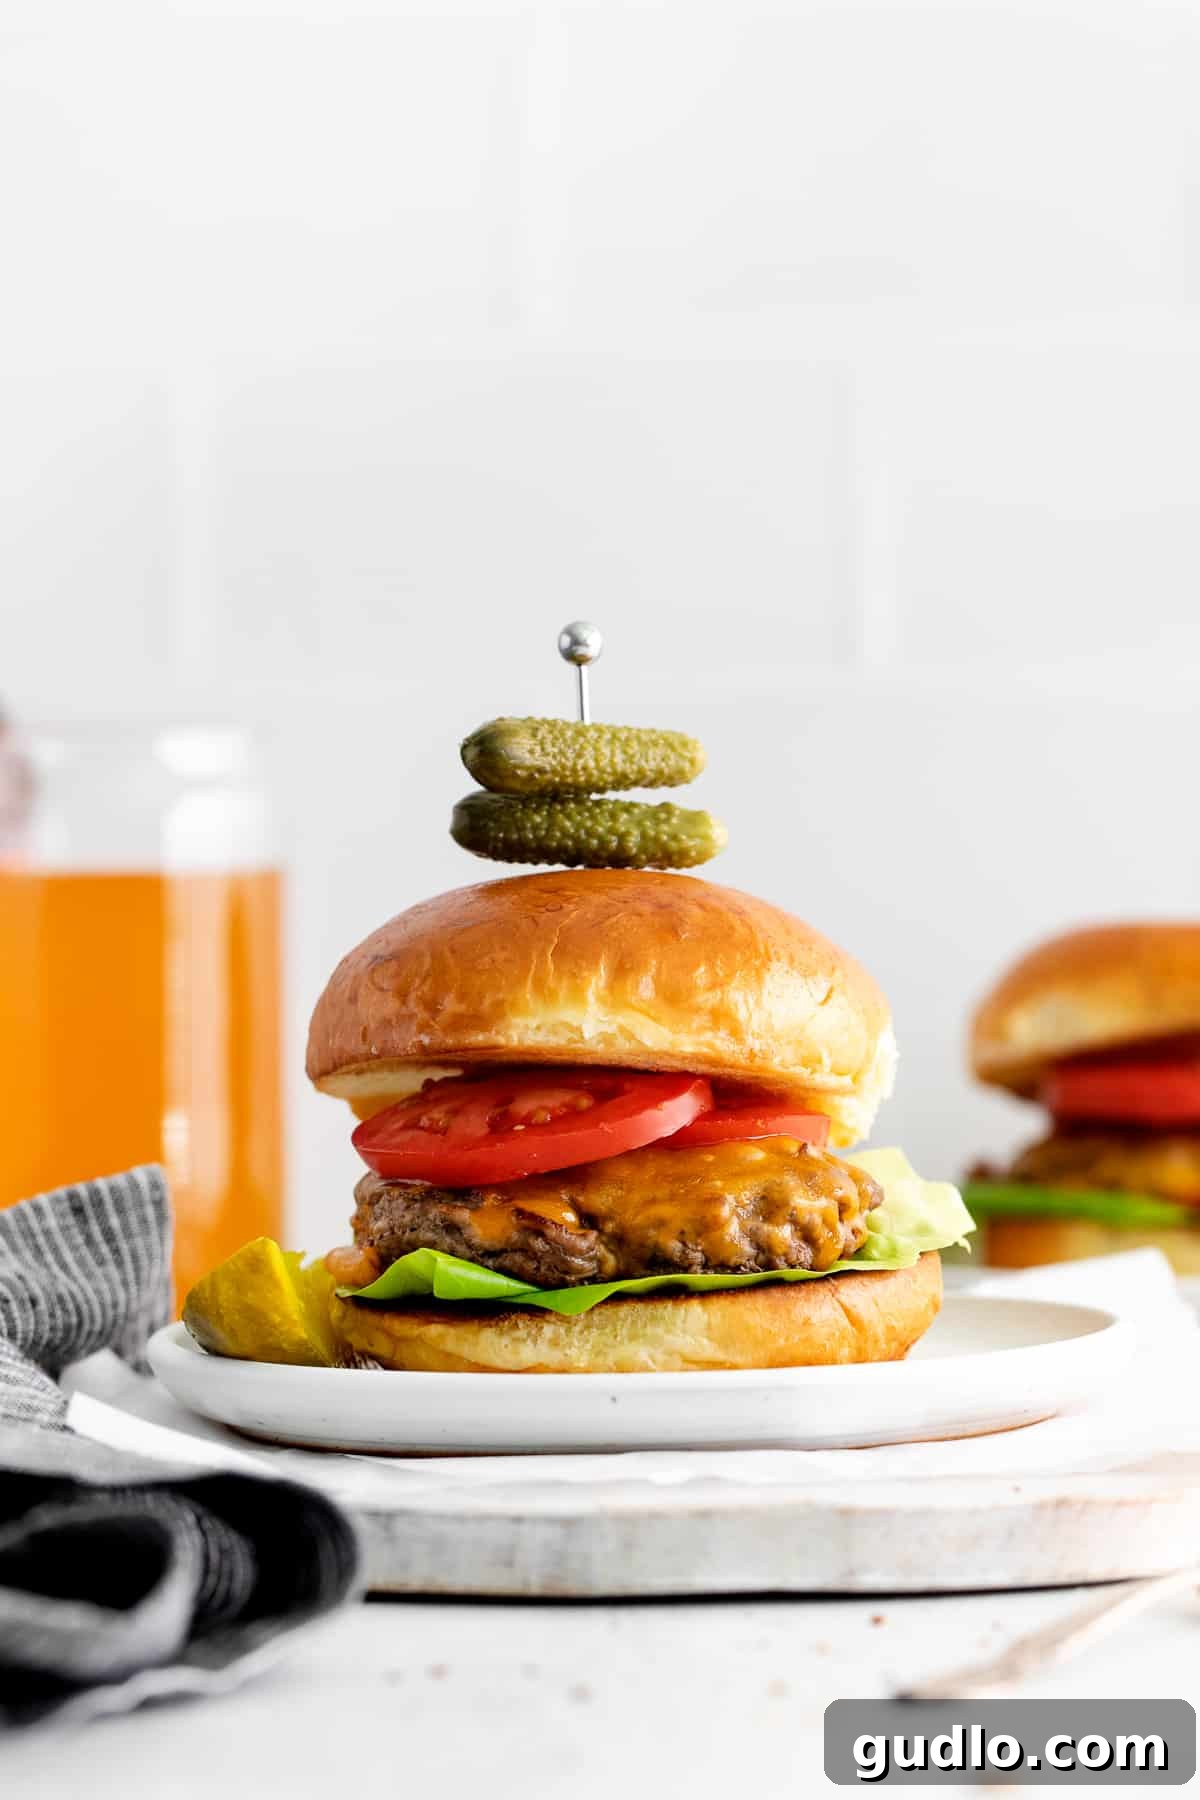
The BEST Simple Cheeseburgers: Your Go-To Recipe for Juicy Perfection
It’s burger night, and you don’t need a fancy restaurant to enjoy a truly spectacular cheeseburger! If you’ve ever doubted your ability to create a perfect burger at home, prepare to be amazed. These simple cheeseburgers are incredibly juicy, astonishingly easy to prepare, and represent the quintessential summer meal – or a comforting dinner any time of year. With just a few basic ingredients and straightforward steps, you’ll be sinking your teeth into a homemade masterpiece in no time.
Why You’ll Fall in Love with These Homemade Cheeseburgers
Super Simple to Master: Crafting homemade ground beef cheeseburgers has never been easier. From toasting buns to forming patties and melting cheese, each step is designed for simplicity, making this recipe accessible for cooks of all skill levels. You’ll gain confidence in the kitchen and impress everyone with your burger-making prowess.
A Quick 30-Minute Meal: When hunger strikes and time is short, this recipe comes to the rescue. In less than 30 minutes, you can have a full, satisfying, and utterly delicious dinner ready on the table. It’s the perfect solution for busy weeknights, impromptu gatherings, or whenever you crave a classic comfort food quickly.
Unbeatably Moist & Juicy: Bid farewell to dry, crumbly burgers forever! We’re sharing our tried-and-true techniques and top tips to ensure your cheeseburgers are consistently moist, tender, and bursting with savory juices. Every bite is a testament to perfectly cooked ground beef and melted cheese, creating an unforgettable texture and flavor experience.
Effortlessly Customizable: While the base recipe is simple and perfect on its own, these cheeseburgers are a blank canvas for your culinary creativity. Load them up with your favorite toppings, experiment with different cheeses, or even try unique bun varieties. It’s a meal that truly caters to everyone’s preferences.
The Ultimate Crowd-Pleaser: Whether you’re cooking for family, friends, or just yourself, these simple cheeseburgers are guaranteed to be a hit. Their classic appeal and undeniable deliciousness make them a universal favorite, perfect for backyard BBQs, casual dinners, or game day feasts.
Essential Ingredients for Your Simple Cheeseburger Masterpiece
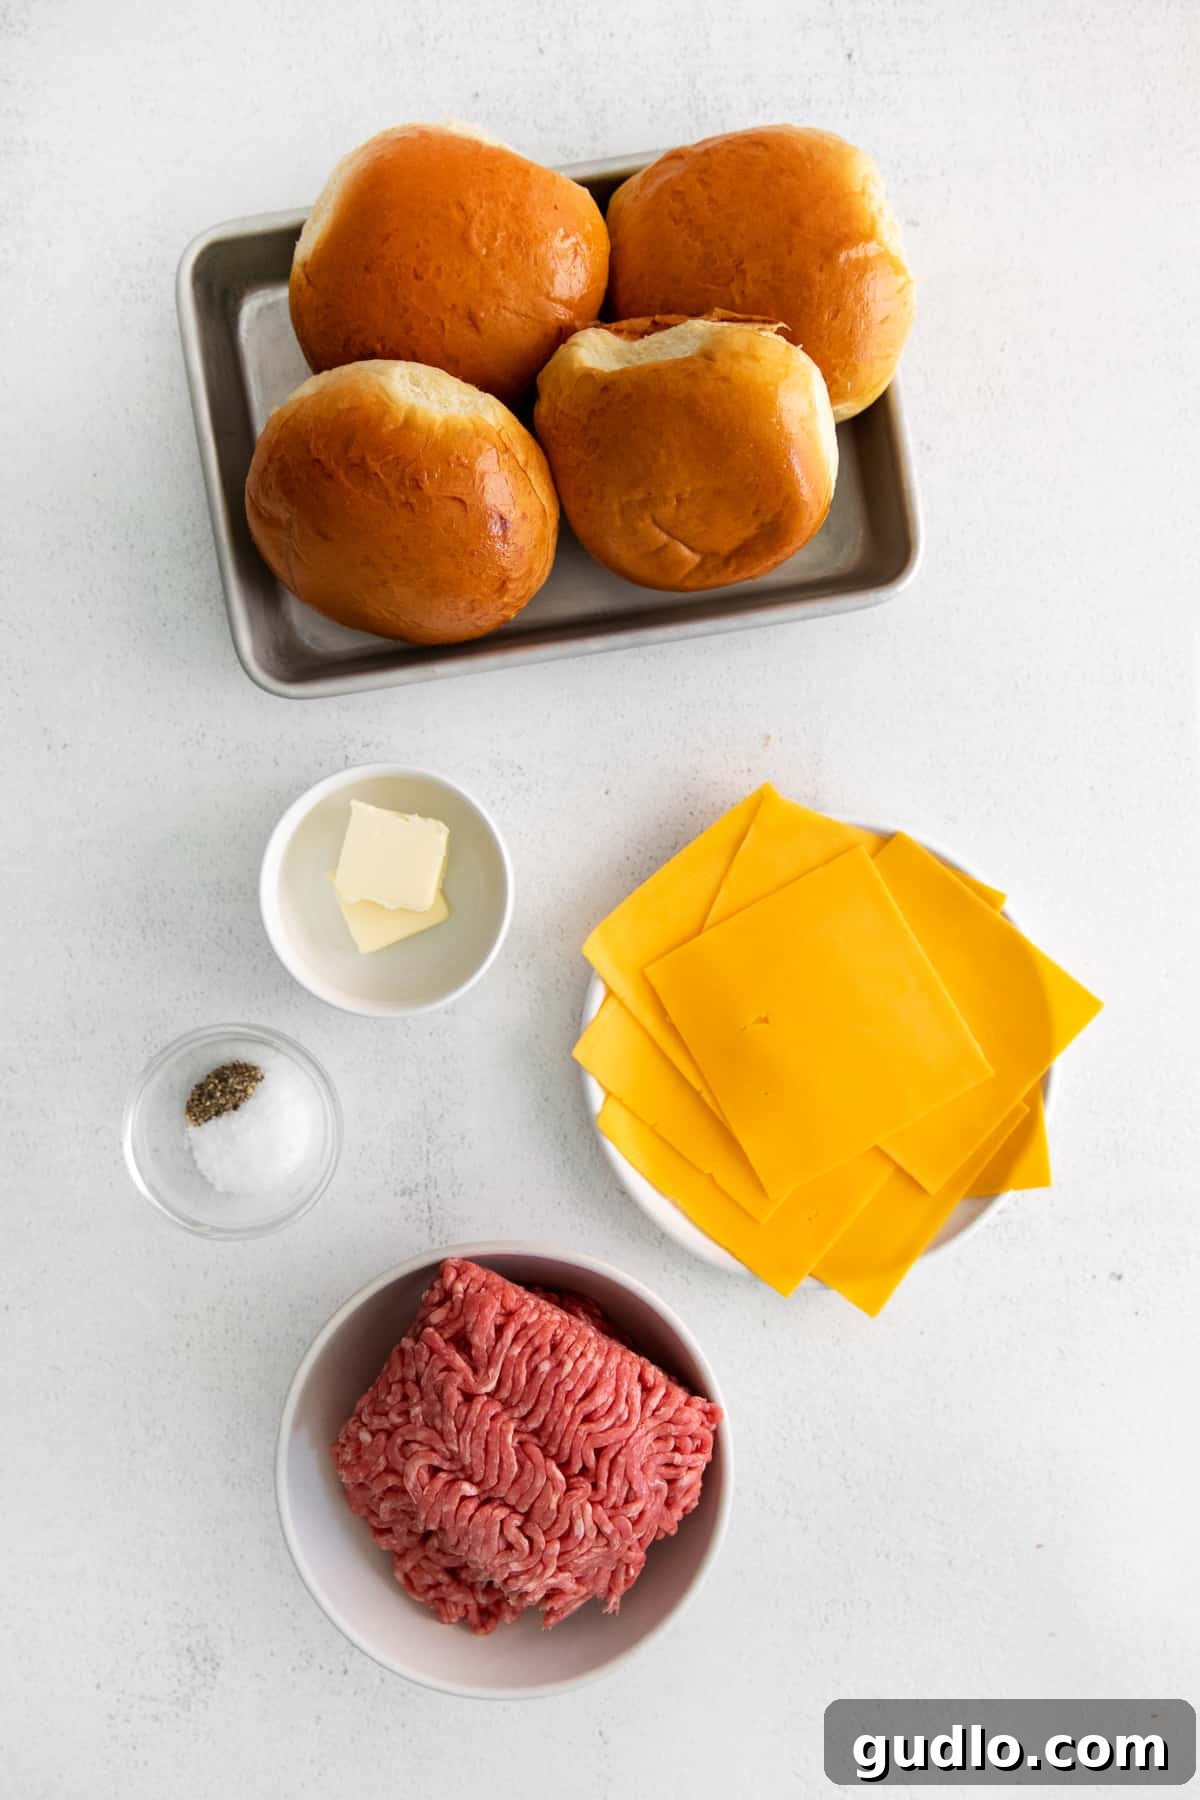
Creating a truly exceptional cheeseburger starts with high-quality ingredients. Here’s what you’ll need to gather:
- Unsalted Butter: Room temperature unsalted butter is key for achieving perfectly golden-brown, toasted hamburger buns. The butter not only adds a rich flavor but also creates a slight crispness that enhances the overall burger experience. Avoid cold butter as it won’t spread as easily or toast as evenly.
- Hamburger Buns: This is where you can truly customize your burger! While we adore a classic, soft brioche bun for its buttery richness and slight sweetness, don’t hesitate to explore other options. A hearty pretzel bun offers a unique chew and salty crust, while a dense rye bread can provide a sophisticated twist. Consider potato buns for extra softness or classic sesame seed buns for a timeless feel.
- Ground Beef (85/15 Blend): For the ideal balance of flavor and juiciness, we highly recommend an 85/15 ground beef blend (85% lean, 15% fat). This fat content renders down during cooking, keeping the patties incredibly moist and flavorful without making them overly greasy. While leaner blends like 90/10 can be used, they may result in a slightly drier burger.
- Salt & Pepper: Sometimes, simplicity is best. A generous seasoning of salt and freshly ground black pepper is truly all you need to bring out the natural, delicious flavors of the ground beef. Don’t underestimate the power of these fundamental spices!
- Sliced Cheddar Cheese: There’s nothing quite like the creamy, sharp tang of classic sliced sharp cheddar melting over a hot burger patty. It’s the quintessential cheeseburger topping. However, feel free to use your favorite variety of sliced cheese. American cheese offers a super-melty, gooey texture, provolone provides a milder, nutty taste, or even a spicy Monterey Jack can add a kick.
Step-by-Step Guide: Crafting Your Perfect Simple Cheeseburgers
These incredibly delicious cheeseburgers come together in just four easy steps, meaning you’re mere moments away from savoring homemade burger perfection. Let’s walk through the process:
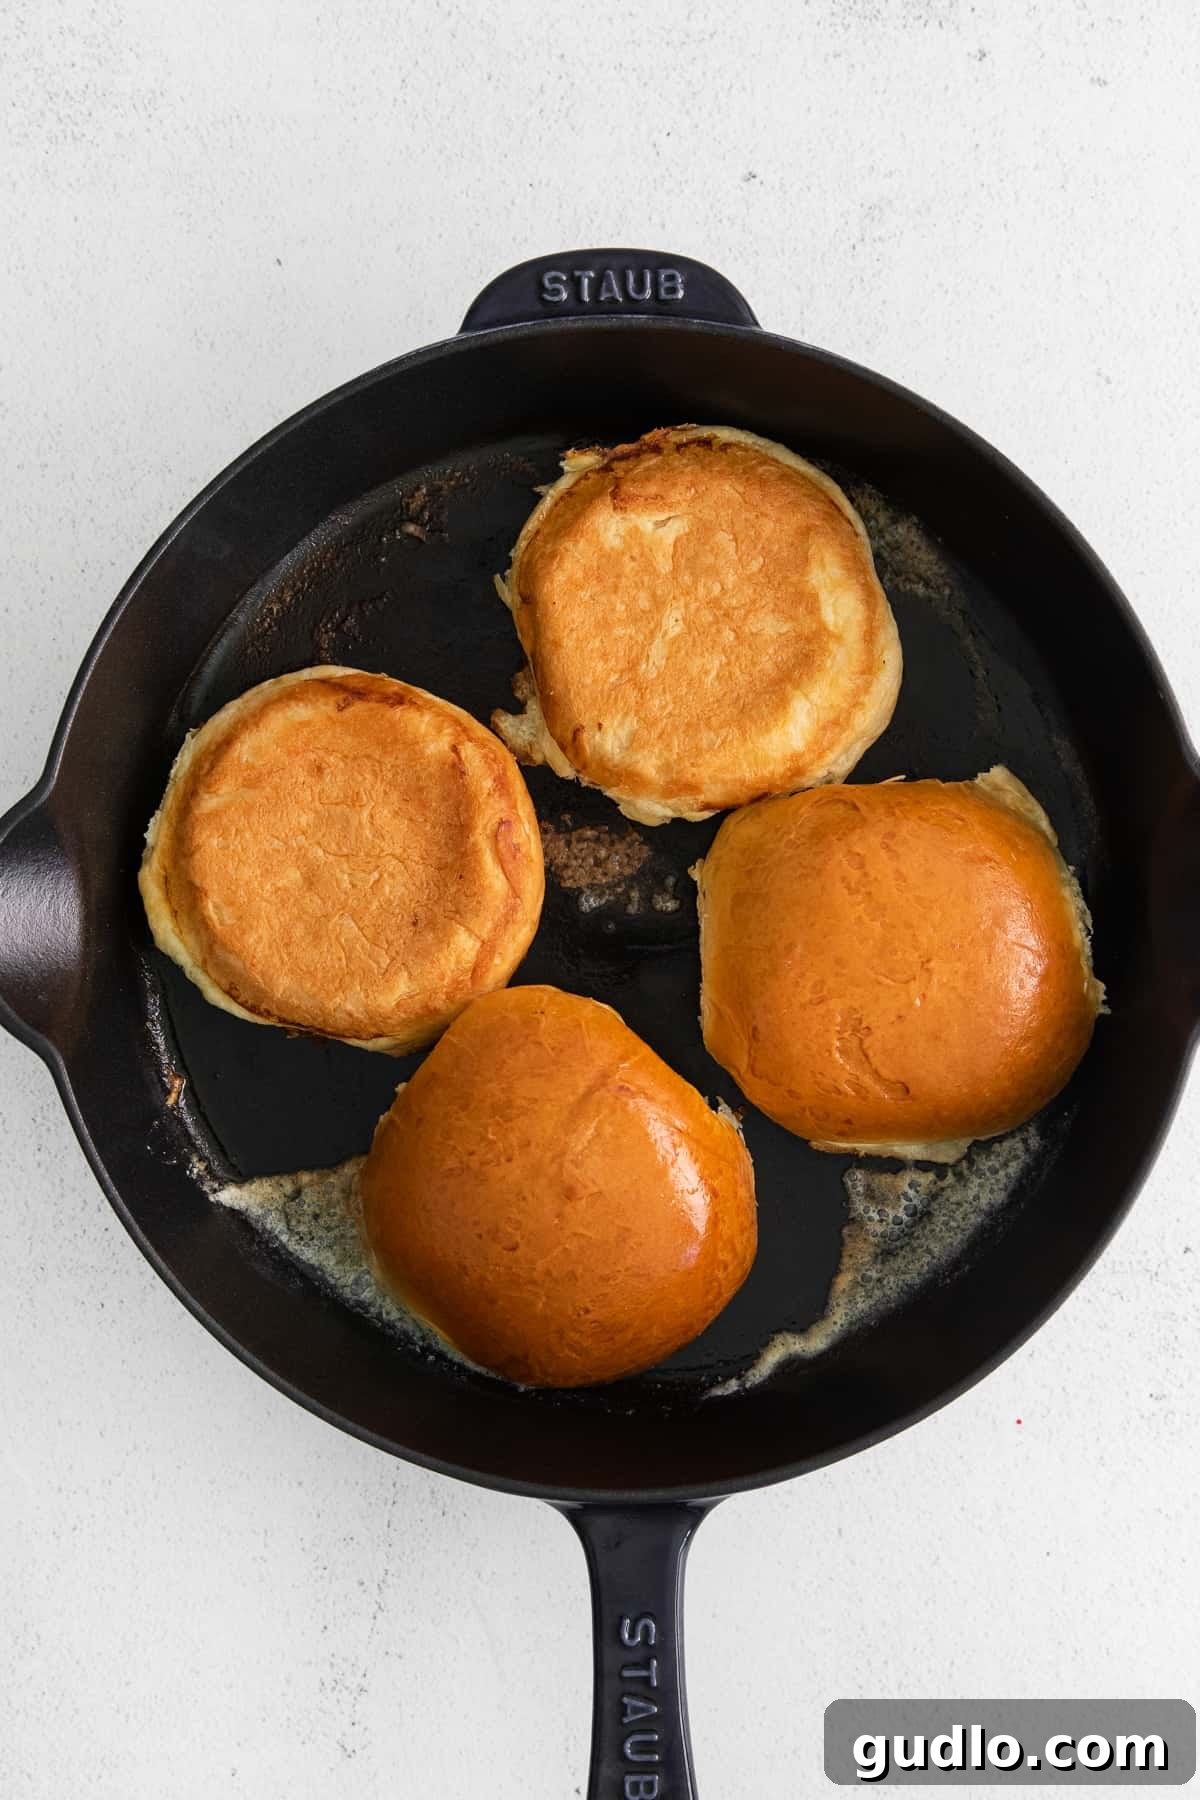
Step 1: Perfectly Toast Your Buns
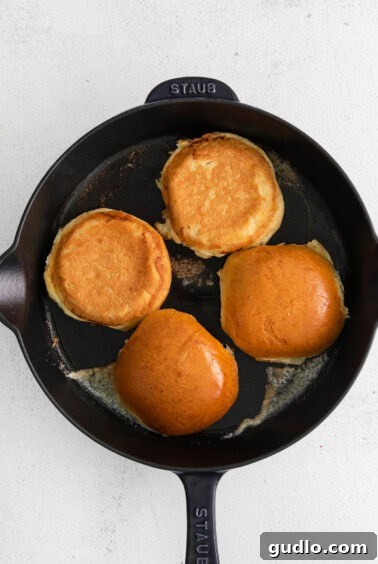
Begin by lightly spreading a thin, even layer of room temperature unsalted butter on the inside of each hamburger bun. This butter layer is crucial for achieving that desirable golden-brown color and a subtle crispness. Heat a large skillet (cast iron works wonderfully for even heat) over medium-high heat. Once hot, place the buttered sides of the buns face down in the skillet. Toast for 2-3 minutes, watching carefully until they turn a beautiful golden brown and become slightly crisp. Remove from the skillet and set aside.
Step 2: Prepare Your Juicy Burger Patties
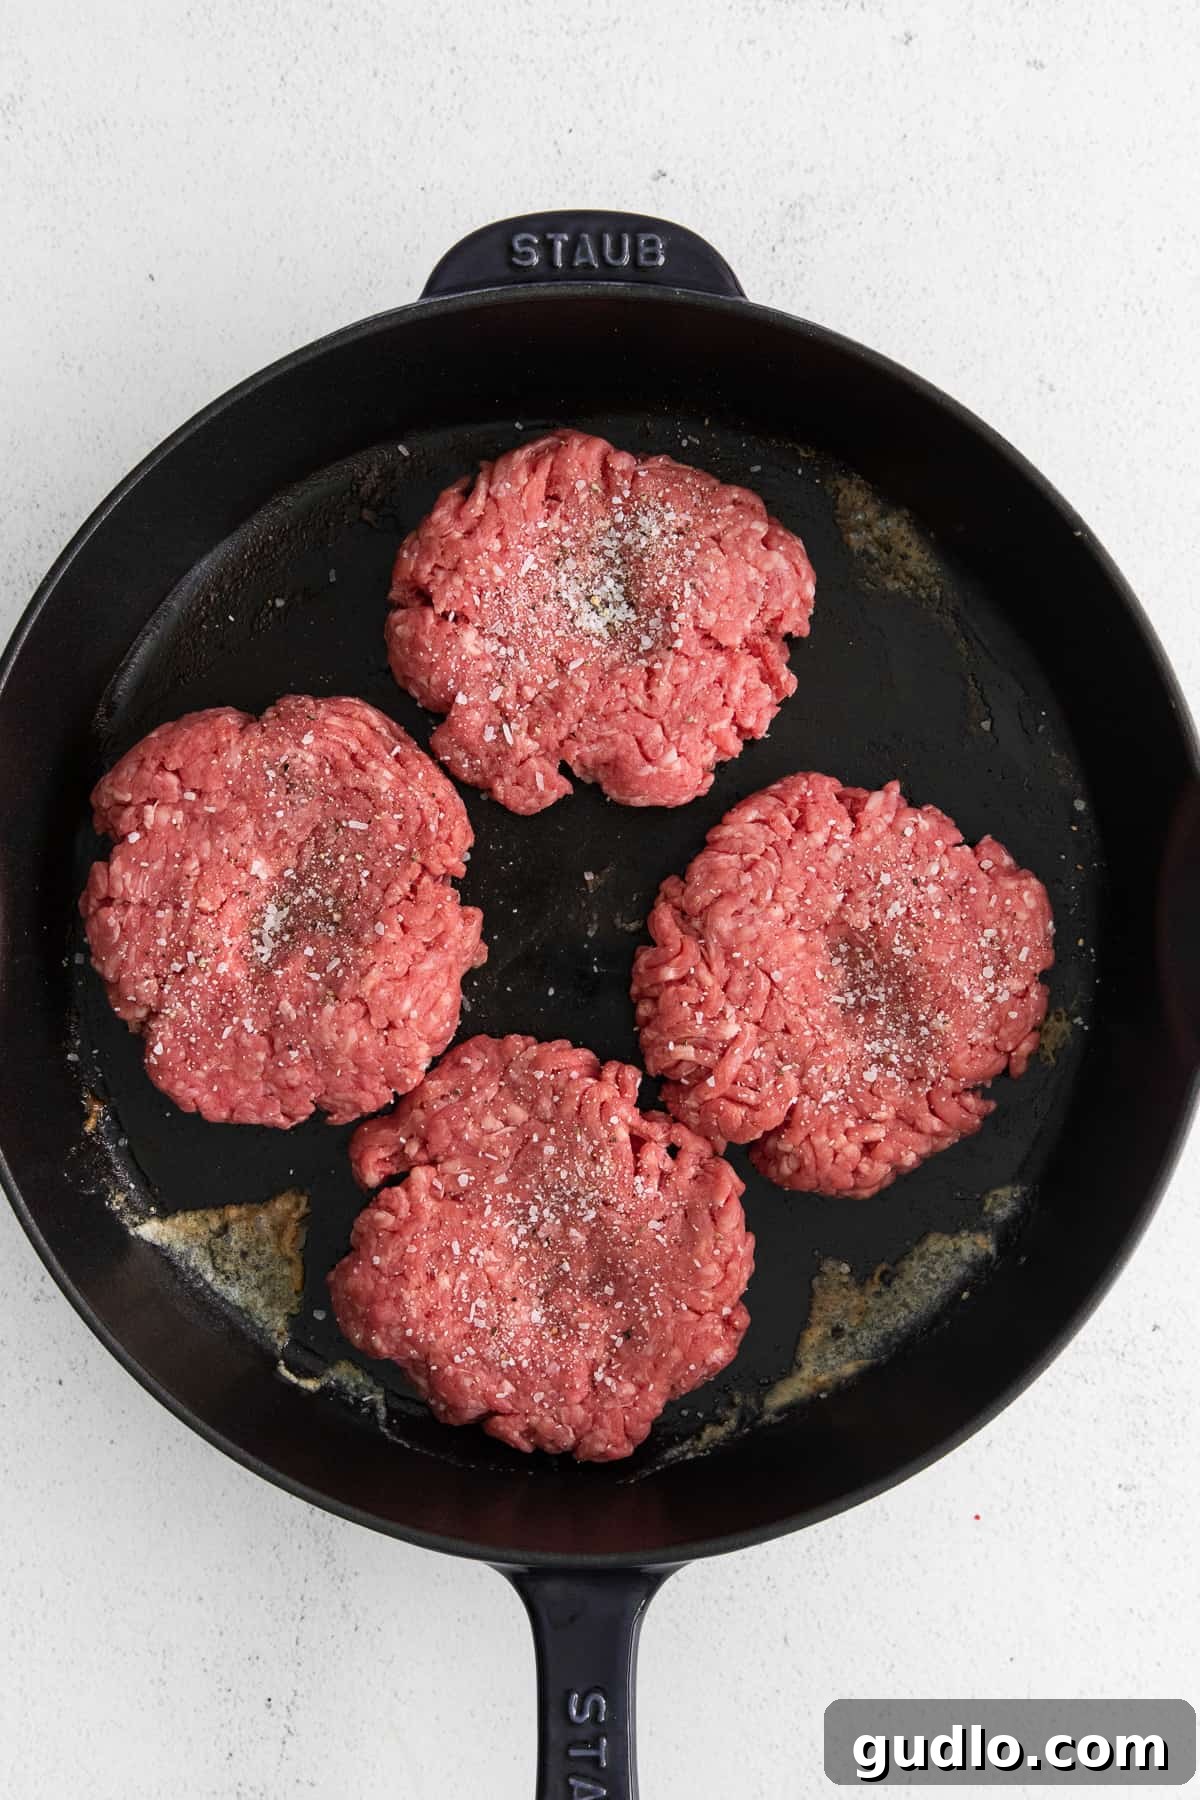
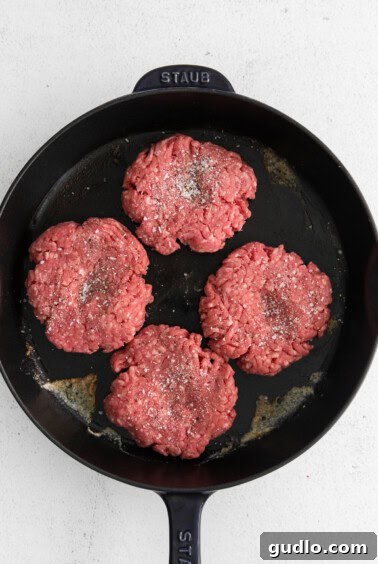
Gently divide the ground beef into four equal sections. Handling the meat as little as possible is important to prevent toughness. Lightly form each ¼ section into a patty, aiming for a diameter of about 4 ½ – 5 inches. Ensure the patties are slightly wider than your buns, as they will shrink during cooking. A crucial tip for preventing your burgers from bulging into a “meatball” shape: make a shallow thumbprint indentation in the center of each patty. This helps the burger cook evenly and maintain a flat shape. Generously season both sides of each hamburger patty with salt and freshly ground black pepper. Don’t be shy with the seasoning; it’s essential for flavor!
Step 3: Cook Your Burgers to Perfection
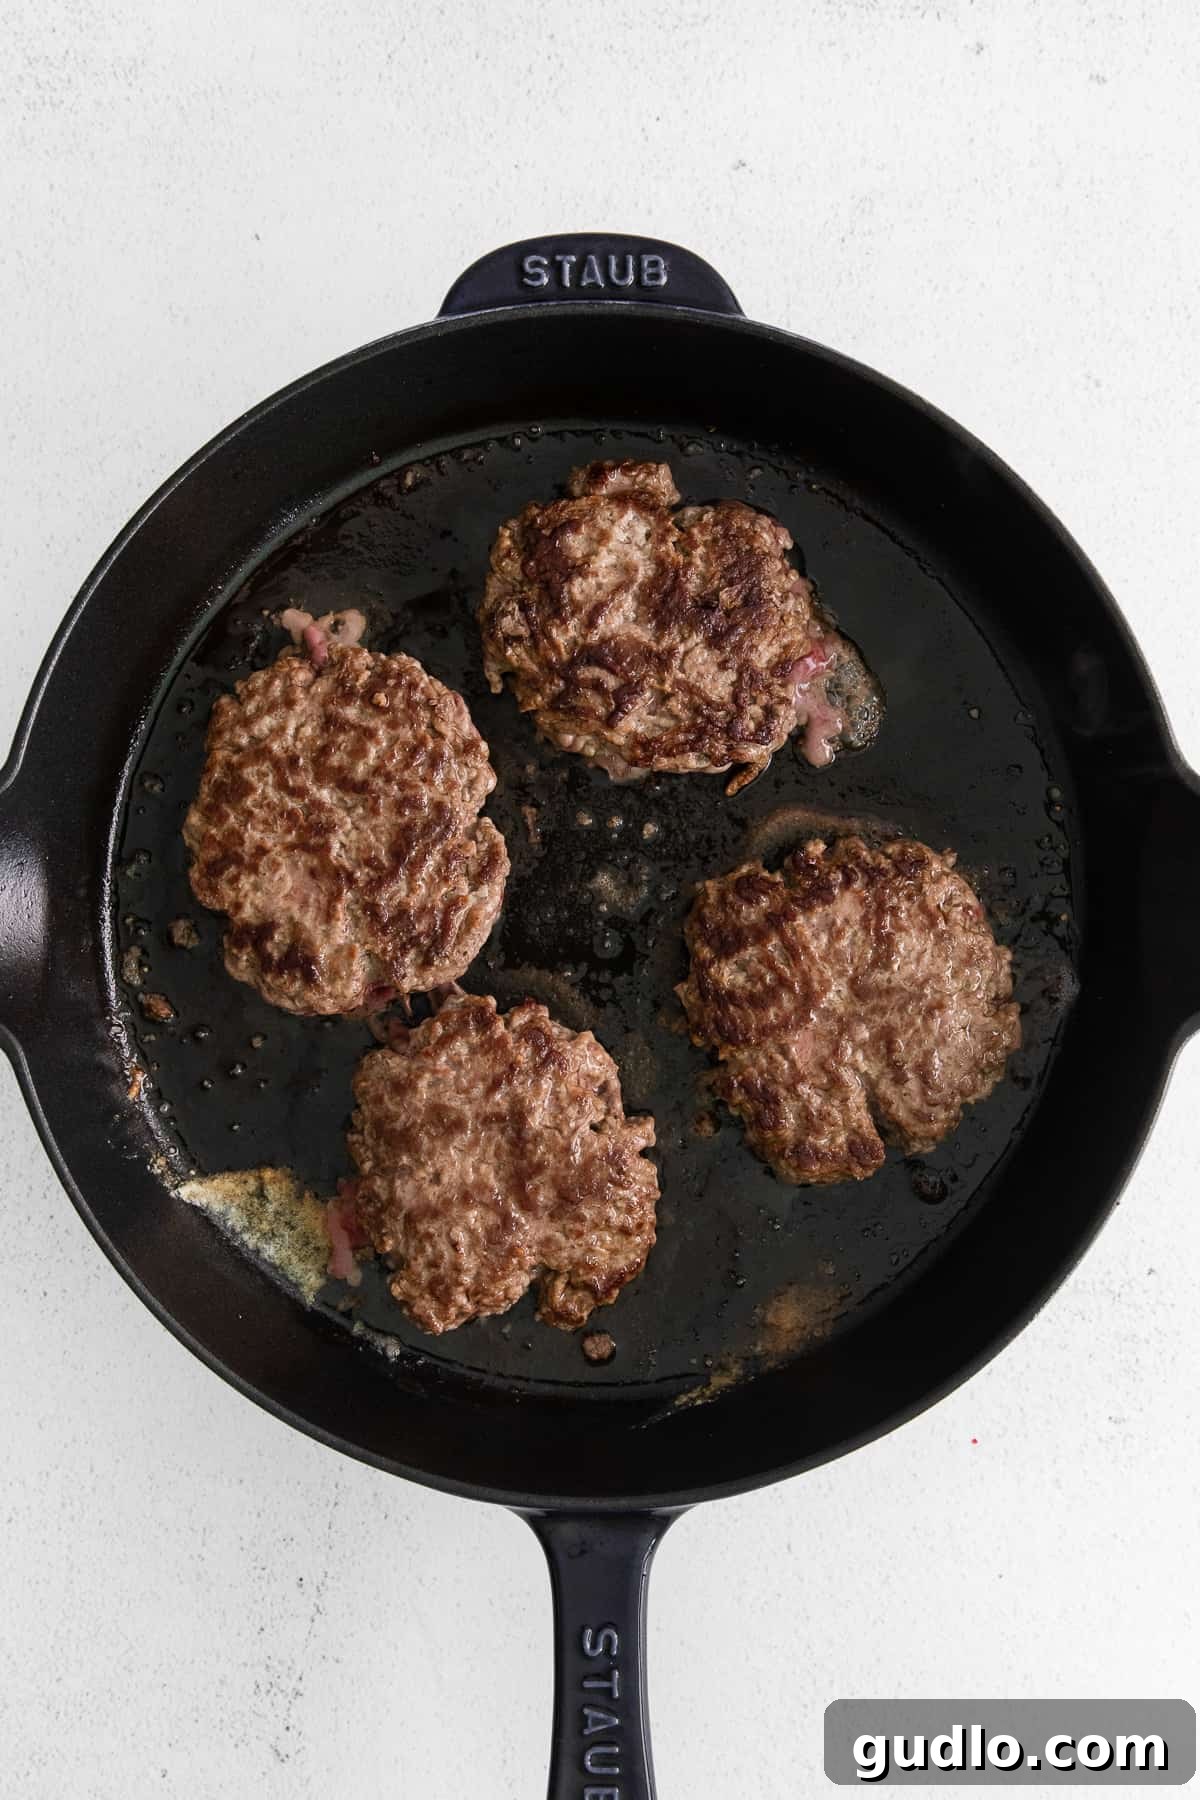
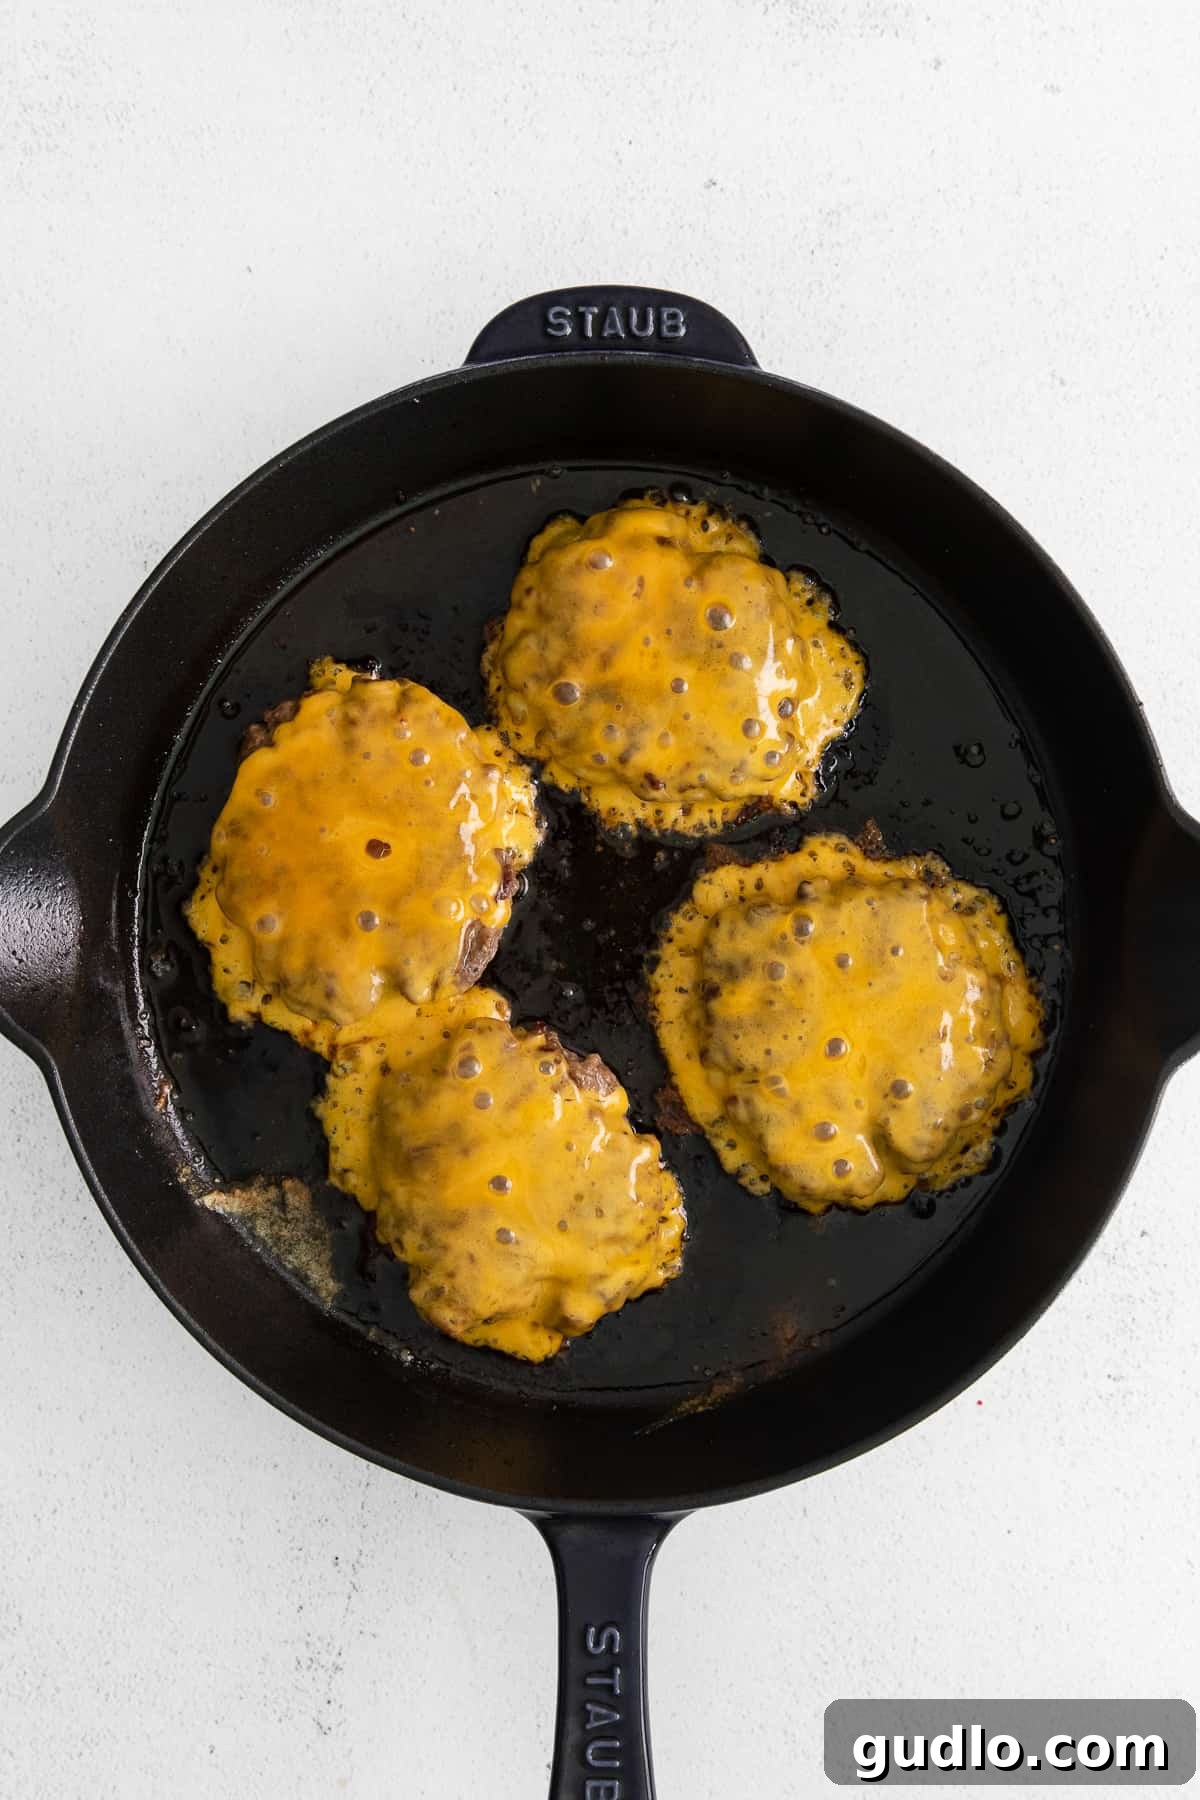
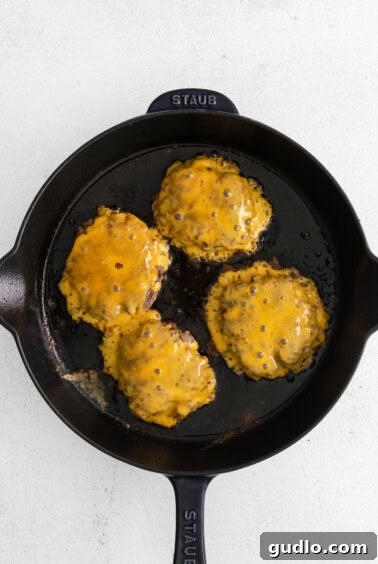
Return the same skillet to medium heat. Allow the pan to get very hot – you want a good sizzle when the meat hits it – but not so hot that it’s smoking excessively. Carefully place the hamburger patties into the hot skillet, thumbprint side up. Resist the urge to press down on the burgers with your spatula, as this squeezes out all the delicious juices. Cook without moving for 3-4 minutes to develop a beautiful, flavorful crust. Flip the patties and cook for another 3-4 minutes on the second side. For medium-rare, aim for 3 minutes per side; for medium, 4 minutes; and for well-done, cook a bit longer. Once flipped, immediately place two slices of cheddar cheese on top of each burger. Cover the skillet with a lid or a piece of tin foil to trap the heat, allowing the cheese to melt completely and become wonderfully gooey, which typically takes about 1-2 minutes.
Grilling Instructions for a Smoky Flavor: If you prefer to grill your cheeseburgers, preheat your grill to a high temperature, between 450℉ to 500℉. Place the seasoned patties directly on the hot grates. Grill the burgers for 3 to 4 minutes on each side, or until they reach your desired level of doneness. Add the cheese during the last minute of grilling, covering with a grill lid to help it melt.
Step 4: Assemble and Savor Your Creation
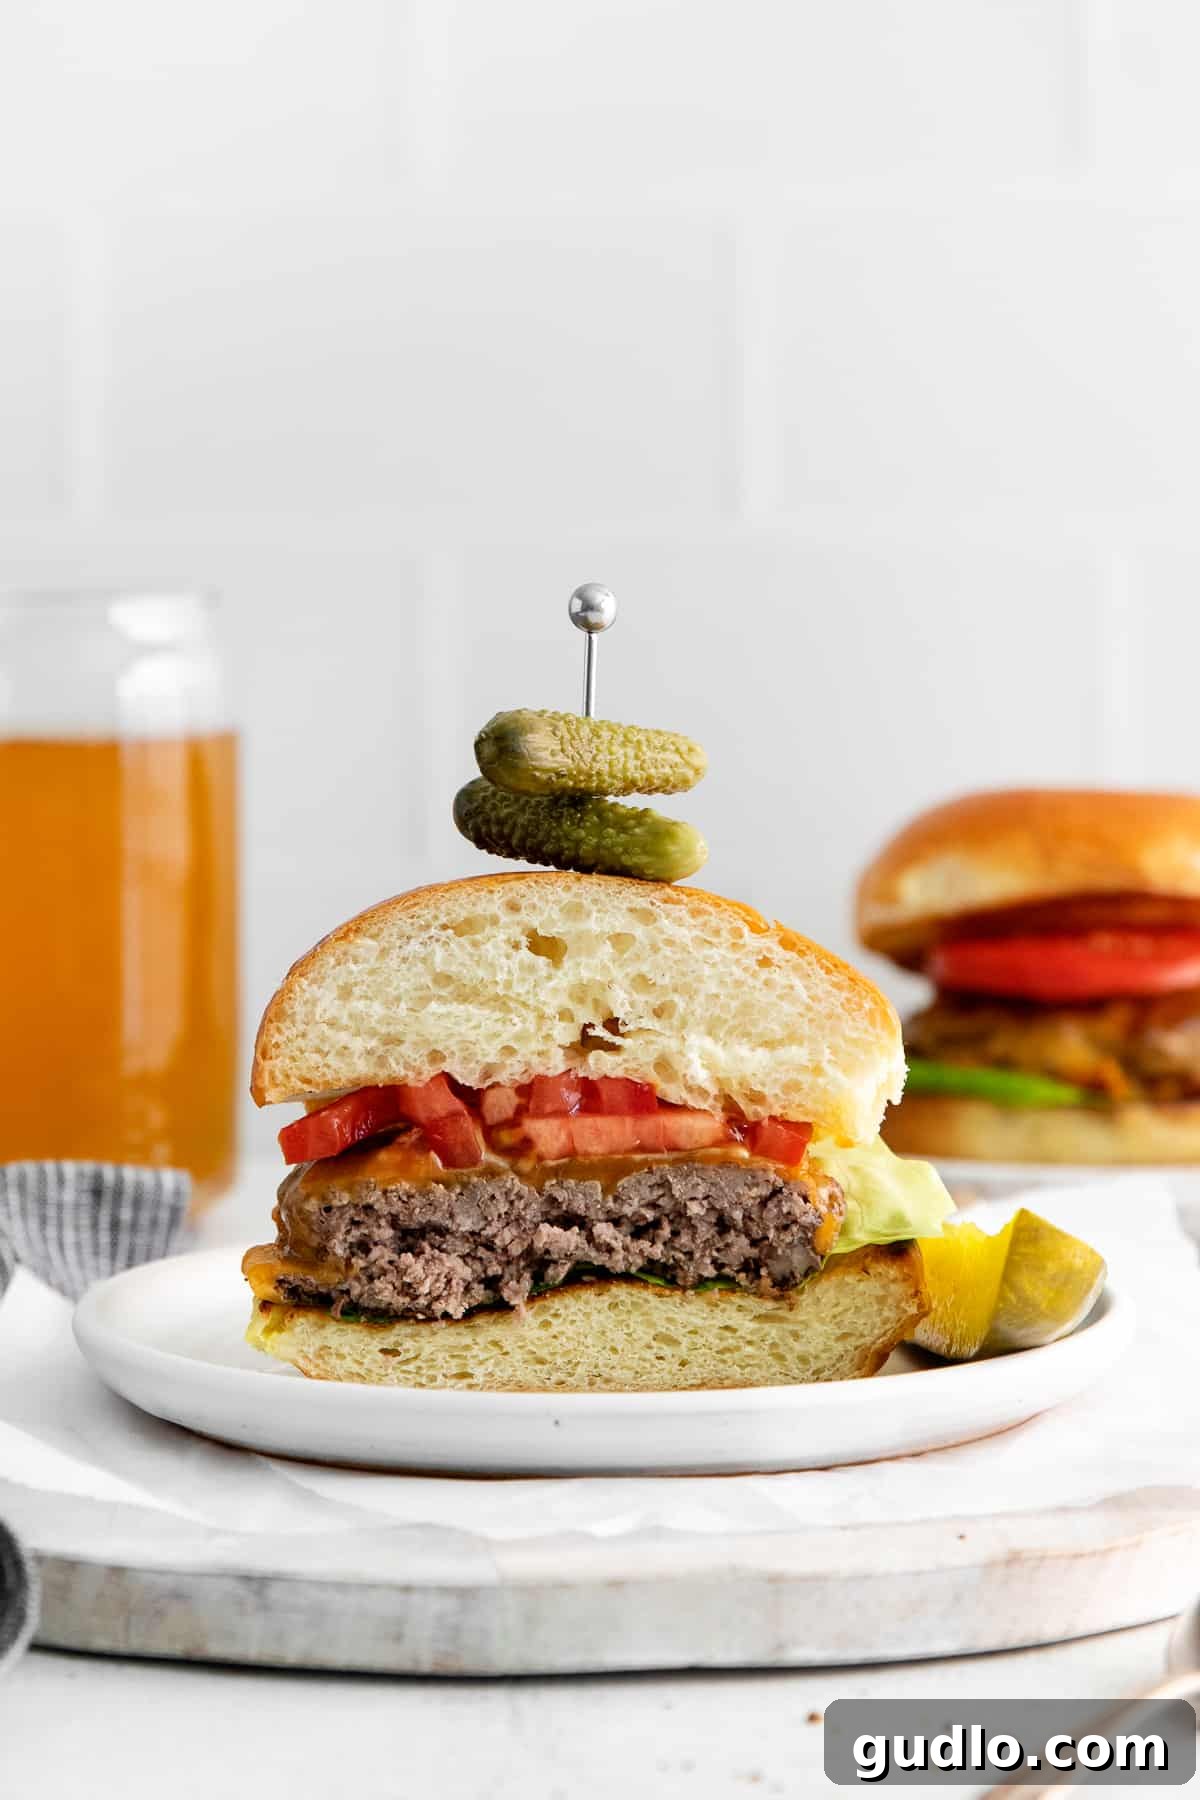
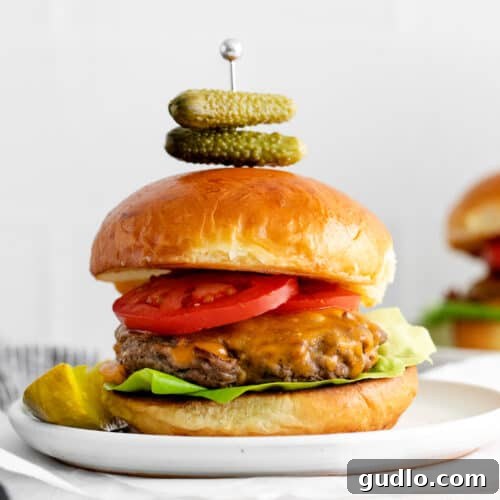
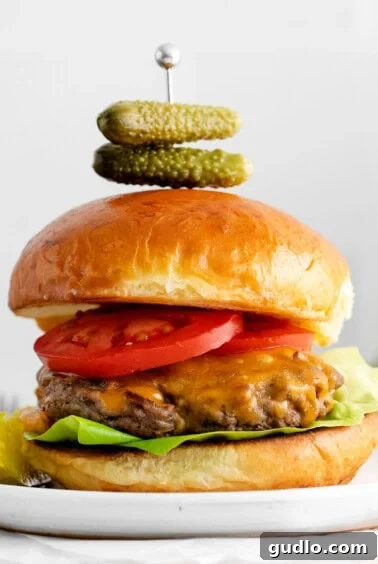
Once your patties are perfectly cooked and the cheese is gloriously melted, it’s time for the grand assembly! Place a juicy cheeseburger patty on a toasted bun. Now, unleash your creativity and load it up with your favorite toppings (we’ll suggest some below). Once assembled, serve immediately and enjoy the fruits of your simple, yet masterful, labor!
Unleash Your Creativity: Best Toppings for Cheeseburgers
While the combination of a juicy patty, melted cheese, and toasted bun is a masterpiece on its own, adding your favorite toppings truly personalizes your cheeseburger experience. We kept ours classic with crisp lettuce and a ripe tomato slice, but the possibilities are endless! Let your imagination run wild and top your cheeseburgers with whatever your heart desires. Here are some popular ideas to get you started:
- Fresh Greens: Beyond classic iceberg, consider peppery arugula for a sophisticated bite or tender spinach for added nutrition and a milder taste.
- Onions: Thinly sliced white onion adds a sharp, pungent crunch, while caramelized onions offer a sweet, savory depth. Pickled red onions provide a lovely tang and vibrant color.
- Pickles: Dill pickle slices are a classic for a reason, offering a briny, acidic counterpoint that cuts through the richness of the meat and cheese.
- Sauces:
- Classic Mayo: Creamy and rich, it’s a staple for many.
- Mustard: Yellow or Dijon mustard adds a zesty kick.
- Ketchup: The universally loved sweet and tangy condiment.
- BBQ Sauce: For a smoky, sweet, and savory flavor profile.
- Special Sauce: Mix mayo, ketchup, relish, and a dash of hot sauce for a homemade secret sauce!
- Garlic Aioli: A gourmet touch with roasted garlic flavor.
- Vegetables & Freshness:
- Sliced red onion or grilled onions
- Avocado slices or guacamole for creaminess
- Sautéed mushrooms for an earthy note
- Jalapeños (fresh or pickled) for a spicy kick
- Crispy fried onions or onion rings for texture
- Extra Indulgences:
- Crispy bacon strips
- Fried egg (for a breakfast burger twist)
- Another layer of cheese (because why not?)
- Relish (sweet or dill)
Perfect Pairings: Delicious Side Dishes for Your Cheeseburgers
Arugula Goat Cheese Salad
Classic Caesar Salad
Cottage Cheese Salad
Greek Orzo Salad with Feta
Pesto Pasta Salad with Burrata
Expert Tips for Crafting the Ultimate Juicy Cheeseburgers
To truly master the simple cheeseburger and ensure it’s always incredibly juicy and delicious, keep these expert tips in mind:
- The Thumbprint Secret: Preventing the “Mushroom Top”
Adding a slight dimple or thumbprint in the center of your raw burger patty is a game-changer. As ground beef cooks, the proteins contract, causing the patty to puff up in the middle, creating an uneven “mushroom top.” The thumbprint counteracts this by providing space for the meat to expand, ensuring your burger cooks flat and evenly, allowing you to pile on toppings without a wobbling mess.
- Keep That Ground Beef Chilled
Unlike steaks or other cuts of meat that benefit from coming to room temperature before cooking, ground beef should be kept as cold as possible until it hits the hot pan or grill. Cold ground beef holds its shape better, making it easier to form patties without overworking the meat (which can lead to a tough burger). It also helps achieve a better sear on the outside while maintaining juiciness within.
- The Art of the Crust: Resist the Urge to Move
The key to developing a beautiful, crisp, and flavorful crust (the Maillard reaction!) on the outside of your burger patty is simple: do not move it while it’s cooking on the first side. Place it down in the hot skillet and let it be for the full 3-4 minutes. This undisturbed cooking time allows the surface of the meat to caramelize and brown, locking in juices and developing deep, savory flavors. Only flip once you see a good crust formed.
- Don’t Overwork the Meat
When forming your patties, handle the ground beef as little as possible. Overworking the meat can break down the protein fibers, resulting in a dense, tough, and less juicy burger. Gently shape the patties, just enough to hold together, and then stop.
- Perfect Patty Thickness
Aim for patties that are about ¾-inch thick. This thickness allows them to cook through evenly without drying out, and ensures a satisfying meat-to-bun ratio. Remember to make them slightly wider than your buns to account for shrinkage.
- When to Add the Cheese
For perfectly melted, gooey cheese, add the slices during the last minute or two of cooking. If using a skillet, cover it with a lid or foil. This traps the heat and creates a steamy environment that melts the cheese beautifully over the hot patty.
Storage Solutions for Your Cheeseburger Patties
Whether you have leftovers or want to prepare ahead, proper storage ensures your delicious cheeseburger patties remain fresh and ready to enjoy.
You can store cooked cheeseburger patties in the refrigerator for up to 5 days. Ensure they are placed in an airtight container to maintain freshness and prevent them from absorbing other odors.
Freezer Instructions for Cooked Patties: Allow the cooked burger patties to cool completely to room temperature. Wrap each patty tightly in plastic wrap, then place them in a freezer-safe bag or container. They can be stored in the freezer for up to 3 months. This is a great way to meal prep!
To Thaw Cooked Patties: For best results, remove the frozen burger patties from the freezer and transfer them to the refrigerator 24 hours before you plan to reheat them. Once completely thawed, you can gently reheat them in a skillet over low-medium heat, in the oven, or even on a grill until warmed through.
Storing Raw Patties: If you’re prepping ahead, form your patties and place them on a sheet of parchment paper. Stack them with parchment paper in between each patty to prevent sticking, then place them in an airtight container or freezer bag. Store in the refrigerator for up to 2 days, or freeze for up to 3 months. Thaw raw patties overnight in the refrigerator before cooking.
Frequently Asked Questions About Simple Cheeseburgers
- Can I use different types of ground meat?
Absolutely! While 85/15 ground beef is recommended for optimal juiciness, you can experiment with other meats. Ground turkey or chicken can be used for a leaner option, though they might require a bit more oil to prevent sticking and may be slightly less juicy. For a richer flavor, consider a blend of ground beef and pork.
- What’s the best way to make these gluten-free?
To make these cheeseburgers gluten-free, simply swap out traditional hamburger buns for your favorite gluten-free buns. Ensure all other toppings and condiments are also gluten-free. The patty itself is naturally gluten-free.
- How do I ensure the cheese melts perfectly every time?
The key to perfectly melted cheese is trapping the heat. Once you’ve flipped your burger and added the cheese, cover the skillet with a lid (or tin foil if you don’t have a lid). This creates a steamy environment that quickly and evenly melts the cheese without overcooking the burger. For grilling, place a small metal bowl or an inverted foil pan over the cheeseburgers on the grill.
- Can I prepare the patties ahead of time?
Yes, you can! Form your patties as instructed, then stack them with parchment paper in between each one. Place them in an airtight container or zip-top bag and refrigerate for up to 2 days before cooking. This can significantly cut down on prep time on the day you plan to cook.
- What’s the best way to reheat leftover cheeseburgers?
To reheat a fully assembled cheeseburger, separate the components if possible. Reheat the patty gently in a skillet over low heat, or in the oven at a low temperature (around 275°F/135°C) until warmed through. You can re-toast the bun briefly. Reheating the entire assembled burger can make the bun soggy and the toppings wilted.
More of our Favorite…
Creative Cheeseburger Recipes to Try Next
Loved these simple cheeseburgers? Expand your cheeseburger horizons with these delicious variations and related recipes:
- Hearty Cheeseburger Casserole
- Flavorful Cheeseburger Pie
Simple Cheeseburgers
Prep: 10 minutes
Cook: 10 minutes
Total: 20 minutes
Pin
Ingredients
- 2 tablespoons unsalted butter, room temperature
- 4 hamburger buns
- 1 lb. 85/15 ground beef
- 1.5 teaspoons salt
- ½ teaspoon ground pepper
- 8 slices cheddar cheese
Instructions
-
Spread the room temperature unsalted butter evenly on the inside of each hamburger bun.
-
Heat a large skillet (preferably cast iron) over medium-high heat. Place the buttered buns face down and toast for 2-3 minutes, or until they turn golden brown and slightly crisp. Set aside.

-
Divide the ground beef into 4 equal sections. Gently form each section into a patty approximately 4 ½ – 5 inches in diameter, making them slightly wider than your buns. Create a shallow thumbprint indentation in the center of each patty to prevent bulging.
-
Generously season both sides of each hamburger patty with salt and freshly ground pepper.
-
Heat the same skillet over medium heat. When the pan is very hot but not smoking, place the hamburger patties into the skillet, thumbprint side up.
-
Cook the patty without moving for 3-4 minutes to form a crust. Flip to the other side and cook for another 3-4 minutes, or until desired doneness is reached.
-
Place 2 slices of cheddar cheese on top of each burger. Cover the skillet with a lid or tin foil for 1-2 minutes, or until the cheese is completely melted and gloriously gooey.
-
Assemble your cheeseburger with a patty on a toasted bun, topped with your favorite additions. Serve immediately and enjoy every juicy bite!
Tips & Notes for Success
- Grilling instructions: For a delicious smoky flavor, preheat your grill to 450℉ to 500℉. Grill the burgers for 3 to 4 minutes on each side, or until your desired doneness is achieved.
- The Dimple Trick: Adding a thumbprint to the center of each patty helps prevent the burger from puffing up into a “meatball” shape, ensuring even cooking and a flat surface for toppings.
- Keep it Cold: Ground beef should be kept as cold as possible before cooking. This helps the patties maintain their shape and juiciness, unlike steaks which benefit from room temperature.
- Crispy Crust: The secret to a beautiful, crisp crust is to avoid moving the burger once it’s placed in the hot pan or on the grill. Let it sear undisturbed for the first few minutes to develop that flavorful Maillard reaction.
- Don’t Overwork: Handle the ground beef gently and as little as possible when forming patties. Overworking can lead to a tough, dry burger.
Watch How It’s Made

Watch the video above for a visual guide on how to make these delicious simple cheeseburgers!
Nutrition Facts
Nutrition information is automatically calculated and should only be used as an approximation. It can vary based on specific ingredients and brands used.
Love this recipe? Leave a comment below and share your experience!
Don’t forget to tag your delicious creations on social media with the hashtag #cheeseknees. We’d absolutely love to see what you’re cooking up!