
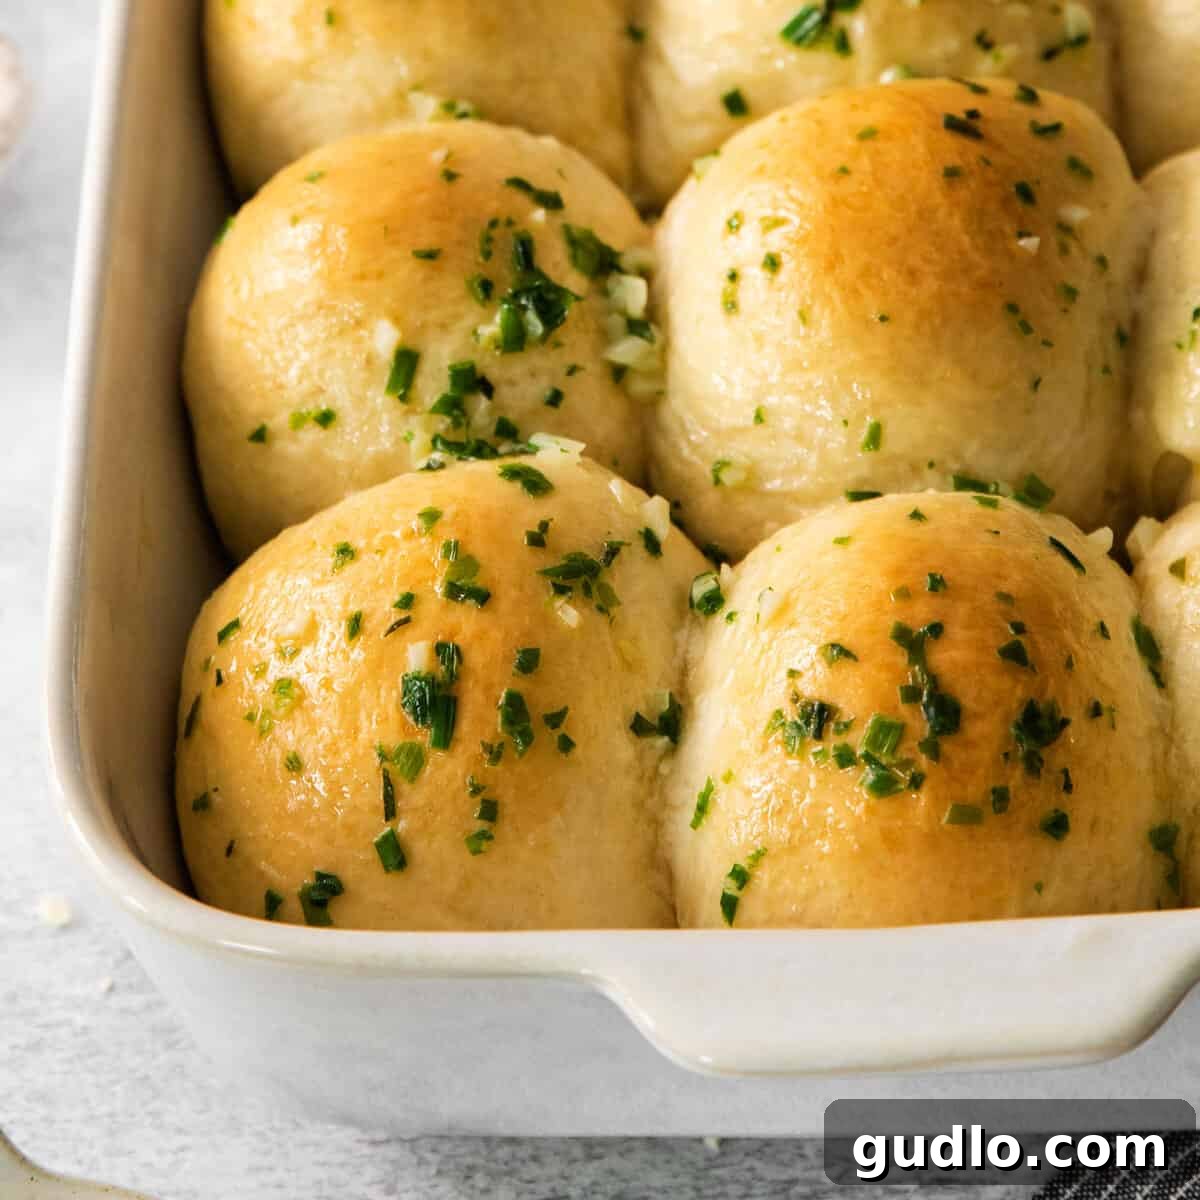
Prepare to elevate your dinner table with these extraordinary garlic chive cream cheese dinner rolls. Far beyond your average bread, these rolls are a symphony of flavors and textures – incredibly soft and fluffy, each bite gives way to a luxurious, rich cream cheese filling that truly sets them apart. And as if that weren’t enough, they are generously brushed with a decadent homemade garlic butter after baking, providing the perfect finishing touch. Get ready to experience pure culinary delight!
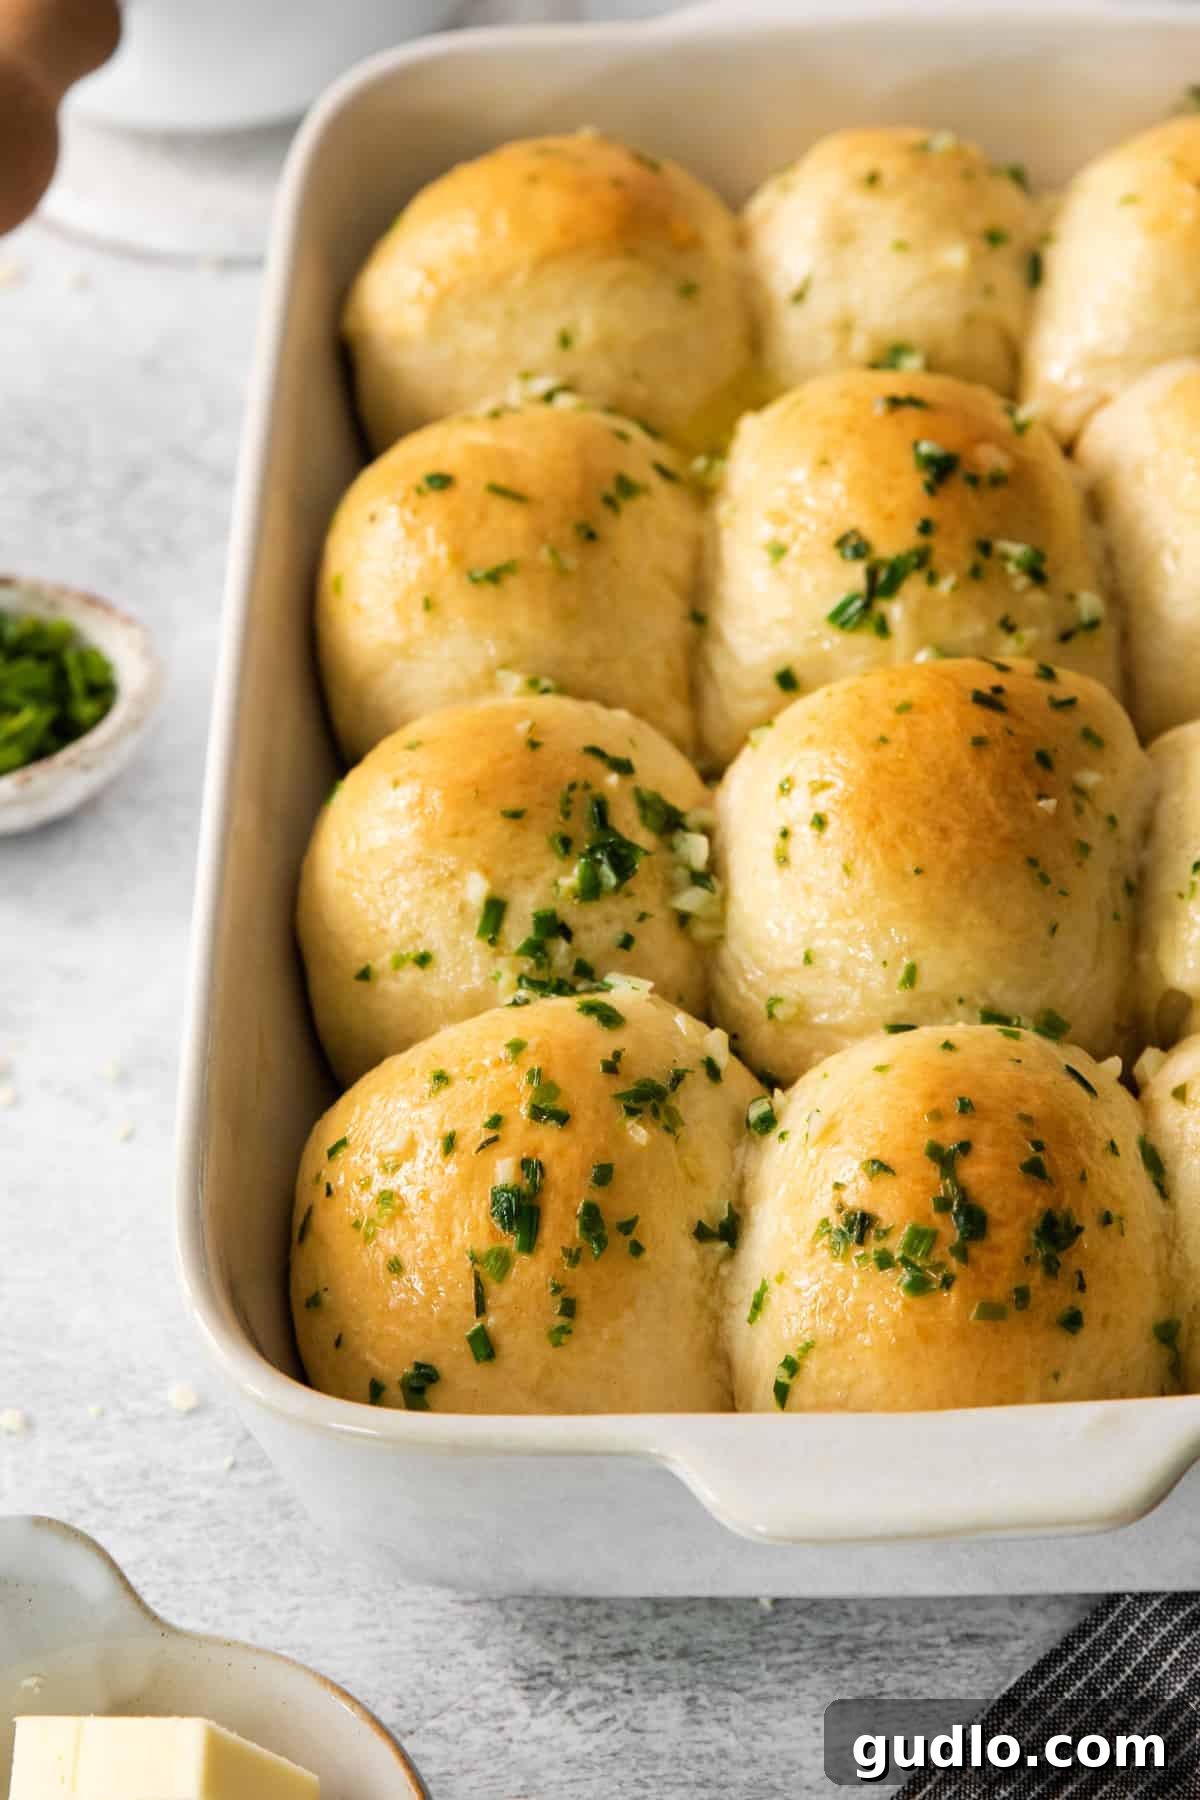
For those who, like me, find themselves utterly captivated by the allure of warm, savory garlic bread, these garlic chive cream cheese dinner rolls are destined to become your next culinary obsession. This recipe transforms the humble dinner roll into a show-stopping side dish, offering a harmonious and utterly irresistible balance of savory garlic, fresh chives, and a creamy, tangy cream cheese core. The fluffy texture of the bread, combined with the melting richness of the filling and the aromatic garlic butter glaze, creates an experience that’s both comforting and gourmet.
Crafting homemade bread might seem daunting, but this recipe is surprisingly approachable. While it does require patience to allow the soft dough to rise to perfection – typically a couple of hours – the active preparation time is remarkably short, demanding only about 20 minutes of your attention. Baking takes just 25 minutes, meaning you can achieve bakery-quality results right in your own kitchen. These versatile rolls are an ideal accompaniment to any meal, transforming a simple dinner into a memorable feast, and they make a particularly impressive addition to holiday spreads or special gatherings.
Why These Garlic Chive Cream Cheese Rolls Are a Must-Try
What makes these garlic chive cream cheese dinner rolls stand out from other bread recipes? It’s all in the exquisite balance and thoughtful combination of ingredients. Each element is carefully chosen to contribute to an overall experience that is both unique and deeply satisfying. From the moment the warm, yeast-infused dough begins to form, you know you’re creating something special. The light, airy texture of the rolls provides the perfect vehicle for the creamy filling, while the vibrant chives add a fresh, subtle onion note that complements the robust garlic beautifully. This isn’t just bread; it’s a culinary journey in every bite.
Essential Ingredients for Your Cream Cheese Bread Rolls
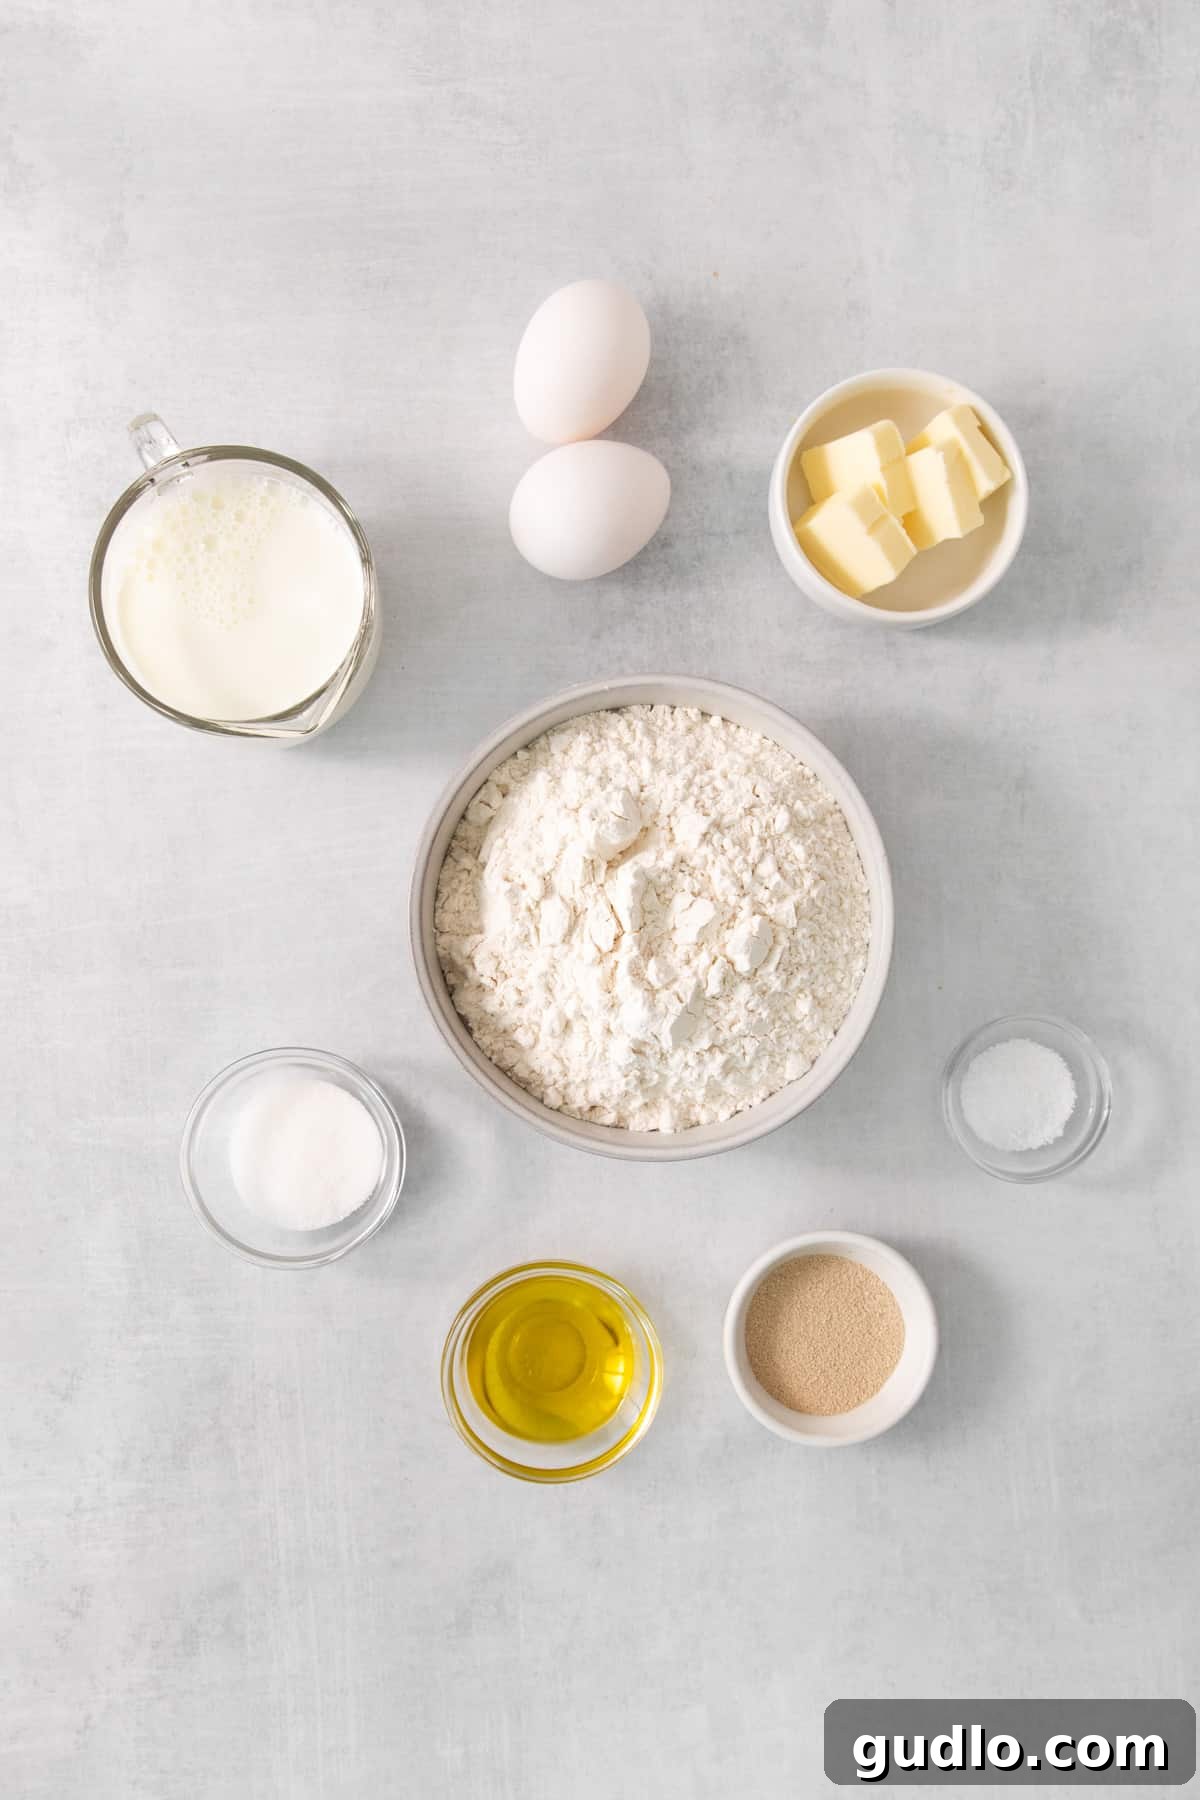
To embark on this delightful baking adventure, you’ll need a few key ingredients to create these homemade garlic chive cream cheese rolls. The foundation of our fluffy dough relies on quick-rise yeast and a touch of granulated sugar, which helps activate the yeast and lends a subtle sweetness. Beyond the basics, ensure you have an ample supply of softened cream cheese for that luscious filling and fresh garlic to infuse both the dough and the finishing butter with its irresistible aroma. Quality ingredients make all the difference in achieving that perfect taste and texture.
For the dough, you’ll combine quick-rise yeast, sugar, warm milk, all-purpose flour, salt, separated eggs, and softened unsalted butter. These ingredients work in harmony to create a rich, elastic dough that bakes into wonderfully soft rolls. The filling is simply luxurious cream cheese, cut into chunks for easy stuffing. And for that glorious topping, you’ll need minced garlic, unsalted butter, and fresh minced chives. This combination creates a fragrant, savory glaze that is brushed on the rolls straight out of the oven, permeating them with incredible flavor and a beautiful sheen.
Key Kitchen Tools for Baking Success
While many baking tasks can be done by hand, certain tools will make the process of creating these dinner rolls much smoother and more enjoyable:
- Stand Mixer: A stand mixer fitted with a dough hook attachment is highly recommended. It takes the heavy lifting out of kneading, ensuring your dough is perfectly mixed and developed to achieve that smooth, elastic consistency crucial for fluffy rolls. This hands-off approach allows for consistent kneading, which is vital for gluten development.
- Tea Towel: You’ll need a clean tea towel (or plastic wrap) to cover the dough during its rising period. This helps to create a warm, moist environment that encourages the yeast to work its magic, allowing the dough to double in size beautifully.
- 9×13-inch Casserole Dish: This standard baking dish is perfect for arranging and baking your 12 rolls, allowing them to gently kiss each other as they rise and bake, creating those wonderfully soft edges.
Creative Variations and Substitutions for Cream Cheese Dinner Rolls
One of the joys of baking is the ability to customize recipes to suit your taste or what you have on hand. These cream cheese dinner rolls are wonderfully adaptable, allowing for delightful variations:
- Yeast Alternatives: If your pantry doesn’t stock quick-rise yeast, don’t fret! You can absolutely use active dry yeast instead. The primary difference is the rising time. With active dry yeast, you’ll need to be a bit more patient, allowing the dough to rise for approximately an hour before you proceed with shaping and baking. Always ensure your yeast is fresh and active for the best results.
- Experiment with Cream Cheese Flavors: The cream cheese filling is a canvas for creativity! While plain cream cheese offers a beautiful tangy counterpoint, feel free to explore flavored varieties. Imagine the savory depth of an herb and garlic cream cheese, or the vibrant tang of a sun-dried tomato cream cheese tucked inside these fluffy rolls. These simple swaps can introduce an entirely new dimension of flavor, making each batch uniquely exciting.
- Herb Swaps for Chives: Chives lend a mild, fresh oniony note, but other fresh herbs can create distinct flavor profiles. Consider swapping chives for finely chopped fresh parsley for a brighter, more classic green herb essence, or for dill to introduce a unique, slightly tangy and aromatic twist. Even a blend of herbs like rosemary and thyme could create a more rustic, savory roll, perfect for pairing with heartier dishes.
- Add a Spicy Kick: For those who love a bit of heat, consider finely dicing a jalapeño and mixing it into the cream cheese filling, or adding a pinch of red pepper flakes to the garlic butter topping.
- Cheese Enhancements: While cream cheese is the star, a sprinkle of shredded cheddar, mozzarella, or Parmesan cheese mixed into the cream cheese filling or even on top of the rolls before baking can add extra savory depth and a delightful cheesy pull.

Pro Tip:
Homemade Cream Cheese
Did you know that crafting your own cream cheese at home is surprisingly simple? With just three basic ingredients – milk, lemon juice, and salt – you can create a fresh batch from scratch. So, the next time you find yourself low on cream cheese, or simply wish to try a wholesome homemade alternative, be sure to explore our comprehensive homemade cream cheese tutorial! It’s an easy way to ensure you always have this versatile ingredient on hand.
Storage & Freezer Directions
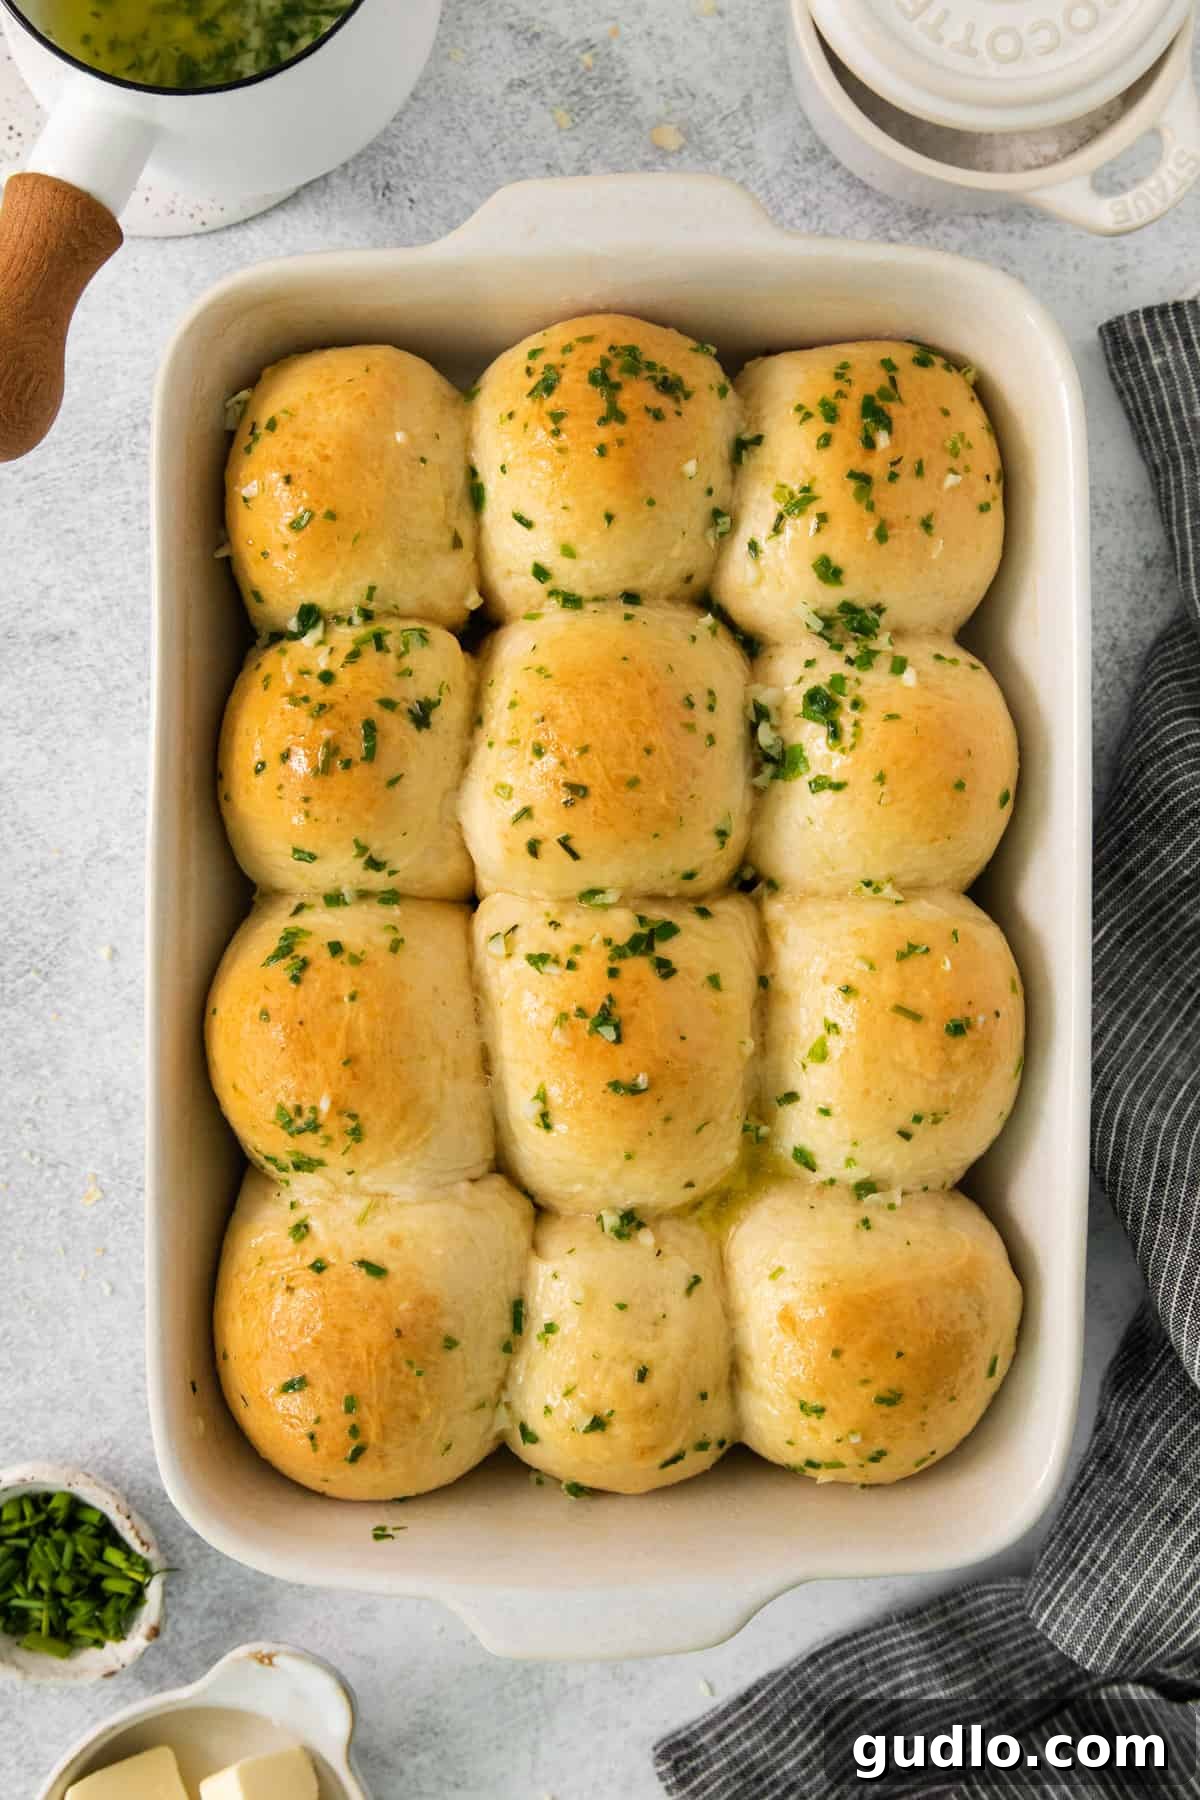
To keep your delicious cream cheese dinner rolls fresh and flavorful, proper storage is key. Any leftover rolls should be placed in an airtight container and stored at room temperature. When stored correctly, they will maintain their deliciousness for up to 4 days, perfect for enjoying as a quick snack or alongside another meal.
While these rolls are undeniably delightful fresh, we generally do not recommend freezing this recipe. Cream cheese tends to change texture when frozen and thawed, often becoming crumbly or watery, which can compromise the rich, smooth consistency of the filling that makes these rolls so special. For the best experience, enjoy them within a few days of baking.
How to Soften Cream Cheese Quickly
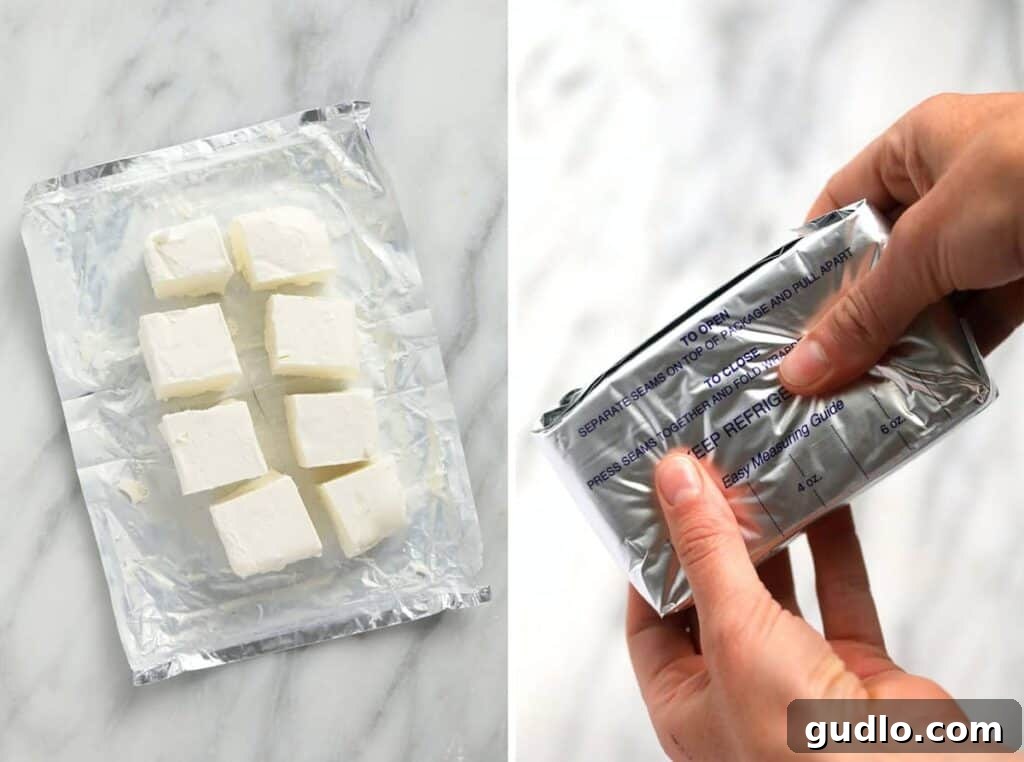
Many recipes, including this one, call for softened cream cheese. This ensures a smooth, lump-free filling that blends perfectly into your dough. If you often find yourself forgetting to take cream cheese out of the fridge in advance, we’ve got you covered! Check out our dedicated post – How to Soften Cream Cheese – 4 Ways! Here, you’ll discover four distinct and incredibly quick methods to bring your cream cheese to the ideal softened consistency for all your baking and cooking needs, saving you time and frustration.
Delicious Serving Suggestions
These warm, buttery, and incredibly flavorful rolls are designed to be the ultimate companion to a wide array of showstopping main dishes. Their rich, savory profile makes them particularly suited for dipping, scooping, or simply enjoying alongside hearty meals. Here are some inspired pairings:
- Soup Companions: There’s nothing quite like a fluffy roll dipped into a comforting bowl of soup. These rolls are exceptional alongside our rich Lasagna Soup, creamy Broccoli Cheese Soup, or our soothing Creamy Chicken Soup. The roll’s ability to soak up the flavorful broth is pure bliss.
- Entrée Enhancements: Elevate your main course by serving these rolls alongside robust dishes. They perfectly complement a succulent roast chicken, a tender pot roast, or even a simple grilled steak. The garlic and chive notes will beautifully echo and enhance the flavors of your entrée.
- More Cream Cheese Craze: If these rolls spark a newfound love for cream cheese in savory dishes, don’t stop here! Continue your culinary exploration with our delightful Cream Cheese Chicken recipe or indulge in the cheesy goodness of our Cream Cheese Chicken Enchiladas. Both are guaranteed to satisfy your craving for creamy, comforting meals.
- Iconic Main Dish Pairings: Beyond the cream cheese theme, these rolls are a fantastic match for other beloved dishes. Consider pairing them with our incredibly flavorful Creamy Garlic Chicken for an extra layer of garlicky goodness, or serve them with the trendy and delicious Baked Feta Pasta to complete a Mediterranean-inspired spread.
- Brunch or Appetizer Spread: While perfect for dinner, these rolls also make an impressive addition to a brunch buffet or as an appetizer for a party. Serve them warm with extra garlic butter on the side for dipping.
Garlic Chive Cream Cheese Rolls: The Ultimate Savory Treat
Prep: 2 hours
Cook: 25 minutes
Total: 2 hours 25 minutes
Save
Saved
Pin
Ingredients
For the Fluffy Dough
- 1 packet quick-rise yeast, approximately .25 oz, essential for a speedy rise
- 1 tablespoon granulated sugar, to feed the yeast and add a hint of sweetness
- 1 cup 2% milk, warmed to about 110℉ (lukewarm, not hot)
- 3.5 cups all-purpose flour, for the perfect dough structure
- 1 teaspoon salt, to enhance all flavors
- 2 large eggs, separated; one for the dough, one for the egg wash
- 4 tablespoons unsalted butter, softened and divided for dough and greasing
- 2 teaspoons olive oil, for greasing the rising bowl
For the Creamy Filling
- 8 oz. cream cheese, full-fat, softened and cut into 12 equal chunks for easy stuffing
For the Irresistible Garlic Chive Topping
- 3 cloves garlic, freshly minced for maximum flavor
- 4 tablespoons unsalted butter, melted for brushing
- ¼ cup chives, freshly minced for a bright, aromatic finish
Instructions for Baking the Perfect Rolls
-
Begin your dough by combining the warm milk (ensure it’s around 110℉, like bathwater, to activate the yeast without killing it), the packet of quick-rise yeast, and the granulated sugar in a spacious bowl. Gently stir these ingredients together and then set the bowl aside in a warm spot. This crucial step allows the yeast to “bloom” or activate, which should take approximately 10 minutes. You’ll know it’s ready when a visible layer of frothy bubbles forms on the surface, indicating the yeast is alive and well.
-
While your yeast is blooming, prepare your stand mixer. In the bowl of the stand mixer, fitted with the dough hook attachment, add the all-purpose flour and salt. Give them a quick mix on low speed to ensure they are well combined. This prevents pockets of unmixed salt in your final dough.
-
Once your yeast mixture is beautifully bloomed, transfer it into the stand mixer bowl with the flour and salt. Now, add one of the separated large eggs and 3 tablespoons of the softened unsalted butter. Begin mixing on low speed, gradually increasing to medium-low. Allow the mixer to work its magic for a full 10 minutes. At the end of this period, your dough should appear smooth, elastic, and slightly tacky to the touch. A simple test: gently poke the dough with your finger; it should bounce back quickly, indicating proper gluten development.

-
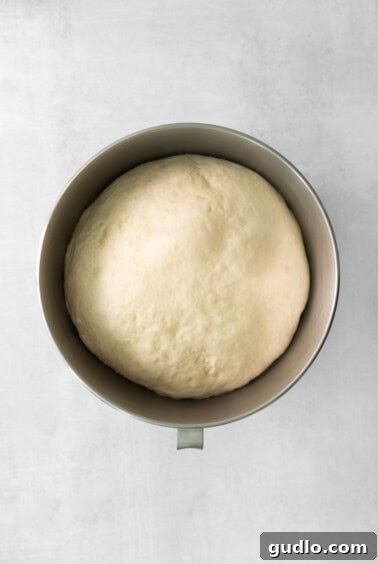
Lightly grease a large clean bowl with 2 teaspoons of olive oil. Transfer your smooth, elastic dough into this oiled bowl, turning it once to ensure it’s coated. Cover the bowl snugly with plastic wrap, then drape a clean tea towel over it. Place the covered bowl in a warm, draft-free spot in your kitchen (an oven with just the light on often works well). Allow the dough to rise until it has beautifully doubled in size, which typically takes about 1.5 hours, depending on the warmth of your environment. This first rise is crucial for developing flavor and achieving a light texture.
-
While the dough is completing its final rise, prepare your rich cream cheese filling. Ensure your 8 oz. block of cream cheese is softened to room temperature for easier handling. Then, carefully cut it into 12 equally sized chunks. This pre-portioned approach will make the stuffing process much quicker and ensure an even distribution of the creamy filling in each roll.
-
Once your dough has successfully doubled in size, gently turn it out onto a lightly floured work surface. Avoid punching it down too forcefully, as you want to preserve some of that airy structure. Using a sharp knife or a dough scraper, divide the dough into 12 equally sized pieces. Each piece should weigh roughly 2 to 2.5 ounces. Even portions ensure consistent baking and presentation.
-
Take one portion of dough and place it on your lightly floured work surface. Cup your hand over the dough and, using gentle, circular motions, roll it until a rough ball has formed. Don’t worry if it’s not perfectly smooth; some creases are natural at this stage. The key is to create a relatively uniform shape. Repeat this process for all 12 dough pieces, arranging them nearby as you work.
-
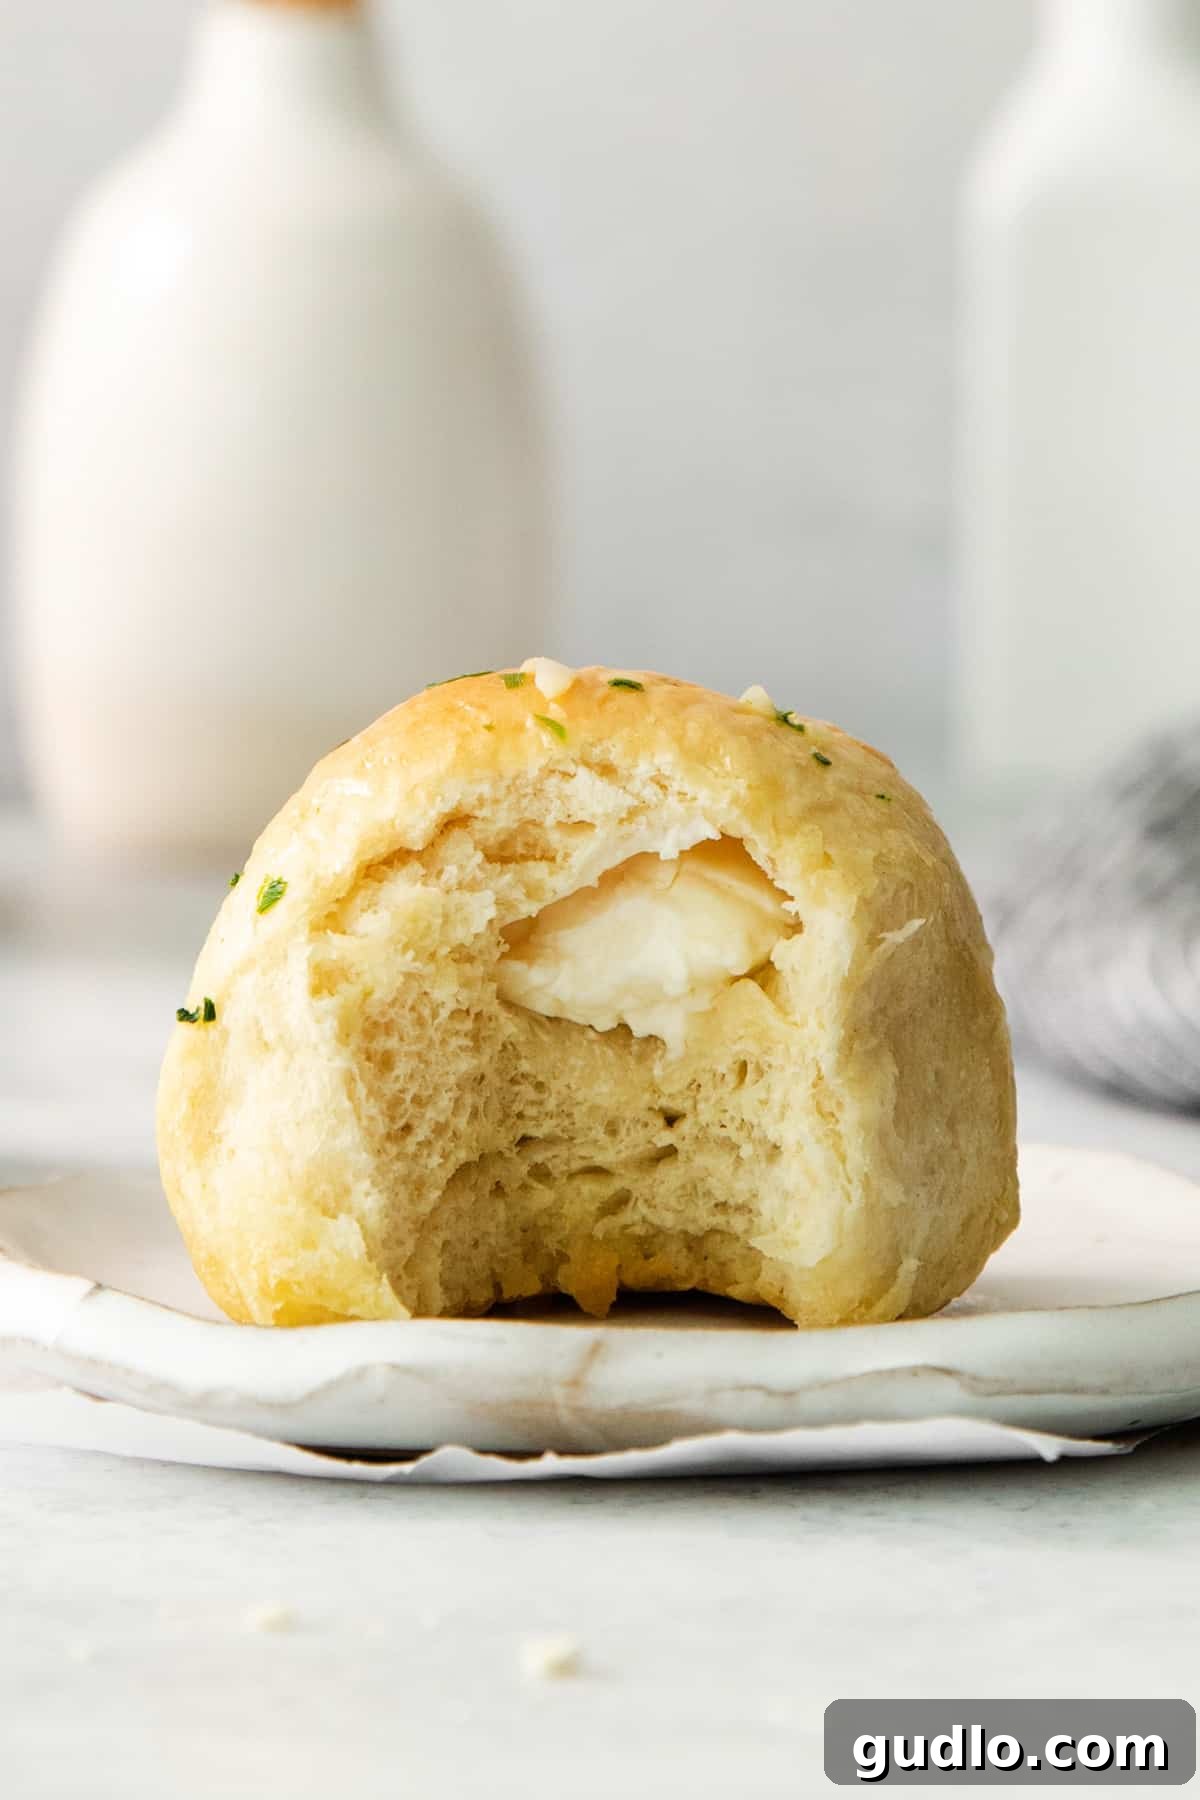
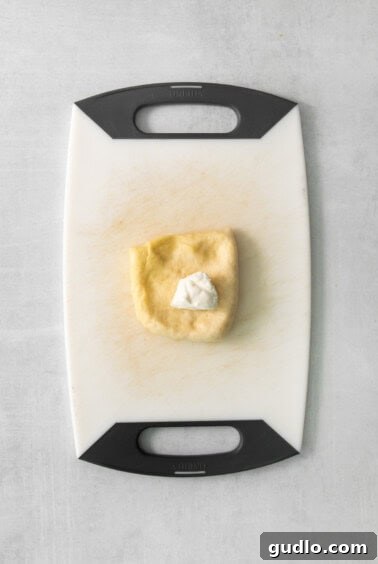
Now it’s time to add the luscious cream cheese filling! Take one dough ball and gently flatten it into a circle, about 3-4 inches in diameter, ensuring the center is slightly thicker than the edges. Place one chunk of your softened cream cheese in the very center of the dough circle. Carefully gather the edges of the dough and fold them up over the cream cheese, pinching them firmly together at the top to completely seal the filling inside. Roll it gently between your palms to smooth out any seams, creating a neat, filled ball. Repeat for all remaining dough balls and cream cheese chunks.
-
Take a 9×13-inch casserole dish and spread the remaining tablespoon of softened unsalted butter evenly across the bottom and sides. This will prevent the rolls from sticking and contribute to a beautiful golden crust.
-
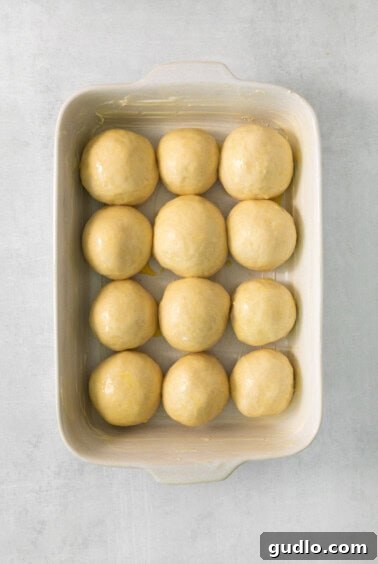
Carefully arrange the filled dough balls in the prepared casserole dish, placing them seam-side down. They should be relatively close together but not tightly packed, as they will expand during the second rise and baking. In a small bowl, whisk the remaining egg (the one you separated earlier) to create an egg wash. Lightly brush the tops of the dough balls with this egg wash; this will give them a beautiful golden sheen and a slightly crisp crust. Cover the dish loosely with plastic wrap or a tea towel and allow the rolls to undergo their second rise for 30-45 minutes, or until they look visibly puffy.
-
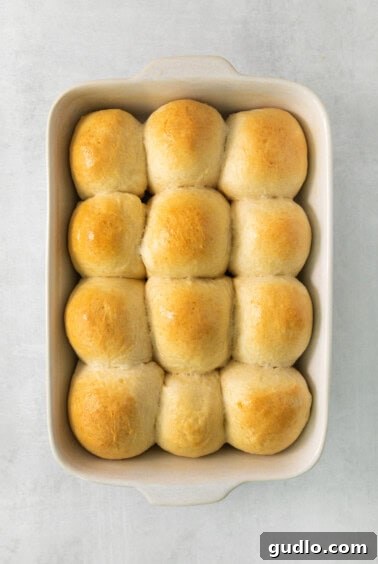
While the rolls are completing their second rise, preheat your oven to 350℉ (175°C). Once preheated and the rolls have puffed up, bake them for approximately 18-20 minutes, or until they turn a beautiful golden brown on top and are cooked through. The exact baking time may vary slightly depending on your oven, so keep an eye on them towards the end.
-
While your rolls are in their final minutes of baking, prepare the aromatic garlic chive topping. In a small saucepan, combine all of the topping ingredients: the minced garlic, the remaining 4 tablespoons of unsalted butter, and the minced chives. Heat this mixture over low heat, stirring occasionally, until the butter has fully melted and the garlic and chives have become fragrant. This process should take about 5 minutes, infusing the butter with incredible flavor.
-
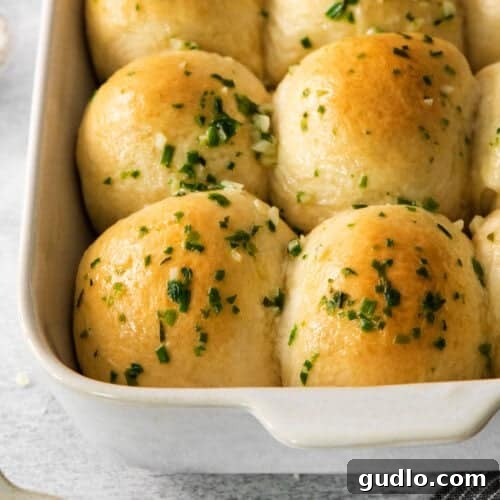
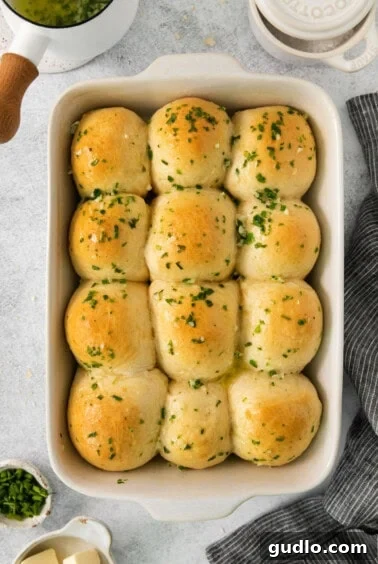
As soon as the rolls emerge from the oven, still warm and golden, generously brush their tops with the freshly prepared garlic chive melted butter. The warm rolls will absorb this savory glaze beautifully, adding an extra layer of flavor and a glorious shine. Serve these delectable rolls warm and enjoy the explosion of flavors!


Pro Tips & Notes for Perfect Rolls
- Yeast is Key: We’ve opted for quick-rise yeast in this recipe for efficiency, but feel free to use active dry yeast if that’s what you have on hand. The most critical aspect is ensuring your yeast is active and has enough time to bloom. You’ll know your yeast is happy and active when you see a foamy, bubbly layer forming on the surface of the milk mixture after about 10 minutes. If no bubbles appear, your yeast might be old or the milk too hot/cold, and it’s best to start again with fresh yeast.
- Temperature Control: Be very mindful of the milk’s temperature. It should be warm to the touch (like bathwater) but not hot. Overheating the milk will kill the yeast, preventing the dough from rising. If your milk is too hot and you don’t see any bubbles or frothing, it’s an indication that your yeast has not activated, and the dough will likely not rise.
- Don’t Over-Flour: When turning out and shaping the dough, use flour sparingly on your work surface and hands. Too much added flour can result in dense, dry rolls. A lightly floured surface is all you need to prevent sticking.
- Softened Cream Cheese: Ensuring your cream cheese is properly softened (as discussed above) is vital for a smooth, lump-free filling that won’t tear your delicate dough.
- Patience During Rising: Dough rising times are approximate and depend on the warmth of your kitchen. If your kitchen is cool, the rising might take a bit longer. Look for the visual cue of the dough doubling in size, rather than strictly adhering to the clock.
Watch How It’s Made!
Nutrition Information (Per Serving)
Carbohydrates: 31 g,
Protein: 7 g,
Fat: 16 g,
Fiber: 1 g,
Sugar: 3 g
Nutrition information is automatically calculated and provided for general guidance only. It should only be used as an approximation and may vary based on specific ingredient brands and preparation methods.
Love this recipe? Share your thoughts below!
We absolutely adore seeing your culinary creations! Don’t forget to tag your posts on social media with the hashtag #cheeseknees. We’d love to see your beautiful garlic chive cream cheese rolls!