
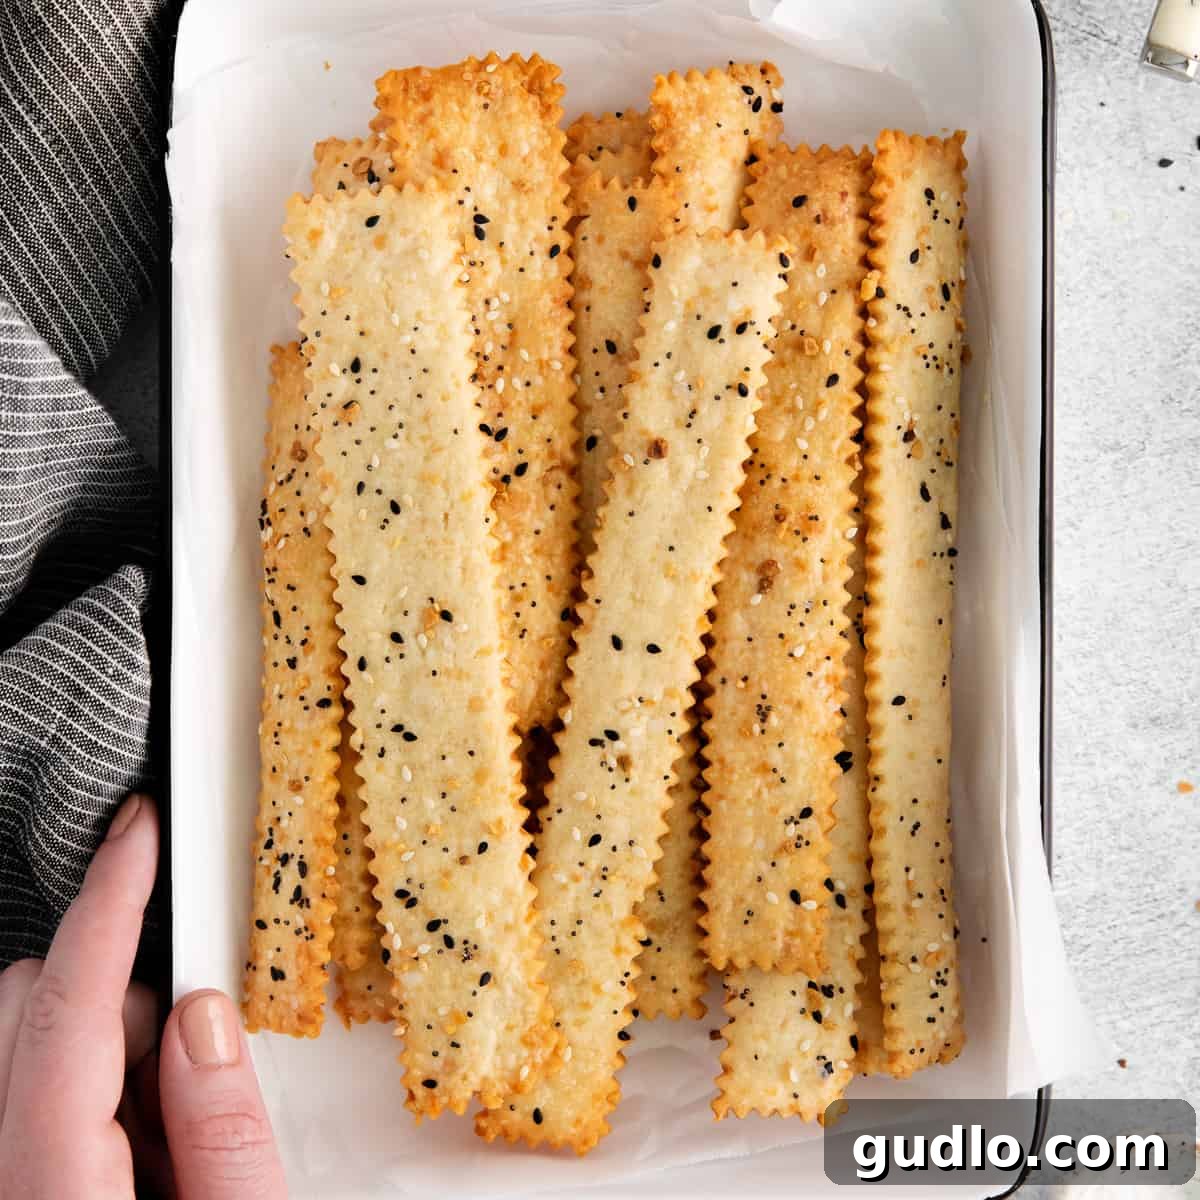
The Ultimate Homemade Crunchy Cheese Crackers: A Flavorful DIY Snack
Tired of bland, artificial store-bought crackers? Get ready to elevate your snack game with these incredible homemade crunchy cheese crackers. Crafted with the rich, bold flavors of sharp cheddar and Pecorino Romano cheese, combined with simple pantry staples like flour, butter, and cold water, these crackers are a revelation. They are surprisingly easy to make and offer an unparalleled crispness and savory depth that will have everyone asking for more. Perfect for any occasion, from casual snacking to elegant entertaining, they’re a testament to the fact that the best treats often come from your own kitchen. Prepare yourself for a homemade snack experience that delivers on taste, texture, and pure satisfaction.
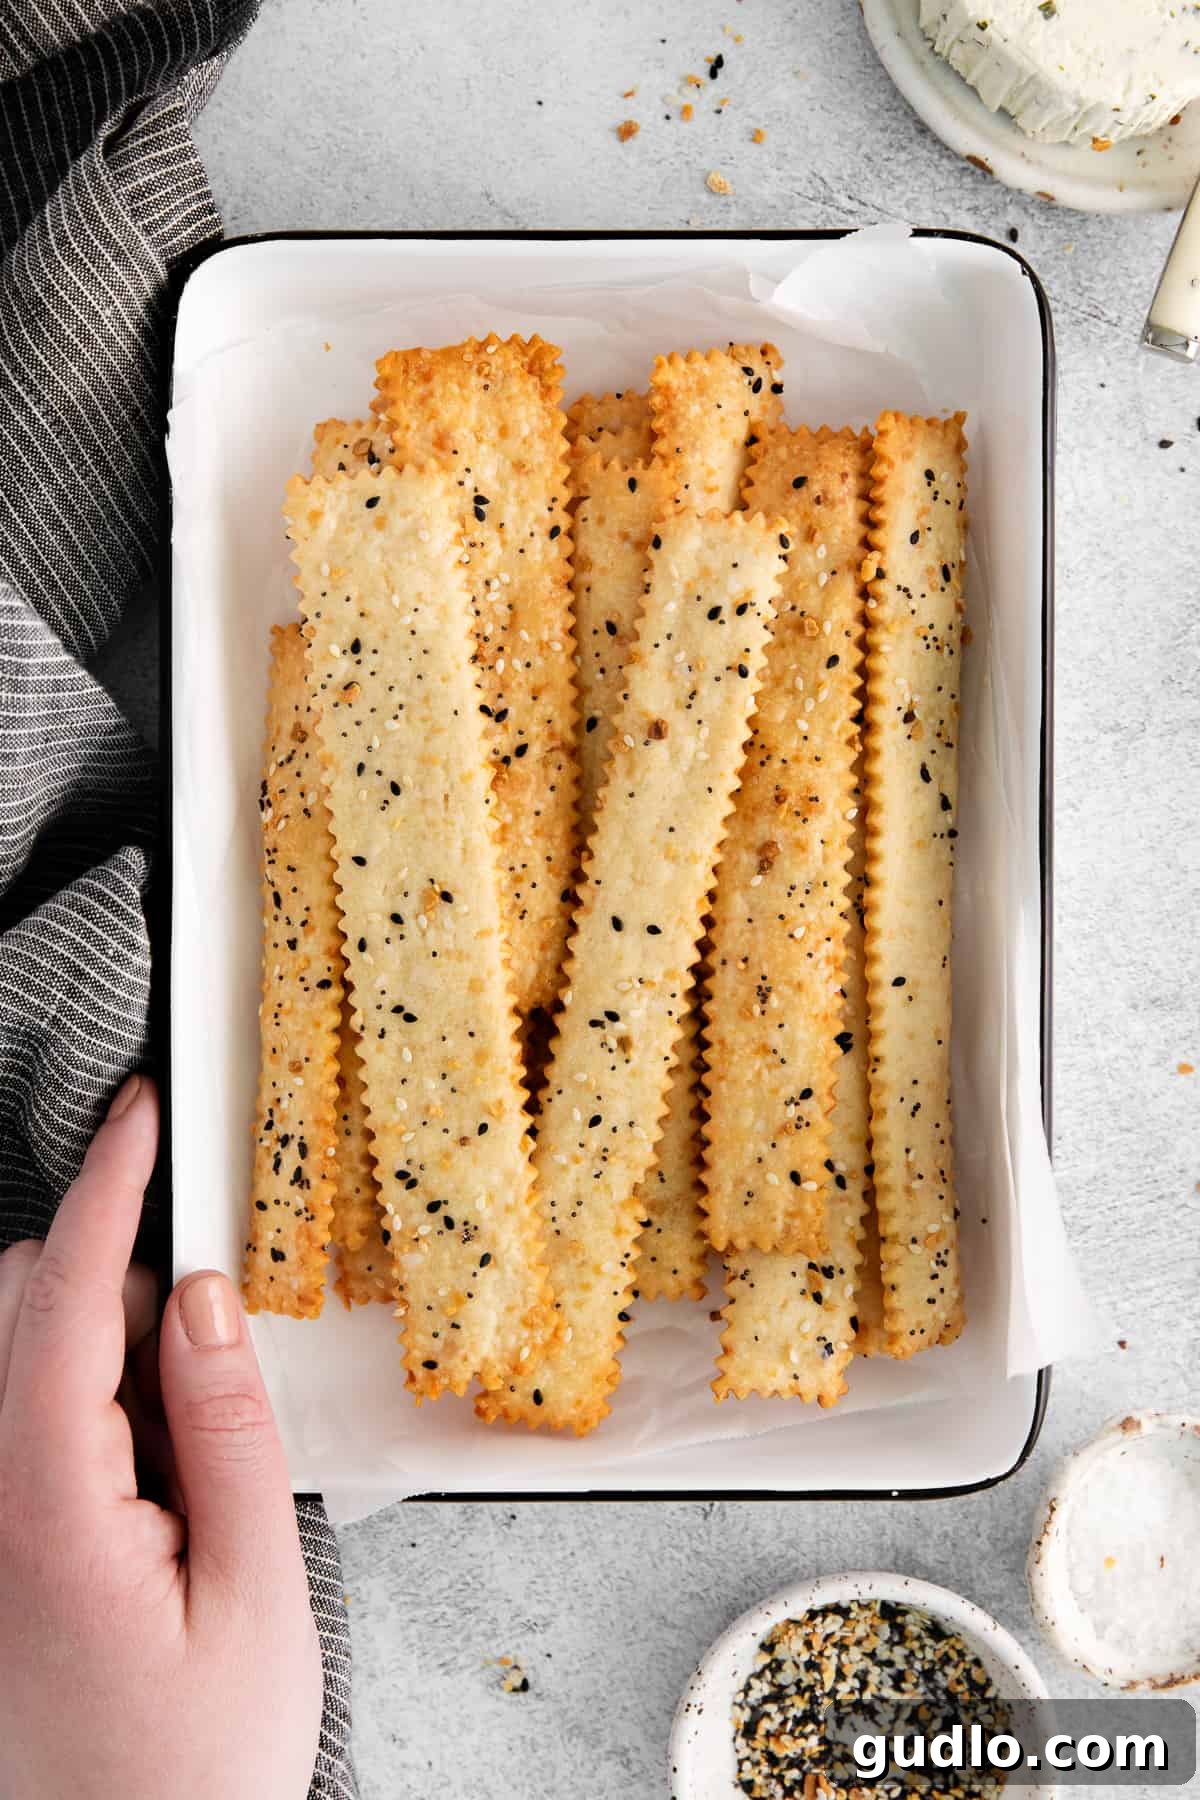
Why You’ll Love Crafting These Homemade Cheese Crackers
There’s a unique satisfaction that comes with creating your own delicious snacks from scratch, and these savory cheese crackers are no exception. This straightforward recipe combines two distinct cheeses with just a handful of other ingredients to produce crackers that are far superior to anything you’d find on a supermarket shelf. Forget about additives and preservatives; with this recipe, you control the quality and flavor, ensuring a wholesome and utterly delectable result. The process is also incredibly rewarding, transforming simple components into a gourmet snack that truly stands out.
These homemade crackers aren’t just crunchy and delightful; they’re incredibly versatile. Their robust cheesy flavor and irresistible snap make them an ideal companion for a variety of culinary delights. Serve them alongside creamy hummus, an artisan cheese board, or a lavish charcuterie spread to impress your guests. They also make a fantastic accompaniment to hearty soups or fresh salads, adding a delightful crunch. Or, simply enjoy them on their own as a satisfying, flavorful snack that’s perfect for movie nights, afternoon cravings, or anytime you desire a cheesy, crispy treat. Once you try these, you’ll never go back to store-bought.
Unbeatable Benefits of Making Your Own Cheese Crackers!
- Superior Flavor Profile: Experience the intense, authentic taste of real sharp cheddar and Pecorino Romano, far beyond what commercial crackers offer.
- Perfectly Crunchy Texture: Achieve that ideal crispness and satisfying snap with every bite, a hallmark of a truly great cracker.
- Incredibly Versatile: An ideal pairing for a wide array of gourmet dips, artisan spreads, robust cheeses, and elaborate charcuterie boards.
- Easy & Rewarding Baking Project: A straightforward recipe that’s fun to make, yielding impressive results that will delight friends and family.
- Fully Customizable: Easily adapt the flavors by experimenting with different cheese combinations and a vast selection of savory seasonings.
- Wholesome & Natural: Enjoy a snack free from artificial flavors, colors, or preservatives, knowing exactly what ingredients are used.
- Cost-Effective: Often more economical in the long run than repeatedly purchasing premium store-bought options.
Essential Ingredients for Your Perfect Cheese Crackers
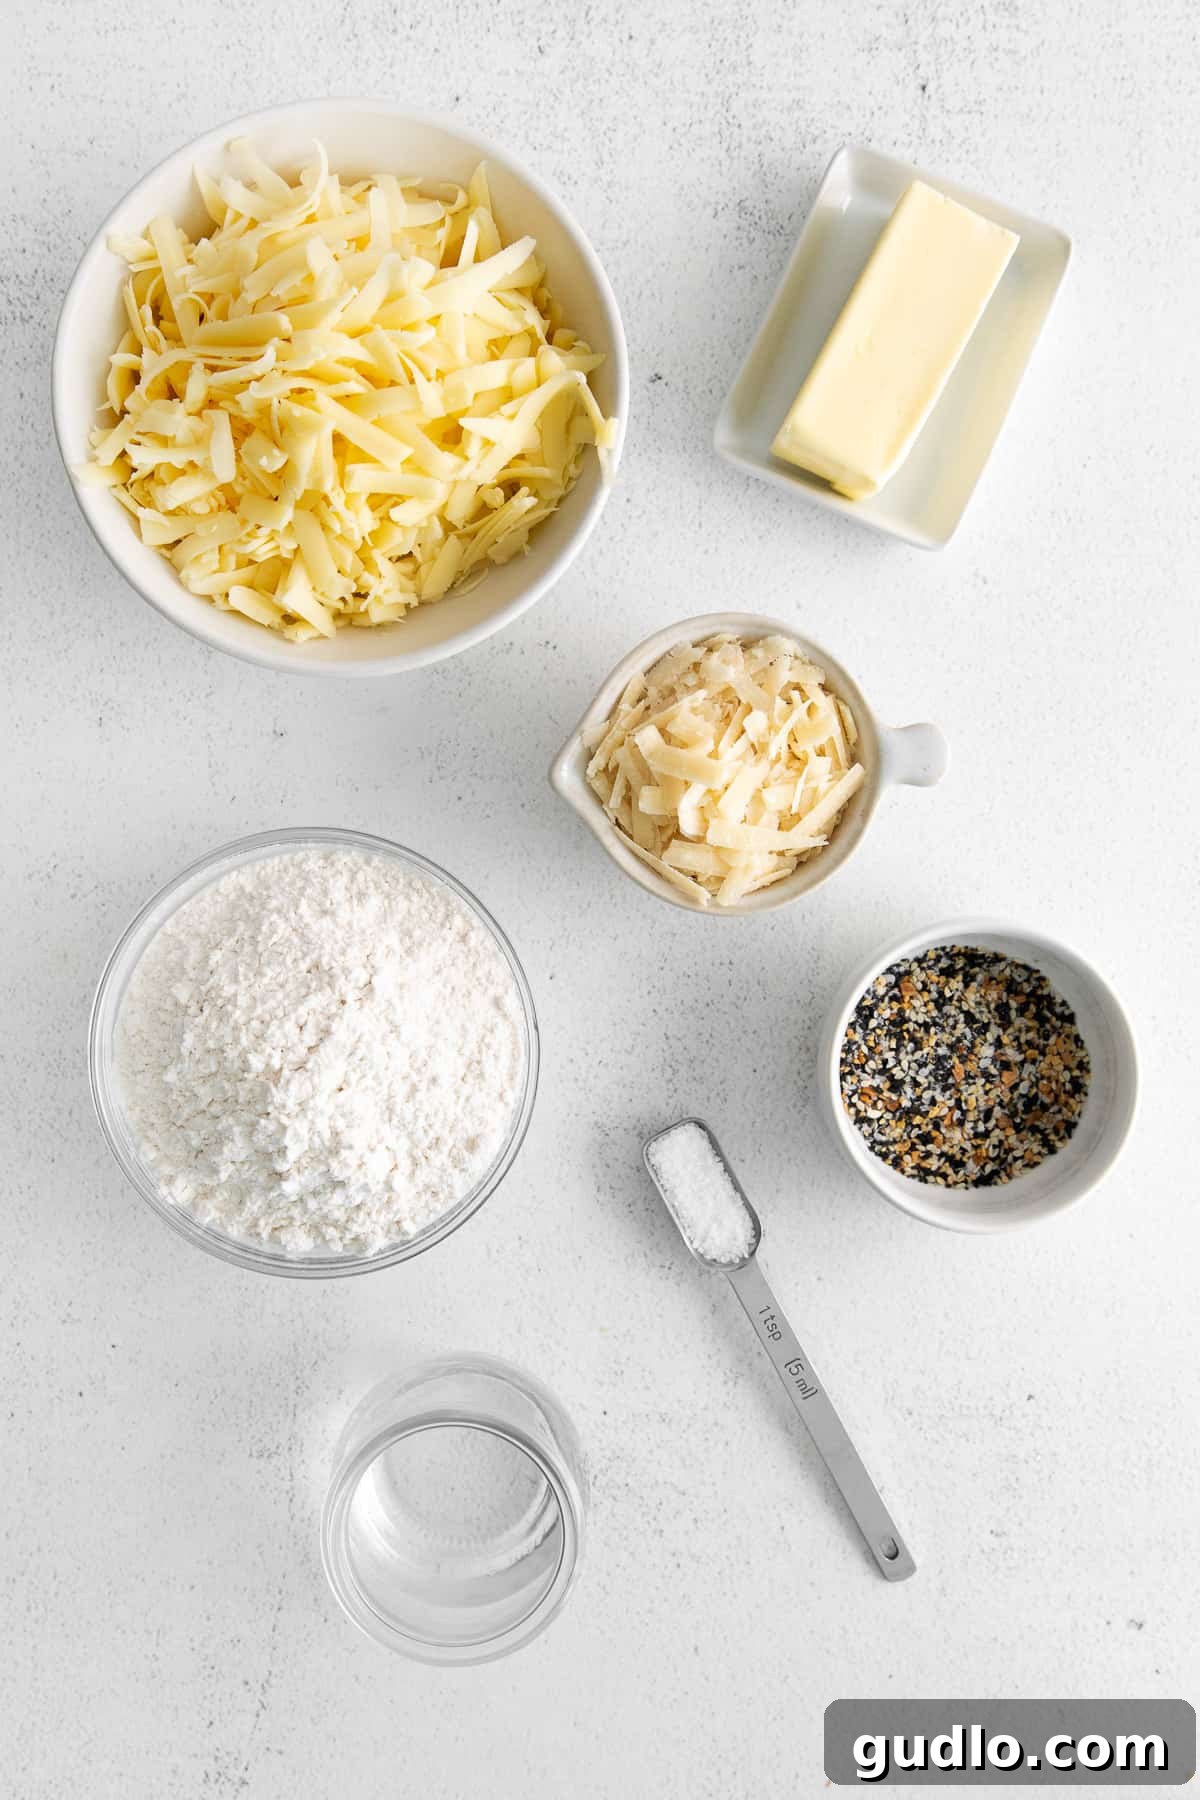
The secret to exceptional homemade cheese crackers lies in a few key, high-quality ingredients. Each component plays a vital role in achieving that coveted crunchy texture and rich, savory flavor. Understanding the role of each ingredient will help you perfect your cracker-making skills and even encourage creative experimentation. Here’s a closer look at what you’ll need:
- Premium Cheeses: This recipe truly shines with the robust combination of sharp white cheddar cheese and Pecorino Romano cheese.
- Sharp White Cheddar: This provides a tangy, pronounced cheddar flavor that forms the delicious backbone of these crackers. Its distinct sharp notes contribute significantly to the overall savory profile, making each bite intensely cheesy. If you prefer, you can certainly opt for yellow cheddar, which will lend your crackers a more classic, vibrant golden hue. For best results, choose a high-quality block of cheddar and shred it yourself.
- Pecorino Romano: A hard, salty Italian cheese traditionally made from sheep’s milk, Pecorino Romano adds a distinct sharp, salty, and slightly nutty depth that complements the cheddar beautifully. Its strong, pungent flavor ensures a complex taste, meaning a little goes a long way to infuse your crackers with Mediterranean flair. If Pecorino Romano is hard to find, a high-quality Parmesan cheese makes an excellent substitute, offering a similar umami-rich saltiness and granular texture.
Pro Tip: Always grate your cheese fresh! Pre-shredded cheeses often contain anti-caking agents like cellulose, which can prevent the cheese from melting smoothly and negatively affect the texture and crispness of your homemade crackers.
- All-Purpose Flour: This is the fundamental structural foundation of our savory crackers. Standard all-purpose flour provides the right balance for a dough that is both pliable enough to roll thinly and strong enough to bake into a tender yet crisp cracker. While we haven’t extensively tested this specific recipe with alternative flours (like whole wheat or gluten-free blends), sticking to all-purpose flour will ensure consistent and delicious results for your first batch.
- Unsalted Butter: As the primary fat in these crackers, butter contributes significantly to their rich flavor, tender interior, and desirable crisp texture. Using unsalted butter is recommended as it allows you to precisely control the overall saltiness of the crackers, especially important given the natural saltiness of Pecorino Romano. Ensure your butter is at proper room temperature (softened but not melted) for optimal creaming with the cheese, which helps create a uniform and airy mixture.
- Ice Cold Water: This seemingly simple ingredient is surprisingly crucial! Cold water is essential for bringing the dough together without overworking the gluten, which can lead to tough, chewy crackers instead of crisp ones. Adding it slowly, teaspoon by teaspoon, helps you achieve the perfect dough consistency – firm but pliable, not sticky or crumbly. The cold temperature also helps keep the butter firm, which is key to creating delicate layers and a flakier, more tender texture during baking.
- Kosher Salt: An indispensable ingredient, kosher salt is vital for enhancing all the other savory flavors in the crackers. Kosher salt has larger crystals and a cleaner, less harsh taste compared to fine table salt. It integrates well into the dough, distributing flavor evenly. Always adjust the amount to your preference, keeping in mind the inherent saltiness of the Pecorino Romano cheese.
- Optional Seasonings: This is where your culinary creativity can truly shine and personalize your homemade crackers! We’ve had fantastic results and highly recommend trying both everything bagel seasoning for a nutty, savory bite, and Italian seasoning for an aromatic, herbaceous touch, sprinkled generously on top before baking. Other delicious options to consider for a flavor twist include:
- Smoked paprika or a pinch of cayenne pepper for a subtle warmth or a spicy kick.
- Garlic powder or onion powder for an aromatic, savory boost that complements the cheese beautifully.
- Freshly cracked black pepper for a pungent, subtle bite and visual appeal.
- Dried herbs like rosemary or thyme for an earthy, fragrant aroma that pairs well with savory dips.
Don’t be afraid to experiment with different spice blends to find your absolute favorite flavor combinations!
Step-by-Step Guide to Crafting Perfect Homemade Cheese Crackers
Making your own cheese crackers might seem intimidating, but with these clear, easy-to-follow steps, you’ll be a cracker-making pro in no time! The key to achieving that signature crispness and rich flavor lies in precision and patience, especially during the chilling and rolling phases. Follow these instructions carefully, and you’ll be rewarded with a batch of irresistible homemade savory crackers.
Step 1: Cream Butter and Cheese
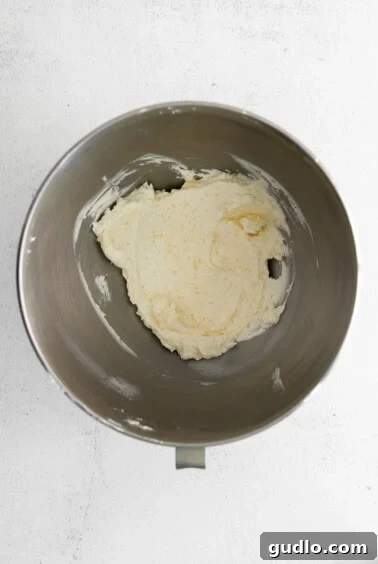
Begin by adding the softened unsalted butter, freshly shredded sharp cheddar cheese, and shredded Pecorino Romano cheese into the mixing bowl of an electric stand mixer. If you don’t have a stand mixer, a powerful hand mixer will also work effectively. Fit the stand mixer with the paddle attachment. Beat the mixture on medium-high speed for 5-6 minutes. Continue mixing until all the ingredients are thoroughly combined and the mixture transforms into a light, smooth, and creamy consistency. This crucial aeration step helps to create pockets of air, which contribute to the final crackers’ tender yet crisp texture.
Step 2: Incorporate Flour & Cold Water
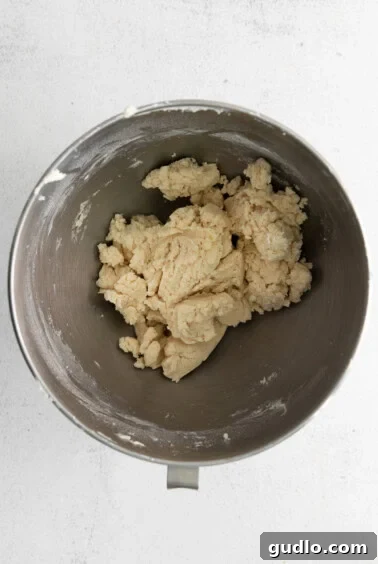
In a separate small bowl, whisk together the all-purpose flour and kosher salt until well combined. With the mixer still on low speed, slowly add the dry flour mixture to the wet butter and cheese mixture in the stand mixer bowl. Mix until just combined and the ingredients start to form a dry, crumbly mixture. It’s essential not to overmix at this stage, as excessive gluten development can lead to tough crackers.
Next, gradually add the ice cold water, one teaspoon at a time, continuing to mix on low speed. Observe the dough closely; add just enough water until the dough comes together and forms a cohesive ball. The dough should feel firm but pliable and smooth, not sticky or excessively crumbly. The slow addition of water is important to achieve the correct, non-sticky consistency.
Step 3: Form and Refrigerate the Dough
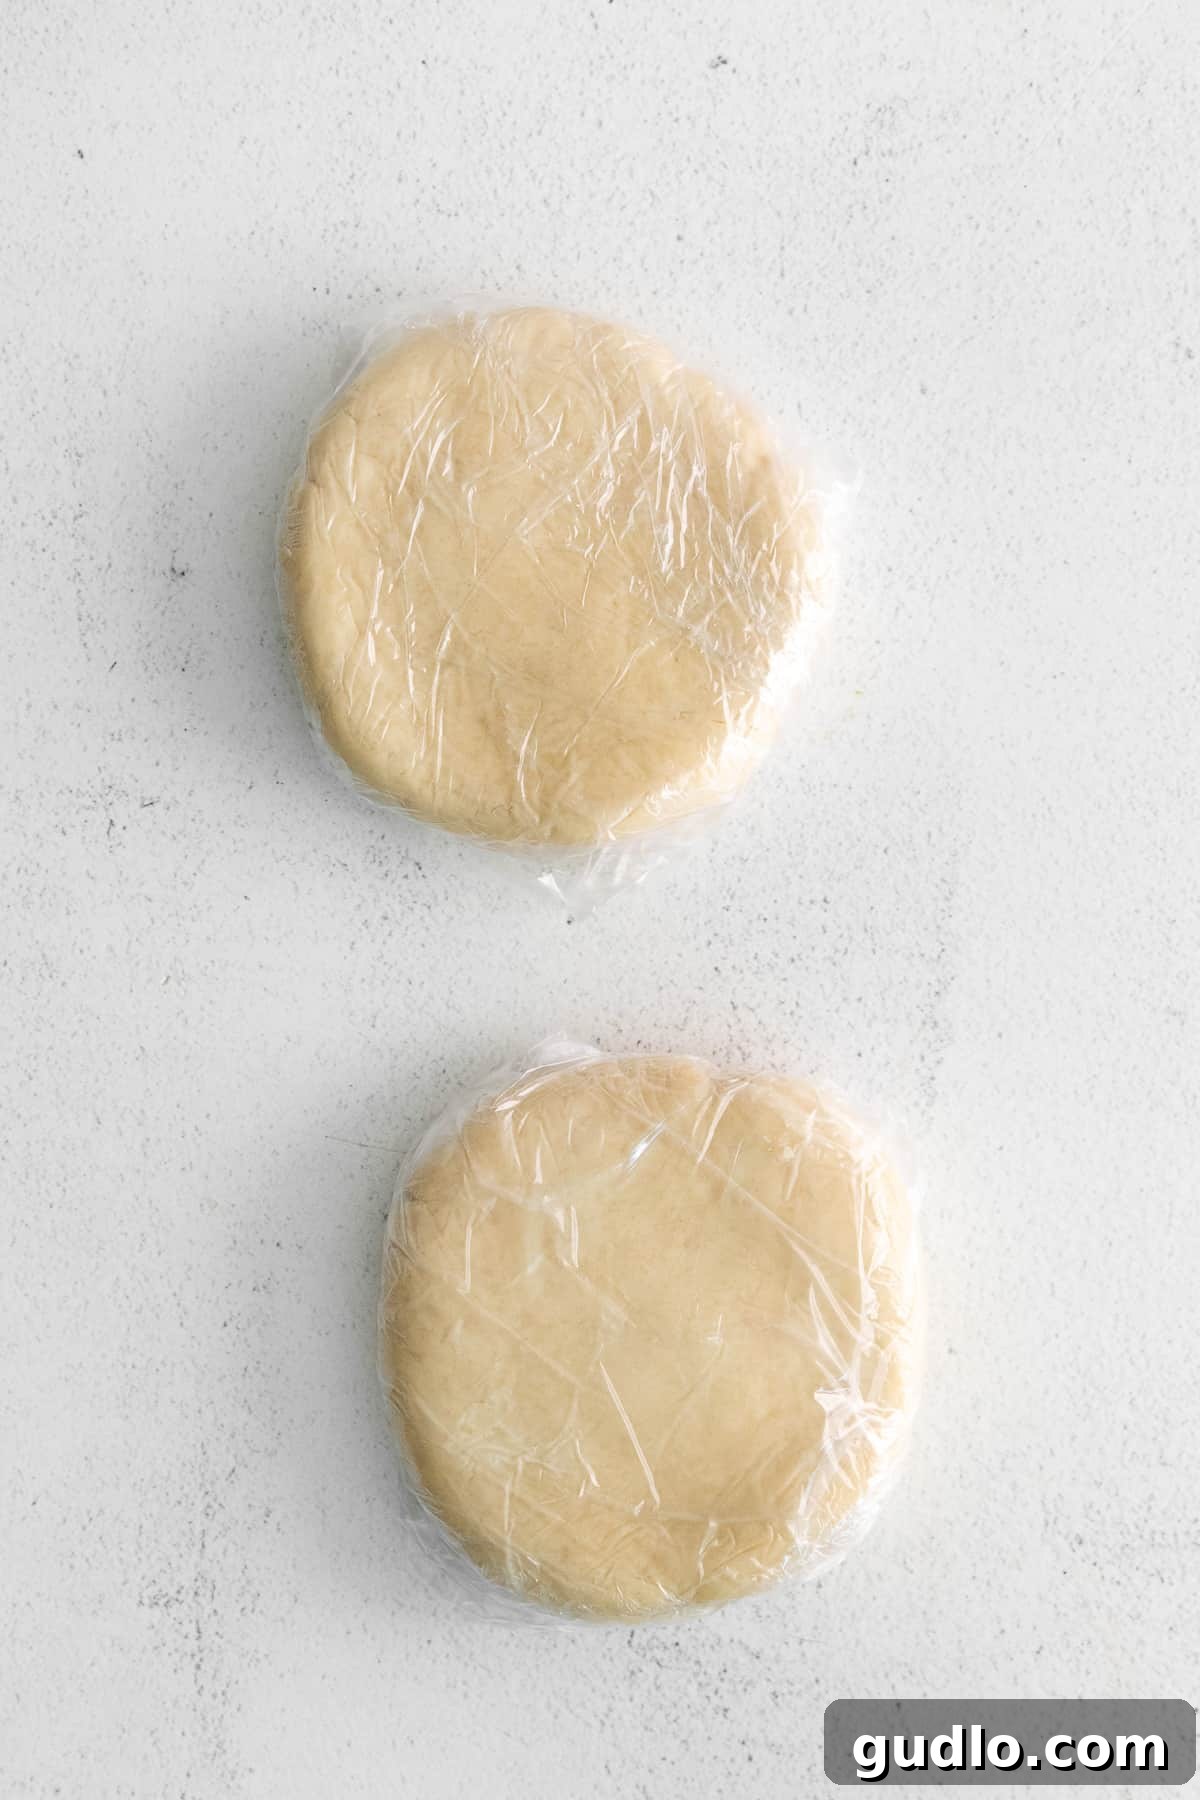
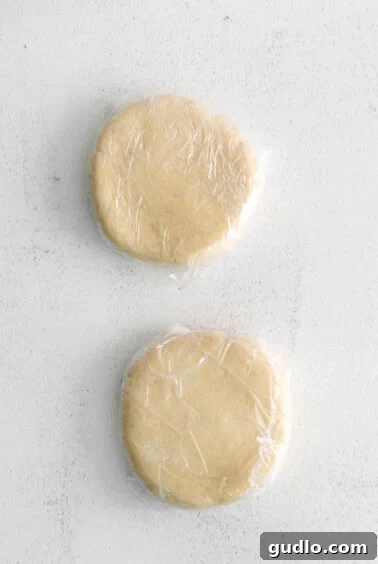
Once the dough has formed, remove it from the mixer bowl. Divide the dough into two equal portions. Gently form each portion into a smooth ball, and then flatten them slightly into uniform disc shapes. Wrap each dough disc tightly in plastic wrap, ensuring that no air can penetrate, which could dry out the dough. Transfer the wrapped dough discs to the refrigerator and chill for a minimum of 1 hour, or ideally up to 24 hours. This initial chilling period is absolutely crucial: it allows the butter to firm up, making the dough much easier to roll thinly, and it helps prevent the crackers from spreading too much during baking, ensuring they maintain their crisp shape.
Step 4: Roll, Season, and Cut the Dough
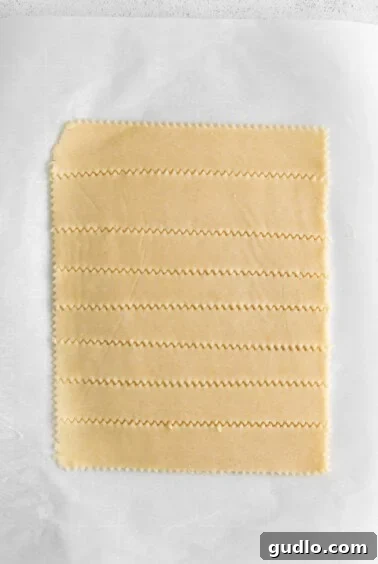
Once the dough has thoroughly chilled and is firm, remove one disc from the refrigerator and preheat your oven to 375ºF (190ºC). Lightly flour your clean work surface or, for easier handling and cleanup, lay down a large piece of parchment paper. Place one dough disc on the prepared surface and roll it out evenly. The goal here is to achieve a very thin rectangle, approximately 1/8 of an inch thick or even thinner if you can manage it without tearing. Remember, the thinner the dough, the crisper your final crackers will be. If the dough becomes too warm and sticky while rolling, simply place it back in the fridge for 10-15 minutes to firm up.
Once rolled to your desired thinness, sprinkle your chosen seasoning (such as everything bagel or Italian seasoning) generously and evenly over the entire surface of the dough. Use your rolling pin to gently roll over the seasoning, pressing it lightly into the dough. This ensures the seasoning adheres well and doesn’t fall off during baking.
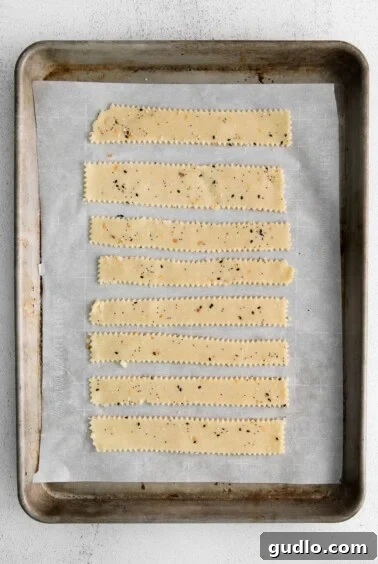
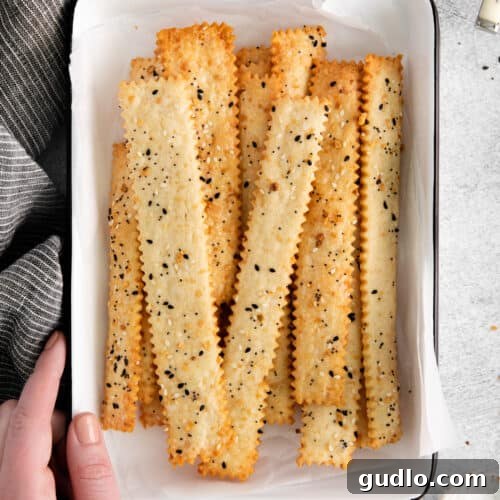
Now, it’s time to cut! For uniform and professional-looking crackers, use a ruler to measure and guide your cuts. Slice the dough into long strips, aiming for about 1 inch wide. Then, using a pizza cutter or a pastry wheel, slice these strips crosswise to create your desired cracker shapes. You can opt for traditional squares, or follow our suggestion and cut them into elegant 7-8-inch long rectangles for a more unique presentation. Don’t worry too much about perfection; they will bake beautifully and taste amazing either way. Carefully transfer the entire piece of parchment paper with the cut crackers onto a large baking sheet, ensuring the crackers are not touching each other to allow for even baking and maximum crisping.
Step 5: Second Freeze (Crucial for Non-Spreading & Crispness)
This step is absolutely vital for perfectly formed, flat, and crispy crackers – do not skip it! Once your crackers are cut and arranged on the baking sheet, transfer the entire baking sheet into the freezer for 15-20 minutes. This quick freeze serves a critical purpose: it thoroughly sets the butter and the dough’s shape, effectively preventing the crackers from spreading, puffing up excessively, or losing their distinct edges in the oven. It’s the ultimate secret to achieving that signature flat, incredibly crispy cracker texture, much like the technique used for perfectly shaped sugar cookies! This brief chilling period ensures your efforts in rolling and cutting pay off with beautiful, professional-looking results.
Step 6: Bake to Golden Perfection
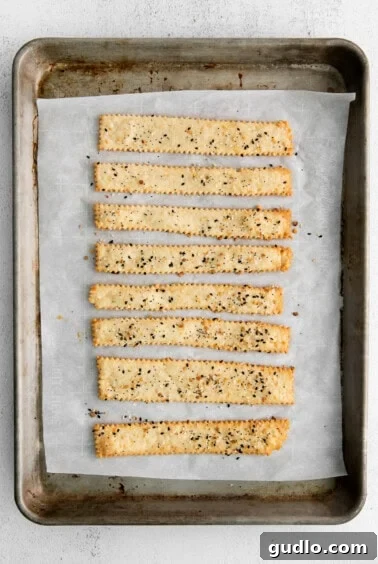
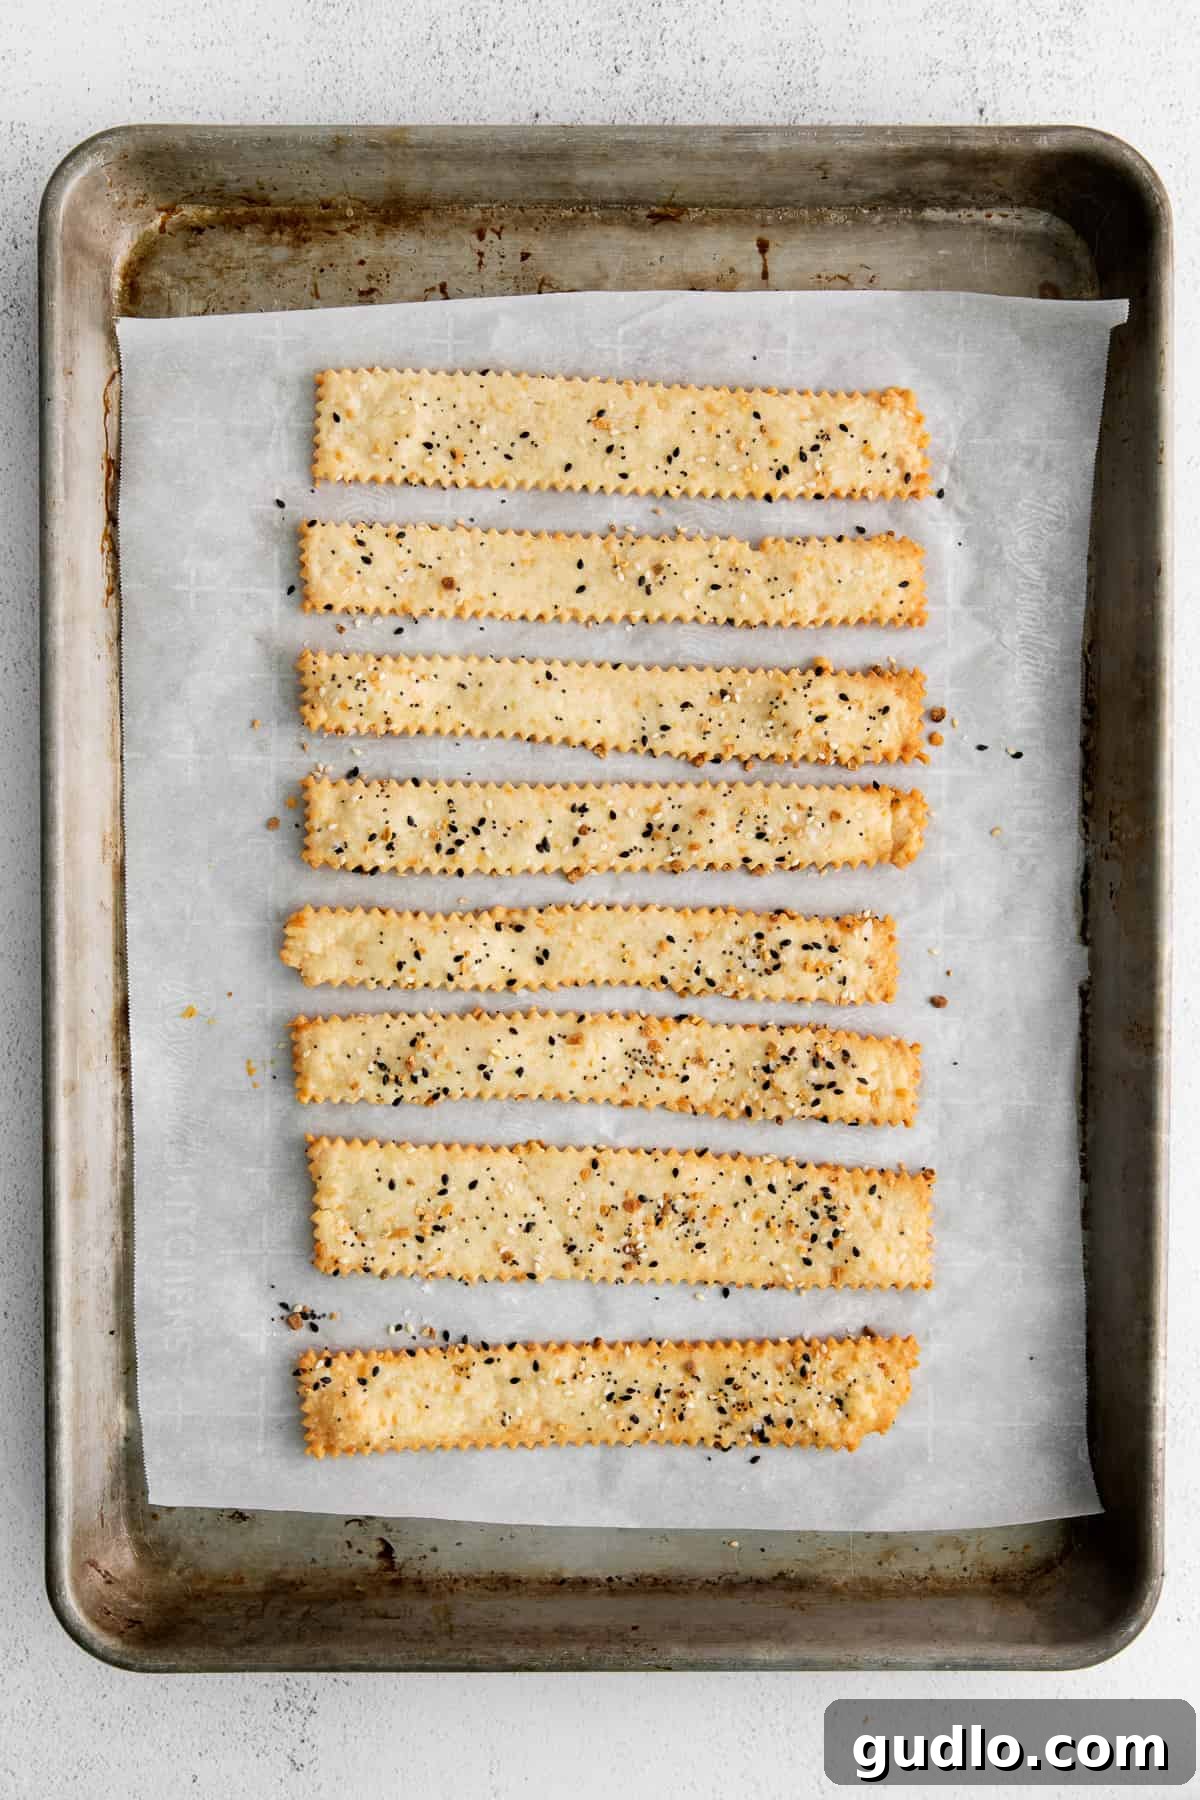
Once the crackers are firm from their freezer chill, carefully transfer the baking sheet into the preheated oven. Bake for 15-17 minutes. The precise baking time can vary depending on your oven and the thickness of your crackers, so keep a close eye on them. You’re looking for the edges to turn a beautiful golden brown and for the crackers to appear firm and crisp. They should be uniformly colored, signaling their readiness.
Upon removing them from the oven, immediately slide the parchment paper with the baked crackers onto a wire cooling rack. This quick transfer prevents them from continuing to cook on the hot baking sheet, which could lead to over-browning or even burning. Allowing them to cool completely on a rack is essential, as they will crisp up even further as they reach room temperature, achieving that perfect, satisfying snap. Resist the urge to snack immediately – patience will be rewarded!
Creative Ways to Serve Your Delicious Cheese Crackers
These homemade cheese crackers are so robustly flavored and delightfully crispy, they’re truly delightful on their own. However, their savory, cheesy profile also makes them an outstanding companion for a wide variety of dips, spreads, and culinary creations. Elevate your next gathering or simply enhance your daily snacks with these inspired serving suggestions:
- Cheesy Hot Crab Dip: The rich, creamy, and intensely savory notes of a bubbling hot crab dip, generously loaded with cheese, create an indulgent and unforgettable pairing with the crisp texture of these crackers. It’s an elevated appetizer that’s perfect for game days, festive holiday gatherings, or any special occasion.
- Chicken Bacon Ranch Dip: A warm, deliciously savory, and undeniably cheesy dip featuring the beloved combination of tender chicken, smoky bacon, and zesty ranch flavors finds its perfect match in these crunchy cheese crackers. This irresistible pairing is a guaranteed crowd-pleaser and comes together surprisingly quickly.
- Cold Crab Dip: For a lighter, yet equally flavorful option, a cool and refreshing crab dip, made with fresh, succulent crab meat and simple, bright ingredients, provides a delightful textural and flavor contrast to the baked crackers. It’s a sophisticated snack that’s surprisingly easy to prepare for any event.
- Baked Brie with Fig Jam: Imagine the warm, gooey richness of oven-baked brie, perhaps infused with a luscious sweet fig jam, generously scooped onto a savory cheese cracker. The exquisite interplay of creamy, sweet, and crunchy textures and flavors is absolutely divine and makes for an elegant, show-stopping appetizer.
- Classic Hummus & Dips: The earthy, smooth, and creamy texture of your favorite traditional hummus or other savory vegetable dips (like spinach-artichoke or roasted red pepper) is a natural partner for these crispy, sturdy crackers.
- Elevated Charcuterie Boards: Transform any charcuterie or cheese board into a gourmet display. The robust cheese flavor in these homemade crackers expertly complements an array of cured meats, fresh and dried fruits, crunchy nuts, olives, and a variety of artisanal cheeses, adding an extra layer of texture and taste.
- Gourmet Soup & Salad Topper: Lightly crush a few crackers and sprinkle them generously over a steaming bowl of tomato soup, a creamy bisque, or a fresh garden salad. They offer an unexpected layer of crunch and a burst of cheesy goodness, serving as a superior homemade alternative to croutons.
- Wholesome Kid-Friendly Snack: Offer these flavorful homemade crackers as a healthier, more delicious alternative to heavily processed packaged snacks. They’re perfect for lunchboxes, after-school treats, or a satisfying anytime bite for children and adults alike.
Storage Tips for Maximizing Freshness and Crunch
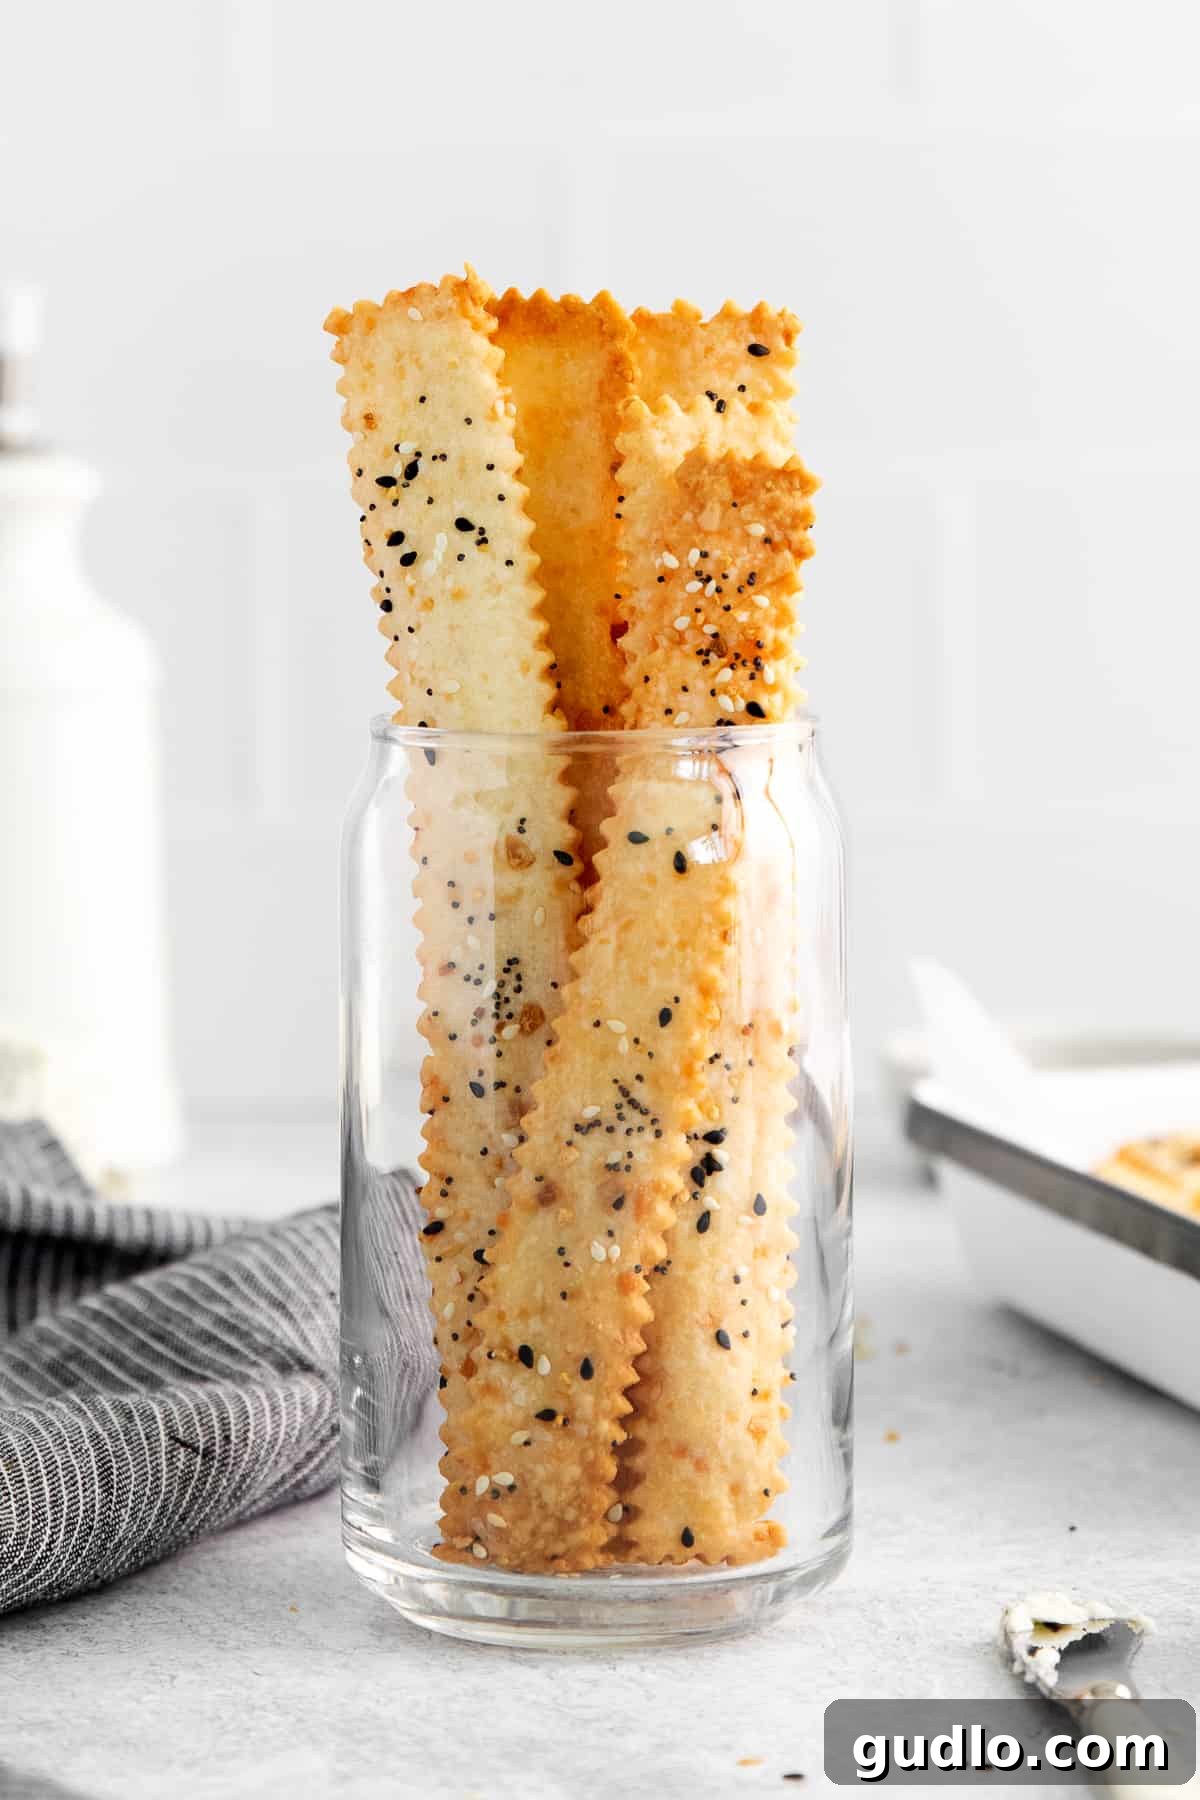
While these homemade cheese crackers are undeniably best enjoyed fresh from the oven, still warm and fragrant, you can certainly store them to savor later. Proper storage is absolutely essential to maintain their delicious crunch and preserve their savory flavor for as long as possible.
To store your cooled cheese crackers, place them in an airtight container. Keep the container at room temperature, ideally in a cool, dark pantry or cupboard away from direct sunlight and humidity. Stored this way, they will remain wonderfully crispy and flavorful for up to 3 days. To further extend their crispness and absorb any residual moisture, you can place a piece of paper towel at the bottom of the container before adding the crackers. Avoid refrigerating them, as the humidity within a refrigerator can quickly soften and compromise their texture.
For longer-term convenience, you can freeze the unbaked dough. After forming the dough into discs (Step 3), wrap them tightly in plastic wrap, then wrap them again in a layer of heavy-duty aluminum foil. Label and freeze for up to 1 month. When you’re ready to bake a fresh batch, simply thaw the dough discs in the refrigerator overnight. Once thawed, proceed with rolling, cutting, and baking as instructed in Steps 4-6, adding a few extra minutes to the baking time if needed, as the dough will be colder.
Looking for more cheesy delights to satisfy your cravings?
More Irresistible Cheesy Appetizers to Try
- Crispy Air Fryer Ravioli: Discover a surprisingly quick and easy way to enjoy golden-brown, perfectly crispy, and cheesy ravioli without the need for deep-frying. A fantastic crowd-pleaser!
- Hearty Ground Beef Quesadilla: Whip up a satisfying and versatile meal or appetizer packed with flavorful seasoned ground beef and wonderfully melted cheese, all in a crispy tortilla.
- Garlicky Cheese Bread: Indulge in the ultimate comfort food side dish, featuring gooey melted cheese generously spread on toasted bread, absolutely perfect for dipping in your favorite soup or pasta sauce.
Homemade Cheese Crackers Recipe Card
This recipe yields approximately 6 servings of delightful, crunchy cheese crackers, perfect for sharing or savoring throughout the week.
By: Lee Funke
Prep time: 2 hours (includes essential chilling time for the dough)
Cook time: 15-17 minutes
Total time: Approximately 2 hours 15 minutes
Ingredients
- ⅓ cup unsalted butter, softened to room temperature
- 6 oz. white sharp cheddar cheese, freshly shredded
- 3 oz. pecorino romano cheese, freshly shredded
- 1.25 cups all-purpose flour
- 1 teaspoon kosher salt
- 4 tablespoons cold water (plus more if needed, 1 teaspoon at a time)
- 1 tablespoon everything bagel seasoning or Italian seasoning (optional, for topping)
Instructions
- Cream Butter and Cheese: In the bowl of an electric stand mixer (or using a hand mixer), combine the softened unsalted butter, shredded sharp cheddar cheese, and shredded Pecorino Romano. Beat on medium-high speed for 5-6 minutes until the mixture is light, smooth, creamy, and thoroughly combined.
- Add Flour & Water: In a separate small bowl, whisk together the all-purpose flour and kosher salt. With the mixer on low speed, gradually add the flour mixture to the cheese mixture. Mix until just combined and a dry, crumbly mixture forms. Then, slowly add the cold water, one teaspoon at a time, continuing to mix until a cohesive dough forms. Avoid overmixing.
- Form Dough Discs and Refrigerate: Divide the dough into two equal portions. Form each portion into a ball, then flatten into discs. Wrap each dough disc tightly in plastic wrap and refrigerate for at least 1 hour, or until firm. This step is crucial for easy rolling and preventing spreading.
- Roll, Season & Cut: Preheat oven to 375ºF (190ºC). On a piece of parchment paper, roll out one dough disc into a very thin rectangle, aiming for less than 1/8 inch thick (the thinner, the crisper!). Sprinkle your chosen seasoning over the dough and gently roll it in with a rolling pin to ensure it adheres. Use a ruler and a pizza or pastry cutter to slice the dough into 1-inch wide strips, then cut crosswise into your desired cracker shapes (e.g., 7-8-inch long rectangles or squares). Carefully transfer the parchment paper with the cut crackers onto a large baking sheet, ensuring they are not touching. Repeat with the second dough disc.
- Freeze (Crucial Step): Place the baking sheet with the cut crackers into the freezer for 15-20 minutes. This essential step sets the butter and the dough’s shape, preventing the crackers from spreading or puffing up excessively in the oven, ensuring a perfect crisp texture.
- Bake to Golden Perfection: Bake in the preheated oven for 15-17 minutes, or until the crackers are beautifully golden brown and crisp around the edges. Watch them closely, as baking times can vary.
- Cool Completely: Immediately slide the parchment paper with the baked crackers onto a wire cooling rack. Allow them to cool completely, as they will crisp up even further as they cool. Serve and enjoy!
Tips & Notes for Success
- The two most critical steps for achieving perfectly crispy, flat, and non-puffed crackers are: 1) ensuring the dough is rolled out extremely thin (less than 1/8 inch) and 2) refrigerating the dough twice (once after mixing and shaping, and again after cutting the crackers). Do not skip these steps!
- Feel free to experiment with various spice rubs and toppings beyond everything bagel and Italian seasoning. A sprinkle of smoked paprika, garlic powder, onion powder, a dash of cayenne, or a mix of dried herbs like rosemary and thyme can add wonderful depth and unique flavor to your homemade crackers.
- Always ensure your butter is softened to room temperature for the initial creaming stage, but the water you add should be ice cold. This temperature contrast helps control gluten development and contributes to a flakier, crisper cracker.
- When rolling out the dough, if it starts to become too soft or sticky, simply place it back in the refrigerator for 10-15 minutes to firm up before continuing. This makes handling much easier.
Watch the Recipe Video
Nutrition Facts (Approximate per Serving)
Calories: 358 kcal
Carbohydrates: 22 g
Protein: 14 g
Fat: 24 g
Fiber: 1 g
Sugar: 1 g
Nutrition information is automatically calculated and should only be used as an approximation. These values can vary based on exact ingredient brands and portion sizes.
Loved this recipe? Your feedback means the world to us!
Leave a comment below!
Don’t forget to tag your delicious creations on social media with the hashtag #cheeseknees. We’d absolutely love to see what wonderful cheesy snacks you’re baking in your kitchen!