
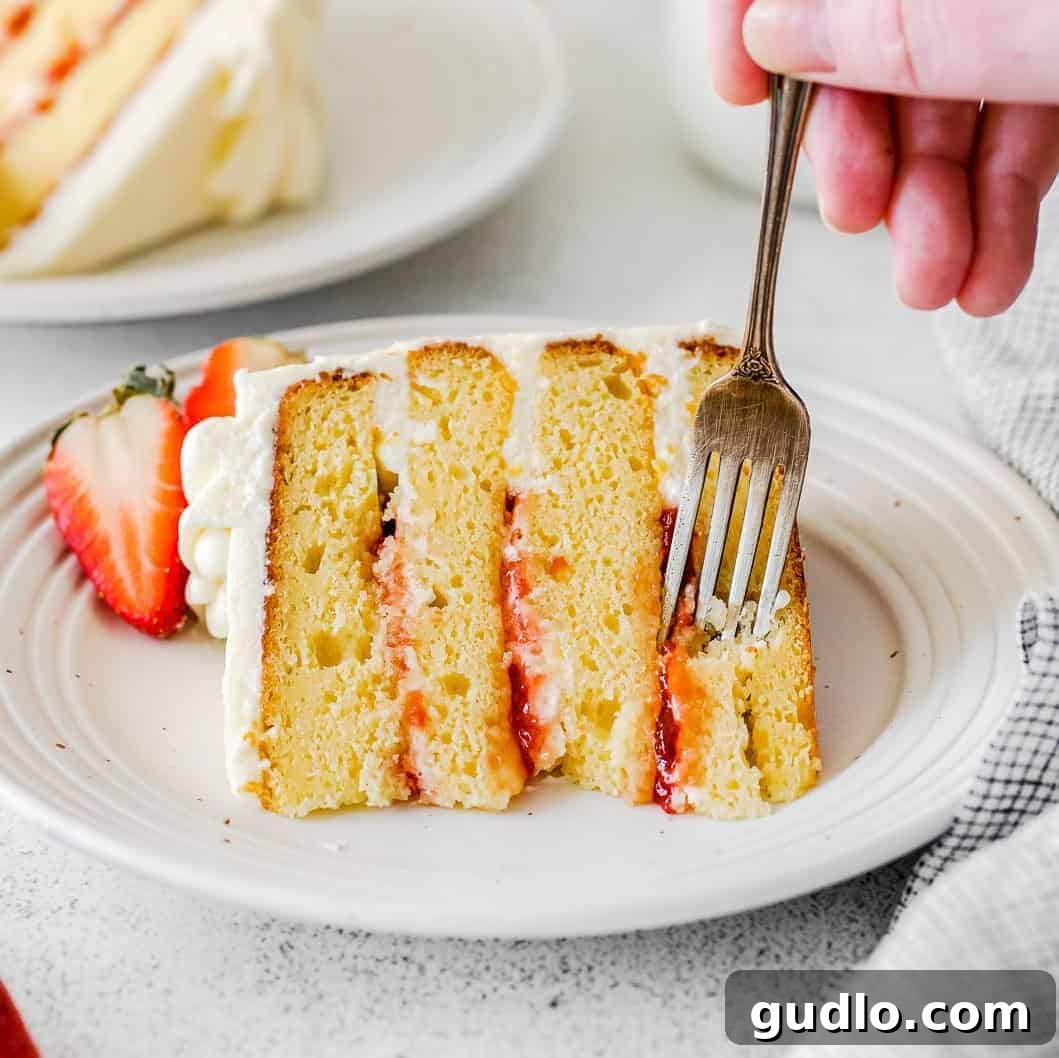
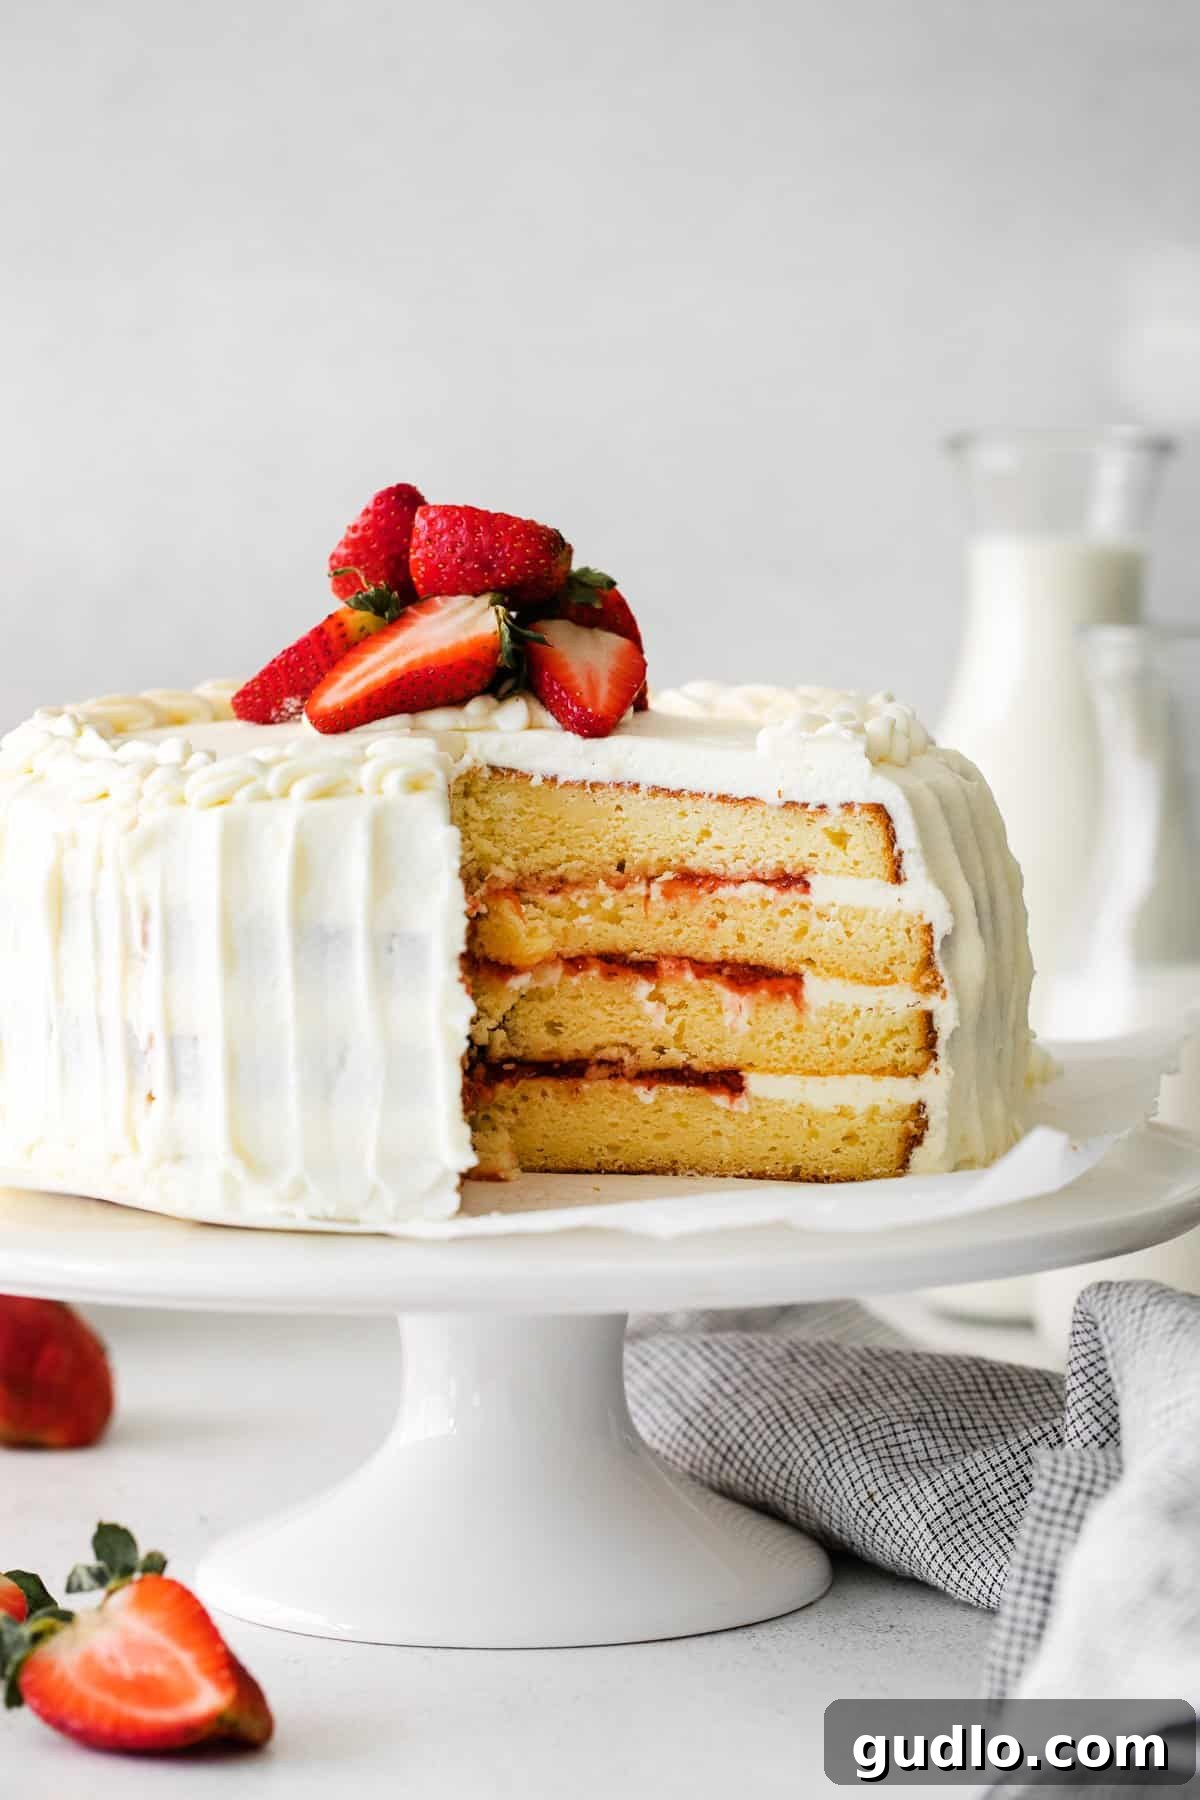
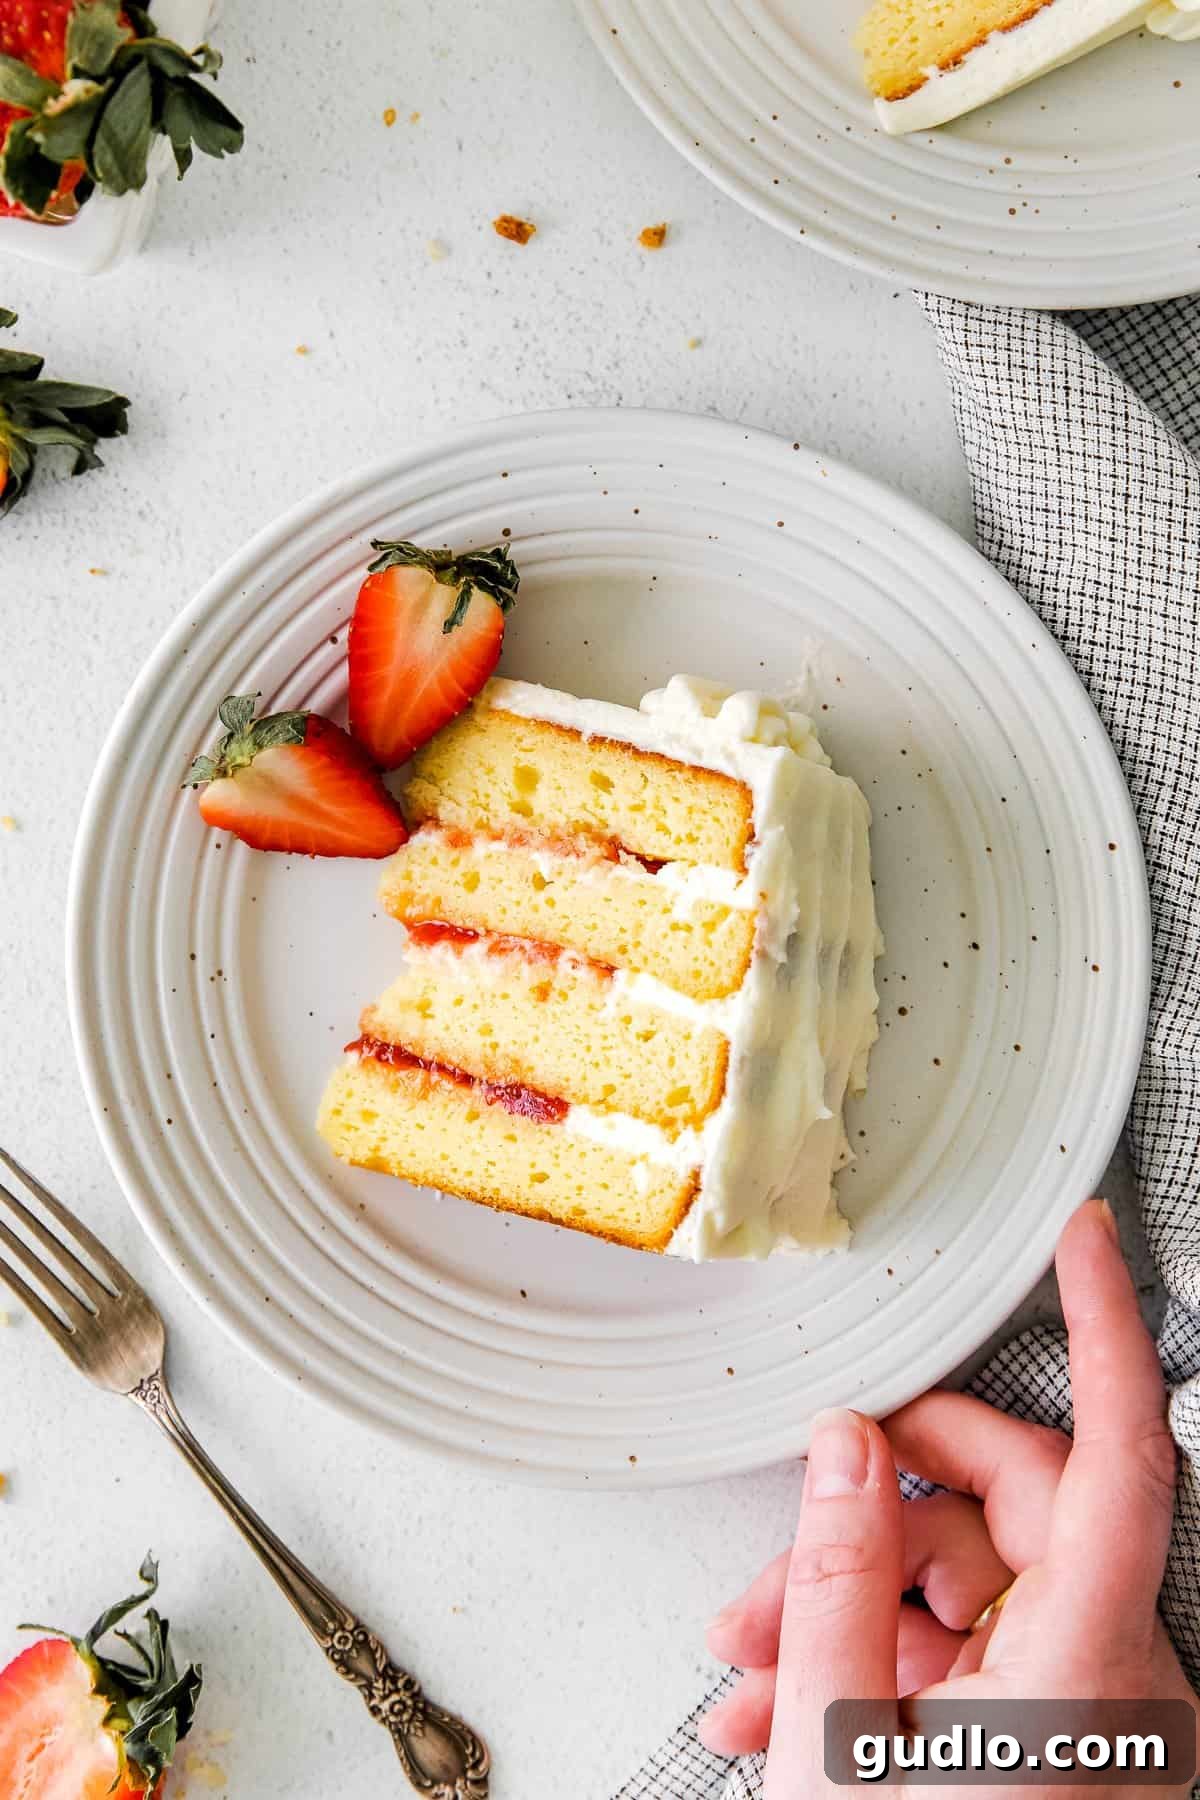
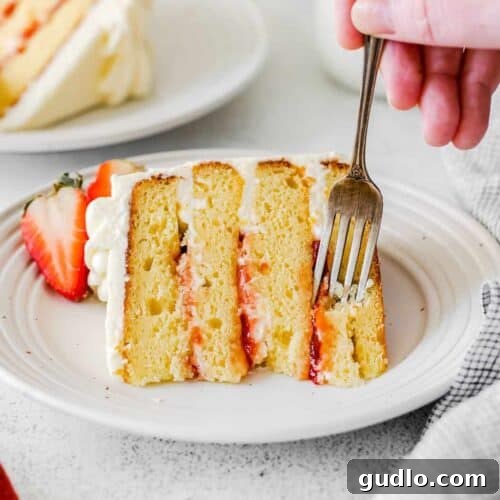
Indulge in a slice of pure joy with this exquisite **Strawberry Ricotta Layer Cake**. Crafted with a unique blend of delicate almond extract and bright lemon zest, its ricotta-infused layers boast an unparalleled moist and tender crumb. Each luscious layer is generously spread with a fluffy, tangy cream cheese frosting and rich strawberry preserves, creating a harmonious symphony of flavors and textures. This stunning dessert isn’t just a cake; it’s a celebration, perfect for elevating any special occasion or simply treating yourself to a baking masterpiece. Get ready to impress your guests and delight your taste buds with this unforgettable homemade creation.
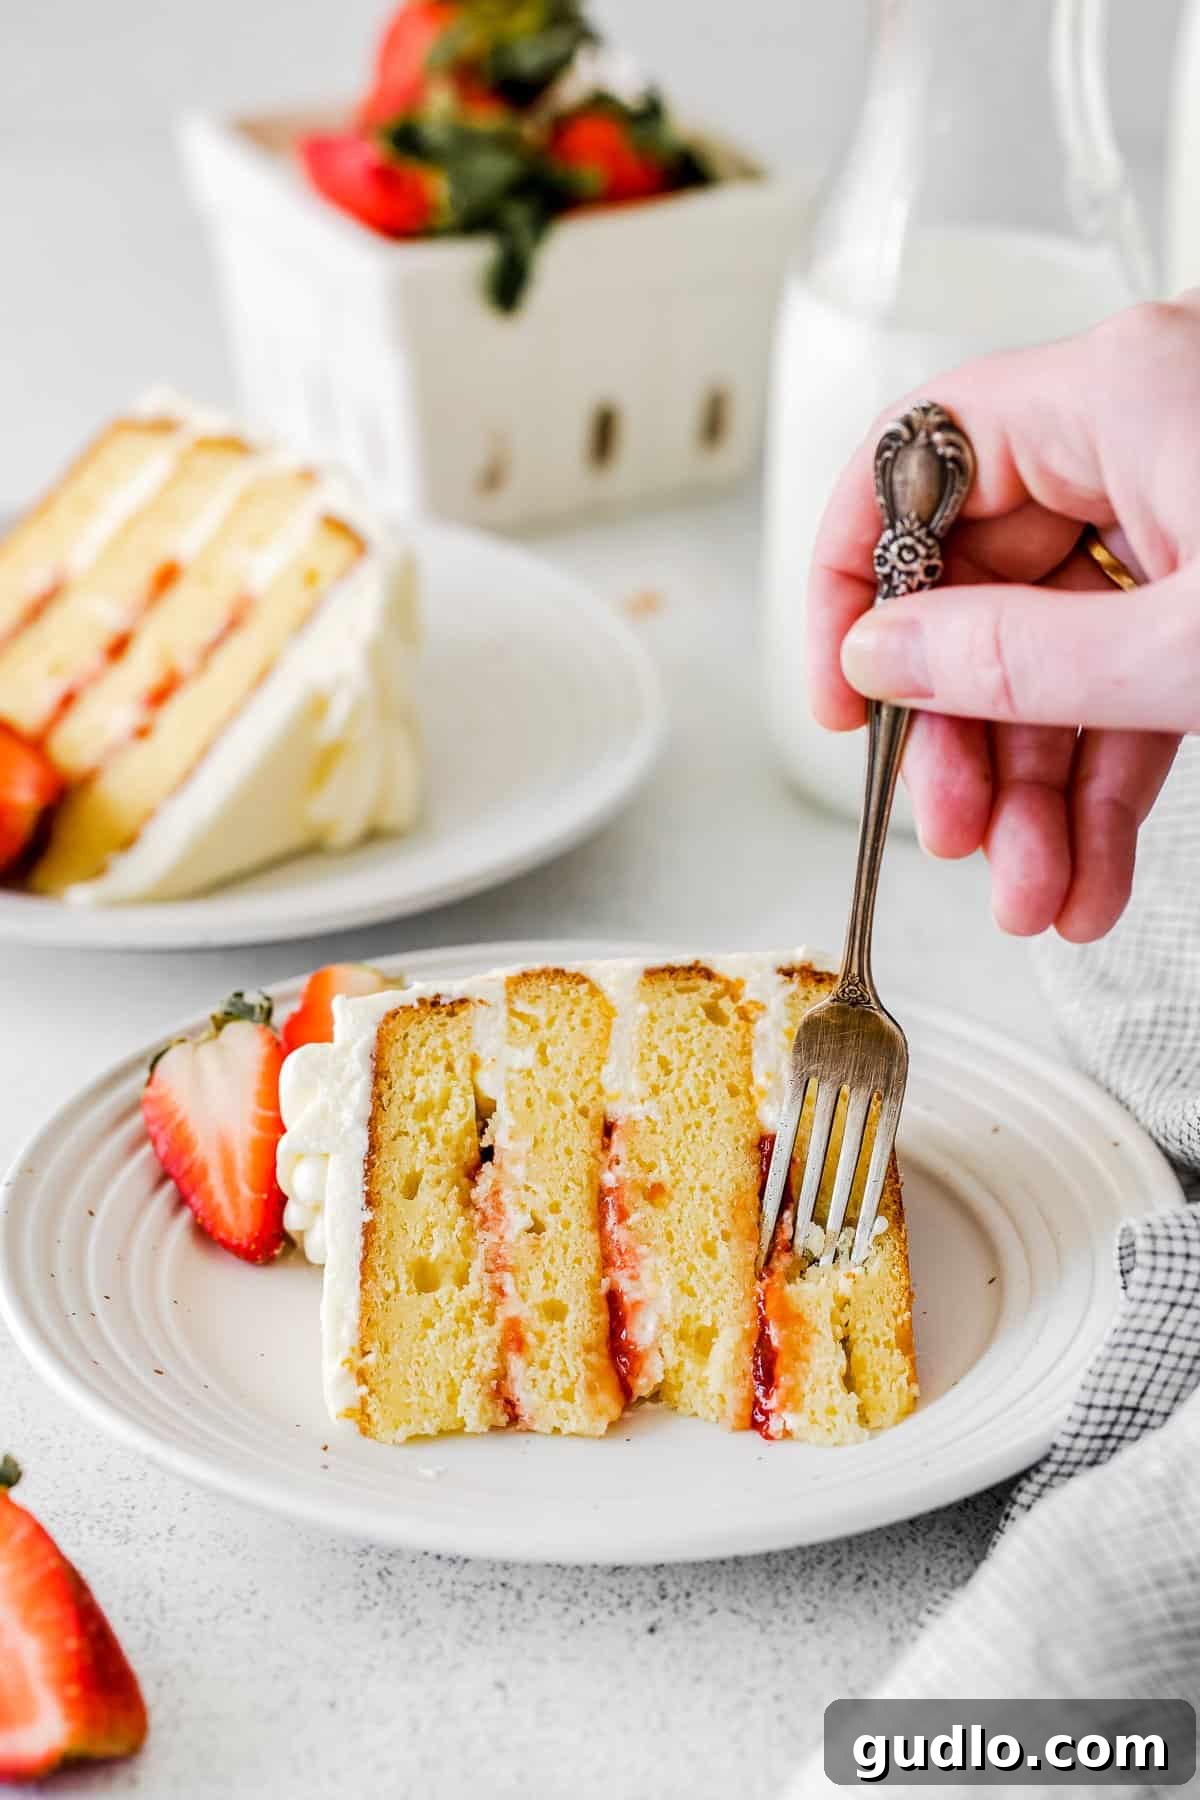
Mastering the Gorgeous Strawberry Ricotta Layer Cake
Creating a show-stopping layer cake might seem daunting, but we firmly believe that every home cook can become a confident baker. This **strawberry ricotta layer cake** recipe is designed to be approachable yet incredibly rewarding. It’s not only a delightful culinary project but also an opportunity to express your creativity through decoration. Prepare to embark on a baking adventure that culminates in a dessert so beautiful and delicious, you’ll wonder why you didn’t try it sooner!
Why You’ll Adore This Strawberry Ricotta Layer Cake!
- **Unforgettable Flavor Fusion:** The marriage of **almond and fresh lemon** elevates the rich ricotta cake base, perfectly complemented by a decadent, yet light, cream cheese frosting. This exquisite balance ensures every bite is a delightful experience, never too sweet, always perfectly harmonious. The subtle nutty notes from the almond extract blend beautifully with the zesty brightness of lemon, creating a sophisticated palate.
- **Unleash Your Creativity with Decoration:** This recipe provides the perfect canvas for your artistic flair. Whether you prefer a rustic, elegantly simple finish or an elaborately piped design, this cake encourages personalized touches. From fresh strawberry garnishes to intricate frosting swirls, you have the freedom to make this layer cake truly your own, transforming it into a visual masterpiece that matches its incredible taste.
- **A Forgiving and Versatile Recipe:** Even if you’re new to baking, this ricotta cake recipe is remarkably forgiving. Its robust structure and moist texture make it easy to handle, slice, and assemble. This adaptability makes it an ideal choice for any gathering, from casual family dinners to grand celebrations like birthdays, anniversaries, or holiday feasts. It’s a cake that consistently delivers outstanding results, boosting your baking confidence with every successful creation.
Spotlight on Key Ingredients for Your Ricotta Cake
Before you even think about cracking an egg or preheating your oven, remember the baker’s golden rule: **Mise en place**. This French culinary term means “everything in its place,” and it’s absolutely crucial for successful baking. Measure out all your ingredients accurately and have them ready before you begin. Imagine the frustration of being halfway through mixing the batter only to discover you’re short on ricotta! A little preparation goes a long way in ensuring a smooth and enjoyable baking process.
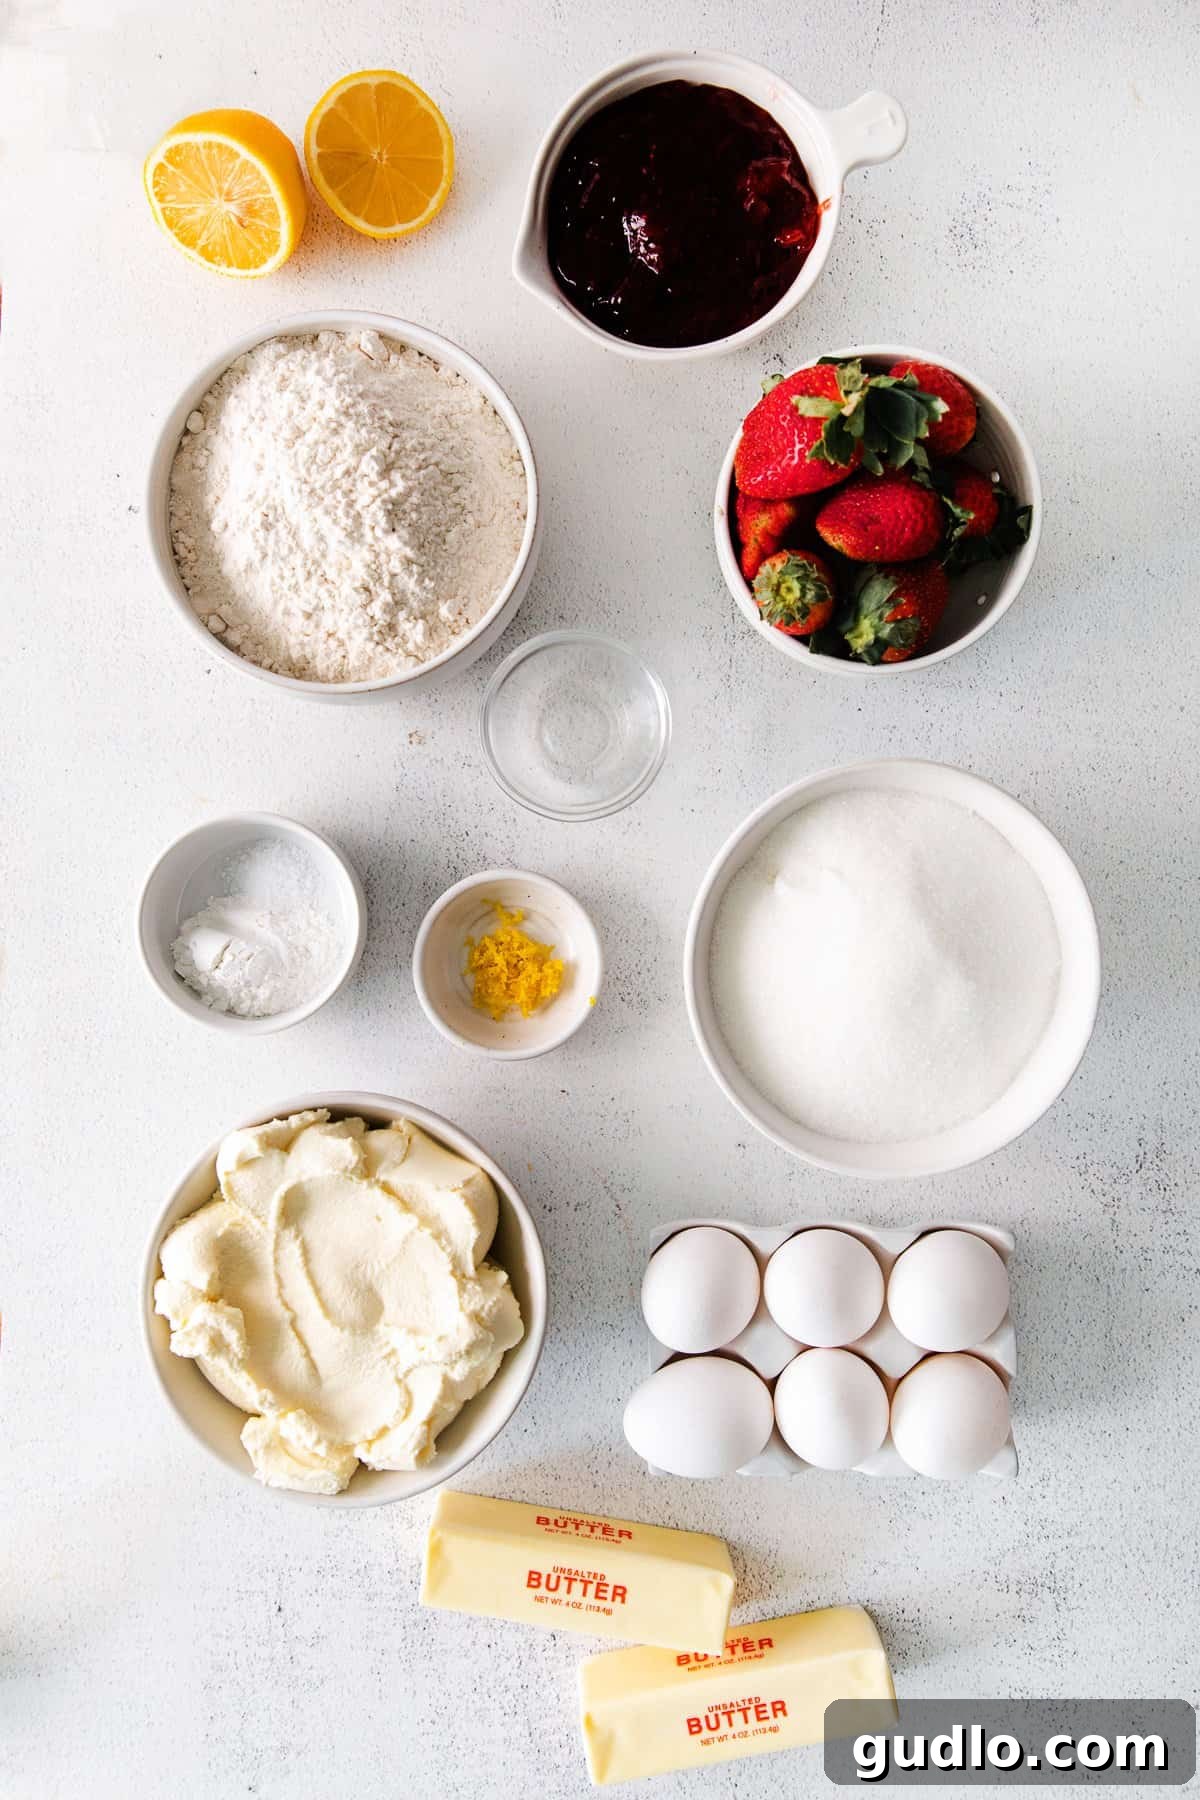
Below, we highlight some of the star ingredients that make this strawberry ricotta layer cake truly exceptional. For a complete list with precise measurements, please refer to the detailed recipe card at the end of this article.
- **Whole Milk Ricotta Cheese:** This is the heart of our incredibly moist ricotta cake. We specifically call for whole milk ricotta due to its higher fat content, which contributes immensely to the cake’s tender texture and rich flavor. Avoid fat-free or low-fat varieties, as they tend to contain more moisture and less flavor, potentially compromising the delicate balance of the cake. Ensure your ricotta is at room temperature for optimal incorporation into the batter.
- **All-Purpose Flour:** For a consistently light and fluffy cake, all-purpose flour is your best friend. We strongly advise against substituting it with other types of flour, as they can significantly alter the cake’s structure and texture. Always ensure your flour is fresh; old flour can lose its leavening properties and negatively impact the final bake. Sifting the flour is also a great practice to prevent lumps and ensure even distribution.
- **Almond Extract:** Ah, the secret weapon! Almond extract is our absolute favorite addition to ricotta cakes. Its warm, slightly nutty, and aromatic notes beautifully complement the richness of the ricotta and the sweetness of the strawberries. It adds a sophisticated depth of flavor that distinguishes this cake from others.
- **Fresh Lemon Juice and Zest:** Brightness is key! Always use fresh lemon juice and zest in this recipe. The zest carries potent citrus oils that infuse the cake with a vibrant, refreshing aroma and flavor, perfectly cutting through the sweetness and richness. Fresh juice provides a cleaner, more intense lemon tang than bottled alternatives.
- **Strawberry Preserves:** For a truly delectable filling between layers, choose strawberry preserves over jam or jelly. Preserves are characterized by their delightful chunks of real fruit, which provide bursts of sweet, fruity flavor and a wonderful textural contrast throughout each slice of cake. These hidden pockets of strawberry goodness make every bite exciting.
- **Cream Cheese:** The foundation of our dreamy, fluffy frosting. Using full-fat cream cheese is essential for achieving the desired rich taste and smooth consistency. It’s crucial to let your cream cheese soften to room temperature before you begin making the frosting. This prevents lumps and ensures a perfectly smooth, whip-able frosting that spreads effortlessly.
- **Unsalted Butter:** Used in both the cake and the frosting, unsalted butter allows you to control the overall saltiness of your dessert. Like cream cheese, ensure your butter is at room temperature. This is vital for properly creaming with sugar in the cake batter and for achieving a light and airy frosting.
Essential Tools to Elevate Your Baking Experience
Having the right tools can make all the difference in your baking journey, transforming a complex task into a joyful creation. While some items are optional for a basic cake, these tools are highly recommended for achieving professional-level results with your **strawberry ricotta layer cake**.
- **Standing Mixer:** A true workhorse in any baker’s kitchen, a standing mixer with a paddle attachment makes creaming butter and sugar, and whipping frosting, an effortless task. It ensures consistent mixing and aeration, which are crucial for a light cake and fluffy frosting.
- **Cake Stand:** Not just for presentation! A sturdy cake stand, especially one with a rotating turntable, is invaluable for decorating. It allows you to smoothly rotate the cake as you apply frosting, making it easier to achieve even coats and beautiful finishes.
- **Piping Tools:** For those who love to add decorative flourishes, a set of piping bags and various tips opens up a world of creative possibilities. From elegant borders to intricate designs, piping tools allow for precise and beautiful frosting application, enhancing the visual appeal of your cake.
- **Frosting Knife (Offset Spatula):** An essential for smoothly spreading frosting on both the top and sides of your cake. The offset design helps keep your knuckles clear of the cake surface, allowing for cleaner and more even application.
- **Cake Pans (9-inch round):** High-quality cake pans are fundamental. Choose pans with straight sides and a light color to ensure even baking and golden-brown crusts. We recommend using two 9-inch round pans for this recipe to create two generous cake layers that will then be split.
Starter
All-in-One Cake Decorating Kit
If you’re embarking on your baking journey, a comprehensive starter cake decorating kit is an invaluable investment! This all-inclusive kit typically features everything you need – including a rotating cake stand, various piping tips, spatulas, and bags – to create any gorgeous cake with confidence and ease. It’s perfect for beginners looking to achieve professional-looking results right from the start.
Step-by-Step Guide: Crafting Your Ricotta Layer Cake
Let’s get baking! Follow these detailed steps, and you’ll soon have beautiful, perfectly baked ricotta layers ready for assembly and decoration. The process is straightforward, ensuring a delightful experience from start to finish.
Prepare the Cake Pans & Embrace Mise en Place
Begin by preheating your oven to the specified temperature (usually 350°F / 175°C). Next, prepare your cake pans meticulously. Lightly grease two 9-inch round cake pans with non-stick cooking spray or butter, then line the bottoms with parchment paper. Do not skip this crucial step! Parchment paper acts as a fail-safe, ensuring your delicate cake layers release effortlessly from the pans without sticking or tearing. It truly makes a world of difference for a smooth transition from pan to cooling rack.
As previously emphasized, measure out **all** of your ingredients accurately before you even think about mixing. This meticulous preparation, known as “mise en place,” guarantees you won’t encounter any surprises or delays during the baking process, setting you up for success.
Mixing the Perfect Cake Batter
For this recipe, you’ll be preparing a single batch of batter that will be divided between two cake pans. Remember, consistency is key, so aim for an even distribution.
**Combine the Dry Ingredients:** In a medium-sized bowl, whisk together your all-purpose flour, baking powder, and salt. For an extra smooth batter, consider sifting these dry ingredients through a fine-mesh strainer to eliminate any lumps. Set this mixture aside; you’ll incorporate it into the wet ingredients shortly.
**Cream the Wet Ingredients:** In a large mixing bowl, preferably of a standing mixer fitted with the paddle attachment (or using an electric hand mixer), combine the softened unsalted butter and granulated sugar. Cream these two ingredients together on low to medium speed for about 2-3 minutes. Continue mixing until the mixture becomes visibly light, fluffy, and pale in color. This process incorporates air, which is essential for a tender cake.
Pause to scrape down the sides of the mixing bowl with a rubber spatula, ensuring all ingredients are fully incorporated. Then, **add the room temperature whole milk ricotta cheese** to the butter and sugar mixture. Mix on low speed for 3-4 minutes, or until the three ingredients are well combined. Don’t worry if there are a few tiny lumps of ricotta; this is perfectly normal and contributes to the cake’s unique texture.
Next, **incorporate the almond extract and fresh lemon zest** into the bowl. Mix just until combined, ensuring the fragrant flavors are evenly distributed throughout the batter.
**Add Eggs One at a Time:** Gently crack one large egg into the mixing bowl and mix on low speed until it is just incorporated into the cake batter. Repeat this process with the remaining eggs, adding them one by one. Be careful not to overmix at this stage; overworking the batter can result in a tough cake.
**Integrate Dry into Wet:**
Once again, scrape down the sides of the mixing bowl with your spatula to ensure everything is evenly mixed. Now, with the mixer on its lowest speed, **slowly add the reserved flour mixture** to the wet ingredients. Mix just until the flour is fully incorporated and no streaks of dry flour remain. Stop mixing as soon as the batter comes together to avoid developing too much gluten, which can lead to a dense cake.
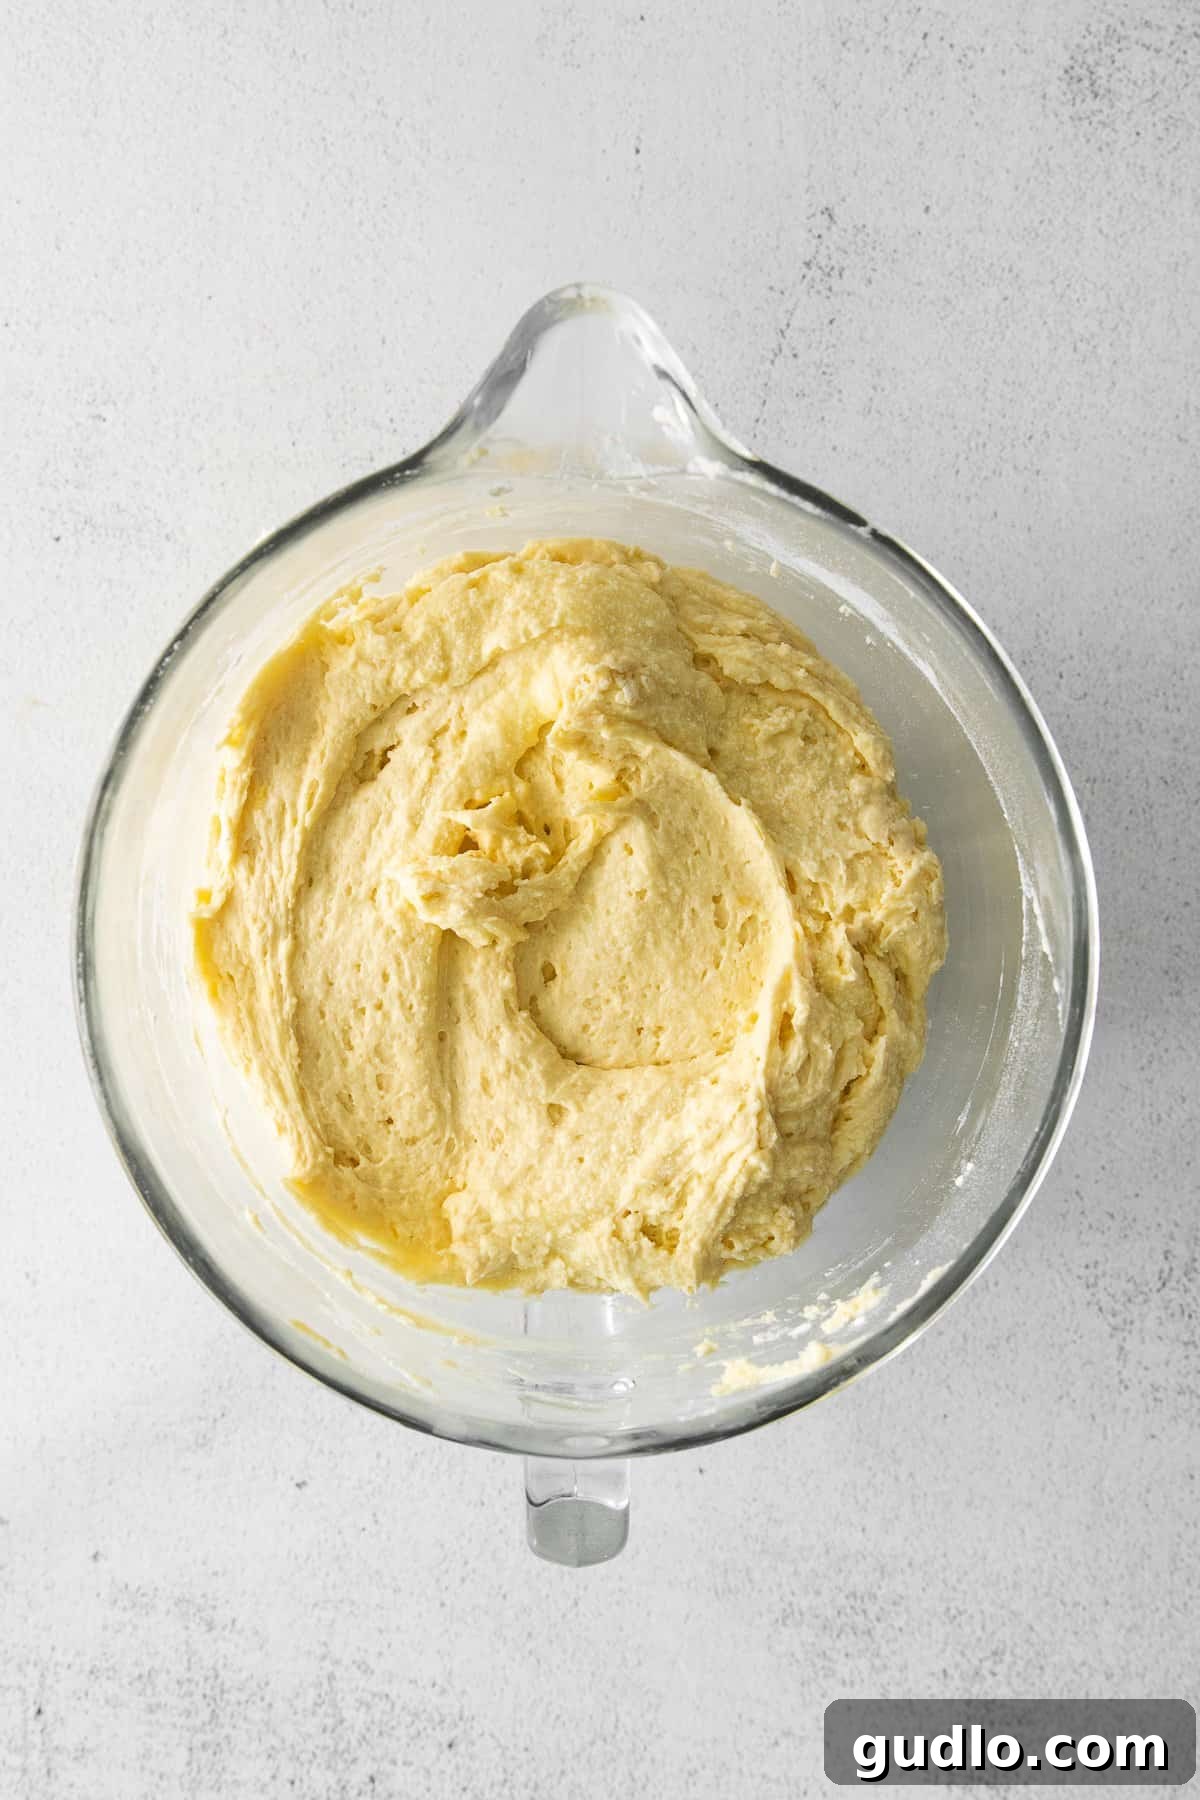
Baking Your Delectable Cake Layers
Carefully pour half of the prepared batter into each of your lined baking pans. Gently shake each pan back and forth a few times to evenly distribute the batter and create a level surface. Avoid tapping the pans too vigorously, as this can release too much air from the batter. Place the cake pans into your preheated oven and bake for approximately 35-40 minutes.
To check for doneness, insert a wooden skewer or toothpick into the center of the cake. If it comes out clean or with a few moist crumbs attached, your cake is ready. The cake should also feel springy to the touch and the edges should start pulling away slightly from the sides of the pan.
Smart Baking Trick for Even Cakes!
Every oven has its quirks, and some tend to bake hotter on one side than the other. To ensure both of your cake layers bake evenly and achieve uniform golden-brown perfection, simply switch the positions of your cake pans halfway through the baking time. This simple trick helps prevent one side from over-baking while the other remains undercooked, guaranteeing beautifully balanced results.
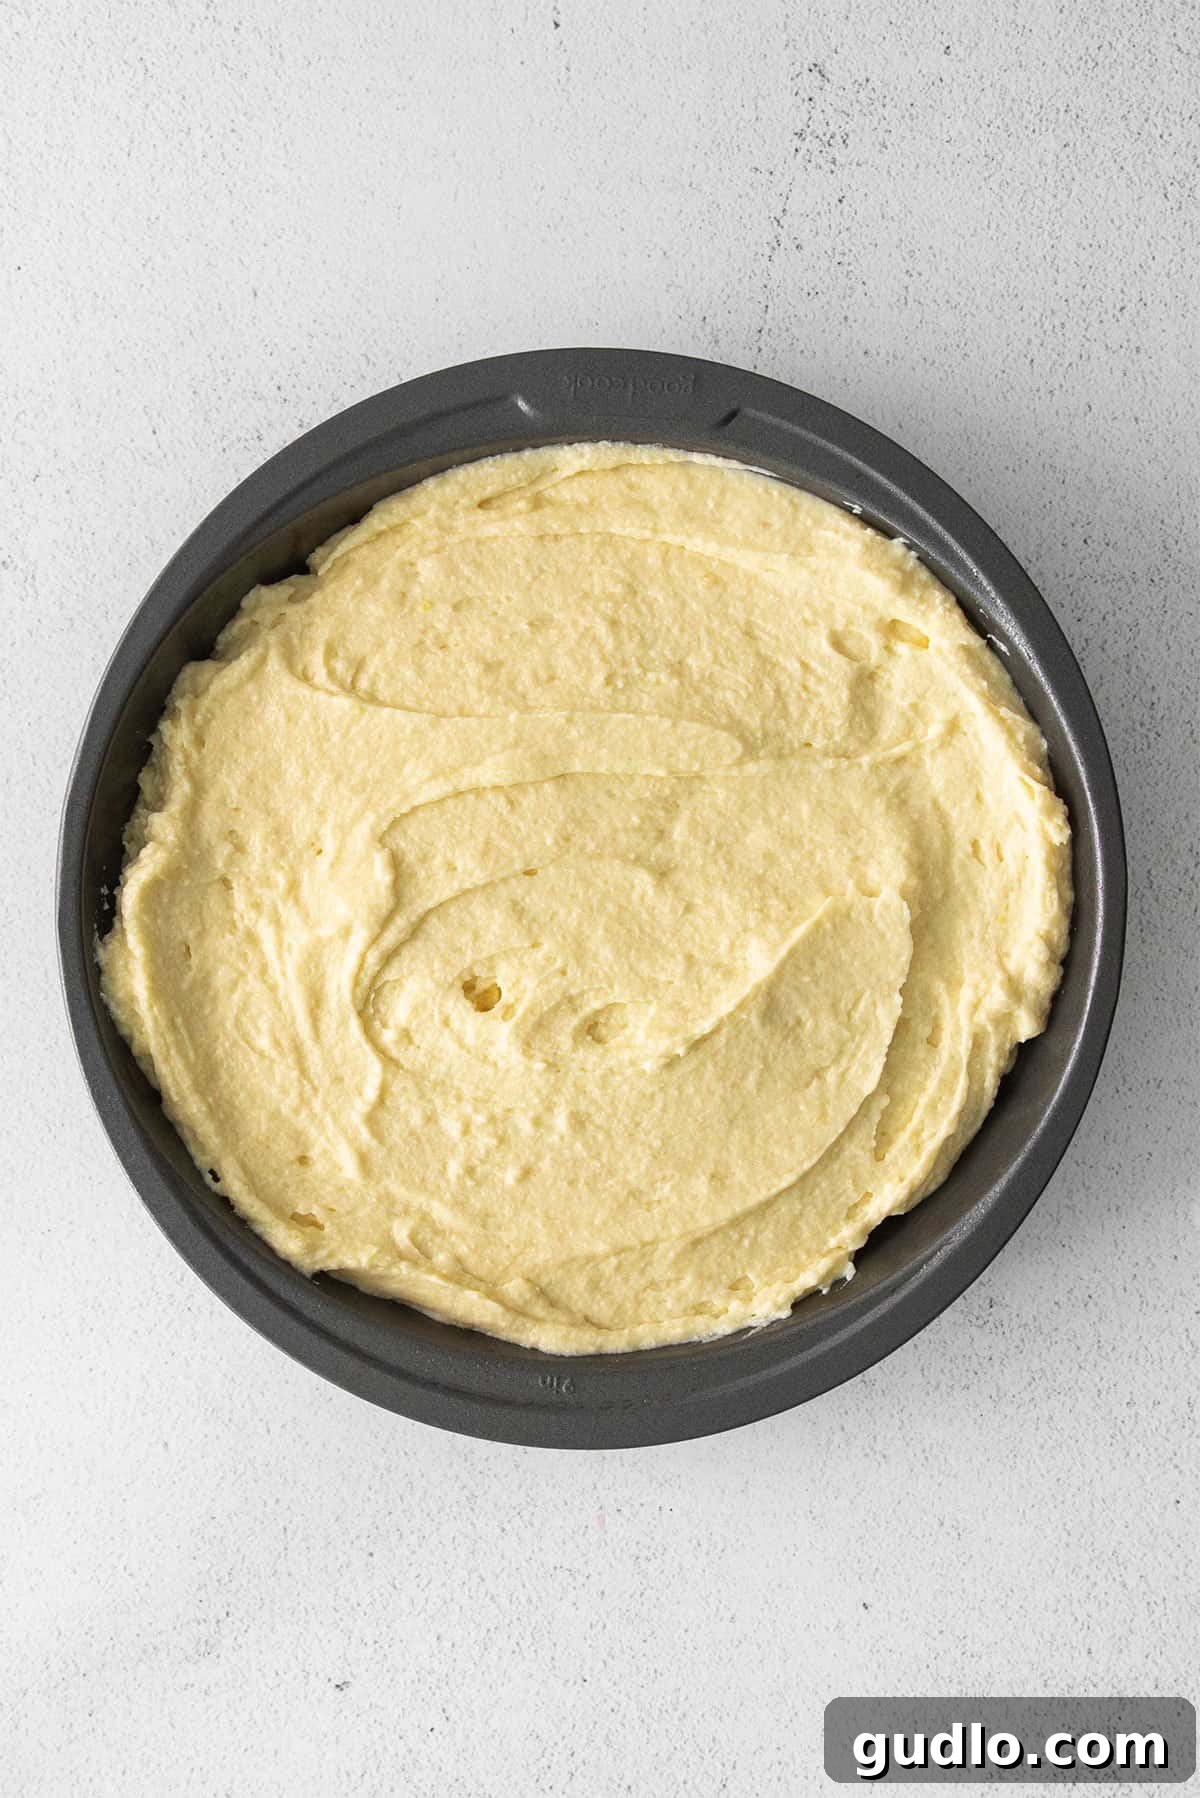
Crucial Cooling: Patience is a Virtue
Resist the temptation to cut or decorate a warm cake! Attempting to do so will inevitably lead to a messy disaster, with frosting melting and layers crumbling. Proper cooling is absolutely vital for a stable and beautifully decorated layer cake. Once your cakes are baked and out of the oven, allow them to cool in their pans on a wire cooling rack for 5-15 minutes. This initial cooling period helps them firm up slightly.
Next, carefully invert each cake onto the cooling rack, removing them from their pans. Thanks to the parchment paper lining, this step should be wonderfully easy. Peel off the parchment paper and let the cakes cool completely on the rack.
To expedite the cooling process, once the cakes have cooled to room temperature, gently wrap each cake tightly in plastic wrap. Then, place them in the freezer for about 30 minutes to an hour. Freezing them slightly makes them much easier to handle and slice, reducing crumbling. If you’re not in a rush, you can also wrap them in plastic wrap and place them in the refrigerator overnight to cool thoroughly.
If you plan to decorate your cake the following day, simply wrap your cooled cakes in plastic wrap and refrigerate them overnight. The cold temperature will make them very firm and easy to handle when you’re ready to slice and frost.
It’s Time for the Dreamy Cream Cheese Frosting!
The luscious cream cheese frosting is the perfect complement to our almond and lemon ricotta cake layers. Its light, tangy sweetness provides an ideal balance. If you are decorating your cake on the same day it was baked, this is the perfect time to prepare your frosting while the cake layers are chilling.
However, if you’re planning to decorate your cake the next day, it’s best to wait until just before assembly to make your frosting. This ensures it’s fresh, perfectly pliable, and at the ideal consistency for spreading and piping, preventing it from becoming too stiff.
**To make your frosting:** Start by combining the powdered sugar and a pinch of salt in a medium bowl; whisk them together briefly to remove any lumps in the sugar. Set this aside.
In the bowl of a stand mixer fitted with the paddle attachment, **add the softened cream cheese**. Whip it on medium-low speed until it is completely smooth and creamy, with no lumps (about 1-2 minutes). Stop the mixer and scrape down the sides of the bowl with a spatula. Then, **add the room temperature unsalted butter** to the bowl.
Increase the mixer speed to medium and beat the cream cheese and butter together for 2-3 minutes. You want the mixture to become incredibly **light, airy, and fluffy**, almost pale in color. This aeration is key to a truly decadent frosting.
Now, with the mixer on low speed, **gradually add the powdered sugar mixture**, about 1/2 cup at a time. Continue adding until all the powdered sugar has been incorporated. Scrape down the mixture from the sides and bottom of the bowl thoroughly. Finally, add the remaining salt and vanilla extract.
Turn the speed up to medium-high and whip for an additional minute. This final whip will make the frosting very light, incredibly fluffy, and almost white, achieving its optimal texture.
Reduce the mixer speed to medium-low. Slowly **drizzle in the heavy cream** until it is fully combined. Continue mixing until the entire mixture is wonderfully light, fluffy, and smooth. Be careful not to overmix, as this can thin the frosting.
**What if My Frosting Isn’t Fluffy Enough?**
Occasionally, frosting can turn out denser than desired. Common culprits include using cold cream cheese or butter, forgetting an ingredient, or not whipping the heavy cream adequately. Don’t despair – your frosting can still be saved!
**To rescue dense frosting and make it more fluffy:** In a **separate bowl**, whip 1/2 cup of very cold heavy whipping cream until it forms light, fluffy soft peaks. Once whipped, gently **fold** this freshly whipped cream into your dense cream cheese frosting using a rubber spatula. Folding it in is crucial; you want to delicately incorporate the air you just whipped into the cream without deflating it, thereby lightening your entire batch of frosting. This technique will transform your frosting into the airy, cloud-like consistency you desire.
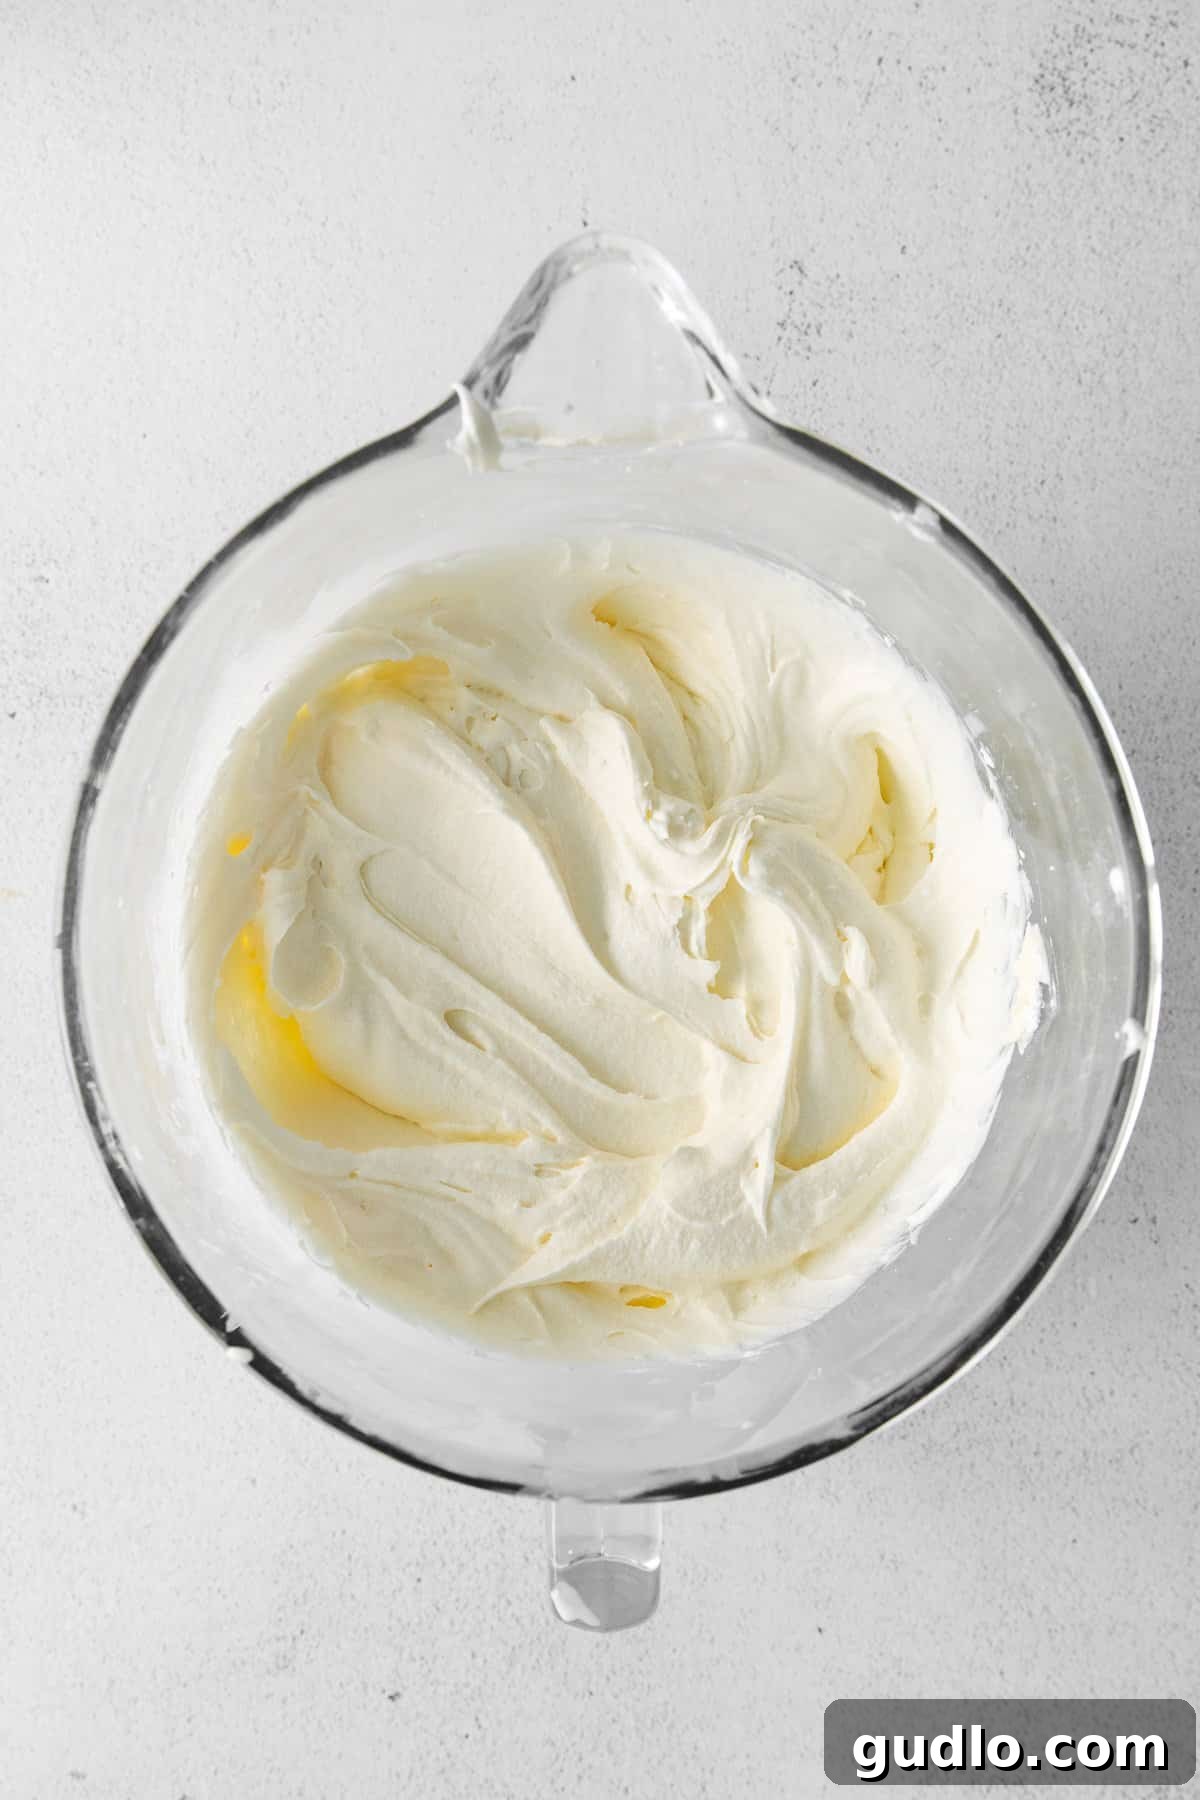
Quick Methods to Soften Cream Cheese
Ever found yourself in a baking emergency with rock-hard cream cheese? Don’t worry! For quick and effective ways to bring cream cheese to the perfect baking temperature, refer to our comprehensive guide – How to Soften Cream Cheese – 4 Ways! This post details unique and efficient methods to get your cream cheese perfectly soft and ready for any recipe, whether you’re short on time or planning ahead.
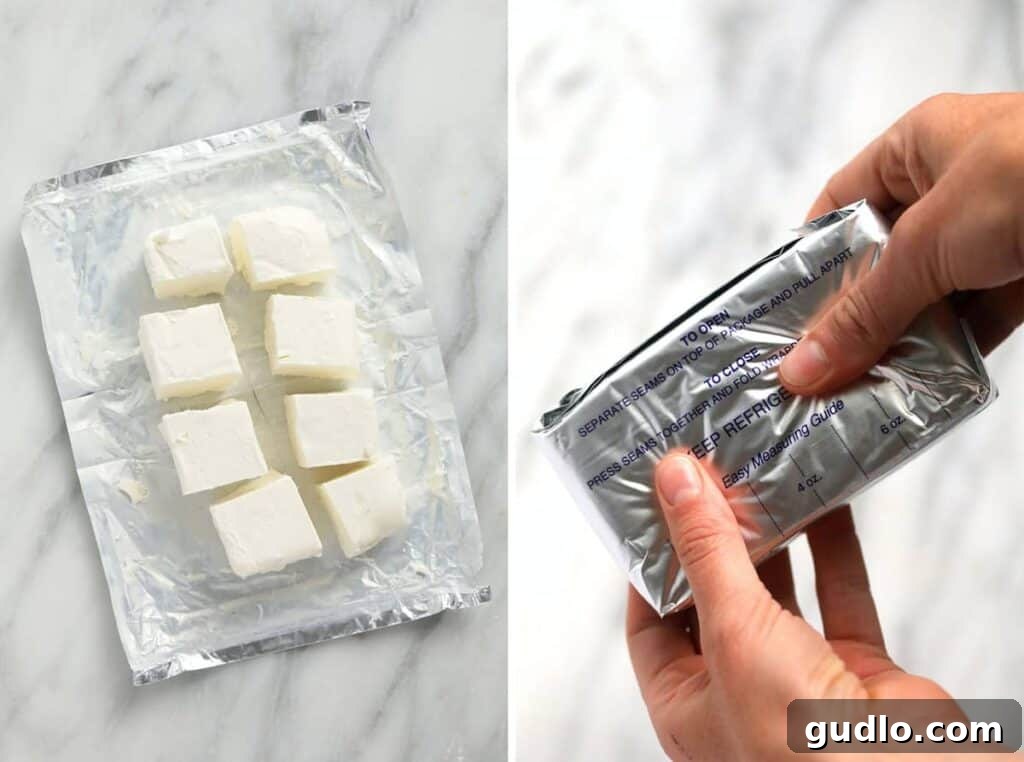
Expert Technique: How to Slice a Layer Cake
Achieving perfectly even cake layers is a hallmark of a professional-looking dessert. For this precise technique, we’ve taken inspiration from the renowned Zoe Bakes Cakes cookbook. Zoe is one of our all-time favorite bakers, and we’re proud to share that she also hails from Minneapolis!
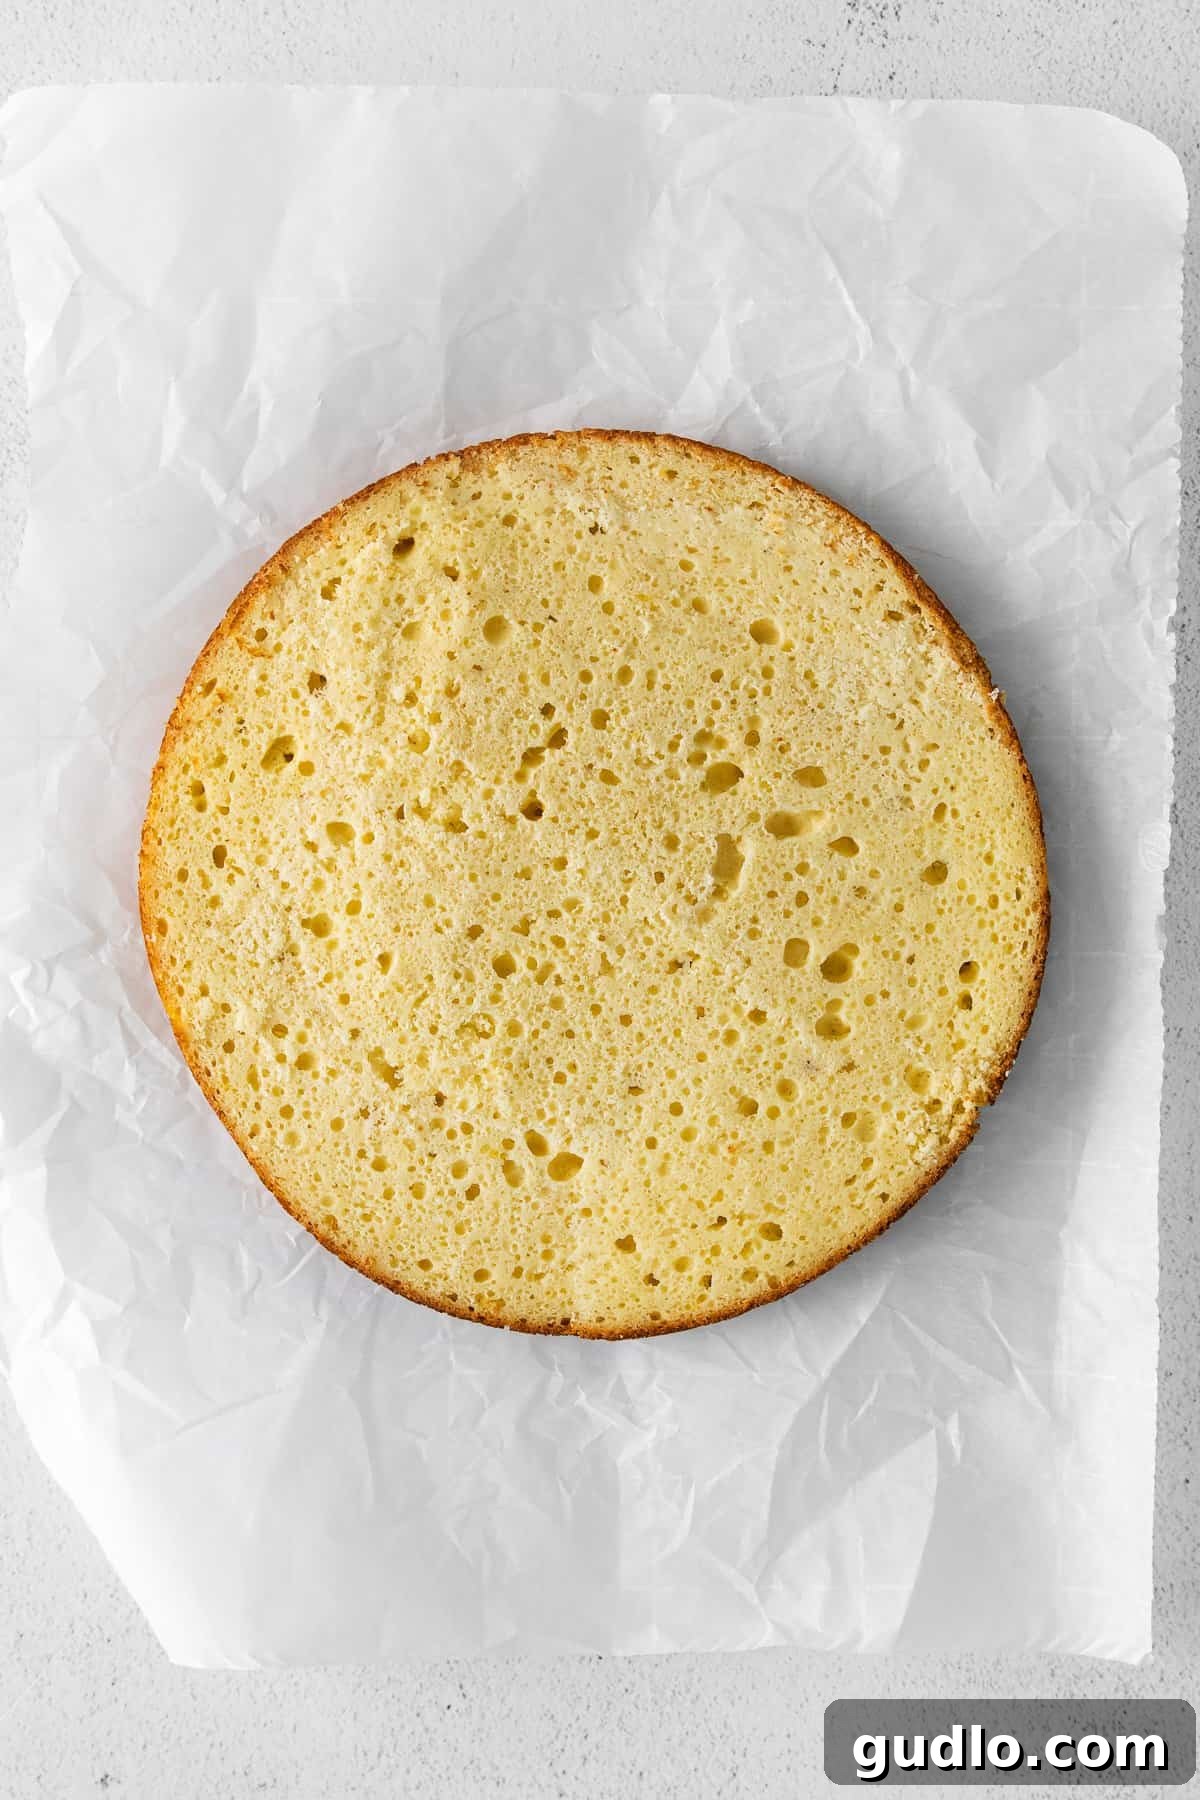
**To slice your cooled cakes into even layers:** Place one of your ricotta cake rounds on a cardboard cake board (or directly on your cake turntable if you’re confident). Position the cake round firmly on a rotating cake turntable. Using a long, serrated knife, carefully hold it parallel to your work surface and slice the cake horizontally in half, creating two thinner cake rounds. Rotate the turntable slowly as you slice to ensure an even cut. Repeat this process with the remaining ricotta cake, so you end up with a total of four beautiful, even rounds of ricotta cake, ready for layering.
Assembling Your Stunning Strawberry Ricotta Layer Cake
**Before you begin layering, take a moment to gather and prepare your components for a smooth assembly process:**
- Gently unwrap your chilled, pre-sliced cake layers from their plastic wrap.
- Prepare the delightful strawberry filling by combining the strawberry preserves and a splash of fresh lemon juice in a small bowl. Stir until well combined; the lemon juice will enhance the fruitiness.
- Place your chosen cake platter or serving plate onto your cake turntable. If you don’t have a turntable, a flat, stable surface will work just fine.
- Fill a pastry bag with a generous amount of your fluffy cream cheese frosting. Having it ready for piping will make creating your frosting “dam” much easier. Be prepared to refill this bag throughout the layering process.
**Now, let’s build your magnificent layer cake!**
- Place your first cake round squarely on the center of the cake platter. Using an angled cake spatula, spread about 1-2 tablespoons of cream cheese frosting thinly and evenly across the center of this bottom cake layer.
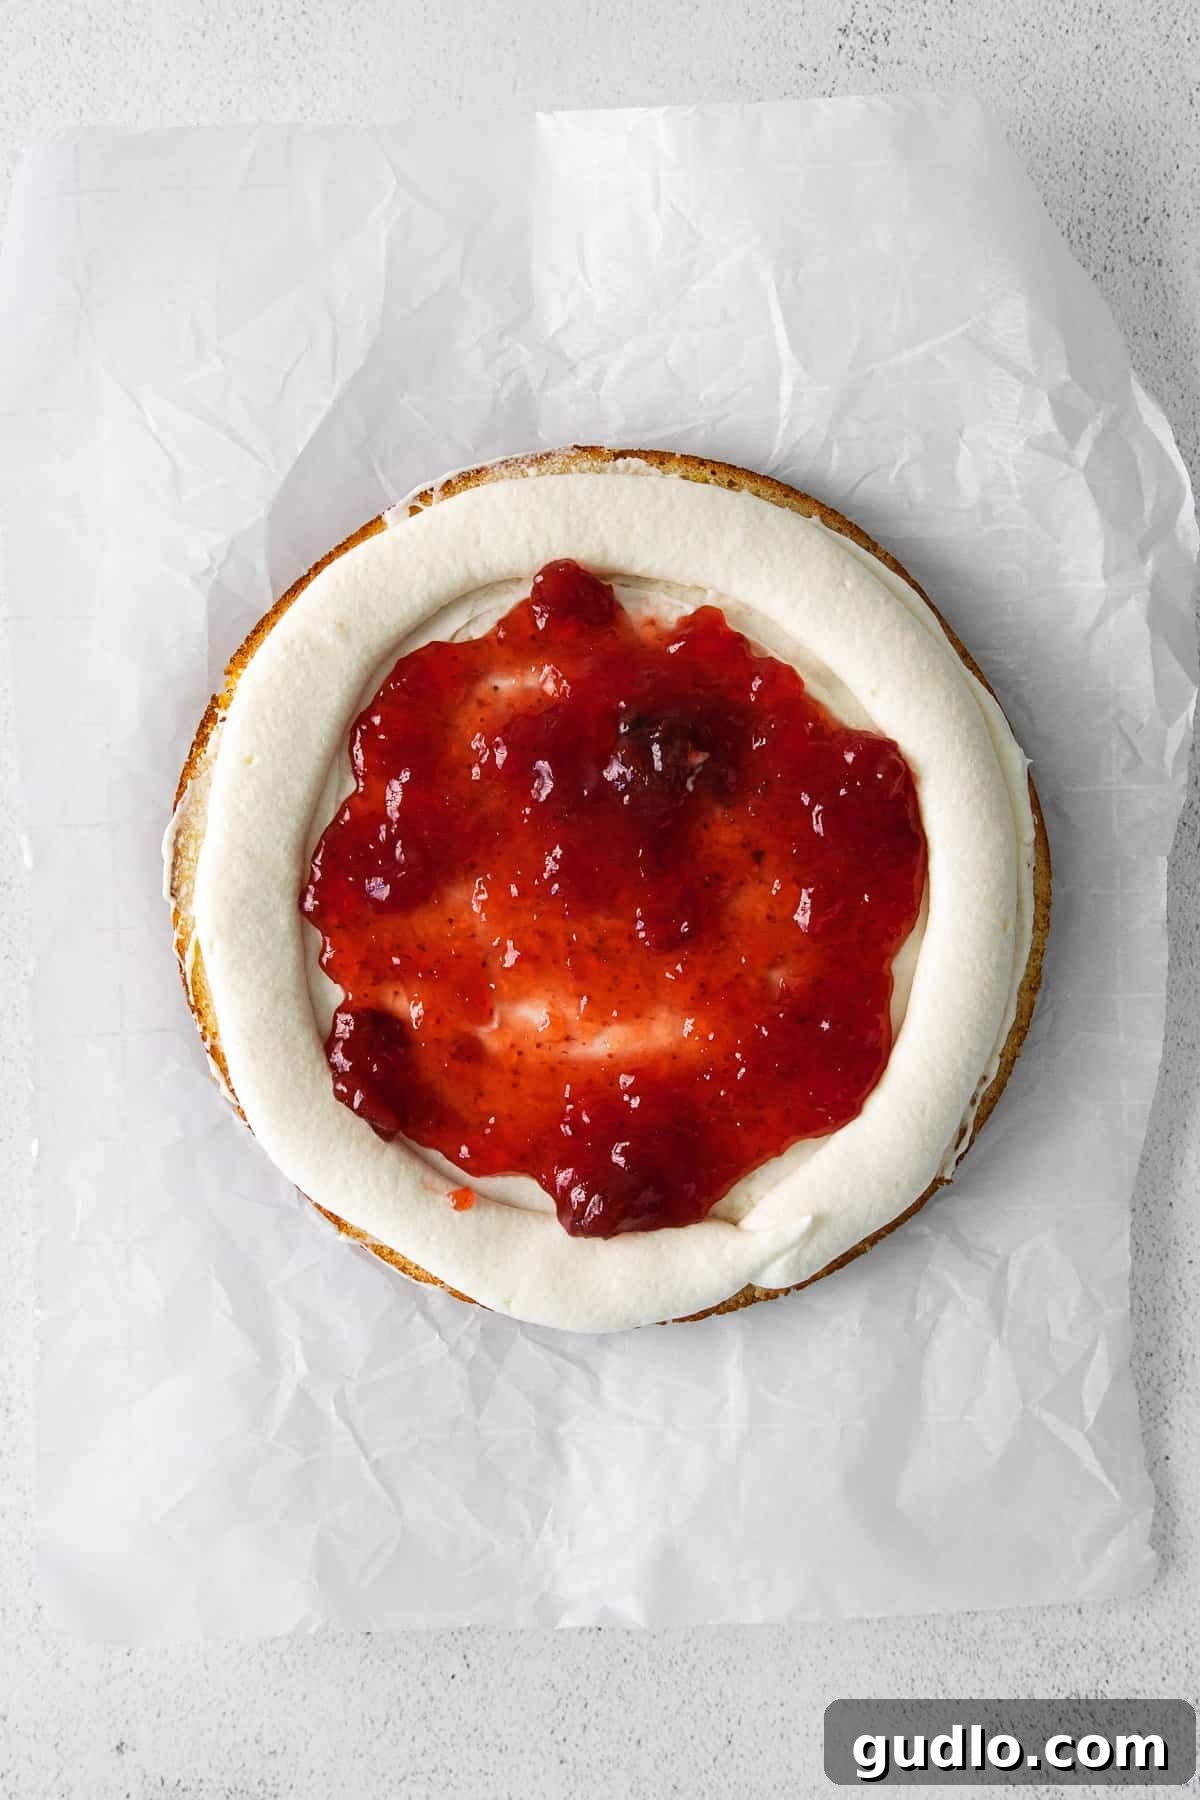
- Next, pipe a sturdy ring of cream cheese frosting around the circumference of the cake layer, creating a “dam.” This clever technique is essential for preventing the strawberry preserves from oozing out of the sides of your finished cake, keeping everything neat and contained.
- Within the frosting dam, spoon approximately 3 tablespoons of your prepared strawberry preserves. Carefully spread the preserves evenly with a small frosting knife or the back of a spoon, making sure it reaches the piped cream cheese ring but doesn’t go over it.
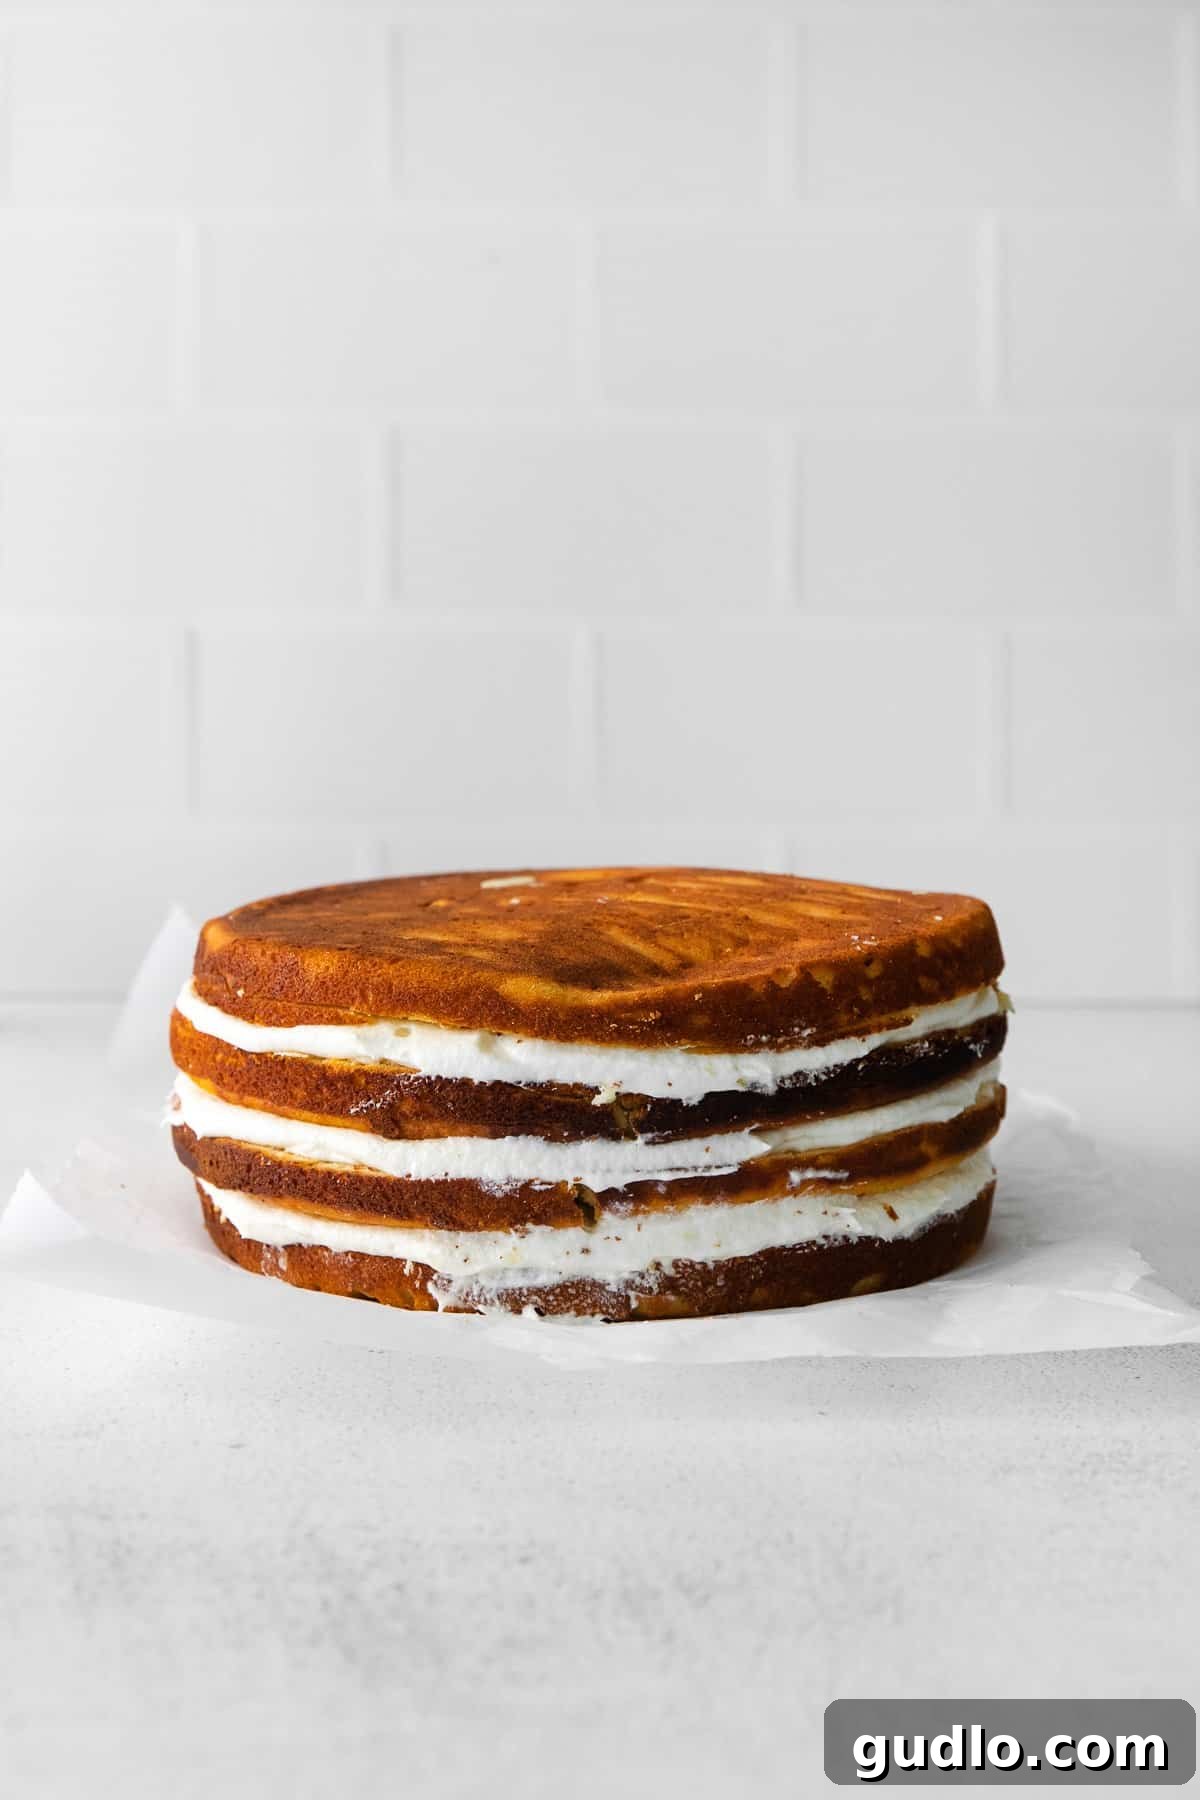
- Gently place another cake round directly on top of the preserves and cream cheese, creating your second layer. Repeat steps 2 and 3 for each subsequent cake layer until all four of your cake rounds have been used. You should now have a towering cake with four distinct layers of moist ricotta cake, alternating with luscious frosting and sweet strawberry preserves.
Unleash Your Inner Artist: Let’s Decorate!
Now for the most exciting part: bringing your **strawberry ricotta layer cake** to life with beautiful decorations! The best news? How you choose to adorn this masterpiece is entirely up to you and your creative vision.
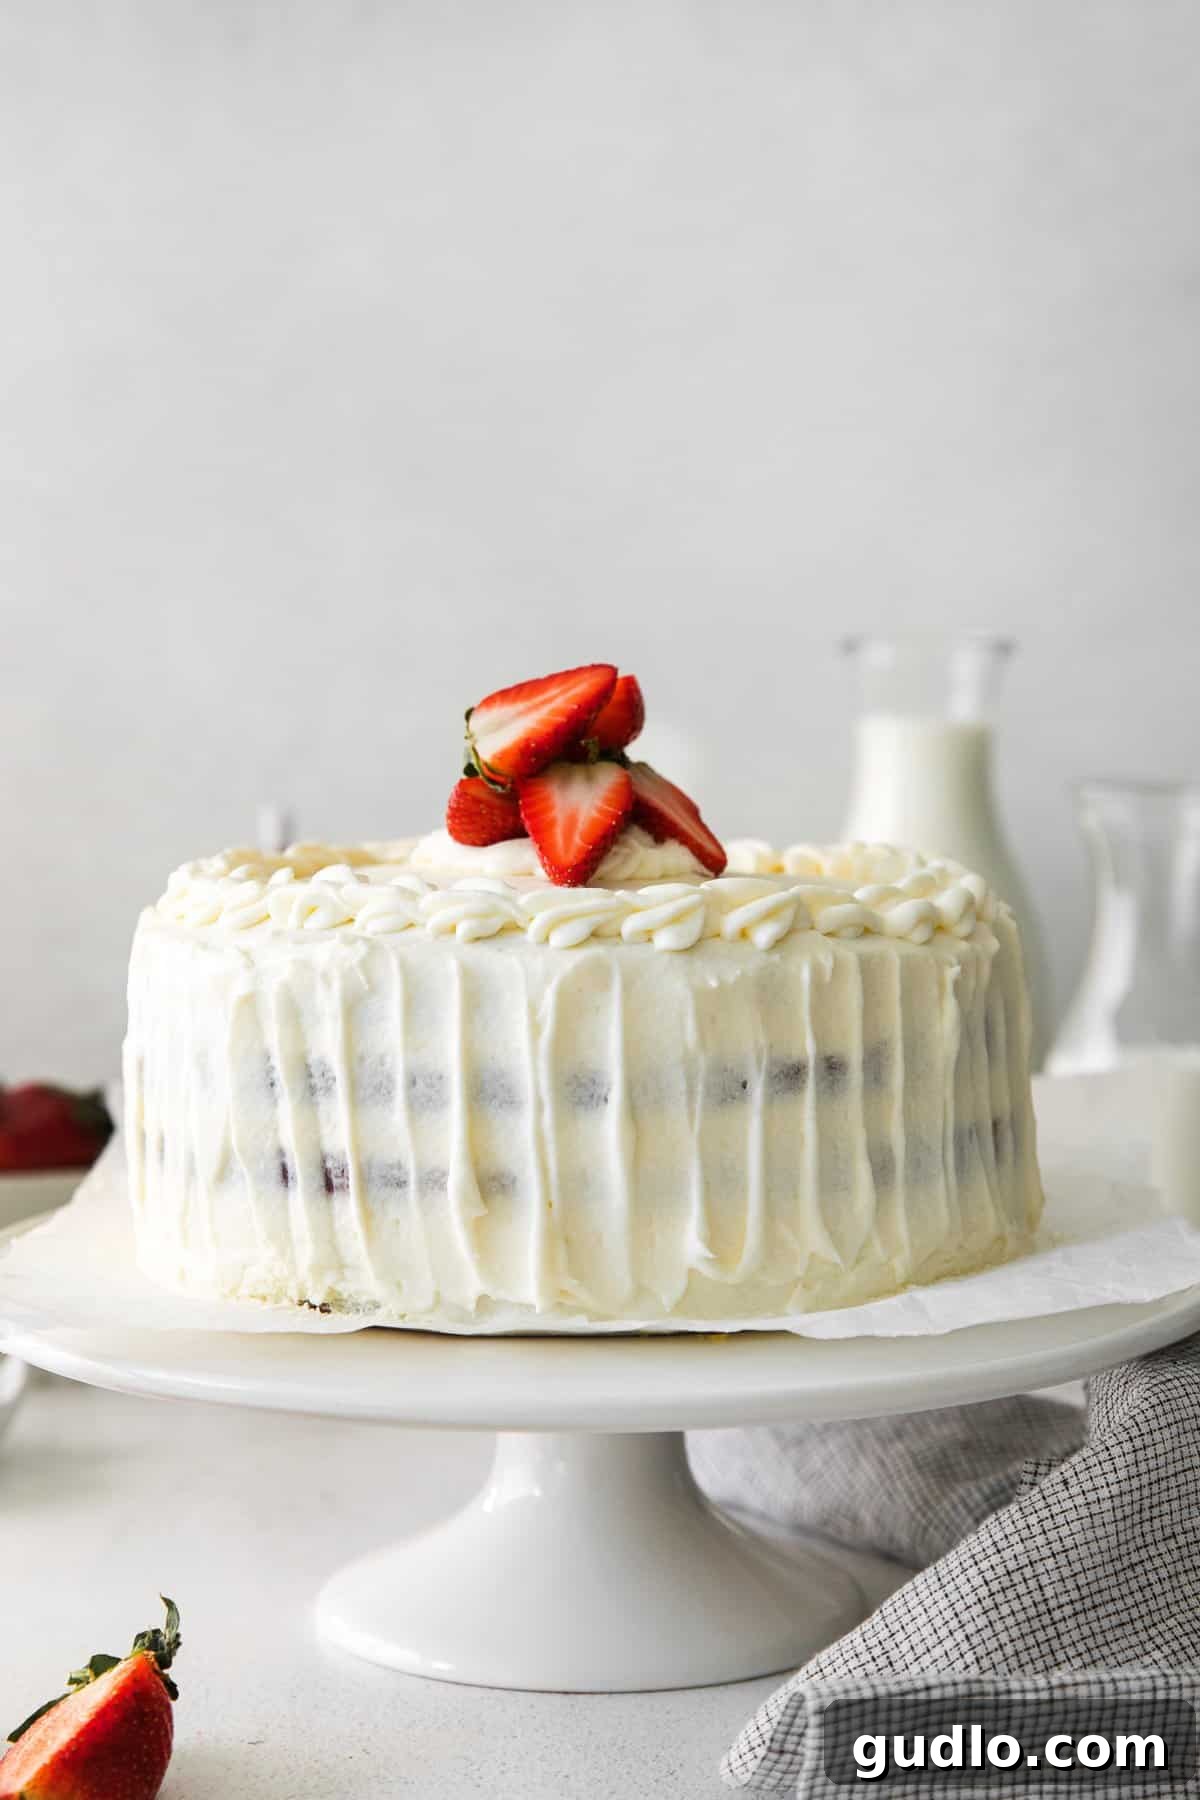
We recommend starting by scooping a generous cup of frosting onto the very top of your assembled cake. Using a large offset frosting knife or spatula, gently begin to push the frosting outwards, slowly moving it towards the edges of the cake. As you do this, continuously turn your cake turntable (or carefully rotate your platter) while keeping your knife in a relatively stable position. This technique helps you achieve a wonderfully smooth, even surface on the top of the cake. Once the top is smooth, use the remaining frosting to cover the sides of the cake, using the same rotating motion for a clean finish.
Feel free to experiment with your piping tools to add charming details. Whether it’s elegant shell borders, delicate rosettes, or simple swirls, these tools allow you to personalize your cake. And of course, no strawberry ricotta layer cake would be complete without a flourish of fresh strawberry slices on top! Arrange them artfully for a burst of color and irresistible freshness.
After your cake is fully decorated and looking spectacular, it’s essential to place it in the refrigerator. Allow it to set for at least 1 hour. This chilling time helps the frosting firm up, ensuring clean slices and preventing any sliding of layers when serving.
Top Tips for a Flawless Strawberry Ricotta Layer Cake
To ensure your **strawberry ricotta layer cake** turns out perfectly every single time, keep these expert tips in mind. They are the secrets to a beautifully textured, moist, and delicious dessert.
- **Practice Mise en Place:** As highlighted earlier, measure all your ingredients and have them prepped before you start mixing. This minimizes stress and ensures you don’t miss a step or ingredient.
- **Take Your Time:** Baking, especially layer cakes, is an art that benefits from patience. Don’t rush through the steps, particularly creaming butter and sugar, or cooling the cakes. Each stage plays a vital role in the final outcome.
- **Avoid Overmixing & Scrape the Bowl:** Overmixing develops gluten, leading to a tough cake. Mix only until ingredients are just combined. Regularly scrape down the sides and bottom of your mixing bowl to ensure all ingredients are uniformly incorporated, preventing pockets of unmixed batter or frosting.
- **Allow Cakes to Cool Completely:** This cannot be stressed enough. Attempting to frost or slice warm cakes will result in a crumbly, messy cake. Patience during the cooling phase is crucial for structural integrity.
- **Equip Yourself with the Right Tools:** While not all tools are strictly necessary, having essentials like a reliable mixer, quality cake pans, and an offset spatula will significantly improve your baking experience and the professional finish of your cake.
- **Room Temperature Ingredients are Key:** For both the cake batter and the frosting, ensure butter, cream cheese, ricotta, and eggs are at room temperature. This allows them to emulsify correctly, resulting in a smooth, cohesive batter and a lump-free, fluffy frosting.
- **Use Quality Ingredients:** The flavor of your cake will only be as good as the ingredients you use. Opt for fresh lemons, whole milk ricotta, good quality almond extract, and preserves with real fruit chunks for the best results.
Frequently Asked Questions About Ricotta Layer Cake
While we appreciate the curiosity for experimentation, we highly recommend sticking with whole milk ricotta cheese for this particular recipe. Our **strawberry ricotta layer cake** has been specifically developed and tested using ricotta to achieve its signature moistness, tender crumb, and unique flavor profile. Other cheeses have different fat contents, moisture levels, and textures that would significantly alter the results, and we cannot guarantee success with substitutions.
Absolutely! Don’t let a lack of specialized tools deter you from making this delicious cake. You can certainly bake this **strawberry ricotta layer cake** using basic kitchen equipment. While a standing mixer makes the job easier, a good electric hand mixer will work just as well for mixing the batter and frosting. You can slice the cake layers with any long, sharp serrated knife, and a regular kitchen knife or the back of a spoon can be used for spreading frosting. Your cake might not have the perfectly polished look of a professional bakery creation, but its incredible taste will more than make up for it!
Yes, this **strawberry ricotta layer cake** freezes beautifully! To ensure the best quality upon thawing, we recommend assembling and frosting the cake completely. Once decorated, place the entire cake in the refrigerator for at least 1 hour to allow the frosting to firm up. After it’s firm, carefully wrap the cake in several layers of plastic wrap, then an outer layer of aluminum foil, to prevent freezer burn. You can freeze the cake for up to 1-2 months. When you’re ready to enjoy, thaw it overnight in the refrigerator before bringing it to room temperature for serving.
Proper Storage for Your Freshly Baked Cake
To maintain the freshness, moisture, and delicious flavor of your **strawberry ricotta layer cake**, proper storage is key. Because of the cream cheese frosting and fresh fruit, this cake should be treated with care.
Store the cake covered with plastic wrap or in an airtight cake dome or container. Place it in a cool place, ideally the refrigerator. It will stay fresh and delightful for up to 5 days. For the best flavor and texture, allow slices to come to room temperature for about 15-20 minutes before serving.
Elevate Your Experience: Serving Suggestions
This **strawberry ricotta layer cake** is a versatile dessert that can grace any table, from a casual afternoon tea to a sophisticated dinner party. Its vibrant flavors and elegant presentation make it a crowd-pleaser for various occasions. Here are a few serving suggestions to make your cake experience even more special:
- **Brunch Delight:** A slice of this light yet satisfying cake pairs wonderfully with a cup of freshly brewed coffee or a mimosa, making it an ideal star for any celebratory brunch.
- **Elegant Dessert:** Serve it as the grand finale to a special meal. A small dollop of lightly sweetened whipped cream or a few extra fresh berries on the side can add an extra touch of luxury.
- **Holiday Centerpiece:** Its festive appearance and delightful flavors make it a perfect fit for spring holidays like Easter, Mother’s Day, or any summer gathering where fresh fruit shines.
- **Casual Treat:** Sometimes, no special occasion is needed! Enjoy a generous slice with a glass of milk or herbal tea for a comforting and indulgent moment.
Creative Variations & Smart Substitutions
While the classic **strawberry ricotta layer cake** is undeniably delicious, don’t hesitate to get creative with flavors and fillings. Here are some ideas to customize this recipe to your liking:
- **Berry Bonanza:** Instead of strawberry preserves, consider using raspberry, blueberry, or mixed berry preserves for a different fruity twist. You can also mix fresh blueberries into the cake batter before baking for added bursts of flavor.
- **Citrus Swap:** If you’re a fan of other citrus flavors, try swapping lemon zest and juice for orange or lime. Orange zest and juice with peach preserves would make a fantastic combination.
- **Nutty Alternatives:** While almond extract is a favorite, you could experiment with vanilla bean paste for a more classic flavor, or even a touch of pistachio extract for an exotic touch.
- **Chocolate Lover’s Dream:** For a richer twist, consider drizzling a thin layer of melted white chocolate over the strawberry preserves before adding the next cake layer.
- **Whipped Cream Frosting:** If you prefer a lighter frosting, you can use a stabilized whipped cream frosting instead of cream cheese frosting. Be sure to stabilize it with gelatin or cornstarch to prevent it from deflating.
- **Garnish Galore:** Beyond fresh strawberries, you can garnish your cake with toasted slivered almonds, delicate chocolate shavings, or edible flowers for an extra touch of elegance.
Discover More of Our Favorite…
Inspiring Cake Recipes
If you’ve fallen in love with baking this **strawberry ricotta layer cake**, you’re in for a treat! Explore more of our beloved cake creations, each designed to bring joy to your kitchen and delight to your palate.
- **Tiramisu Layer Cake:** Experience the classic Italian dessert reimagined as a decadent layer cake, featuring coffee-soaked sponge, mascarpone cream, and a dusting of cocoa.
- **Lemon Ricotta Cake:** If you adore the bright, zesty notes in this strawberry cake, you’ll cherish our standalone Lemon Ricotta Cake – a simpler, equally moist delight perfect for any day.
- **Cherry Ricotta Cake:** For another fruity variation, dive into our Cherry Ricotta Cake, boasting luscious cherry flavors within the same tender ricotta base.
★
★
★
☆
Strawberry Ricotta Layer Cake
Ingredients
For the Cake
- 3 cups all-purpose flour, scooped and leveled (360 grams)
- 4 teaspoons baking powder
- ½ teaspoon salt
- 1 cup unsalted butter, 2 sticks, room temperature
- 2 cups white sugar, 200 grams
- 4 teaspoons almond extract
- 30 oz. whole milk ricotta, room temperature
- 6 large eggs, room temperature
- Zest from 2 large lemons
- 12 oz. jar strawberry preserves
- 2 tablespoons lemon juice
- 1 pint fresh strawberries, thinly sliced, for garnish
For the Cream Cheese Frosting
- 8 oz. cream cheese, room temperature
- 1 cup unsalted butter, room temperature
- 1/4 teaspoon salt
- 6 cups powdered sugar
- 1/2 teaspoon vanilla extract
- ⅔ cup heavy cream
Instructions
-
Preheat your oven to 350ºF (175°C). Prepare two 9-inch round cake pans by spraying them lightly with nonstick cooking spray, then wiping the bottoms with a thin layer of butter. Line the bottom of each pan with a parchment paper circle cut to the same diameter. This ensures the cakes release easily without sticking.
-
In a medium bowl, whisk together the all-purpose flour, baking powder, and salt. For a smoother batter, pour the dry ingredients through a fine mesh strainer to eliminate any lumps. Set aside.
-
In a large mixing bowl (using a stand mixer with a paddle attachment or an electric hand mixer), add the softened unsalted butter, white sugar, and almond extract. Cream these ingredients together on medium speed for about 3-4 minutes until the mixture is light, fluffy, and pale.
-
Scrape down the sides of the mixing bowl with a spatula. Gradually add the whole milk ricotta cheese, about 1/2 cup at a time, mixing on low speed for 3-4 minutes until all ingredients are well combined. Some small ricotta lumps are acceptable.
-
Next, add the fresh lemon zest to the batter and mix just until combined, distributing the citrus flavor evenly.
-
Add the large eggs one at a time to the mixing bowl, mixing on low speed only until each egg is just incorporated into the cake batter. Be careful not to overmix at this stage.
-
Scrape down the sides of the mixing bowl once more. Slowly add the reserved flour mixture to the wet ingredients on low speed, mixing just until the flour is fully incorporated and no dry streaks remain. Stop mixing immediately once combined.
-
Divide the batter evenly between the two lined cake pans. Gently shake the pans back and forth to level out the batter.
-
Bake the cakes for 35-40 minutes, or until a wooden skewer inserted into the center comes out clean and the cake feels springy to the touch. Remember to rotate pans halfway through baking for even cooking.
-
Remove the cakes from the oven and let them cool in their pans on a wire cooling rack for 10-15 minutes. Then, carefully invert them onto the rack to remove from the pans and peel off the parchment paper.
-
Once cool to the touch, wrap each cake tightly in plastic wrap to lock in moisture. Place them on plates and chill in the freezer for 30 minutes to 1 hour to cool completely and firm up (or refrigerate overnight if preparing in advance).*
-
Prepare the Cream Cheese Frosting: Make your frosting just before you are ready to decorate the cake for the best consistency.
-
In a separate bowl, combine powdered sugar and salt; whisk briefly to remove lumps, then set aside.
-
In a stand mixing bowl with a paddle attachment, whip the room temperature cream cheese on medium-low speed until smooth. Scrape down the bowl, then add the room temperature unsalted butter.
-
Mix the butter and cream cheese on medium speed for 2-3 minutes until the mixture is light and fluffy, and pale in color.
-
With the mixer on low, gradually add the powdered sugar mixture, about 1/2 cup at a time, until fully incorporated. Scrape down the bowl, then add the remaining salt and vanilla extract.
-
Increase speed to medium-high and whip for 1 minute until the frosting is very light, fluffy, and almost white.
-
Reduce speed to medium-low and slowly drizzle in the heavy cream until combined. Continue mixing until the frosting is consistently light and fluffy. Set aside.
-
For Cake Assembly: First, prepare the strawberry filling by combining strawberry preserves and lemon juice in a bowl; mix until combined.
-
Place one cooled ricotta cake round on a cardboard cake board (or directly on a cake turntable). Using a long serrated knife, carefully slice the cake horizontally in half to create two thinner cake rounds. Repeat with the second ricotta cake, resulting in 4 uniform cake rounds. Set aside.
-
Fill a pastry bag with cream cheese frosting, ready for piping. You will likely need to refill it during assembly.
-
Place a cake platter on your turntable, then set the first cake round on top. Spread 1-2 tablespoons of frosting thinly across the center of the cake with an angled cake spatula.
-
Pipe a ring of cream cheese frosting around the circumference of the cake layer, creating a “dam” to hold in the preserves.
-
Spoon 3 tablespoons of strawberry preserves into the center of the cake, spreading it evenly within the piped frosting ring using a frosting knife.
-
Place another cake round on top to form the next layer. Repeat steps 22 and 23 for each remaining cake layer until all 4 cake rounds are used.
-
Once all layers are stacked, scoop about 1 cup of frosting onto the top of the cake. Spread the remaining frosting evenly over the top and sides of the entire cake, using an offset spatula and rotating the cake stand for a smooth finish.
-
After frosting, arrange fresh, thinly sliced strawberries artistically on top of the cake for a beautiful garnish.
-
Refrigerate the decorated cake for at least 1 hour before slicing and serving. This allows the frosting to set, making for clean, beautiful slices.
Tips & Notes
- For the best filling, ensure you purchase **strawberry preserves**, not strawberry jelly. Preserves contain delicious chunks of real strawberry, adding superior flavor and texture to your cake layers.
- Using **room temperature cream cheese** for your frosting is critical. It will blend much more smoothly with the butter and powdered sugar, resulting in a perfectly creamy and lump-free frosting that is much easier to spread.
- Do not skip pushing the flour, salt, and baking powder through a fine mesh sieve. This step is essential to ensure there are no lumps in your dry ingredients, contributing to a smooth batter and a consistently tender cake crumb.
- If you are baking the cake layers a day ahead of decorating, there is no need to cool them in the freezer. Simply wrap them tightly in plastic wrap and refrigerate them overnight to chill thoroughly.
- Feel free to decorate this cake to your heart’s content! Get creative with your frosting techniques and garnishes. Fresh berries, lemon zest curls, or even edible flowers can add a personal touch.
Nutrition Information (Approximate Per Serving)
Carbohydrates: 91 g,
Protein: 12 g,
Fat: 37 g,
Fiber: 1 g,
Sugar: 35 g
Nutrition information is automatically calculated and should only be used as an approximation. It may vary based on specific ingredients and preparation methods.
Love this recipe? Leave a comment below!
Don’t forget to tag your beautiful creations on social media with the hashtag #cheeseknees. We absolutely love seeing what you’re baking!