

The Ultimate Guide to Homemade Chili Cheese Fries: Your Go-To Comfort Food Recipe
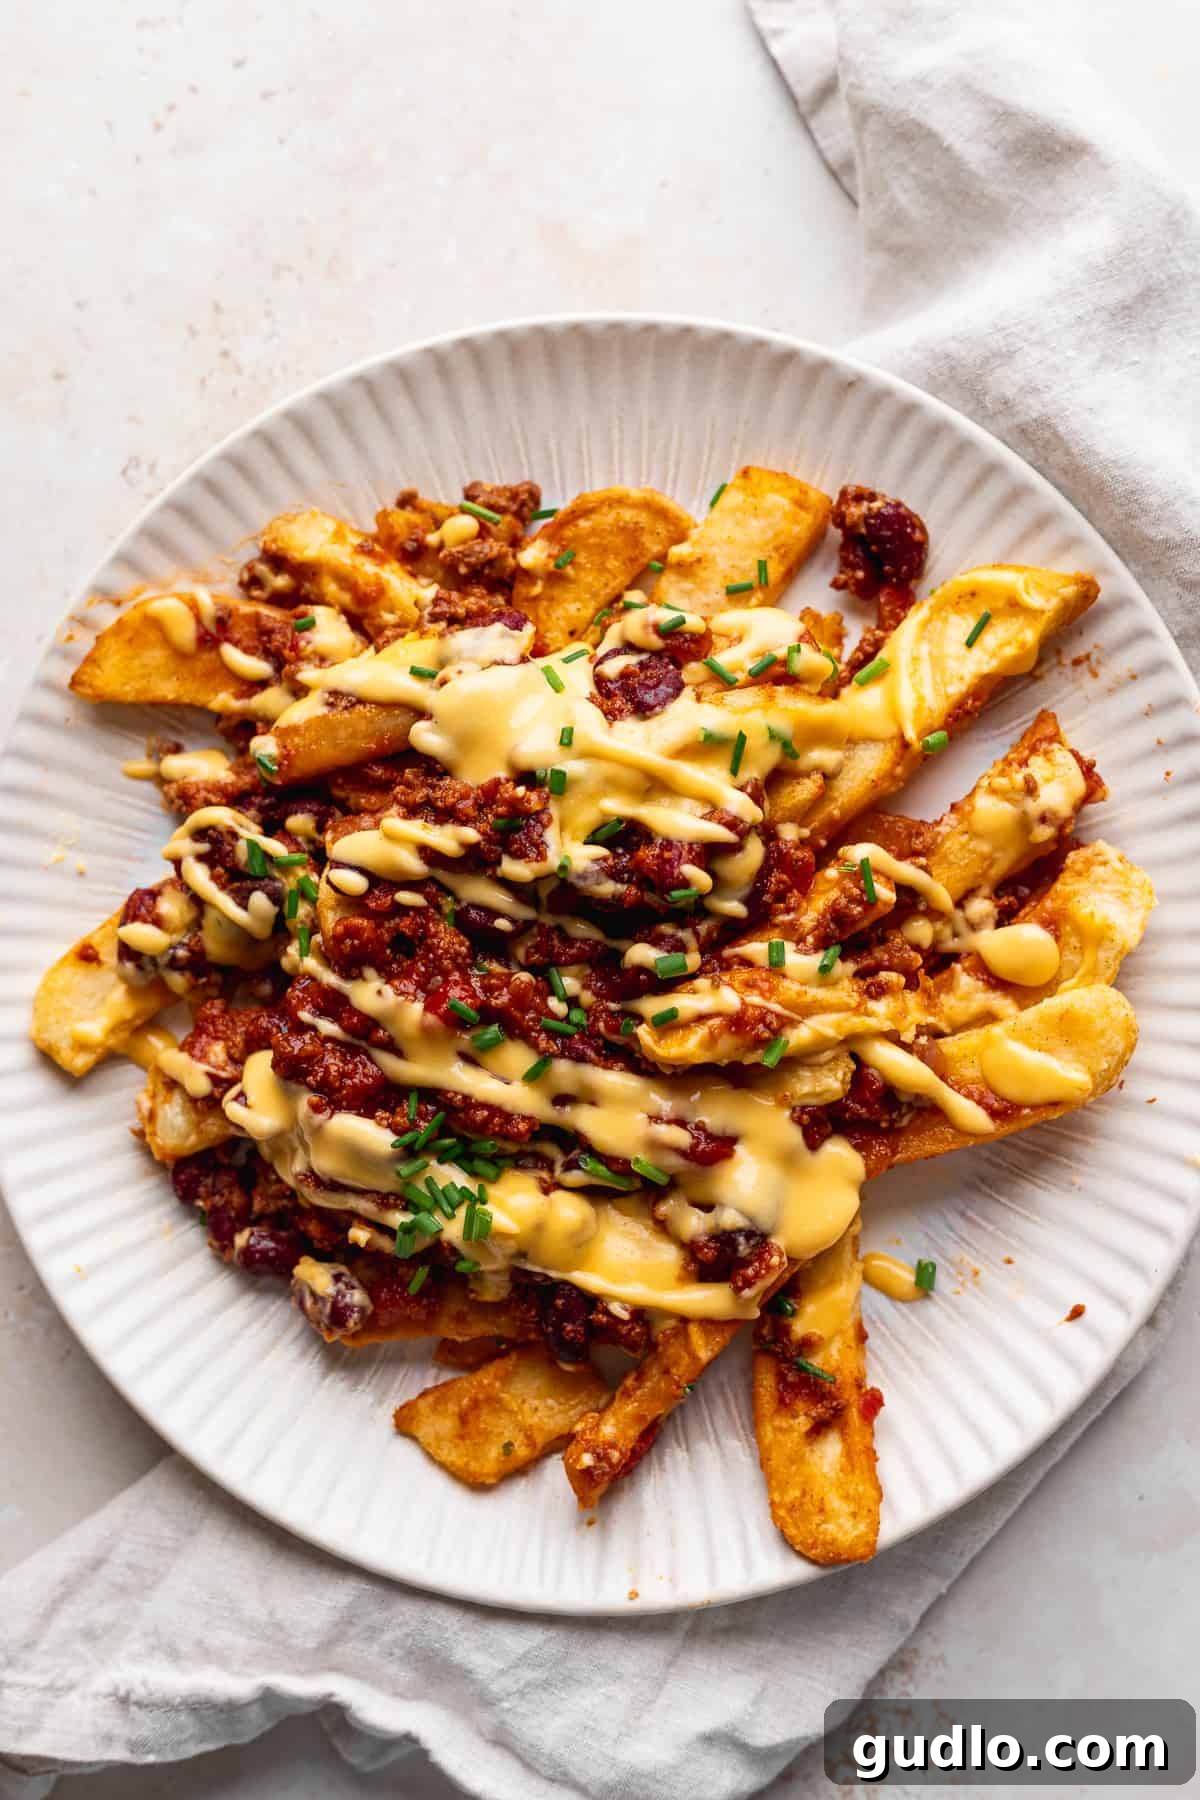
Imagine this: perfectly crispy French fries, generously loaded with a robust, savory homemade chili, and then drenched in a rich, creamy, and irresistible cheese sauce. Is there anything better? We think not! These ultimate chili cheese fries are more than just a snack; they’re a culinary experience, a guaranteed crowd-pleaser that transforms any gathering into a fiesta of flavor. Whether you’re hosting a thrilling game day watch party, looking for an easy yet impressive party appetizer, or simply craving the ultimate comfort food for a cozy night in, this recipe has you covered.
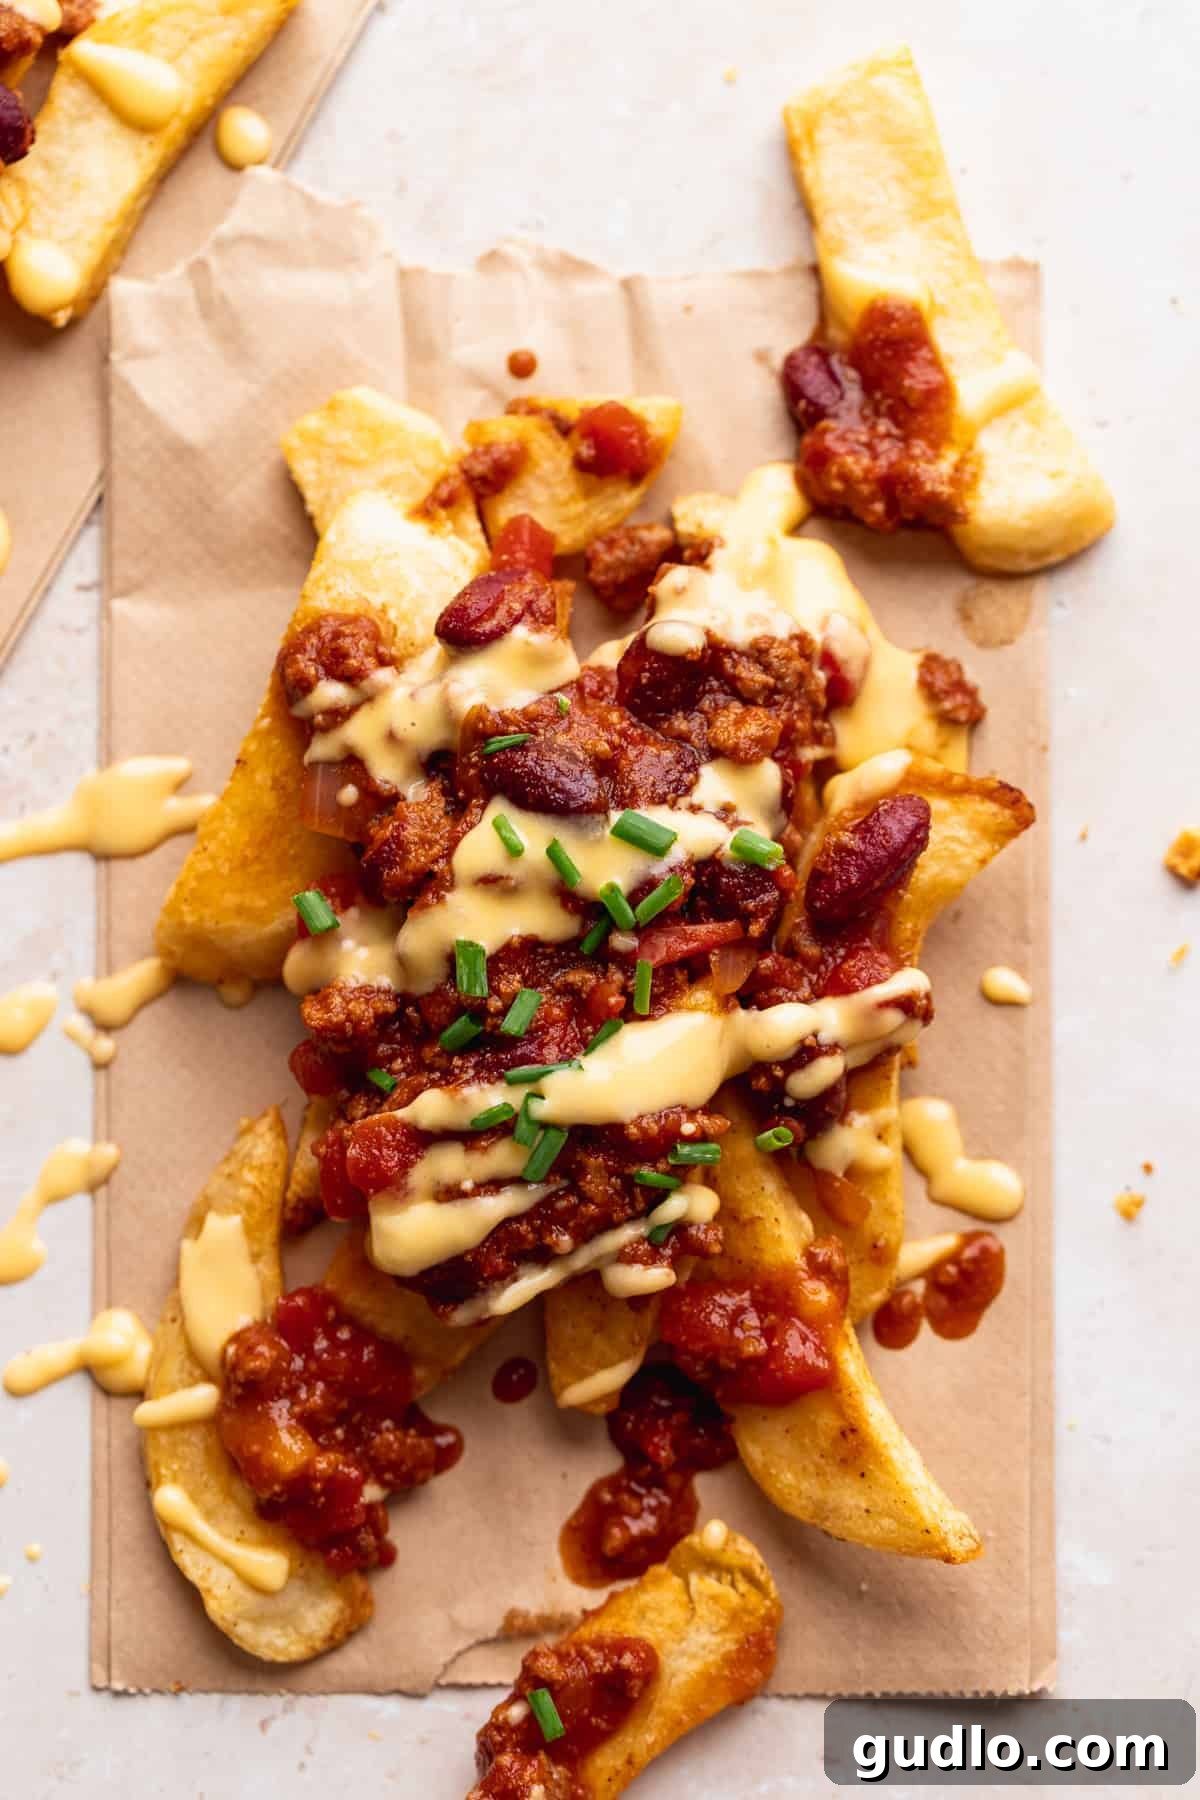
Welcome to the perfect trifecta of textures and tastes: the crunchy exterior of golden fries, the hearty warmth of slow-simmered chili, and the luscious embrace of an exquisite homemade nacho cheese sauce. What’s not to adore? Our recipe celebrates the best of both worlds, offering flexibility to cater to your schedule and culinary ambition. While the convenience of store-bought components is always an option, we truly believe that investing a little extra time in crafting your own chili and cheese sauce elevates this dish from great to absolutely legendary.
For the base, we often opt for high-quality store-bought frozen potato wedges – a simple shortcut that doesn’t compromise on the essential crispiness. However, the true magic unfolds when you prepare your own simple chili and cheese sauce. While canned chili and pre-made cheese sauces are readily available, our experience consistently proves that homemade versions offer unparalleled depth of flavor, fresh ingredients, and a wonderfully satisfying texture that simply cannot be matched. Get ready to impress your taste buds and your guests with this customizable and incredibly delicious recipe!
Essential Ingredients for Epic Homemade Chili Cheese Fries
Crafting the perfect chili cheese fries requires a few key components, each playing a vital role in creating a harmonious blend of flavors and textures. Here’s a closer look at what you’ll need and why these choices make all the difference:
- Fries: The foundation of this dish, your fries set the stage. While you could painstakingly make your own from russet potatoes, we’ve found that high-quality frozen potato wedges offer a fantastic balance of convenience and performance. Their robust shape is ideal for holding copious amounts of chili and cheese without becoming soggy too quickly. For best results, look for options designed for oven baking to achieve maximum crispness.
- Chili: This recipe is a fantastic way to utilize leftover chili, transforming it into a brand-new, exciting meal. If starting from scratch, our super simple recipe features classic ingredients: savory ground beef, aromatic minced onion, rich tomato sauce, diced tomatoes, a touch of sweetness from maple syrup, hearty beans, and a thoughtful blend of chili seasoning. This combination creates a chili that’s deeply flavorful, perfectly textured, and complements the fries beautifully.
- Cheese Sauce: Don’t let the idea of homemade cheese sauce intimidate you! It’s surprisingly simple and yields a profoundly superior flavor and texture compared to pre-made alternatives. All you need are a few pantry staples: butter, flour (to create a smooth roux), milk (for creaminess), sharp cheddar cheese (for that classic, tangy flavor), and a pinch of salt. The result is a velvety, rich sauce that coats every single fry and spoonful of chili, making each bite utterly decadent.
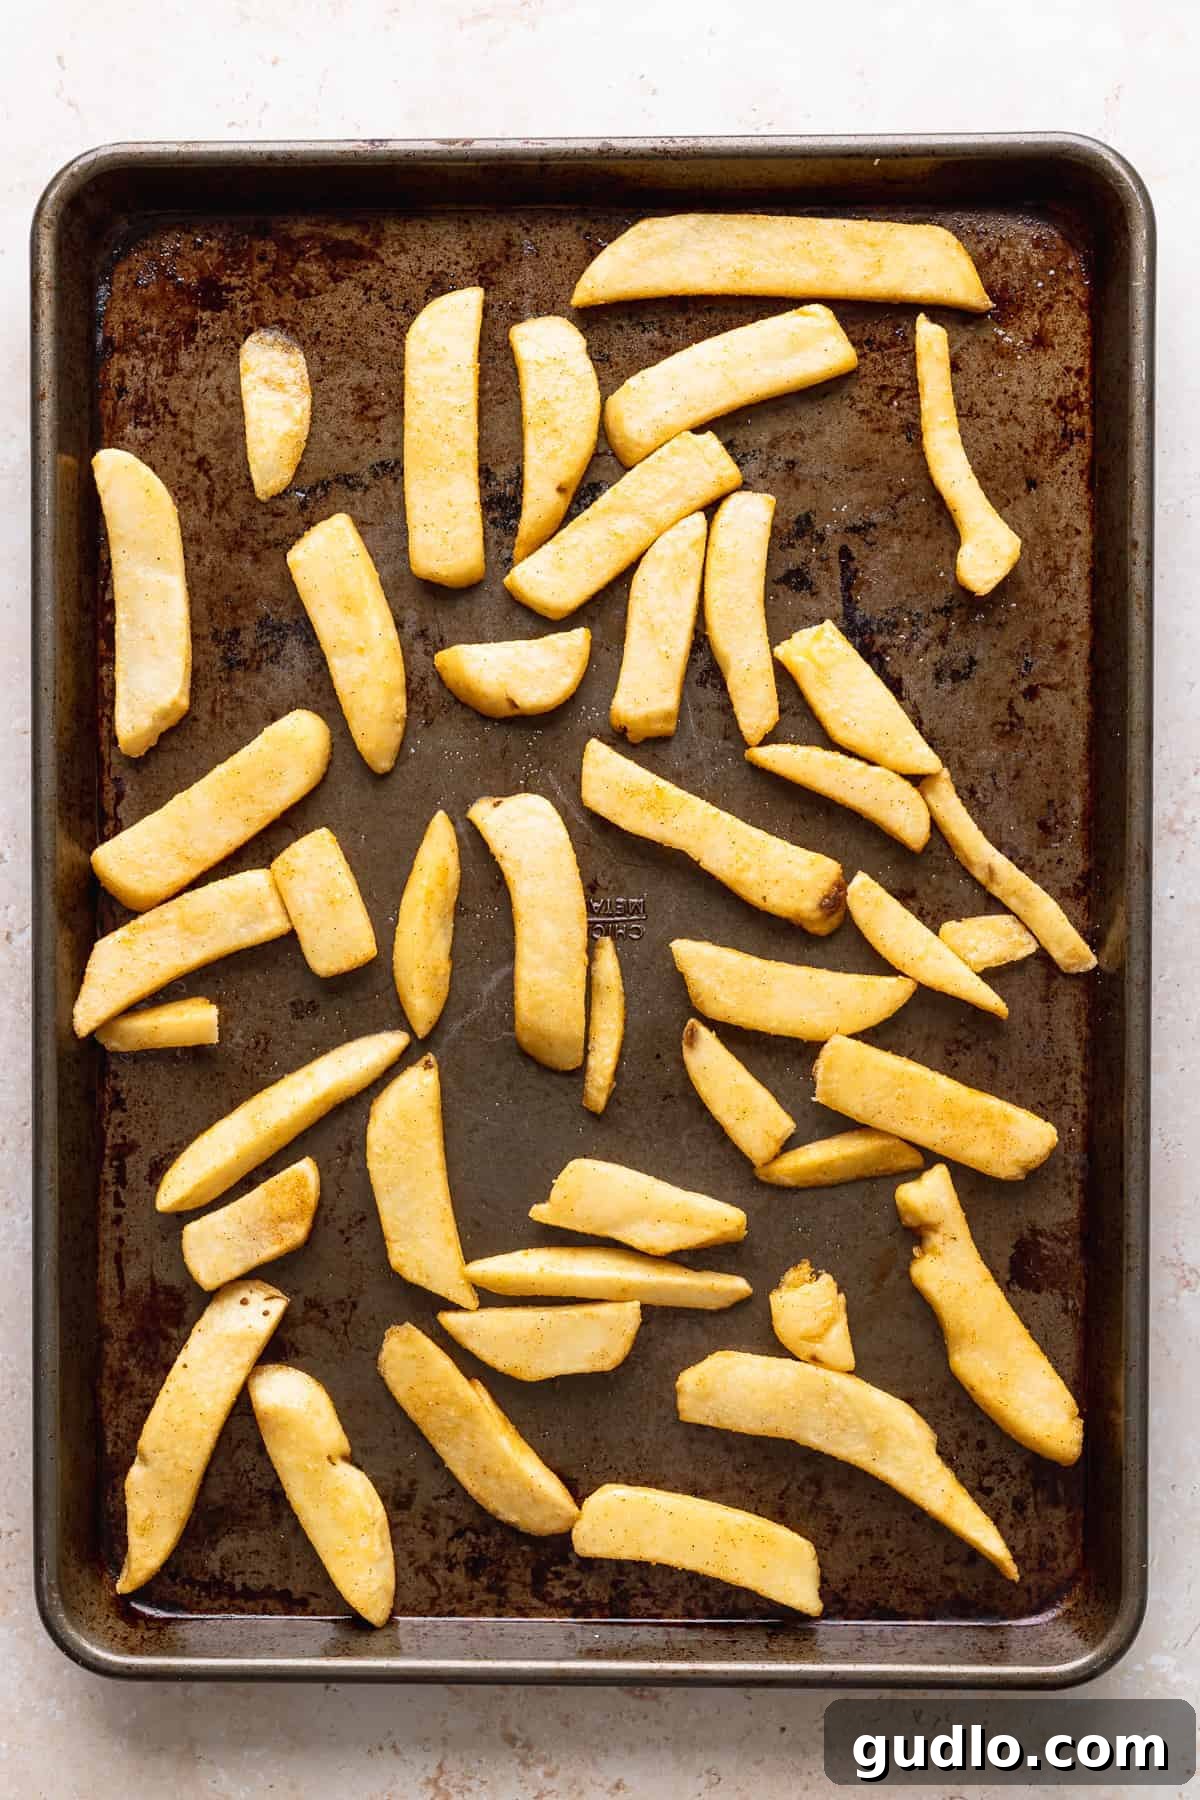
Why Potato Wedges Are the Ultimate Base for Chili Cheese Fries
Choosing the right type of fry is crucial for chili cheese fries, and we wholeheartedly recommend potato wedges for several compelling reasons that elevate the entire experience:
- Superior Scooping Power: Their chunky, robust shape acts as the perfect vehicle, allowing you to scoop up generous amounts of savory chili and gooey cheese sauce with every bite. No more struggling with flimsy fries that break under the weight of delicious toppings!
- Unmatched Crispiness Retention: Unlike thinner French fries that tend to succumb to sogginess quickly when loaded with warm, moist toppings, potato wedges are far more resilient. Their greater surface area and thicker cut mean they retain their crispiness longer, ensuring that satisfying crunch remains through multiple mouthfuls.
Alternatives to potato wedges: If potato wedges aren’t your preference or available, don’t despair! We highly recommend opting for any larger-cut fry variety that offers similar structural integrity. Excellent choices include waffle fries, which have a fantastic grid pattern to catch all the toppings, or hearty steak fries, known for their substantial size and satisfying texture. The goal is to choose a fry that can stand up to the weight and moisture of the chili and cheese without becoming soft too quickly.
Tips for Achieving Perfectly Crispy Fries Every Time
Even when using frozen fries, a few simple techniques can dramatically improve their crispiness, ensuring your chili cheese fries start with the best possible foundation:
- Preheat Thoroughly: Always preheat your oven to the recommended temperature (typically 400-425°F or 200-220°C) and let it come to temperature fully before adding the fries. A hot oven ensures an immediate crisping effect.
- Don’t Overcrowd the Pan: This is perhaps the most crucial tip. Lay your fries in a single layer on a baking sheet, ensuring there’s space between them. Overcrowding traps steam, leading to soggy fries instead of crispy ones. Use two baking sheets if necessary.
- Use a Light Coat of Oil: Even if your frozen fries are pre-oiled, a light drizzle of olive oil or vegetable oil, tossed gently with the fries before baking, can enhance crispiness and help achieve that desirable golden-brown color.
- Season Generously: Don’t forget to season your fries! A sprinkle of Lawry’s salt, garlic powder, or your favorite fry seasoning before baking adds a layer of flavor that complements the chili and cheese.
- Flip Halfway: For even cooking and browning, flip the fries halfway through the baking time. This exposes all sides to the direct heat of the oven.
Crafting the Ultimate Homemade Chili: Flavor Secrets Unveiled
The chili component is where a significant amount of flavor depth comes from, transforming simple fries into a gourmet experience. Making your own chili allows for complete control over ingredients and seasoning. Here’s how to ensure your chili is rich, savory, and perfectly complements your fries:
- Build a Flavor Base: Start by browning your ground beef (or your preferred meat alternative) until it’s fully cooked and nicely caramelized. Drain any excess fat. Then, sauté minced onions and garlic until fragrant and softened. This aromatic base is essential for a rich flavor profile.
- Layering Spices: Don’t skimp on the seasonings! A blend of chili powder, cumin, paprika, garlic powder, onion powder, and a pinch of cayenne for heat creates a complex and balanced chili. Toasting your spices for a minute or two before adding liquids can intensify their flavor.
- Tomato Power: A combination of canned tomato sauce and diced tomatoes provides a robust, tangy backbone. Tomato paste adds an extra layer of concentrated tomato flavor and helps thicken the chili.
- Sweetness and Heat Balance: A touch of sweetness, like maple syrup or a pinch of sugar, can balance the acidity of the tomatoes and enhance the savory notes. Similarly, a dash of Tabasco or your favorite hot sauce provides a welcome kick.
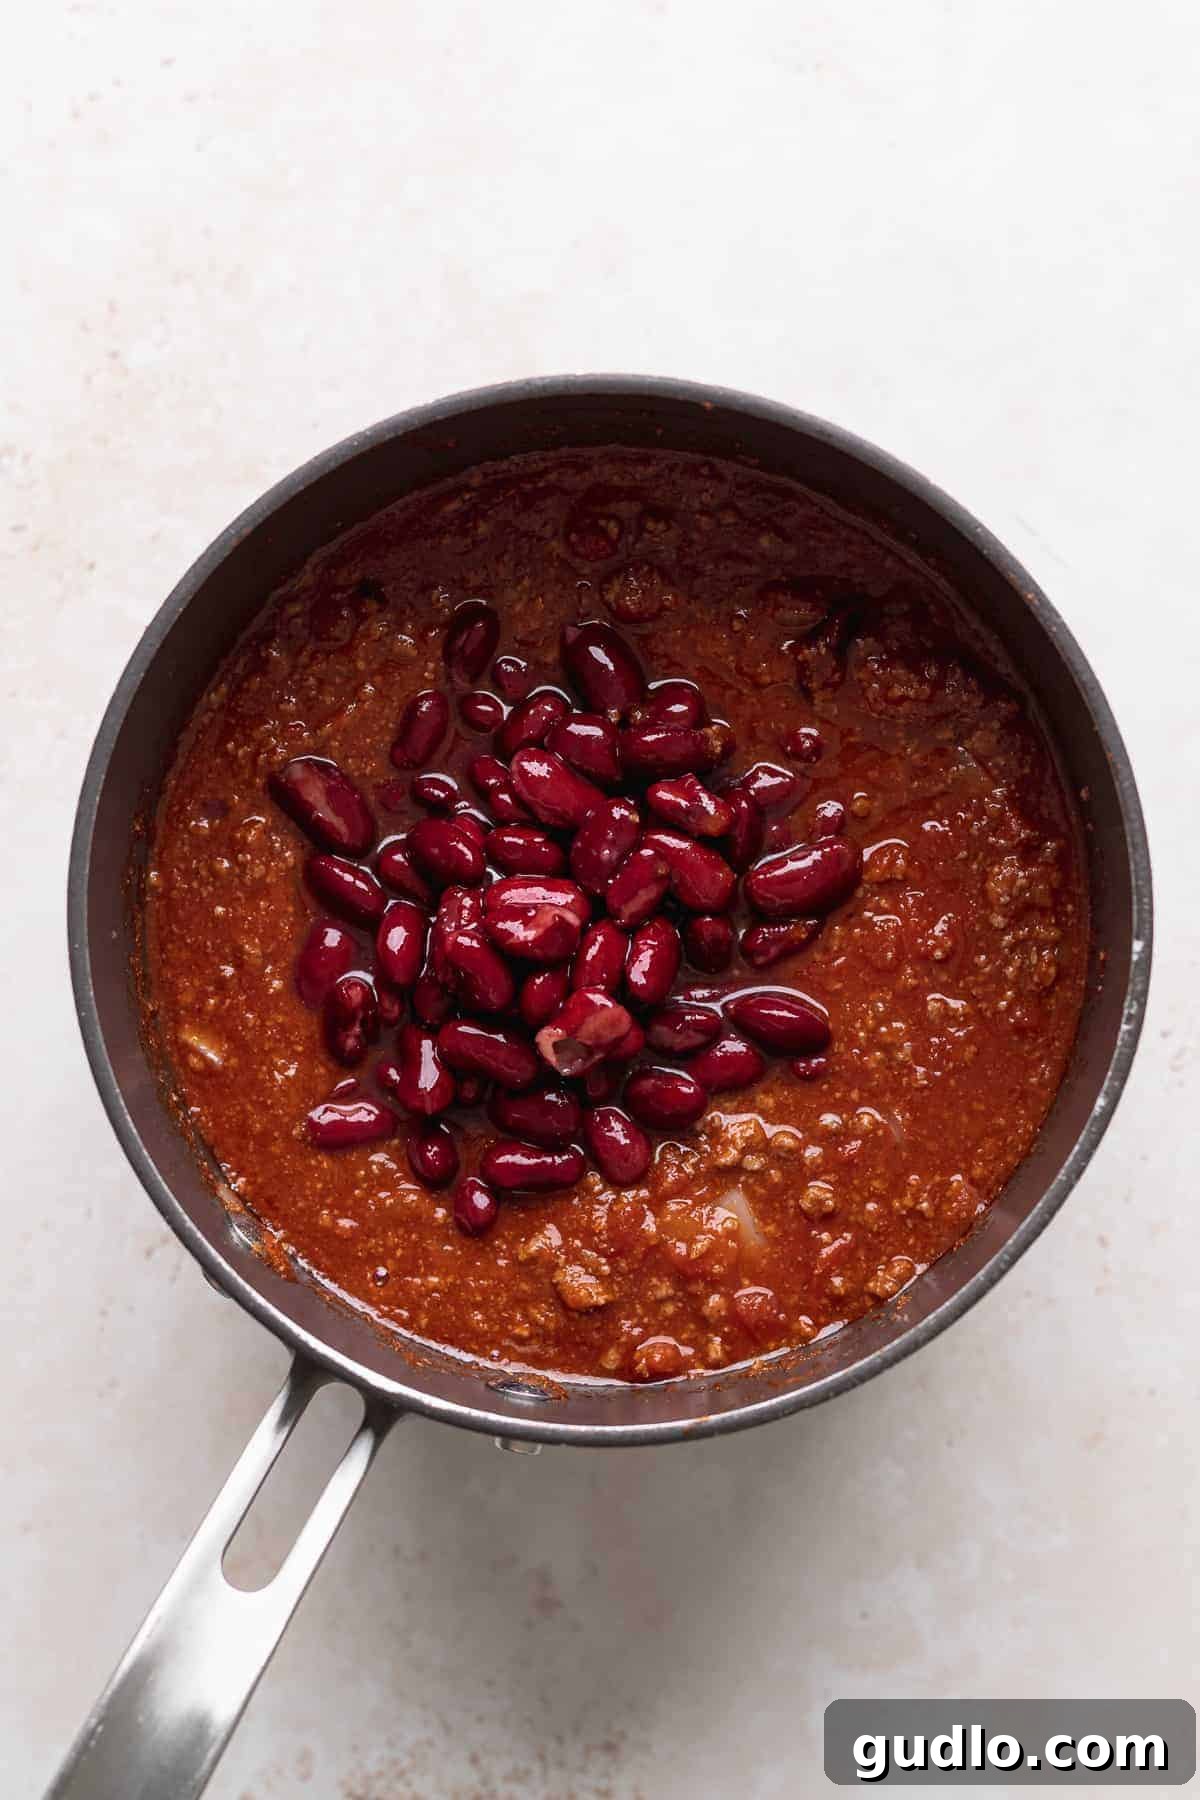
- Simmer for Depth: Once all ingredients are combined, bring the chili to a boil, then reduce the heat and let it simmer. A slow, gentle simmer for at least 15-20 minutes (or longer for more flavor development) allows the ingredients to meld and deepen. Add your drained and rinsed kidney beans towards the end of the simmering process to prevent them from becoming mushy.
Homemade chili can also be prepared a day or two in advance, as the flavors often improve overnight. This makes assembling your chili cheese fries even quicker when hunger strikes!
The Secret to a Silky Smooth Cheese Sauce
A truly exceptional chili cheese fries experience hinges on a smooth, luscious cheese sauce that melts beautifully and clings to every component. Our homemade cheese sauce is surprisingly simple to make and far superior to anything from a can or jar. Here’s how to master it:
- Start with a Roux: The foundation of a perfect cheese sauce is a roux, a mixture of equal parts fat (butter) and flour. Melt butter in a saucepan over medium heat, then whisk in the flour. Cook this mixture for a minute or two, stirring constantly, to cook out the raw flour taste. This creates a thickening agent for your sauce.
- Gradual Milk Addition: Slowly pour in milk (2% milk works well for richness without being too heavy), whisking continuously. This is key to preventing lumps. The mixture will initially be thick, then gradually smooth out as more milk is added. Continue whisking until the sauce begins to thicken and coats the back of a spoon.
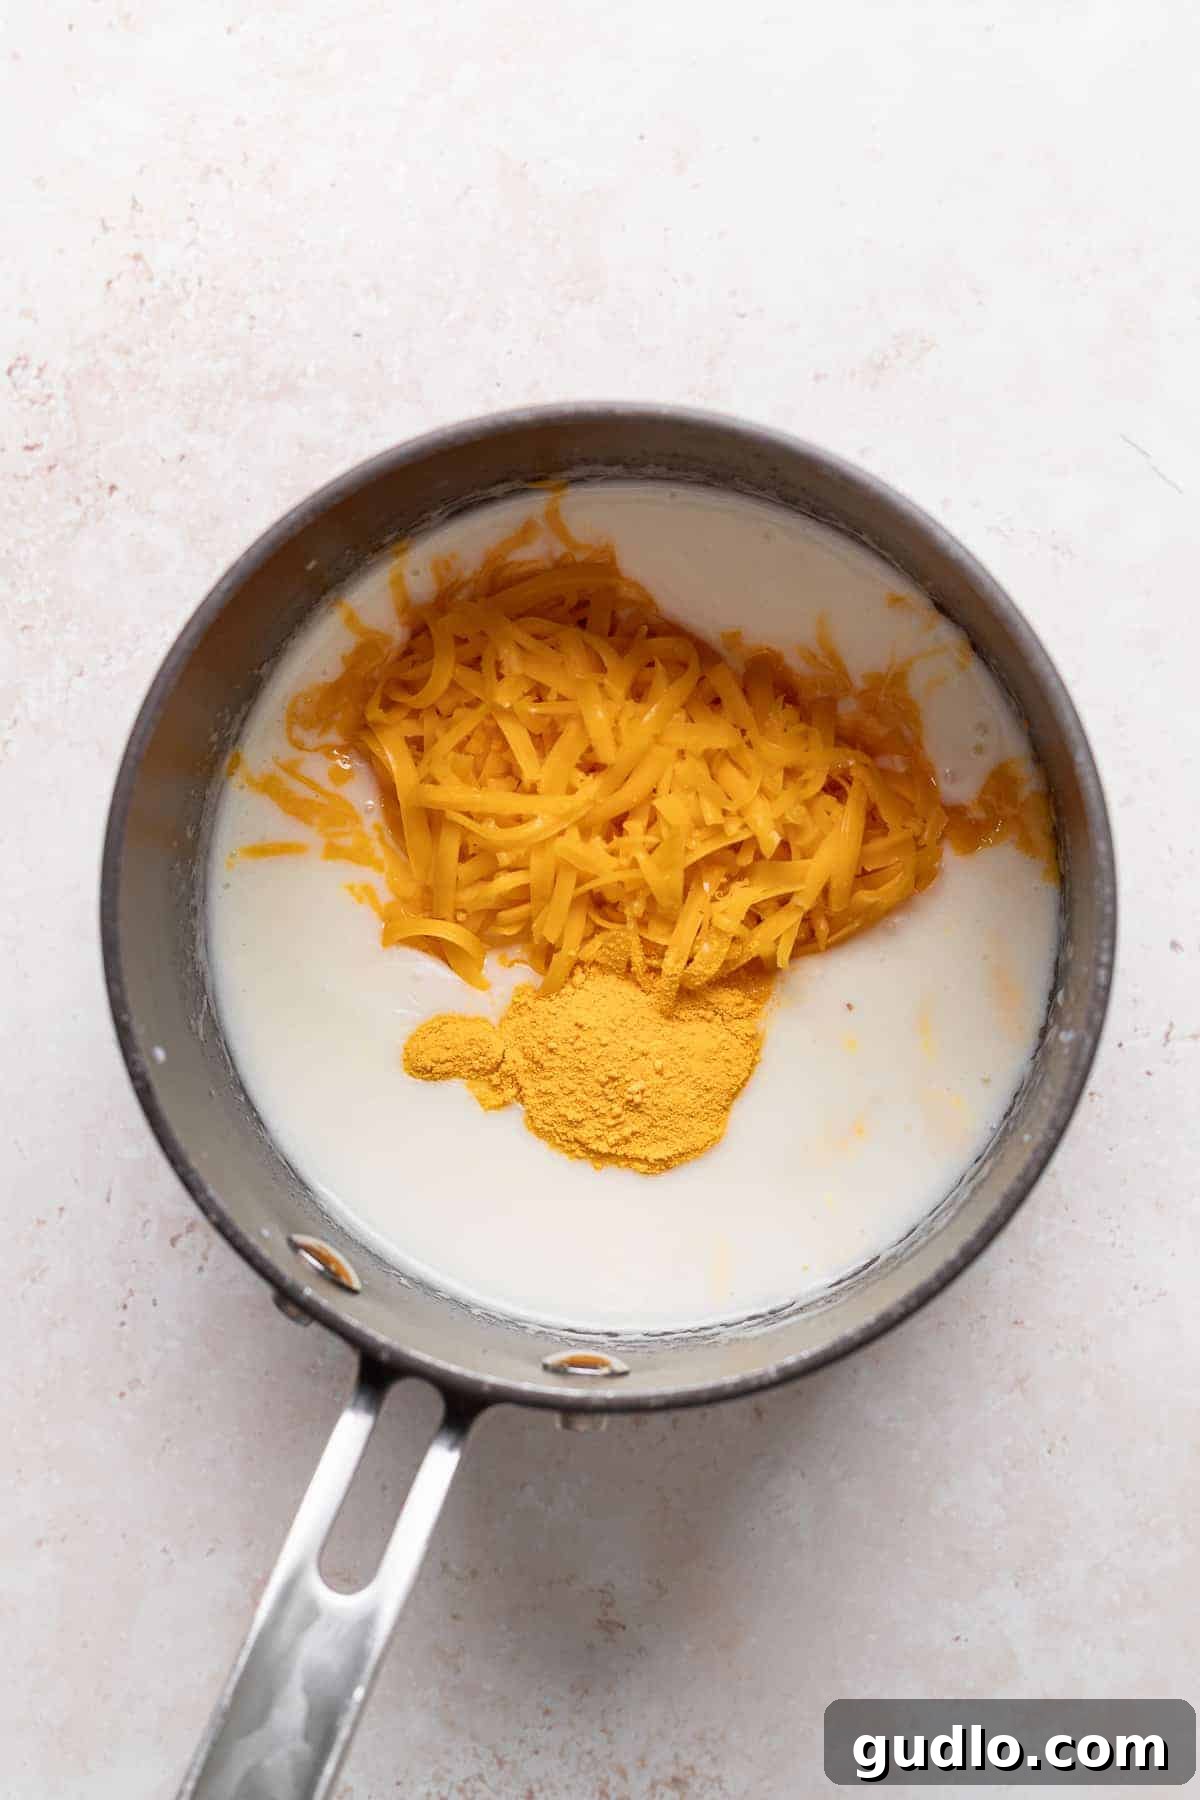
- Off-Heat Cheese Melt: For the silkiest texture, remove the saucepan from the heat before adding your shredded cheddar cheese. Stir vigorously until the cheese is completely melted and incorporated. Melting cheese off the direct heat helps prevent it from becoming grainy or stringy.
- Seasoning: A touch of salt is essential to bring out the cheese flavor. For an extra boost of color and a subtle salty kick, consider adding a small amount of mac and cheese powder (often available in specialty stores or online). A pinch of dry mustard powder can also enhance the cheese flavor without making the sauce taste like mustard.
- Consistency Check: If your sauce is too thick, whisk in a little more warm milk until it reaches your desired pourable consistency. If it’s too thin, you can return it to low heat and gently simmer while whisking until it thickens, being careful not to scorch the bottom.
This method ensures a cheese sauce that is not only incredibly flavorful but also boasts a professional, smooth texture that makes your chili cheese fries truly outstanding.
Explore Other Delicious Cheese Sauce Alternatives
While our classic cheddar cheese sauce is a star, the beauty of chili cheese fries lies in customization! Good news: nearly any creamy cheese sauce can elevate this dish. Feel free to experiment with some of our other beloved homemade cheese sauce recipes to find your perfect match:
- Mac and Cheese Sauce: A richer, often more complex cheese sauce, perfect if you prefer a thicker, bolder cheese flavor.
- Classic Cheddar Cheese Sauce: Our go-to for its balanced flavor and creamy texture, ideal for all types of loaded fries.
- Velveeta Cheese Sauce: For those who love an ultra-smooth, melty, and nostalgic cheese sauce that’s incredibly easy to make.
- Cottage Cheese Queso: A surprising, lighter, yet equally delicious option that’s packed with flavor and a unique texture.
Assembling Your Masterpiece: Layering for Success
The assembly of chili cheese fries is an art form itself, ensuring every bite is a perfect blend of all components. Here’s our recommended layering technique for maximum enjoyment:
- Start with the Fries: Begin by transferring your freshly baked, crispy fries to your serving platter, bowl, or individual plates. Create a nice, even layer or a charming pile, making sure they’re spread out enough to be easily topped.
- Add the Warm Chili: Spoon a generous amount of your hot, savory chili over the fries. Distribute it evenly, ensuring that a good portion of the fries gets coated. The warmth of the chili will also help keep the fries warm and cozy.
- Drizzle the Cheese Sauce: This is the grand finale! Drizzle your silky, hot cheese sauce liberally over the chili and fries. Don’t be shy – aim for complete coverage, letting the sauce melt into every crevice. The visual appeal alone will get appetites soaring.
- Consider Individual Servings: While a large platter is great for sharing, serving chili cheese fries in individual bowls or small pans can help maintain crispiness and temperature for each portion, allowing everyone to enjoy them at their prime.
Assemble just before serving to ensure the fries remain as crispy as possible. The contrast between hot, creamy toppings and crunchy fries is what makes this dish so utterly satisfying.
Storage and Reheating Tips for Chili Cheese Fries
While chili cheese fries are best enjoyed immediately for peak crispiness and warmth, leftovers can be a delightful treat if stored and reheated properly. Here’s how to handle them:
- Immediate Consumption is Key: For the ultimate experience, we strongly recommend indulging in your chili cheese fries as soon as they’re assembled. The fries are at their crispiest, and the chili and cheese sauce are at their most perfect temperature.
- Storing Leftovers: If you find yourself with leftovers (a rare but welcome occurrence!), the best approach is to store the components separately if possible. Keep any remaining chili and cheese sauce in airtight containers in the refrigerator for up to 3-4 days. The fries, unfortunately, will lose much of their crispness once combined with the wet toppings. If they are already assembled, place them in an airtight container and refrigerate.
- Reheating Chili: The chili can be easily reheated on the stovetop over medium-low heat, stirring occasionally until heated through. You can also microwave it in short intervals, stirring between, until hot.
- Reheating Cheese Sauce: Gently reheat the cheese sauce in a small saucepan over low heat, whisking constantly. You might need to add a splash of milk to restore its smooth consistency. Avoid high heat, which can cause the cheese to separate or become oily.
- Reheating Fries (Assembled): Reheating pre-assembled chili cheese fries can be tricky. The best method to regain some crispiness is to spread them on a baking sheet and heat them in an oven or air fryer at 350°F (175°C) for 10-15 minutes, or until warmed through and the fries show some signs of crisping up again. Be aware that they won’t be as crispy as fresh, but still delicious!
Beyond the Basics: Exciting Topping Ideas for Your Chili Cheese Fries
While our chili cheese fries are undeniably delicious as-is, the true fun begins when you make them uniquely your own! Garnish this incredible recipe with any of the following toppings to add extra layers of flavor, texture, and visual appeal:
- Cool & Creamy: A dollop of sour cream or a drizzle of plain Greek yogurt provides a tangy contrast to the richness of the chili and cheese.
- Fresh & Zesty: Finely chopped green onions (scallions) or diced red onion add a fresh, pungent bite.
- Extra Cheesiness: A sprinkle of additional shredded cheddar, Monterey Jack, or a Mexican blend cheese (because you can never go wrong with MORE cheese!).
- Spicy Kick: Sliced pickled jalapeños offer a fantastic burst of heat and tanginess, cutting through the richness.
- Savory Crunch: Crumbled cooked bacon bits add an irresistible smoky, salty crunch.
- Herbal Freshness: Fresh cilantro, roughly chopped, provides a bright, herbaceous note.
- Avocado Goodness: Diced avocado or a dollop of fresh guacamole adds a creamy, healthy fat element.
- Heat Enthusiasts: A few dashes of your favorite hot sauce can intensify the spice factor.
- Garden Fresh: A spoonful of fresh pico de gallo adds a vibrant, fresh salsa element.
Don’t hesitate to mix and match these garnishes to create a personalized chili cheese fries experience that perfectly suits your palate!
More Irresistible Chili Cheese Recipes
If you’ve fallen in love with the chili and cheese combination, you’re in luck! This dynamic duo shines in many other incredible dishes. Explore more of our favorite chili cheese creations:
- Chili Cheese Dip
- Velveeta Chili Cheese Dip
- Chili Cheese Dogs
- Copycat Taco Bell Chili Cheese Burritos
Discover More of Our Favorite…
Irresistible Cheesy Appetizers
If cheese is your weakness (and who can blame you?), then you’ll love exploring our collection of other cheesy appetizers, perfect for any occasion:
- Whipped Feta Dip
- Homemade Mozzarella Sticks
- The Cheesiest Jalapeño Poppers
- Parmesan Crisps
Frequently Asked Questions About Chili Cheese Fries
- Can I make a vegetarian version of chili cheese fries?
- Absolutely! You can easily substitute the ground beef in the chili recipe with a plant-based ground alternative or use a hearty bean-based vegetarian chili. Ensure your cheese sauce ingredients are also vegetarian-friendly.
- What kind of potatoes are best for homemade fries?
- Russet potatoes are typically the best choice for making homemade fries due to their high starch content, which yields a fluffy interior and crispy exterior. Cut them into wedges or thick-cut fries for best results with chili and cheese.
- Can I prepare the chili and cheese sauce in advance?
- Yes! Both the chili and the cheese sauce can be made a day or two ahead of time and stored separately in airtight containers in the refrigerator. Reheat gently on the stovetop, adding a splash of milk to the cheese sauce if needed to restore its consistency.
- How do I keep my fries from getting soggy?
- The key is to bake your fries until very crispy and assemble the chili cheese fries just before serving. Using thicker-cut fries like potato wedges or steak fries also helps them hold up better against the moisture of the chili and sauce. Avoid overcrowding the baking sheet during cooking.
- Can I use pre-shredded cheese for the sauce?
- While convenient, pre-shredded cheese often contains anti-caking agents that can make your cheese sauce grainy. For the smoothest, silkiest cheese sauce, we highly recommend grating your own block of cheese.
Chili Cheese Fries Recipe
Get ready to create an unforgettable dish! These homemade chili cheese fries are designed to be a family favorite, whether it’s for an exciting game day, a fun party appetizer, or a comforting meal. Crisp fries, rich homemade chili, and a creamy cheese sauce make for a truly epic combination.
By: Emily Richter
Cook Time: 35 mins
Total Time: 50 mins
Servings: 8

Ingredients
Potatoes
- 1 lb. frozen wedge potato fries
- 1 tablespoon olive oil
- ½ tablespoon Lawry’s salt
Chili
- 1 lb. ground beef
- ¼ medium white onion, minced
- 15 oz. canned tomato sauce
- 15 oz. canned diced tomatoes
- 2 tablespoons maple syrup
- 2 tablespoons tomato paste
- 1 tablespoon garlic powder
- 1 tablespoon chili powder
- 1 teaspoon paprika
- 1 teaspoon salt
- 2 teaspoons Tabasco sauce
- 30 oz. canned red kidney beans, drained and rinsed
Cheese Sauce
- 2 tablespoons butter
- 3 tablespoons flour
- 1 cup 2% milk
- 1.5 cups cheddar cheese, freshly shredded
- ½ teaspoon salt
- Optional: 1.5 teaspoons mac and cheese powder (adds color and salty flavor)
Optional Toppings
- 1 tablespoon chives, minced
- Sour cream
- Diced red onion
- Shredded cheese (for extra cheesiness)
- Sliced pickled jalapeños
Instructions
Fries
- Preheat the oven to 425ºF (220°C) and generously spray a baking sheet with nonstick cooking spray.
- Pour the frozen potato wedges into a large bowl and drizzle with olive oil. Toss until evenly coated.
- Sprinkle the potatoes with Lawry’s salt and toss again to distribute the seasoning.
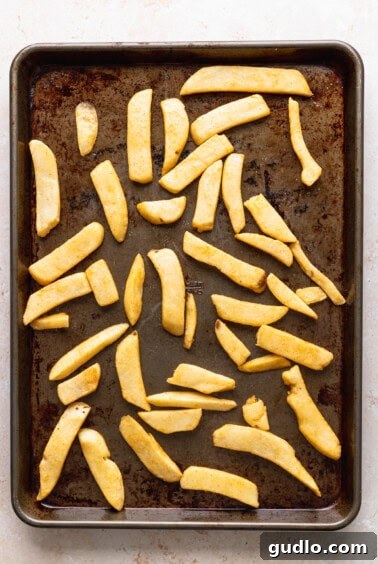
- Spread the seasoned fries out in a single layer on the greased baking sheet. Bake for 20-25 minutes, or until golden brown and crispy.
Chili
- Heat a large pot or Dutch oven over medium-high heat. Add the ground beef.
- Break the beef up into small pieces with a spoon or spatula and cook for 4-5 minutes until browned. Add the minced white onion and continue to cook until the beef is fully browned and the onion is softened. Drain any excess fat.
- Add all of the remaining chili ingredients (tomato sauce, diced tomatoes, maple syrup, tomato paste, garlic powder, chili powder, paprika, salt, and Tabasco sauce) to the pot. Stir until all ingredients are well combined.
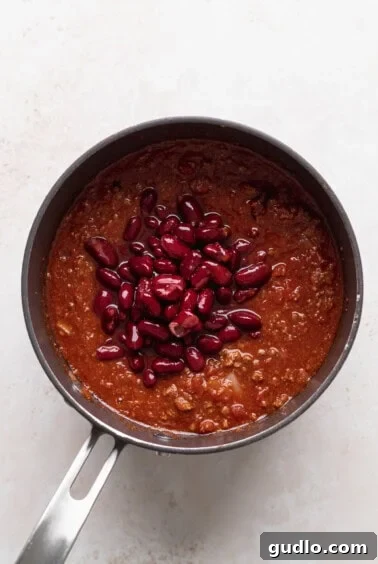
- Bring the chili to a boil, then reduce the heat to low. Stir in the drained and rinsed kidney beans.
- Let the chili simmer gently for 10-15 minutes on low heat while you prepare the cheese sauce.
Cheese Sauce
- Heat a small saucepan over medium heat. Add the butter and let it melt completely.
- Once the butter is melted, add the flour to the saucepan and whisk the ingredients together continuously until a smooth paste (roux) forms. Cook for about 1 minute to cook out the raw flour taste.
- While continually whisking, slowly pour the milk into the saucepan. Whisk until all the milk has been added and all of the crumbles from the roux have dissolved, creating a smooth mixture.
- Continue to whisk the sauce over medium heat until it begins to thicken and lightly coats the back of a spoon.
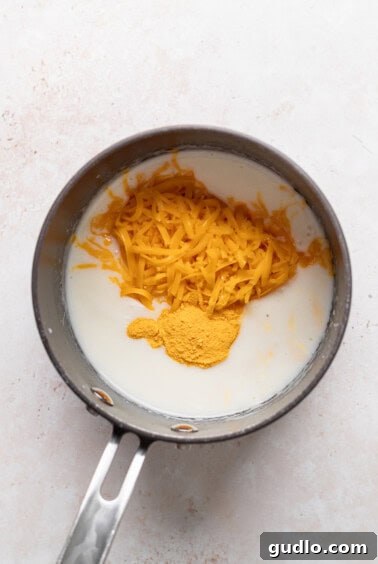
- Remove the saucepan from the heat. Sprinkle the shredded cheddar cheese, salt, and optional mac and cheese powder into the saucepan. Whisk vigorously until all the cheese has completely melted and the sauce is smooth and creamy.
Assemble
- Transfer the baked crispy fries to a large serving platter or individual plates, creating an inviting pile.
- Generously top the fries with the hot, savory chili.
- Drizzle the luscious homemade cheese sauce evenly over the chili.
- Garnish your chili cheese fries with fresh minced chives and any other desired optional toppings. Serve immediately and enjoy!

Watch It: Chili Cheese Fries Video Tutorial
See how easy it is to make these delicious chili cheese fries from scratch by watching our step-by-step video:
Nutrition Information
Below is an approximate nutritional breakdown per serving of our chili cheese fries. Please note that these values are automatically calculated and should be used as an estimation, as they can vary based on specific ingredient brands and preparation methods.
Carbohydrates: 54 g,
Protein: 31 g,
Fat: 33 g,
Fiber: 7 g,
Sugar: 17 g
Nutrition information is automatically calculated, so should only be used as an approximation.