

Get ready to delight your taste buds with the ultimate creamy Chili Cheese Dip! This incredibly easy recipe comes together effortlessly on your stovetop with just four simple ingredients, promising a rich, flavorful, and wonderfully smooth appetizer that’s perfect for any occasion. Grab your favorite tortilla chips and prepare for an unforgettable dipping experience that will become a staple in your recipe collection.
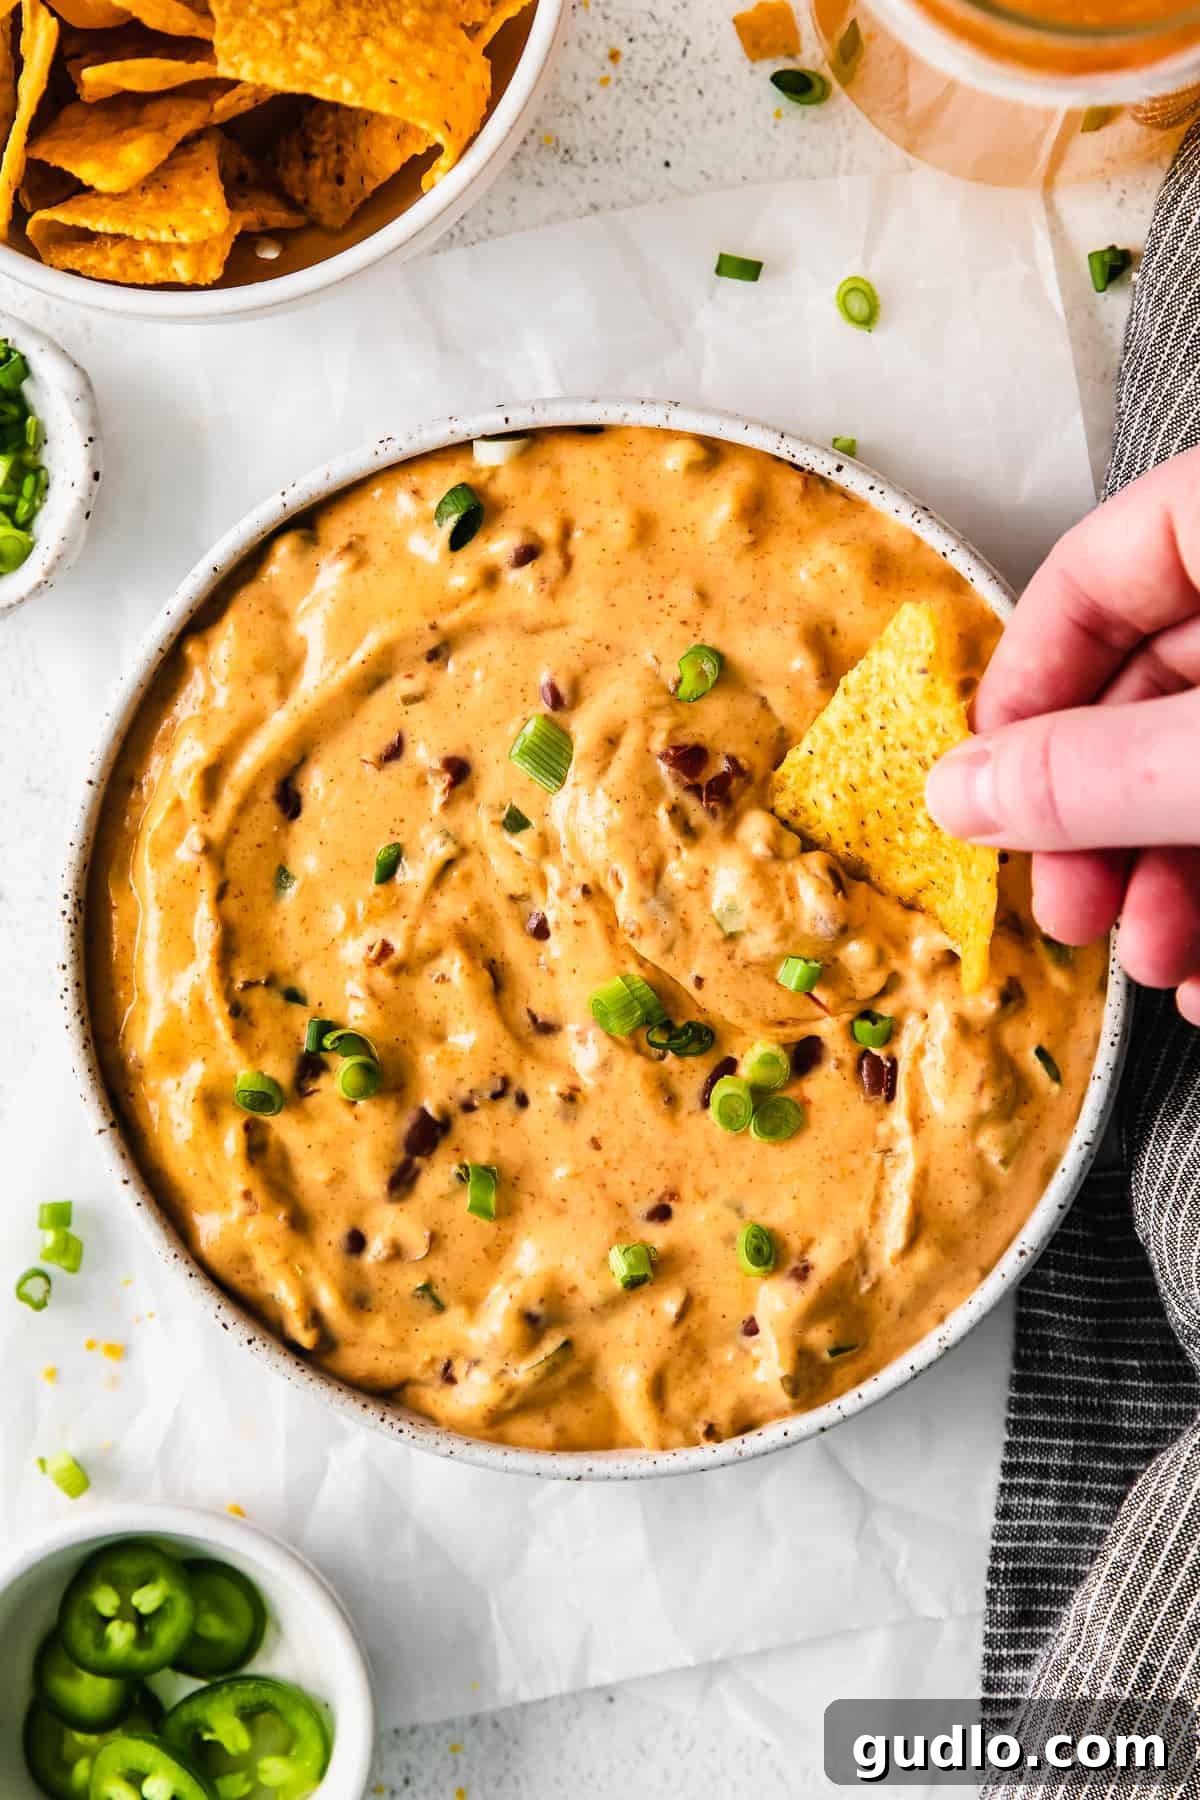
Seriously The Best Stovetop Chili Cheese Dip You’ll Ever Make
Forget complicated recipes and endless cleanup! We’re absolutely serious when we say this homemade chili cheese dip is a true game-changer. It’s unbelievably creamy, bursting with robust flavor, and incredibly simple to prepare using just four core ingredients right on your stovetop. In as little as 15 minutes, you can whip up a batch of this irresistible dip that will have everyone reaching for more, making it the ideal choice for any last-minute craving or planned event.
Whether you’re hosting a lively game day gathering, looking for a quick and satisfying appetizer for unexpected guests, or simply want to treat your family to a fun and delicious side dish, this stovetop chili cheese dip recipe is guaranteed to be a hit. Its effortless preparation, customizable spice level, and universally appealing taste make it an instant crowd-pleaser and a reliable go-to for all cheese lovers. Enjoy the rich, savory notes and the delightful warmth that only a freshly made chili cheese dip can provide.
Why You’ll Fall in Love with This Easy Chili Cheese Dip
Effortless 4-Ingredient Magic: You only need a can of your favorite chili, a block of creamy cream cheese, a generous amount of spicy shredded pepper jack cheese, and a fresh jalapeño to create this incredible dip. This minimal ingredient list means less time spent at the grocery store, less kitchen prep, and more precious moments to enjoy with your guests or family. Simplicity meets sensational flavor in every scoop!
Simple One-Pot Wonder: Say goodbye to stacks of dirty dishes and complicated cooking setups! This entire chili cheese dip comes together beautifully in a single pot right on your stovetop. The streamlined cooking process makes cleanup an absolute breeze, allowing you to relax and savor every delicious bite without the post-cooking chore anxiety.
Lightning-Fast Appetizer: Craving a delicious, warm snack or need an impressive appetizer in a pinch? This recipe is your ultimate culinary hero! It transforms from basic ingredients into a warm, bubbling, and intensely satisfying dip in just 15 minutes flat. Perfect for those spontaneous gatherings, unexpected guests, or simply when a powerful cheese craving strikes, this dip delivers speed and flavor without compromise.
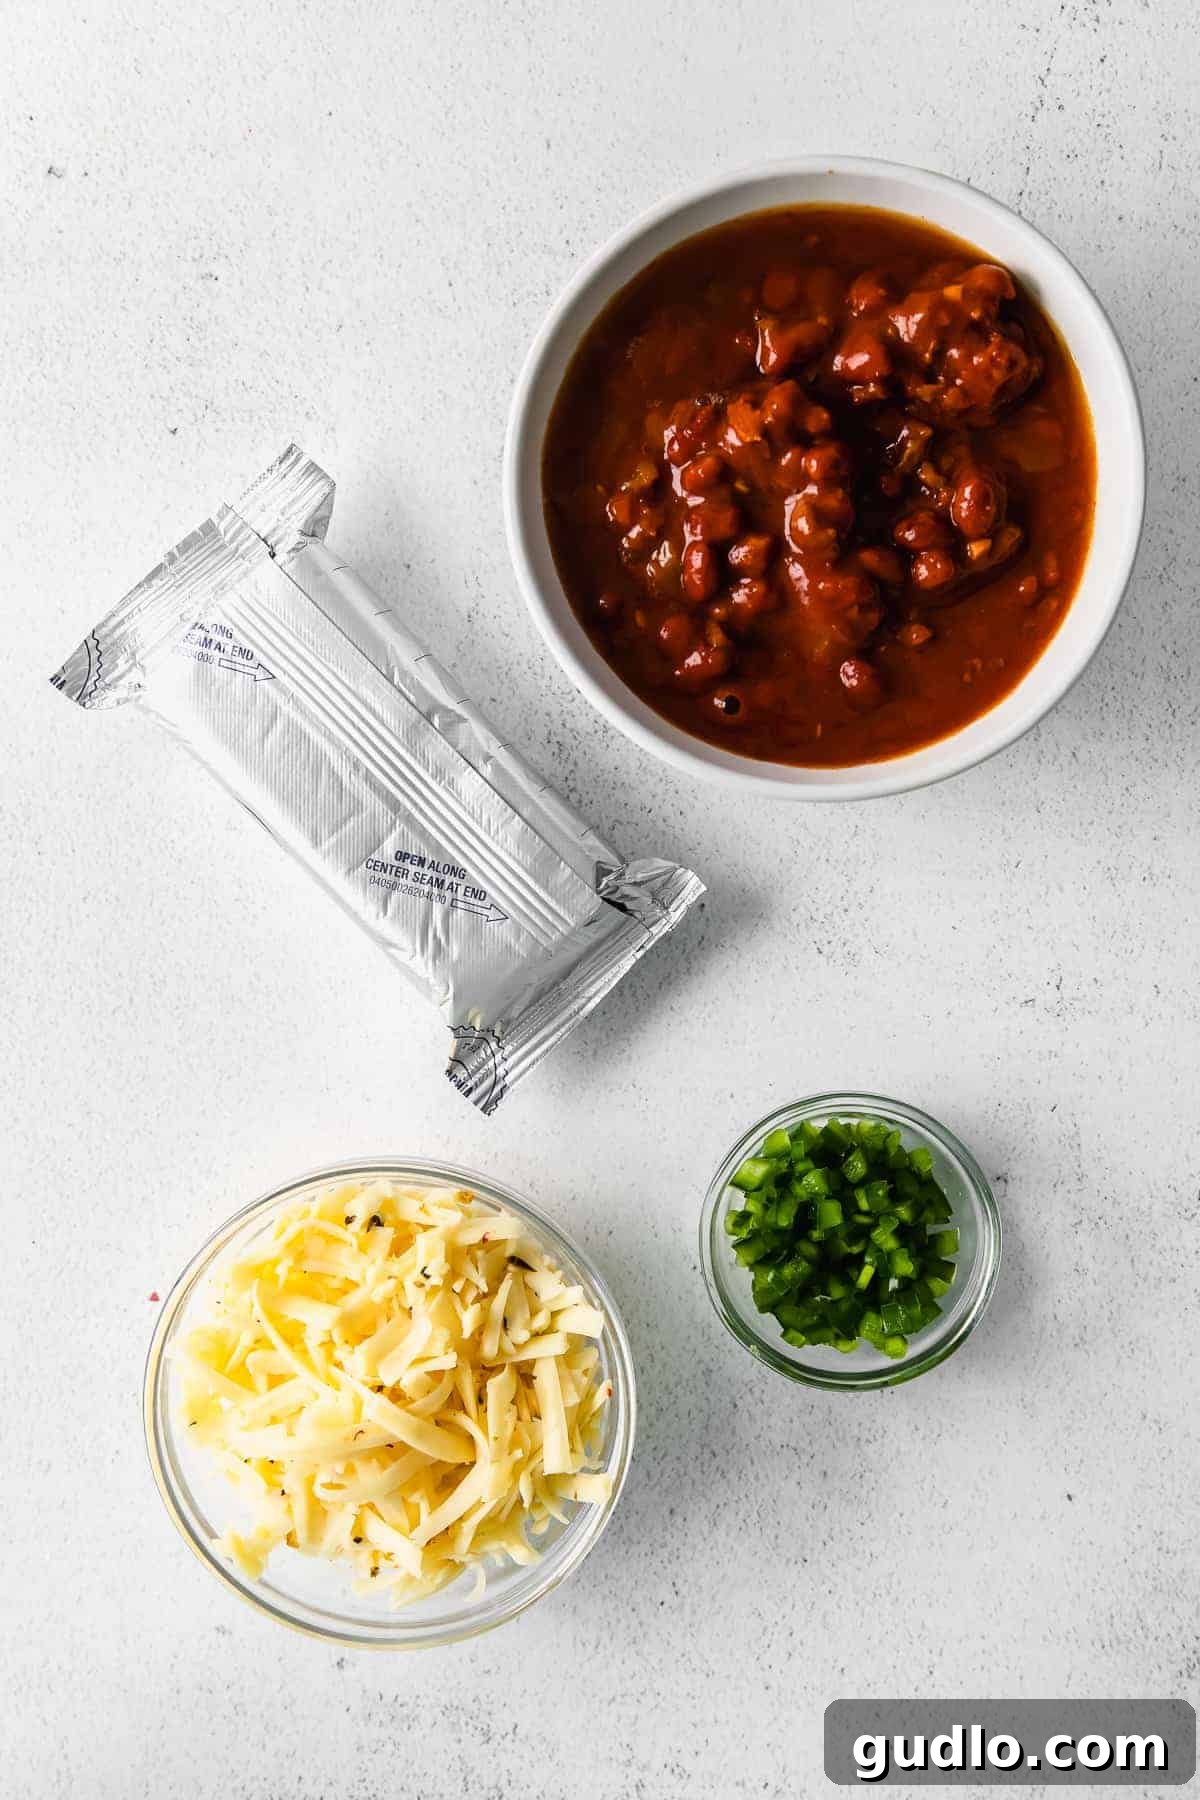
Essential Ingredients for Your Perfect Chili Cheese Dip
Crafting the perfect chili cheese dip starts with understanding the role of each key ingredient. While the list is delightfully short, each component contributes significantly to the dip’s irresistible flavor, texture, and overall appeal.
- Cream Cheese: This is the undeniable secret to our dip’s unparalleled creaminess and smooth consistency. Cream cheese melts beautifully, creating a rich, velvety base that perfectly binds the chili and shredded cheese together into a cohesive, luxurious dip. For the absolute best results, we highly recommend allowing your cream cheese to come to room temperature for at least 30 minutes before you begin cooking; this crucial step helps it melt more evenly and prevents any undesirable lumps from forming in your final dip.
- Pepper Jack Cheese: For that delightful spicy kick and ultimate melty goodness, pepper jack cheese is our top choice. Its inherently creamy texture, combined with bits of spicy peppers, infuses the dip with a fantastic and complex flavor profile that tantalizes the taste buds. While pre-shredded cheese offers convenience, freshly shredded pepper jack will consistently melt more smoothly and uniformly, yielding a silkier, more professional-looking dip. However, if time is of the essence, pre-shredded cheese will certainly still work wonderfully! Feel free to experiment with other melting cheeses like sharp cheddar or Monterey Jack for different flavor nuances.
- Jalapeños: Fresh jalapeños bring a vibrant, zesty freshness and a customizable level of spice to this dip. You have full control over the heat level here: for a milder dip that’s family-friendly, be sure to remove all seeds and the white membranes from the jalapeño. If you prefer a bolder, more fiery spice, feel free to leave some (or even all) of the seeds in. You can also add more than one jalapeño if you’re feeling adventurous! If fresh jalapeños are too spicy for your preference or simply unavailable, you can easily swap them for milder diced green chilies (canned) for a similar earthy flavor profile without the intense heat.
- Can of Chili: The heart and soul of our dip! You have complete freedom to use any variety of canned chili you prefer or happen to have stocked in your pantry. A no-bean chili typically creates a very smooth and uniform dip, while a chili with beans adds more texture and makes the dip even heartier and more substantial. Vegetarian chili is also an excellent option for those seeking a meat-free version, without compromising on flavor. This recipe also presents a fantastic and resourceful way to utilize any leftover homemade chili you might have from a previous meal, transforming it into a brand new, exciting, and irresistible appetizer!
- Olive Oil (or Butter): A small but important amount of olive oil or butter is used to gently sauté the minced jalapeños. This initial step helps to soften the peppers, mellow their raw edges, and, most importantly, allows them to release their aromatic flavors more effectively, infusing the dip with a deeper and more integrated taste from the very beginning.

Simple Steps to Create Your Irresistible Chili Cheese Dip
Making this creamy chili cheese dip is incredibly straightforward and comes together in just a few simple steps. Follow these clear instructions for a perfect, velvety smooth, and intensely flavorful dip every single time:
- Sauté the Jalapeños: Begin by placing a medium-sized saucepan over medium heat on your stovetop. Add about a teaspoon of olive oil (or a pat of unsalted butter) to the pan. Once the oil is shimmering and fragrant, add your finely chopped and deseeded (or seeded, depending on your spice preference) jalapeños. Sauté them for 2-3 minutes, stirring occasionally, until they soften slightly, become aromatic, and lose their raw edge. This step is crucial for building a foundational layer of flavor.
- Combine Chili and Cream Cheese: Reduce the heat to medium-low to prevent scorching. Add the entire can of your chosen chili and the softened, cubed room-temperature cream cheese to the saucepan. Using a sturdy spatula or wooden spoon, stir continuously, gently breaking up the cream cheese, until it has completely melted and is smoothly combined with the chili. This usually takes approximately 3-5 minutes, resulting in a warm, uniform, and slightly thickened base for your dip.
- Melt in the Shredded Cheese: With the heat still on medium-low, gradually add the shredded pepper jack cheese to the mixture, a small handful at a time. After each addition, stir constantly and gently until the cheese has fully melted and integrated into the dip. This slow and steady approach is key to ensuring the cheese melts evenly, preventing it from clumping, becoming grainy, or separating. Continue stirring until all the pepper jack cheese has fully melted and the dip achieves a luxuriously smooth, stretchy, and creamy consistency.
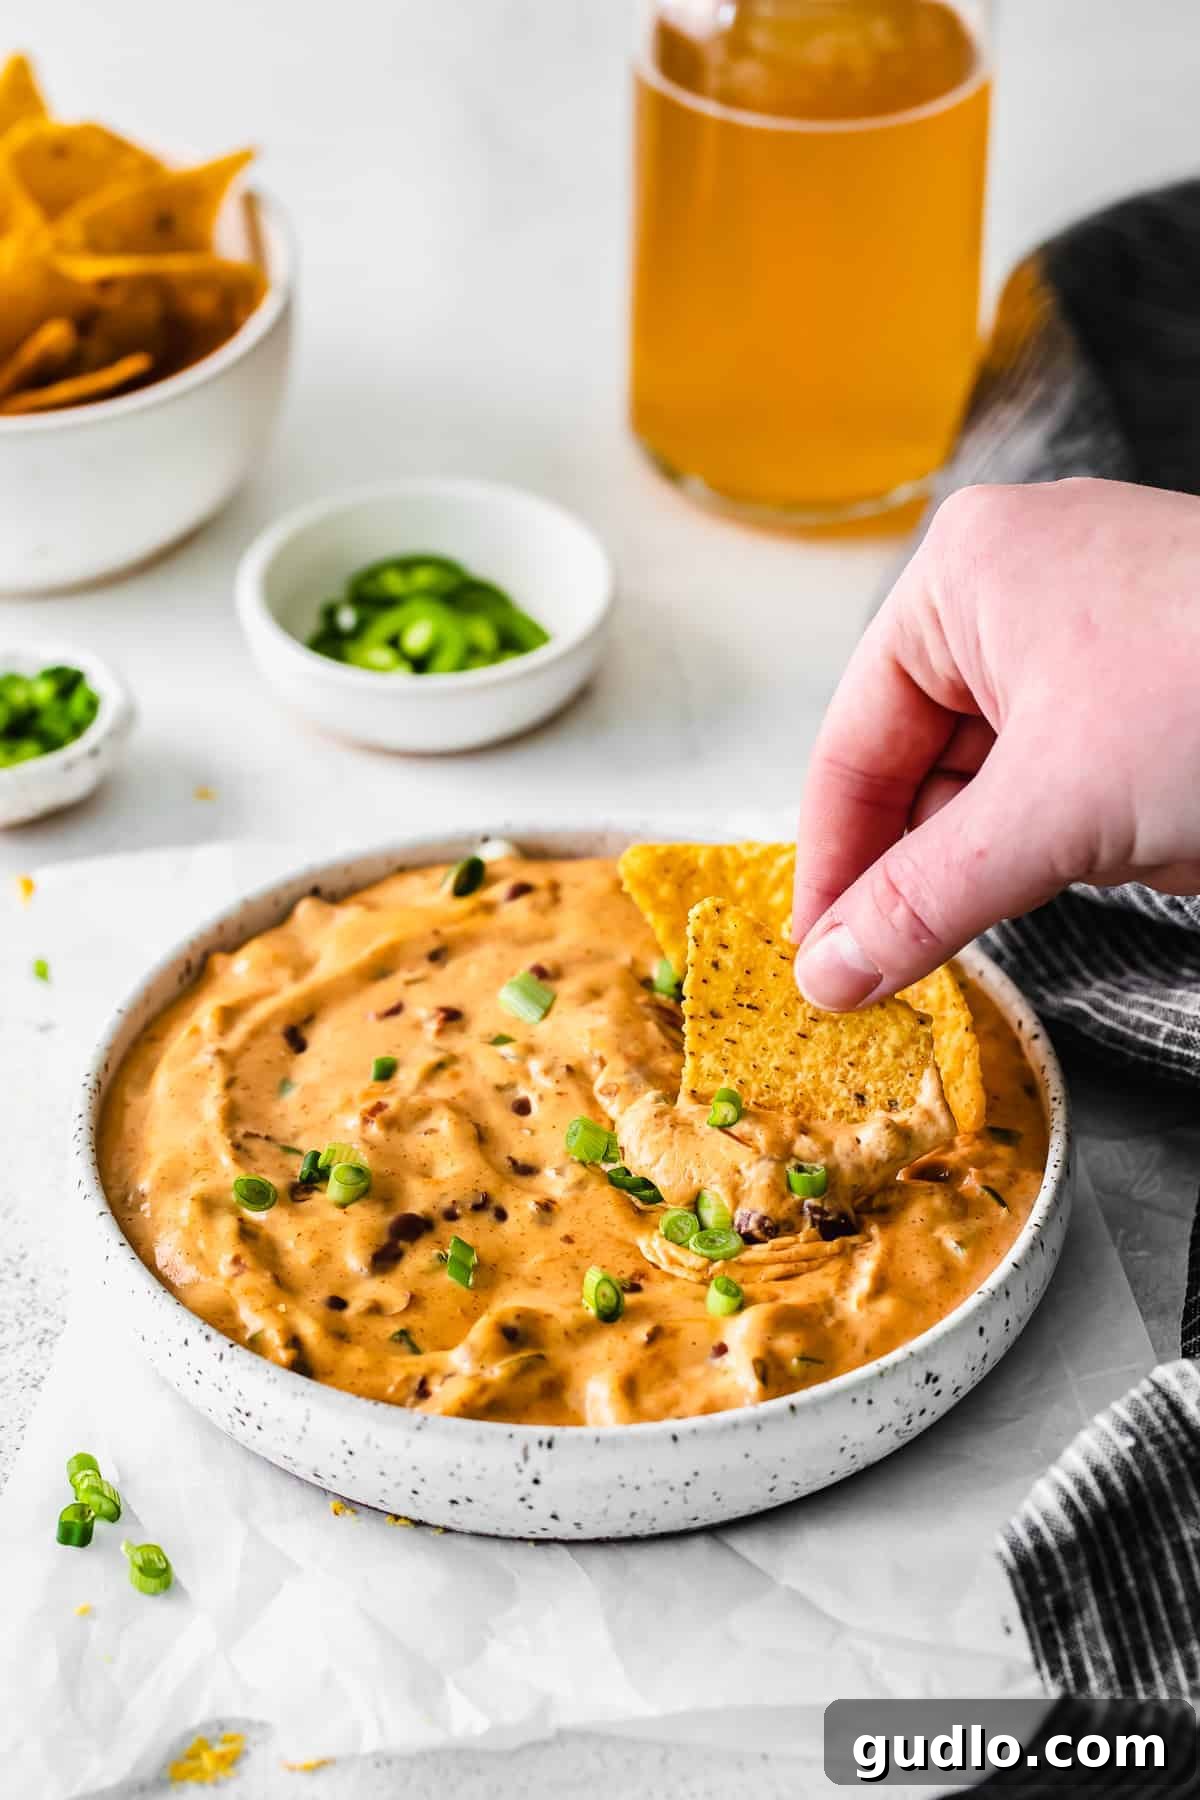
- Serve Immediately or Keep Warm: Once the dip reaches your desired consistency and is bubbling gently, remove it from the heat. You can serve it immediately in a decorative serving bowl, perhaps garnished with some vibrant fresh green onions or fragrant cilantro for a pop of color and freshness. For larger gatherings or extended serving periods, transfer the hot dip to a slow cooker and set it to the “warm” or “low” setting. Remember to give it a good stir every 20-30 minutes to maintain its creamy texture and prevent a “skin” from forming on top as it sits.
Expert Tip: Keep Your Chili Cheese Dip Warm in a Slow Cooker!
One common challenge with many cheese dips, including this chili cheese dip, is that they tend to thicken and firm up as they cool down. This can make them less enjoyable and harder to scoop. To maintain that perfect, lusciously dippable consistency throughout your party or event, we highly recommend transferring your freshly made chili cheese dip into a slow cooker. Set the slow cooker to its lowest “warm” setting, which will gently keep the dip at an ideal molten temperature for hours without overcooking it. This ensures every guest enjoys a perfectly creamy scoop. Just be sure to give it a good stir every 20-30 minutes; this simple action will prevent a slight “skin” from forming on top and ensures even, consistent heating throughout the dip.
Elevate Your Dip: Delicious Toppings for Chili Cheese Dip
While this chili cheese dip is absolutely delicious and satisfying on its own, adding a few fresh and flavorful toppings can take it from great to truly extraordinary. These garnishes not only add visual appeal, making your dip look even more inviting, but also introduce new layers of flavor and texture that perfectly complement the rich, cheesy base:
- Fresh Green Onion: Sliced thinly, green onions provide a mild, crisp, and slightly pungent oniony bite that beautifully contrasts the richness of the cheese. They also add a vibrant pop of fresh green color.
- Cilantro: For a bright, herbaceous, and slightly citrusy freshness that cuts through the richness and complements the chili and cheese flavors perfectly. A must-have for Mexican-inspired dishes.
- Creamy Avocado Slices or Guacamole: Adds a cool, rich, and creamy contrast to the warm, spicy dip. The healthy fats in avocado provide a lovely balance and a luxurious texture.
- Extra Sliced Jalapeños: For those who simply can’t get enough spice, thinly sliced fresh or pickled jalapeños offer even more heat, a tangy crunch, and a bold visual statement.
- Cool Sour Cream or Greek Yogurt: A dollop of creamy sour cream or plain Greek yogurt adds a refreshing, tangy creaminess that can help mellow the spice and provide a cooling contrast.
- Crispy Crumbled Bacon: Introduce a smoky, salty, and utterly savory element by sprinkling crispy bacon bits over your dip. This adds an irresistible crunch and depth of flavor.
- Diced Fresh Tomatoes: For a burst of juicy sweetness and mild acidity, diced fresh tomatoes add a refreshing counterpoint to the rich dip.
- Black Olives: Sliced black olives offer a briny, earthy flavor that pairs well with the chili.
What to Serve with Your Amazing Chili Cheese Dip
The incredible versatility of this chili cheese dip extends far beyond just chips. It pairs wonderfully with a diverse array of dippers and can even be cleverly incorporated into other dishes, transforming them into a full, satisfying meal or an unforgettable snack. Explore these fantastic serving suggestions:
- Classic Tortilla Chips: The quintessential choice! Sturdy, salty tortilla chips are perfect for scooping up generous amounts of this hearty, cheesy dip. Opt for thicker chips that won’t break under the weight of the dip.
- Crunchy Fritos: Their unique, intensely corn-flavored crunch and robust texture stand up beautifully to the rich and savory dip, creating a delightful flavor and texture combination.
- Vegetable Sticks: For a lighter, healthier, and refreshing option, offer an assortment of crisp, crunchy raw veggies. Think vibrant sliced bell peppers (red, yellow, orange), crisp celery sticks, sweet carrot sticks, or even tender broccoli and cauliflower florets. These add a refreshing crunch and a dose of vitamins.
- Warm Pita Bread or Naan: Soft, slightly chewy triangles of warm pita bread or fluffy naan make excellent, more substantial dippers that are perfect for soaking up all the deliciousness.
- Toasted Bread Cubes or Crostini: Cubes of toasted sourdough, French bread, or crunchy crostini provide a rustic and satisfying vehicle for the dip, adding a wonderful textural contrast.
- Bread Bowls or Mini Rolls: For an impressive and fun presentation, serve the entire dip in a hollowed-out bread bowl, allowing guests to tear off pieces of the bread as they dip. Alternatively, offer small, warm dinner rolls for individual dipping.
- Get Creative with Meals: Don’t limit this dip to just dipping! Drizzle this luscious chili cheese dip over beefy tacos, generously spoon it onto cheesy nachos, slather it on loaded baked potatoes, top hot dogs, or even elevate classic sloppy joes for an incredible flavor boost! It also makes a fantastic, indulgent topping for chili dogs, crispy french fries, or a hearty bowl of macaroni and cheese.

Mastering Your Chili Cheese Dip: Essential Tips & Tricks
Achieve the perfect, velvety chili cheese dip every single time with these valuable insights and cooking secrets. These tips will help you navigate common pitfalls and enhance your dip’s flavor and texture.
Low and Slow is Key for Melting Cheese
While it’s perfectly acceptable to sauté your jalapeños over medium heat to soften them, it is absolutely crucial to **avoid melting the cream cheese and especially the shredded cheese over high heat**. Cheese is a delicate ingredient, and drastic temperature changes or excessive heat can cause its fats to separate from the proteins. This often results in an oily, clumpy, or grainy texture instead of the smooth, luxurious, and cohesive dip you’re aiming for. Always keep the heat at medium-low when incorporating and melting the cheeses, exercising patience for the best and most velvety results. This gentle approach ensures a smooth, emulsified finish.
Stir, Stir, Stir for Supreme Creaminess
Unlike some “set it and forget it” recipes, this chili cheese dip thrives on your active involvement and attention! Continuous and thorough stirring is absolutely vital, both when you’re initially incorporating the cream cheese and chili, and particularly when you’re slowly adding the shredded pepper jack cheese. Consistent stirring ensures that all the ingredients combine evenly, prevents the cheese from sticking to the bottom of the pot and potentially scorching, and, most importantly, helps achieve that incredibly smooth, uniform, and irresistibly creamy consistency that defines a truly great chili cheese dip. Don’t skip this step!
Customize the Spice to Your Heart’s Content
This recipe, when followed precisely (especially if you meticulously remove all jalapeño seeds and membranes), yields a relatively mild chili cheese dip that’s approachable for most palates. However, the true beauty of homemade dip lies in its customizability! **Feel free to adjust the spice level to perfectly match your personal preference and adventurousness.** For an extra punch of heat, consider adding a generous pinch of red pepper flakes, a dash of your favorite smoky or fiery hot sauce, or even intentionally leaving some (or all!) of the jalapeño seeds in for a more intense and fiery experience. If you like it even hotter, a small amount of cayenne pepper or a spicier chili powder blend can be mixed in. Always taste and adjust as you go!
Scaling Your Recipe: Double or Halve with Ease
This chili cheese dip recipe is wonderfully flexible and easily adaptable to your serving needs. **It can be effortlessly doubled** if you’re preparing it for a large party, a massive game day crowd, or simply want to ensure ample leftovers for snacking throughout the week. Just make sure you’re using a sufficiently large pot to accommodate the increased volume of ingredients comfortably. Conversely, **you can effortlessly cut this recipe in half** to serve a smaller, more intimate group, or for a cozy night in when you just need a personal cheesy indulgence. When making a smaller batch, keep a closer eye on the cooking and melting times, as they will likely be shorter than for a full batch, and remember to stir frequently to prevent sticking or uneven melting.
Choose Quality Ingredients for Best Flavor
Given that this recipe relies on a surprisingly short list of only four main ingredients, the quality of each component truly shines through and significantly impacts the final taste and texture of your dip. Opt for a good quality canned chili that you genuinely enjoy the flavor of, as it forms the foundational taste profile. Fresh block cream cheese and freshly shredded pepper jack will consistently yield a superior texture and a more vibrant taste compared to their pre-processed, often waxy, counterparts. A good, fresh, firm jalapeño will also contribute a brighter, more potent flavor and better texture.

Storage and Reheating Suggestions for Leftover Chili Cheese Dip
If you happen to have any of this incredibly delicious chili cheese dip leftover – a rare occurrence, indeed! – proper storage and reheating techniques are key to ensuring you can enjoy its delightful flavors again without compromising its texture or quality.
Storing Your Chili Cheese Dip
Allow the chili cheese dip to cool completely to room temperature before transferring it into an airtight container. This prevents condensation from forming and keeps the dip fresh. Store the sealed container in the refrigerator for up to 3 days. Beyond this timeframe, the quality, flavor, and texture of the dip may begin to diminish, and it’s best consumed within the recommended period for optimal enjoyment.
How to Reheat Chili Cheese Dip for Optimal Creaminess
For the absolute best results and to fully restore that perfect, velvety creamy texture, we highly recommend reheating your chili cheese dip using the same gentle stovetop method you used to cook it. This controlled heat helps to gradually melt the cheese back to its luscious state without separating or becoming grainy.
- Stovetop Method: Transfer the chilled chili cheese dip back into a medium saucepan. Turn the heat to medium-low. Stir frequently and gently as the cheese gradually melts and the dip slowly warms through. If the dip appears too thick or stiff from refrigeration, add a small amount of milk (start with 1-2 tablespoons) and stir until it reaches your desired smooth, dippable consistency. Continue stirring until it’s heated evenly and is wonderfully smooth and bubbly.
- Microwave Instructions: If you’re pressed for time, you can use the microwave, though this method requires a bit more vigilance. Transfer the chili cheese dip into a microwave-safe bowl. Add a splash of milk (about 1 tablespoon) to help loosen the dip as it reheats. Microwave on high for 60 seconds. Immediately remove, stir thoroughly to distribute the heat, then continue microwaving in shorter 30-second intervals, stirring meticulously after each, until the dip is uniformly warm and smooth. Be extremely careful not to overheat, as this can cause the cheese to seize or become rubbery.
Freezing Cheese Dip: Not Recommended! Due to the delicate nature of cheese and its tendency to separate, become grainy, or change texture drastically when subjected to freezing and thawing, we strongly advise against freezing this chili cheese dip. For the best possible quality, flavor, and texture, enjoy it fresh or store it in the refrigerator as suggested, and consume it within a few days.
Discover More of Our Favorite Indulgent…
Creamy & Delicious Dip Recipes
If you’ve fallen in love with the rich, cheesy goodness of this chili cheese dip, then you’re in for a treat! We have a collection of other equally irresistible dip recipes that are perfect for any occasion, from casual snacking to elegant entertaining. Get ready to explore more cheesy, savory, and delightful creations:
- Irresistible Pretzel Cheese Dip: A warm, tangy, and utterly delicious cheese dip specifically crafted to pair with soft pretzels, but fantastic with anything!
- The Best Ever Homemade Queso Dip: Our top-rated recipe for a classic, smooth, and perfectly spiced queso dip that will rival any restaurant version.
- Hearty Baked French Onion Dip: A sophisticated and deeply flavorful baked dip, brimming with caramelized onions and rich cheese, perfect for a cozy gathering.
- Classic Cheese Fondue for Gatherings: Indulge in the timeless pleasure of cheese fondue, a communal and fun experience perfect for intimate dinners or lively parties.
Chili Cheese Dip Recipe
This incredibly creamy and flavorful chili cheese dip recipe is a true crowd-pleaser, effortlessly prepared on the stovetop with just 4 simple ingredients in 15 minutes. Perfect for game day, parties, or a comforting family treat!
By: Emily Richter
Prep Time: 5 mins
Cook Time: 10 mins
Total Time: 15 mins
Servings: 6

Ingredients
- 15 oz. can chili (or 1.5 cups homemade chili, your preferred variety)
- 8 oz. cream cheese, cubed and softened to room temperature
- 1 small jalapeño, seeded and minced (adjust quantity and seeds for desired spice level)
- 4 oz. freshly shredded pepper jack cheese (or another good melting cheese)
- 1 teaspoon olive oil (or butter, for sautéing)
- For Garnish (Optional): Fresh green onion (sliced), cilantro (chopped), avocado slices, sour cream, extra sliced jalapeños, or crumbled bacon.
Instructions
- Heat a medium saucepan over medium heat. Add the olive oil. Once the oil is fragrant, add the minced jalapeño and sauté for 2-3 minutes until it softens slightly and becomes aromatic.
- Reduce heat to medium-low. Add the can of chili and the softened, cubed cream cheese to the saucepan. Stir continuously, breaking up the cream cheese, until it has completely melted and is smoothly combined with the chili (this will take about 3-5 minutes).
- Gradually add the shredded pepper jack cheese, a small handful at a time, stirring constantly after each addition. Continue to stir until all the cheese is fully melted and the dip is luxuriously smooth and creamy.
- Remove the dip from the heat. Serve warm immediately, garnished with your desired toppings. For longer serving periods, transfer the dip to a slow cooker set on “low” or “warm”, stirring occasionally to maintain its creamy texture and prevent a skin from forming.
Nutrition Information (Approximate per serving)
- Calories: 275 kcal
- Carbohydrates: 11 g
- Protein: 14 g
- Fat: 20 g
- Fiber: 2 g
- Sugar: 2 g
Nutrition information is automatically calculated and should only be used as an approximation. Actual values may vary based on specific ingredients, brands, and preparation methods.
We genuinely hope you love this creamy chili cheese dip as much as we do! It’s truly a delight to share. Don’t forget to share your delicious creations on social media using the hashtag #cheeseknees – we always love seeing what you’re cooking up and how you make our recipes your own!